

spyrosjzmichos
-
Posts
1,167 -
Joined
-
Last visited
-
Days Won
2
Content Type
Profiles
Forums
Events
Posts posted by spyrosjzmichos
-
-
The way you attached those PE parts is impressive!
So clean and precise!
-
Great progress Milan! It looks lovely!
-
-
Beautiful progress Milan!
And as Peter said, great discussion!
The wing join solution in particular is most useful!

-
-
Looking forward to seeing you work on this one Matt!
-
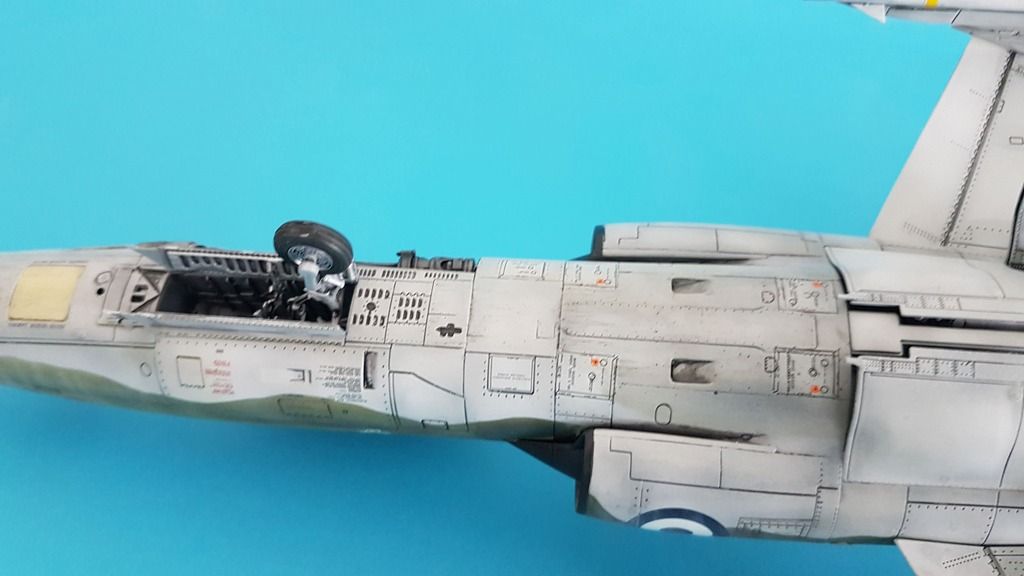
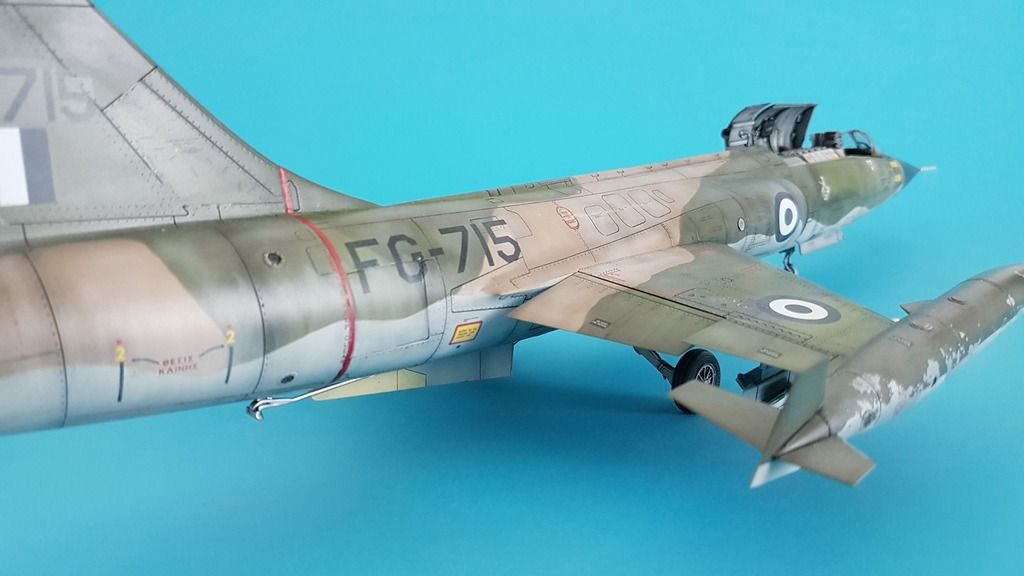
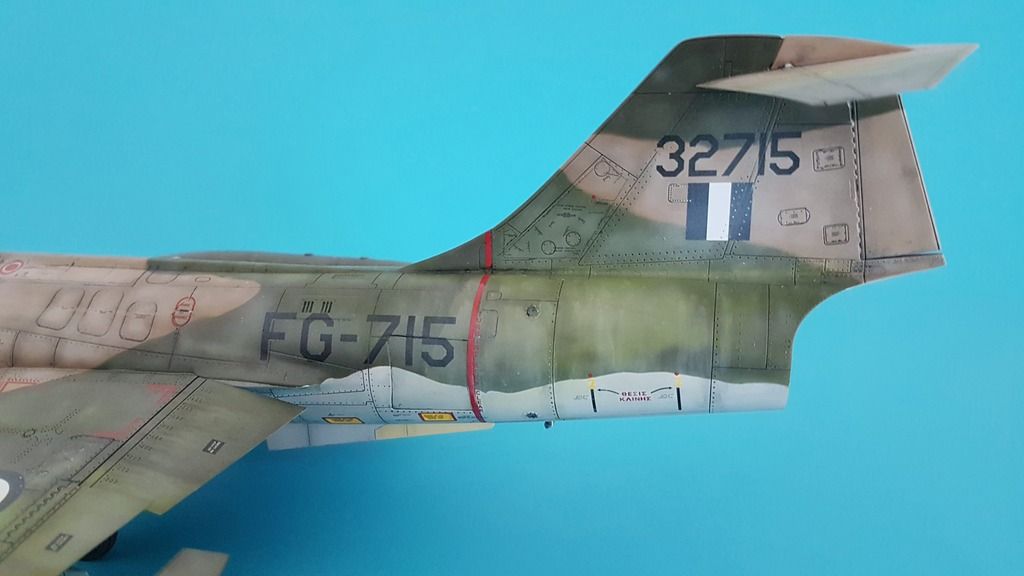
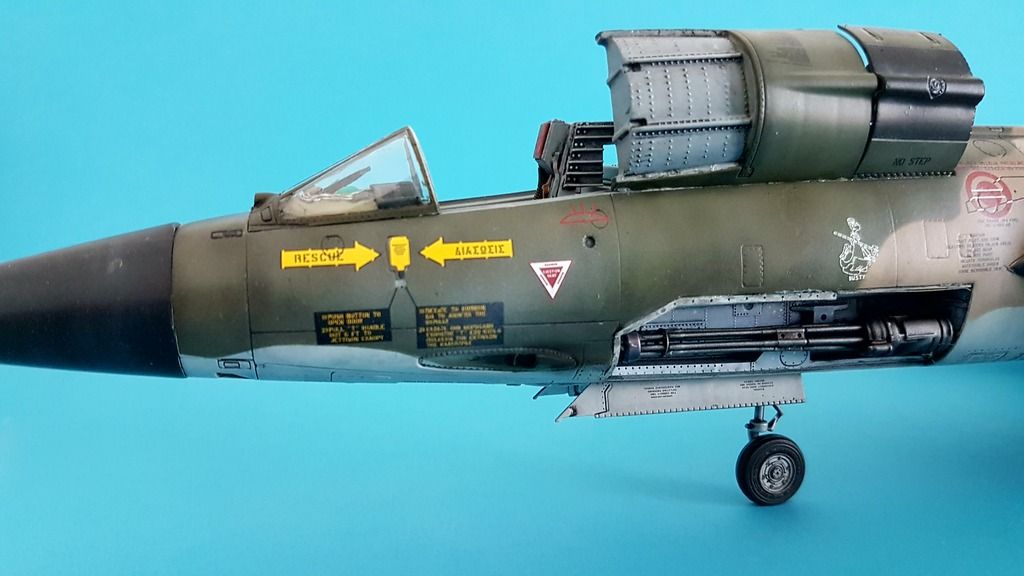
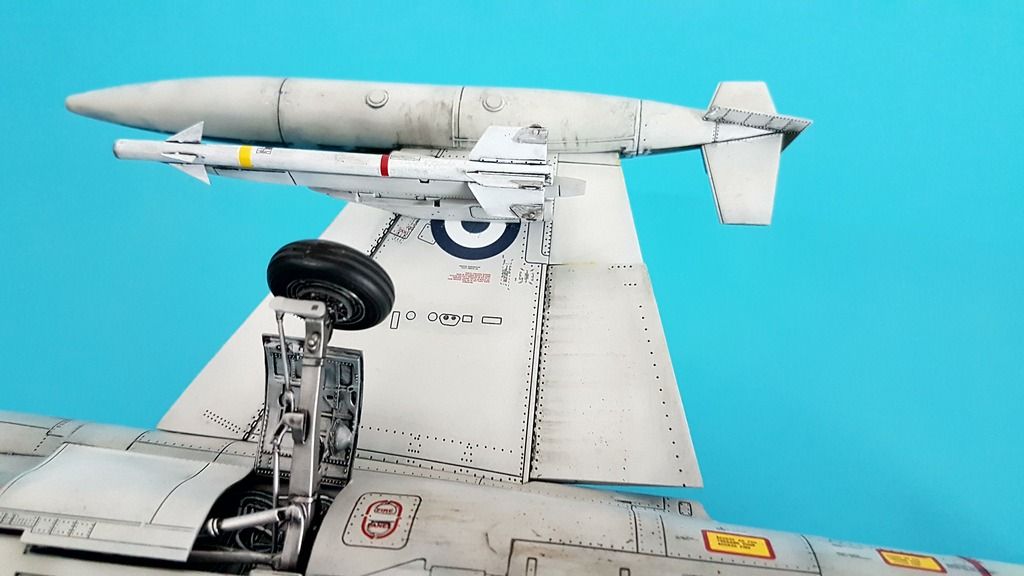
Hi all! While waiting for the replacement canopies to arrive I've been spending some time on correcting a few things on the plane. While not yet complete these included sanding down the bose cone to better fit the fuselage, rescribing over a few panel lines that were covered by the decals and reapplying a wash on some areas.
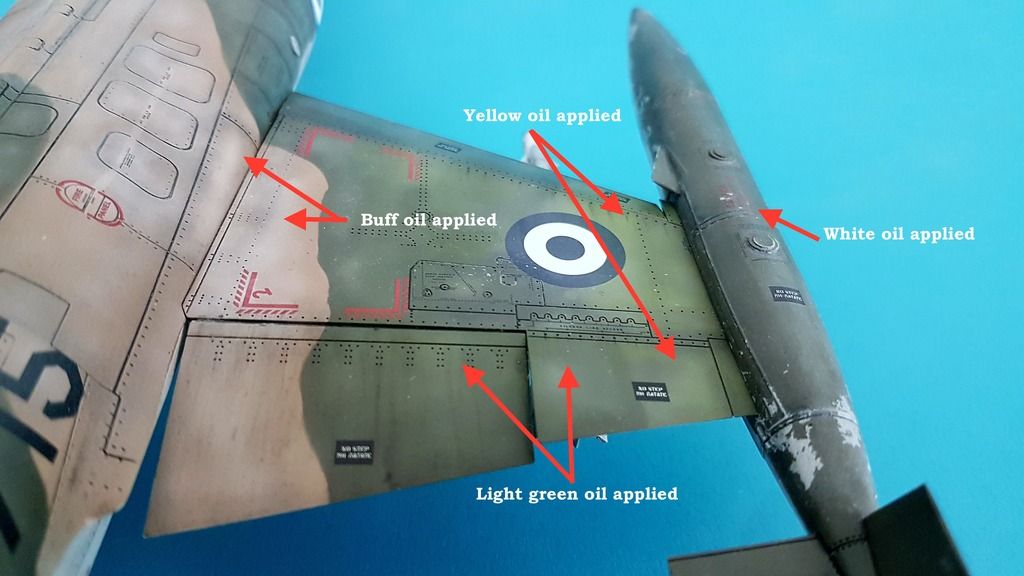
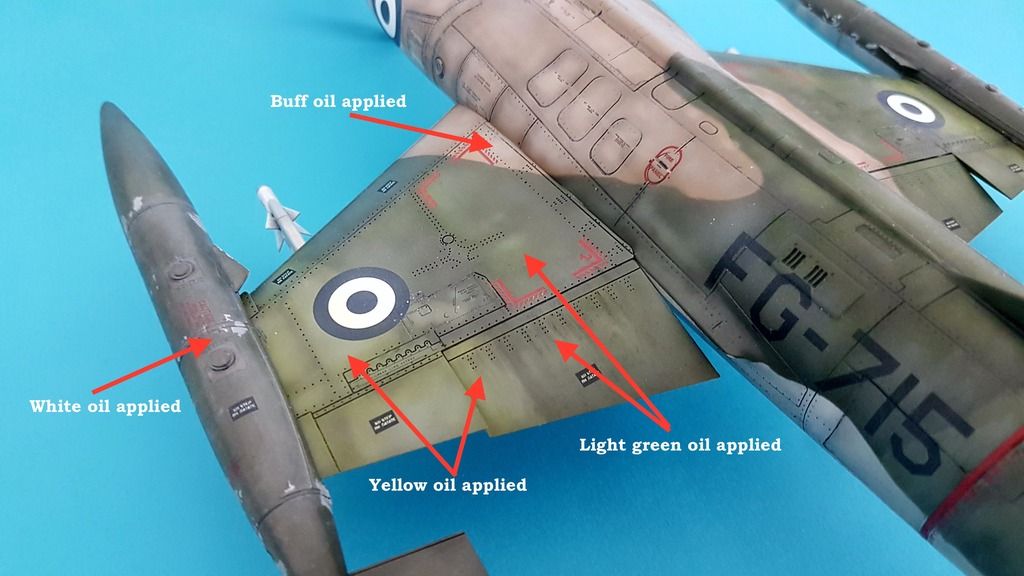
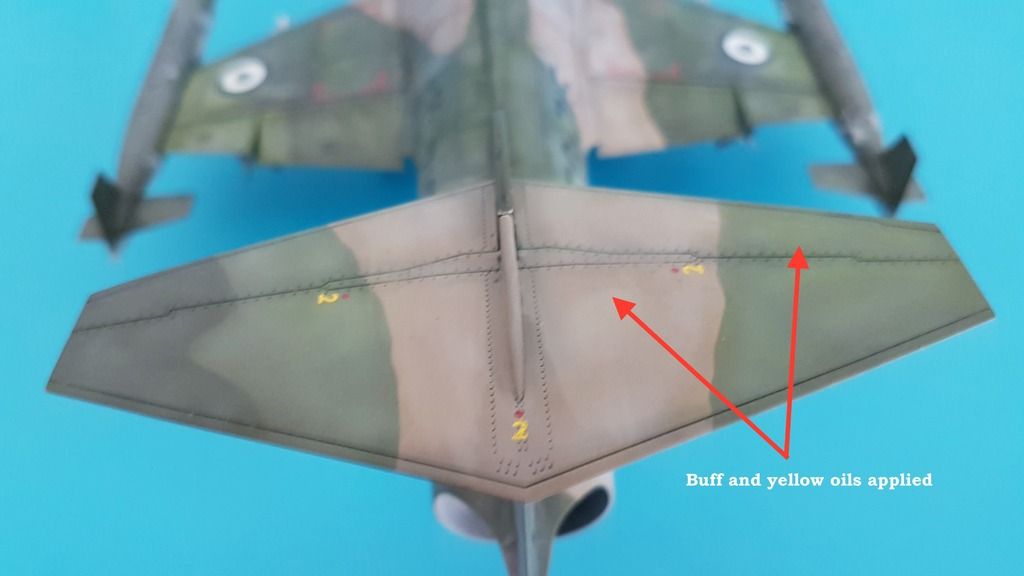
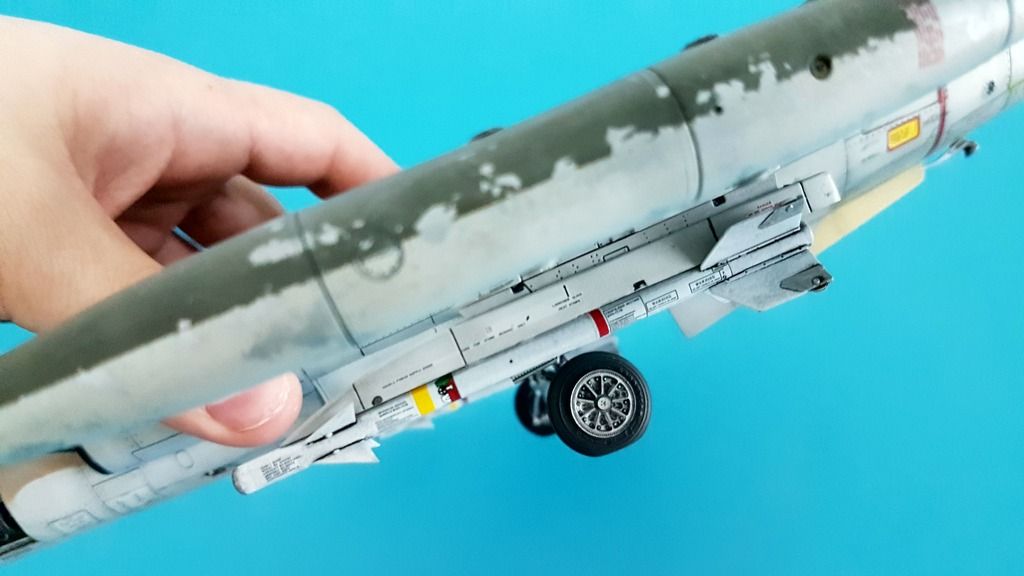
I wanted to add a few photos of the oil and rain streak weathering and the results. I used Ammmo's oilbrushers for the first time. These were applied locally as filters to make colour variations on the camo. Application included yellow and light green on the green areas, buff and white on the brown areas and white on the fuel tanks.
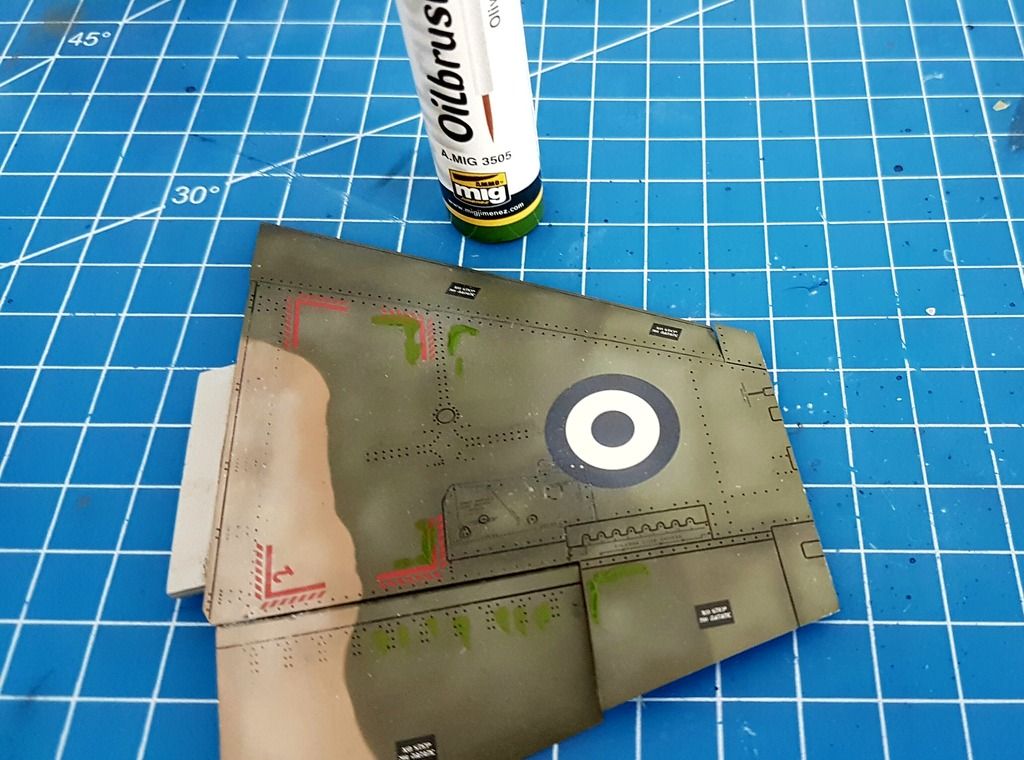
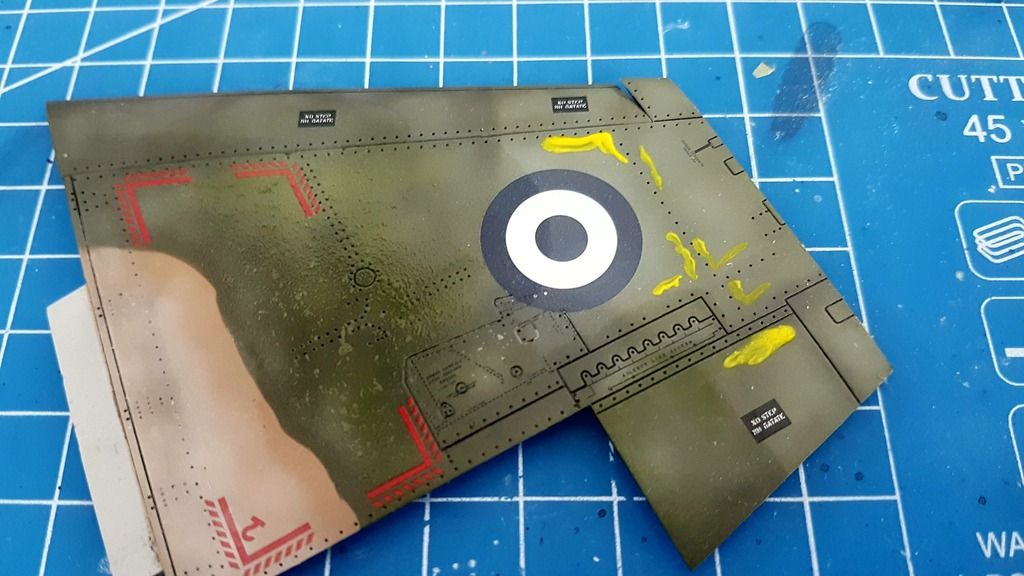
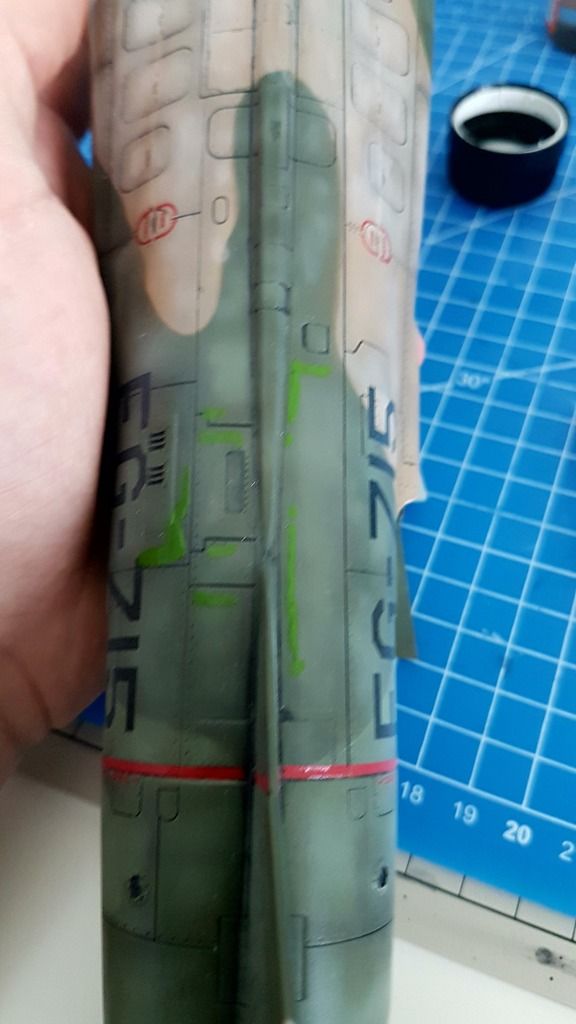
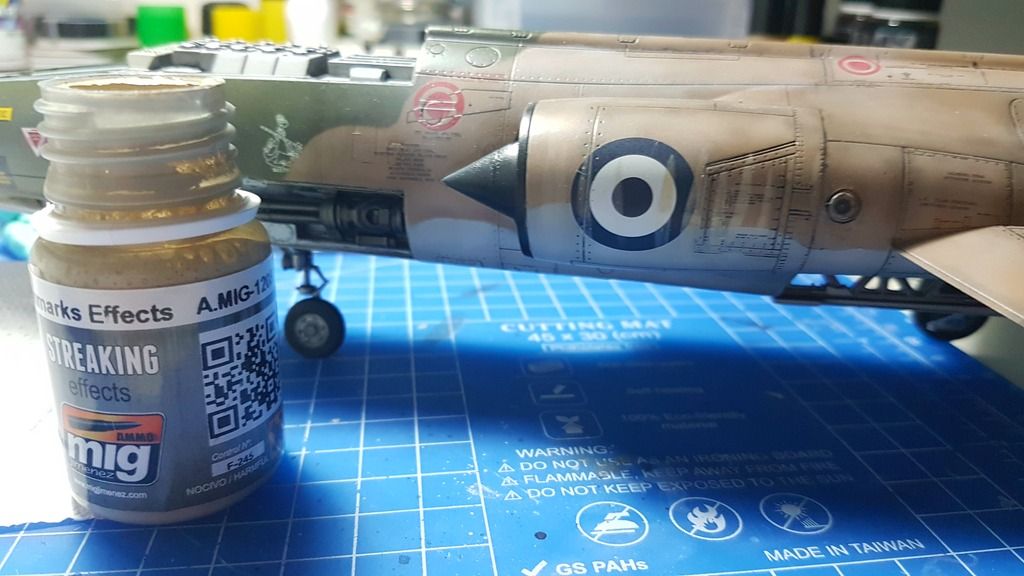
The results of the oilbrushers were pretty good. But to be totally honest I feel these stuff are overhyped and pricey. I think using proper oil paints like Windsor and Newton or Abteillung is better value and you will get the same results.
Regardless, I did get a good result and here's some detail shots.
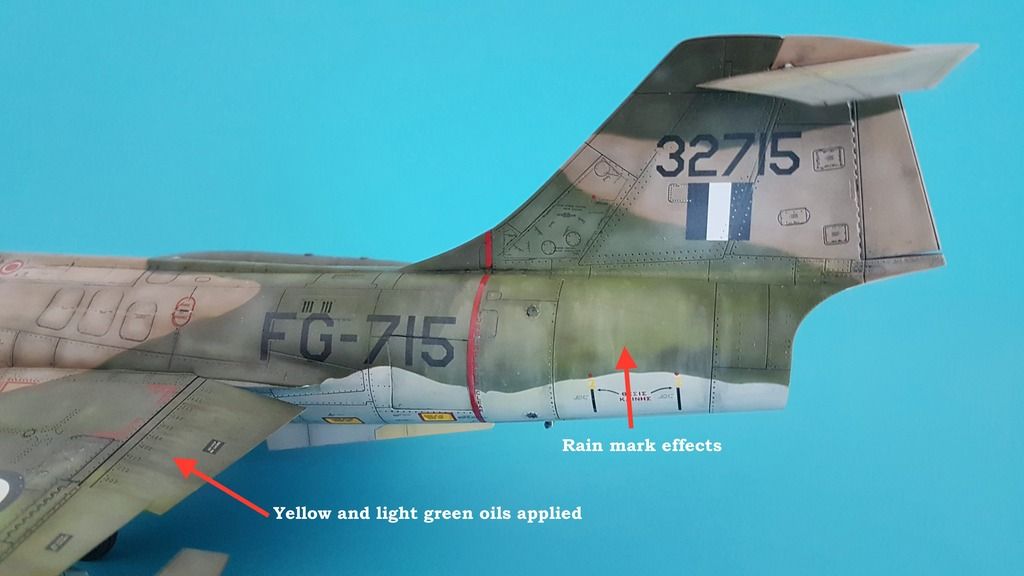
Hope you guys like it. Has anyone else used the oilbrushers? Would be interested to know your experience with them!
-
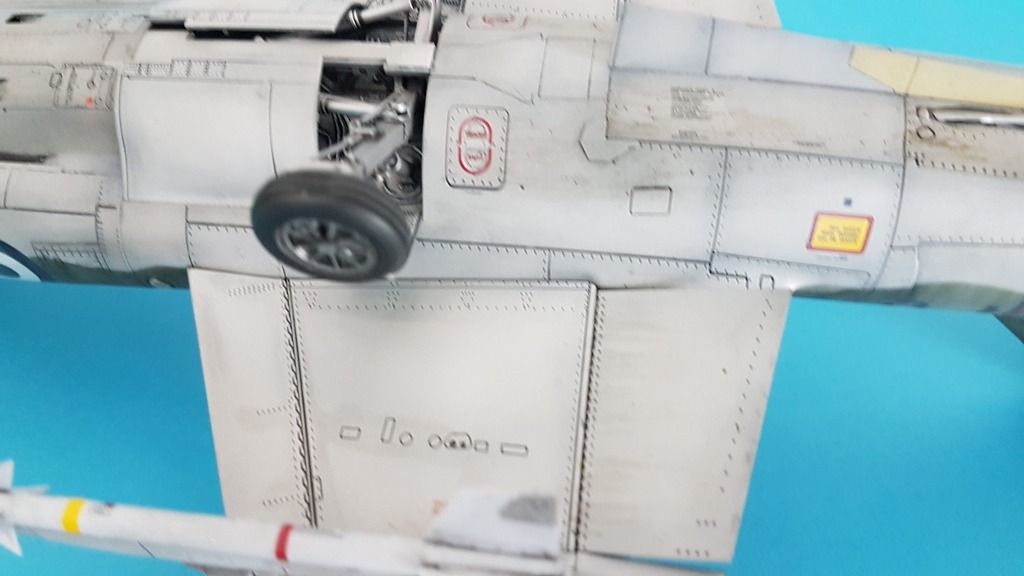
Just a small observation... You might want to check the position of the nose wheel-well gear-doors...
Greetz Rudy.
Hi Rudy. Thanka for the feedback! Could you please let me know which part in particular is wrong so I can fix it? Thanks!
-
Fantastic paint work!!
Thank you!
-
-
-
-
Decals seem to be settling down nicely Markus!
Did you use any decal solution for that?
-
-
Yes! Same as Kev!
I had to read everything from the start and wow! Just wow!
Hope to see more Alan!
-
Great work on the colour variation. I especially like the underneath with the different tones that have come through. Very nice!
Sad about the canopy but if you can get a new one then all good.
Cheers,
Mike
Thanks Mike! Yeah, canopy issue is annoying but will hopefully get the replacement soon.
-
Love it!
Kev
Thank you Kevin!!!

-
Me too! Very nice outlook with these soft colors!
What you mean about "cracks on all parts" - on the clear parts themselves for the canopy, or cracks of the paint near the cockpit frame? Man, this is something beyond the bad luck and the Murphy`s law, since the dropped F-15...
 If it`s the canopy - maybe a vacuum-formed canopy is a good idea. Or if there is a one-piece canopy in the kit (for a closed canopy option), you may still split it for the open canopy opt.
Thanks Milan!
Yeah, the clear part between the canopy frames is cracked so it's beyond repair.
At least Italeri has a spare parts service so no crisis there.
Only problem is Italeri doesn't post to Dubai so had to place the order for my home country, Greece.
Hopefully I'll be able to pick it up in two to three weeks.
Talk about Murphy's law indeed....

-
Wow Steve! Very very impressive!!!
-
-
Welcome to the forum Martin!

And great start on that cockpit!!!
-
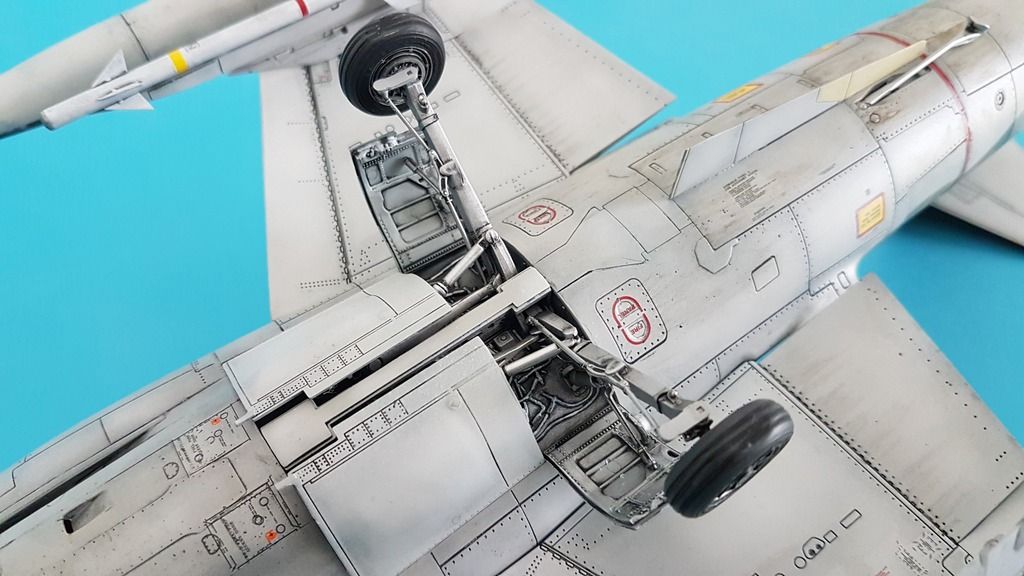
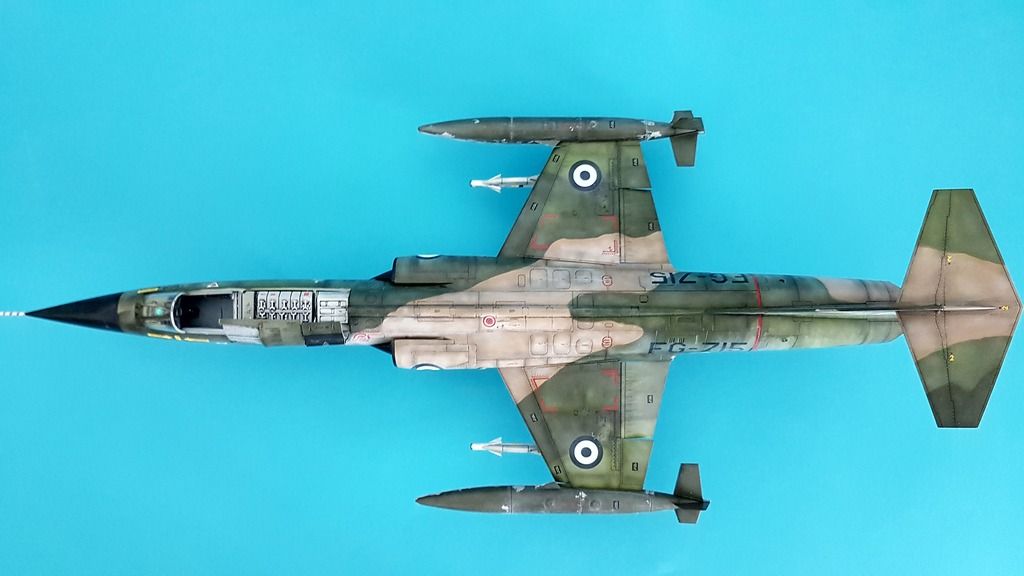
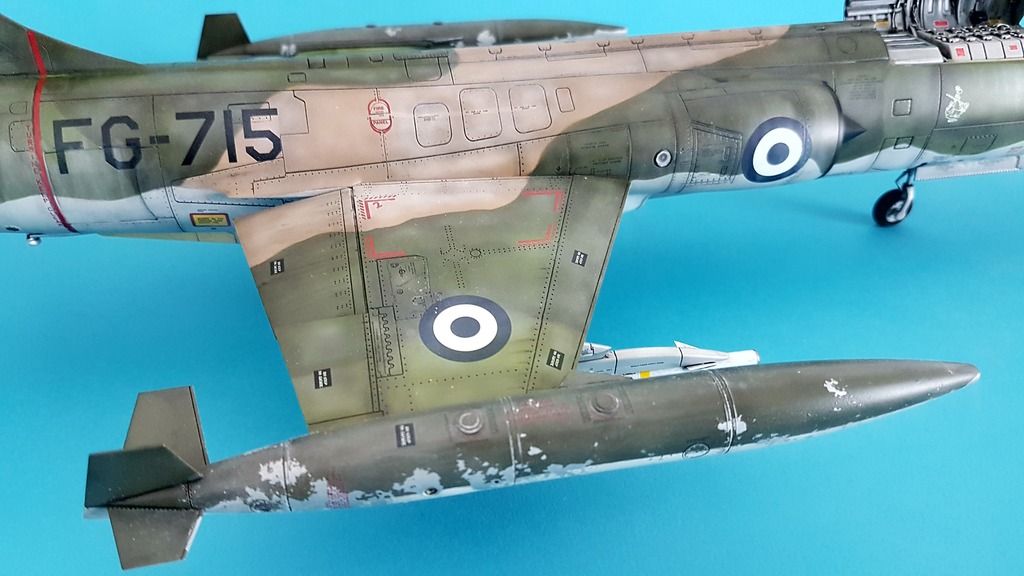
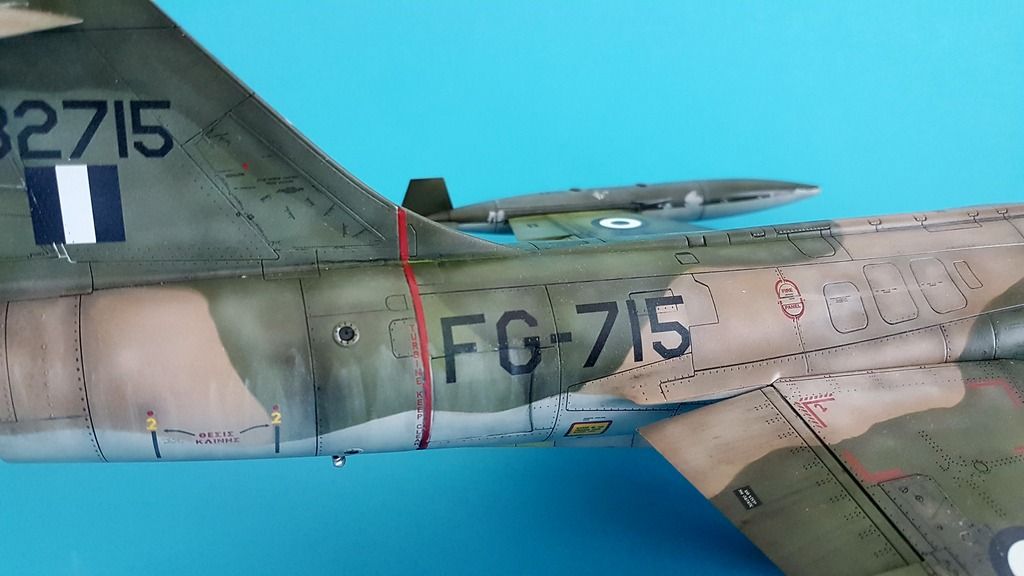
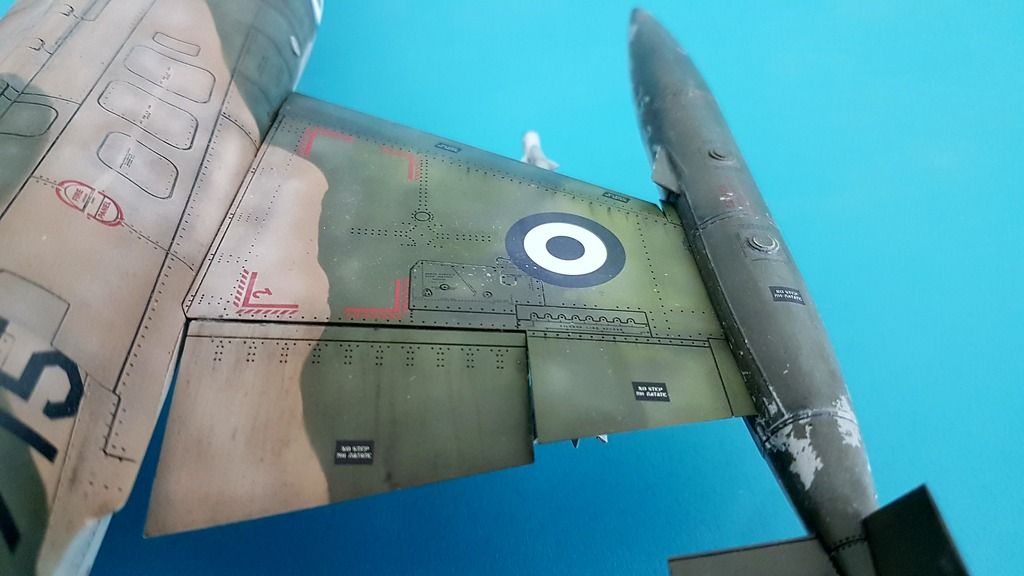
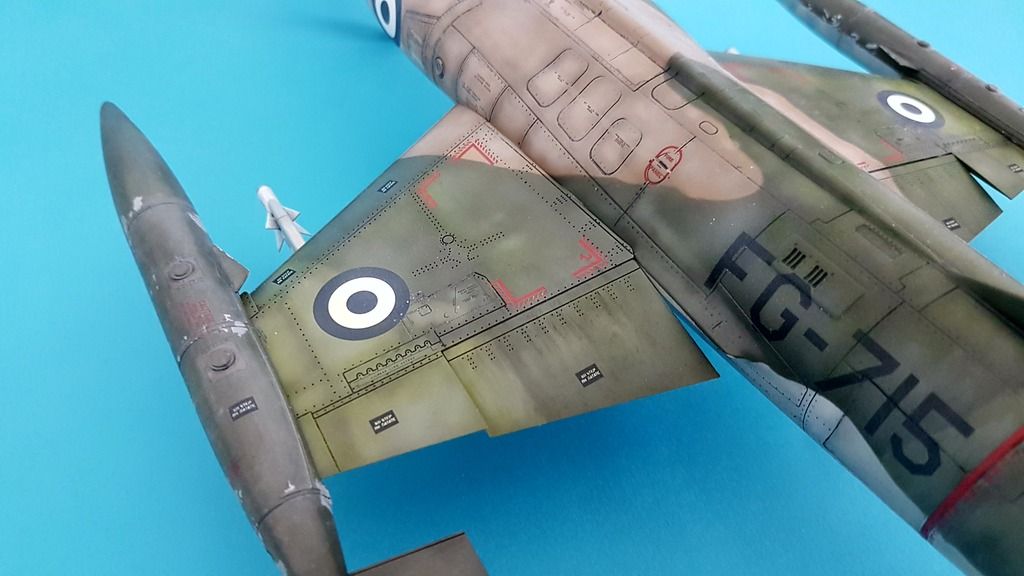
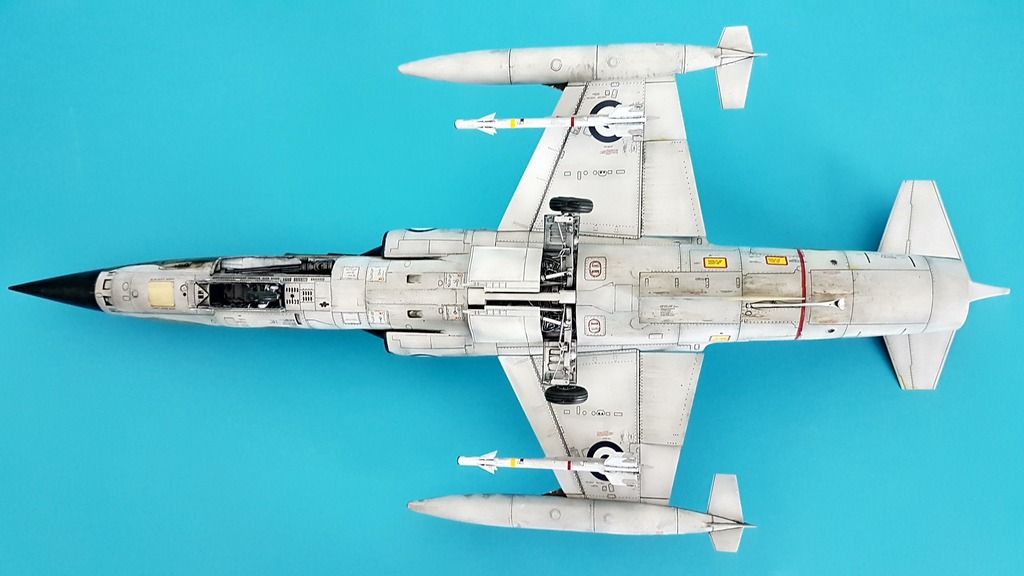
And a few more pics including the AIM-9B missiles!
- Marcel111, Derek B, F`s are my favs and 1 other
-
 4
4
-
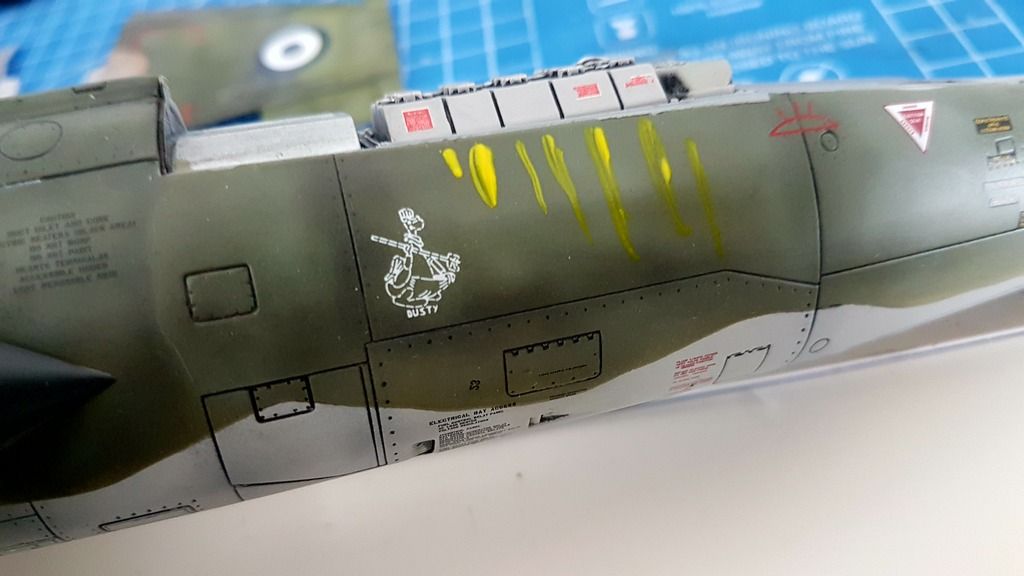
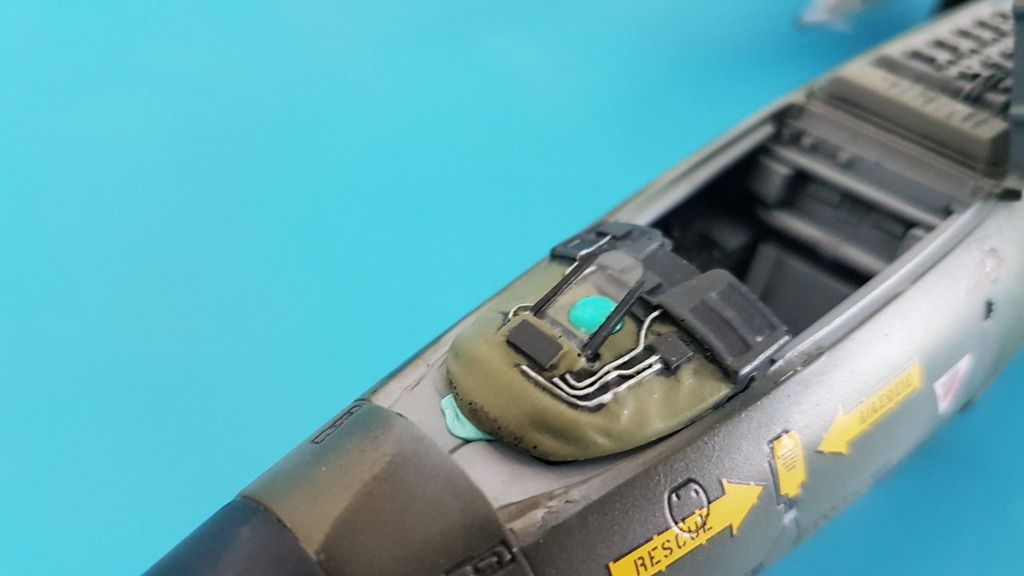
Hi all! Not a huge update this time. I did some final weathering with oils and pigments from Ammo, AK Interactive as well as colour pencils with mixed results. The oil and fuel leaks worked well as well as their oil brushes. The latter I used for the first time and was quite please how nicely the worked as filters on the camo. However, the rain marks and colour pencils look overdone. Will need more practise with these.
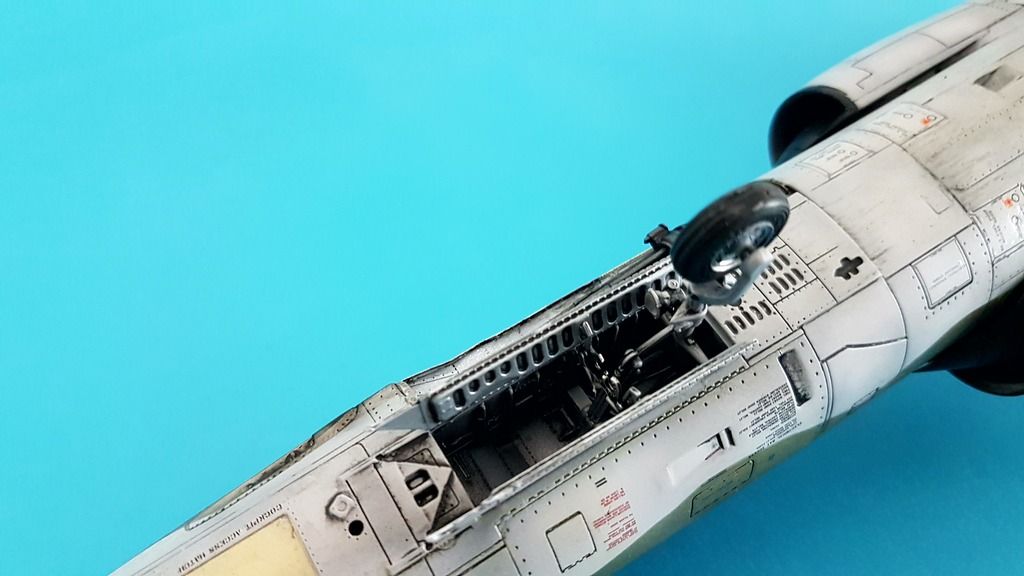
I also did some work on smaller components like the pitot tube, avionics covers and their actuator rods, undercarriage and their covers and HUD display.
Unfortunately, while removing the masking tape from the canopy I noticed cracks on all parts probably after putting too much pressure on them during painting. I immediately placed an order for spares from Italeri so hope to have these soon.
I have now started working on other components like the the maintenance stairs and RBF tags.
I guess the model is almost done!


Thanks for checking!
- F`s are my favs and MikeA
-
2
-
Thank you Mr b!Lovely just how I like it
great work mate
rgds


HAF 1/32 F-104G Italeri
in Works in Progress
Posted
Oh man! Saw what you meant! That was one silly mistake...
Fixed now!
Thanks Rudy!