

Lee White
-
Posts
2,548 -
Joined
-
Last visited
-
Days Won
11
Content Type
Profiles
Forums
Events
Everything posted by Lee White
-
Well, I've started the big Vulcan. Maybe "started" is the wrong word- I haven't glued anything yet, but I've got the fuselage halves cut out, and the canopy cut and sanded to fit, so there are only 3 parts in the pic. Fit is pretty good so far, with only some fine sanding to do to get it to fit even better, but it will need some putty! Perched on it's back is the fuselage of a 21c Bf-109F, to give some scale- Lee

-

This should be an interesting and large build
Lee White replied to ssculptor's topic in Works in Progress
....And connoisuires of fine wine and women, also! Now, pass the Thunderbird, Gladys!! -
This should be an interesting and large build
Lee White replied to ssculptor's topic in Works in Progress
I might have to send some of those minds back to you, Stephen..... -
COOL! I scratched one in 48 many years ago- BIG beast. This plane was to be launched from a 5 mile launch ramp, under rocket power, and reach a low orbit, and skip across the atmosphere and drop a nuke on NYC, and then re-enter, and land back in Germany 2 hours later
-
A Starfix kit, maybe...
-
Please let us know what you think of the canopy, esp the windscreen/hood frame. I thought that it should be a lot more vertical, and not angled forward like a '57 Thunderbird......
-
Beautiful work my friend!!!
-
It's just what the name implies- Scrap-ple. They take everything left over from the slaughtering process, and i mean everything, eyeballs, butts, and teeth, (well, maybe not teeth,) and put in an industrial grinder, add a gelatin to hold the bits together, and sell it. On a similar note, has anyone had a softshell crab sandwich? I remember being given one once on a trip to Delaware, and for whatever reason, I opened up the bread to see what it looked like. Big mistake. It was a whole, dead crab on a piece of bread staring back at me. no lunch for me that day. I seem to prefer my food passing little resemblance to what it looked like when alive. Lee
-
Using the non-calibrated Eyeball Mk.1b (B for bifocals) the pics of the built up model look like the wing sweep is insufficient- Anyone else think so?
-
Matt, after seeing your BV-155, methinks you are quite capable of building just about any vac kit out there. And I hope that Lancman puts his tremendous skills to use and builds the 1/24 Lanc! Lee
-
1:32 Lockheed EC-121K Constellation/Warning Star
Lee White replied to Iain's topic in Works in Progress
I was in a 1/1 EC-121 3 weeks ago- The local museum has one, and was great to go inside and see what passed for hi-tech back in 1954!! -
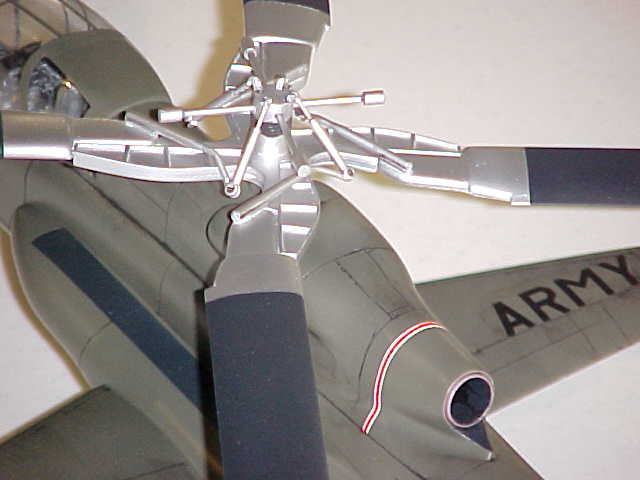
Jack, Here are the rotor pics

-
Hi Jack! I will take some pics and post them here for you- Lee
-
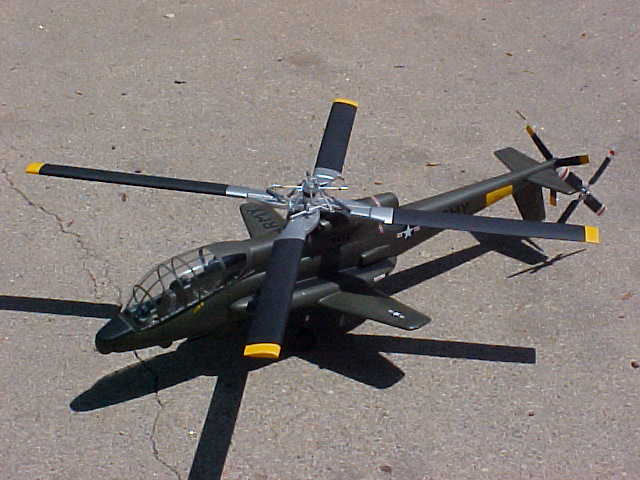
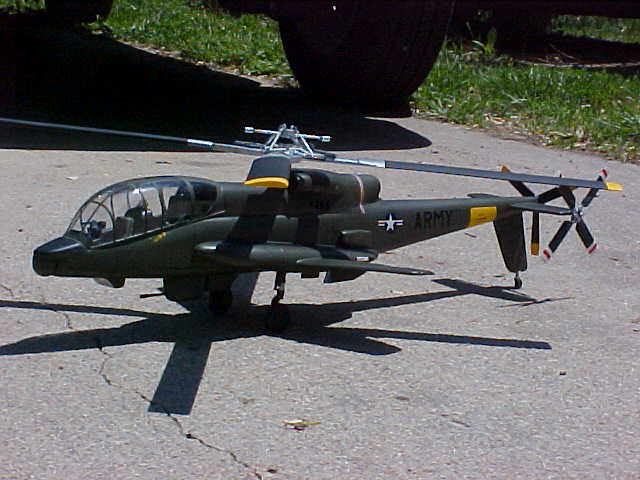
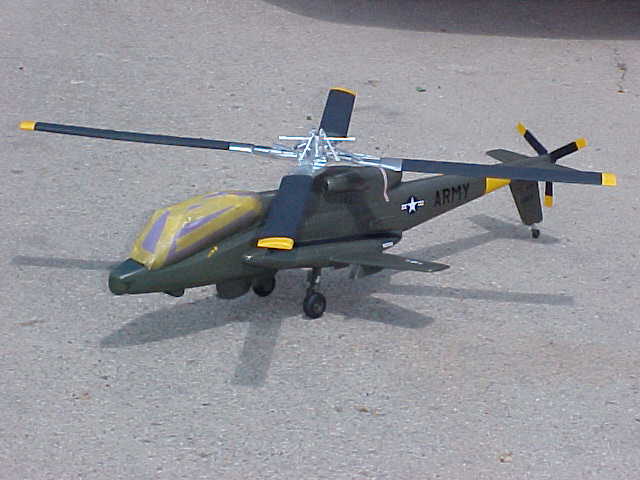
Here is my finished 1/35 Lockheed Cheyenne
-
My kit must be defective- I got the struts!
-
Almost there!!! I haven't finished a kit in ages, and now I'm about to- WOOHOO!! Now I can get this thing off the bench-
-
some decals added....
-
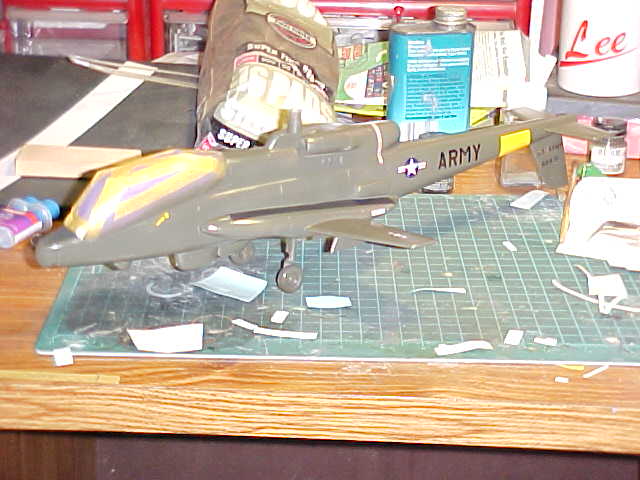
Well, She's green...... Overall OD, with some shading to break up the monotone, but it's a little bleached out here-

-
hi Jack, the canopy fit and painting was pretty straight-forward, I just could not get motivated. Since there is no framework on the model's canopy, I masked off the frames, first the vertical ones, and painted grey followed by OD. I then repeated this on the horizontal frames. An hour's work, but one I just put off for so long. Crazy, eh? Lee
-
Well, finally got around to working on the Cheyenne some more- don't know why, but I really hit a bit of a psychological wall when it came to painting it, especially the canopy. Finally decided to just do it, and now that the canopy is completed, it should be a matter of a week or so till it's done. Yay!

-
I don't think i like the way the gunner is looking at me....
-
21st Century F4U-1D kit
Lee White replied to D Bellis's topic in Incomplete/Stalled Projects Group Build
The exhausts are in the blister pack- Lee -
Bondo doesn't stick well to styrene, in my experience- Lee
-
Hi Allok, So far, it looks like you've been able to tame the beast! I'm going to have to try another one of these- Just a simple one, without too many bells and whistles. And I think Larry is correct- I think these ARE a step up from vacs. And when you find out who slipped a pill in your coffee, remember to share! Lee
-
After seeing your Canberra, Mohawk, and Bronco, I think I know who REALLY has the Master's touch, Mon Frere!!!! Hope to see your Kingfisher too!! Lee
