Search the Community
Showing results for tags 'Skyraider'.
Found 18 results
-
I purchased a Zoukei-Mura A-1J Skyraider from a member here, but am leaning towards building an H. Now the LOGICAL thing to do would be to build the J AND buy an H and then build it. But life is short and kits are many, so looking at the sprues and build manuals, it seems like all the parts for an H are in the J kit, plus an M sprue for changing the wing tips and adding some electronics on the spine. The J seat parts appear to already be on the A sprue. So I'm hoping those of you who have built perhaps both kits can confirm the above or correct any mistakes I have made. My goal is to build a VNAF Skyraider, and the most-appealing are the white Hs that got REALLY dirty and weathered.
- 17 replies
-
- 1
-

-
- zoukei-mura
- skyraider
- (and 2 more)
-
Hi all, While researching for a project, I stumbled on this photo of a VNAF Skyraider. From the nose badge, I supposed that the plane belonged to the 520th Squadron Than Bao (Divine Panther) based at Binh Thuy, South Vietnam between 1965 and 1968. What’s unusual is the blue star-studded rudder reminiscent of the blue fuselage sash on VNAF A-37s. Incidentally the 520th Sqn converted to A-37 in 1968. Can you, Skyraider experts tell me more about it ? What I’d need most is the serial of this aircraft. I also remember having seen a picture of another 520th plane with a red rudder instead of blue. So if you have other photos, they would be very welcome. Thank you all for your assistance. Cheers, Quang
-
This is the second Skyraider from Trumpeter I've knocked out - the first being a Navy 'Nam Spad from circa 1964. HVAR Rockets are Eduard Brasin. The prop is the new prop from Barracuda which I have to say is excellent - apart from getting stung by Customs on import duty.... Decals are from Cap as the Trumpeter ones are very poor quality. Everything else is out of the box. Paints are the new MRP line which are stunning. Pilot is PJ Productions and the quality was pretty good. Not a great deal of colour piccies around of the Korean War spads but enough black and white to get a feel for the extent of the emulsification. Spads shed a lot of oil when flying, emptying most of the oil tank. It's carrying 3 x 2000 lbs bombs withe the HVAR. A heavy load but not uncommon. Anyway - here it is. My next effort is completing a 1/35th Wokka (Chinook). I started it in 2015 and put it on the shelf as the sand filters were doing my head in as I couldn't get them right. A huge amount of work went into the interior and it would be a shame not to complete it. Its circa 2006 around the time of the Kajaki Dam incident where 3 Para very sadly lost a Tom and has a further seven Toms seriously injured. Anyway. Back to the Spad. Hope you like it. Its my favourite piston engined plane and a truly awesome ordnance platform.
-
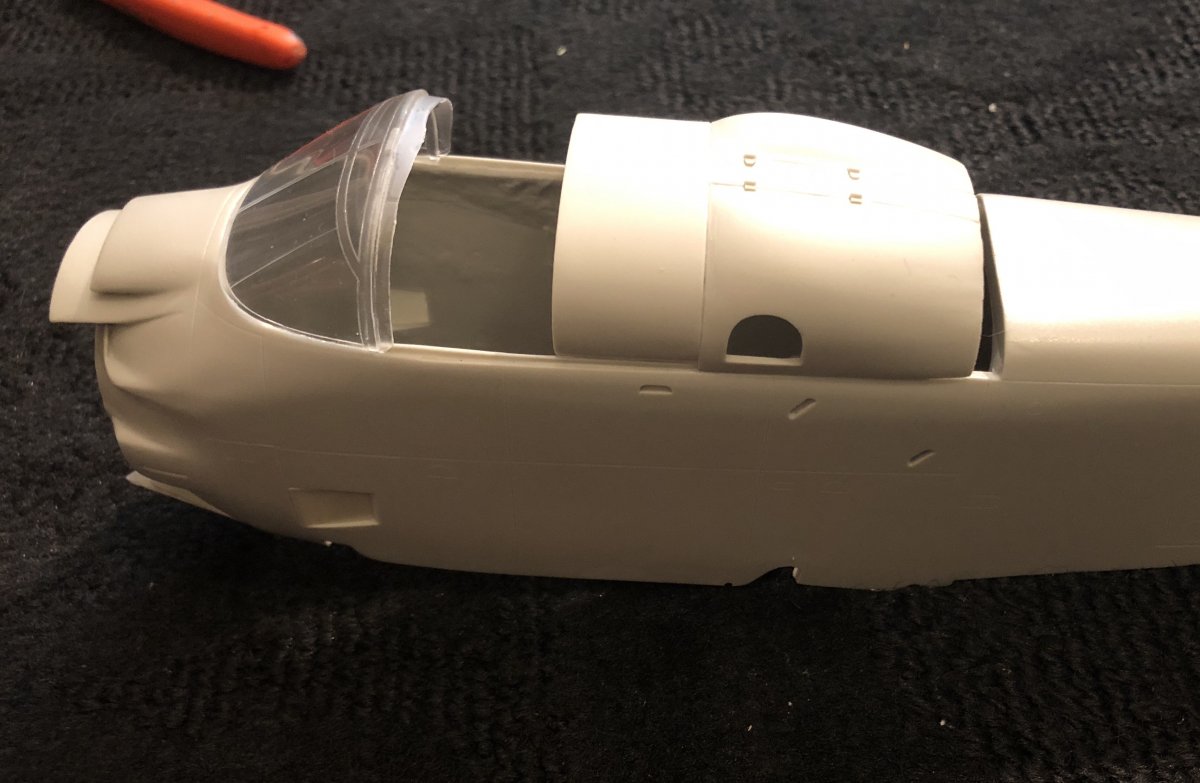
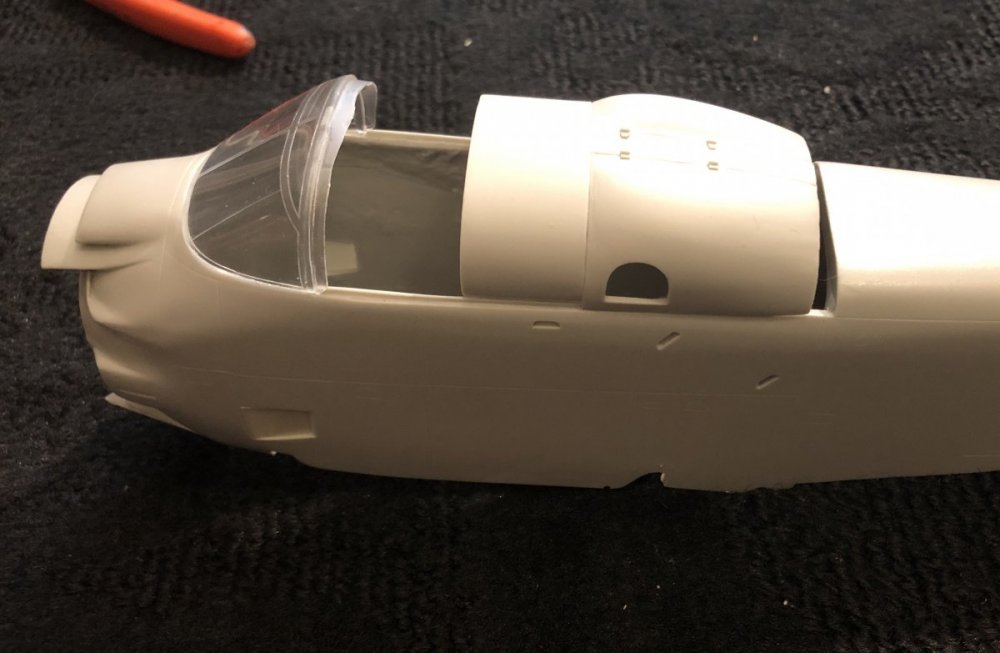
Hello Here's something I am not used to do: a WIP of one of my built. I've decided to share with you the built of my ZM skyraider. I digged up a bit in the archives here and found that built to inspire me https://forum.largescaleplanes.com/index.php?/topic/38670-z-m-douglas-a1-h-skyraider/& The Skyraider is a large plane in real lif. So this will be a big model and I don't know yet where I'll put it when it will be complete. We'll take care of that later. I showed you some weeks ago the content of the package brought by Mr UPS. As ZM does not provide the weapons in the kit, I had to take their addon for the US bombs and rockets. I also took two Rocket launchers from CMK and the gun barrels from Master. In addition I'll use the textil seatbelts. At that scale I should manage to assemble them without hurting my eyes too much... The kit itself is quick nice. ZM provides a lot of stuff for the ones who want to build it open. This is a good basis for a big scratch built exercise but that's not what I gonna do. I don't really like planes with many panels and doors open. I'm painting with brush and Humbrol Enamel as usual. I started just before summer break with the seat and its seat belts. The seat is painted grey 140 and then I showed some wear and with and dry brush of aluminum 56 and a black juice to finish. Then the front and lateral panels. Just black 33 and a bit of dry brush to give to give it a bit of depth. I used the cristal version of the dashboard with the instrument decals. ZM provides also a regualr plastic version with all the instruments engraved.
-
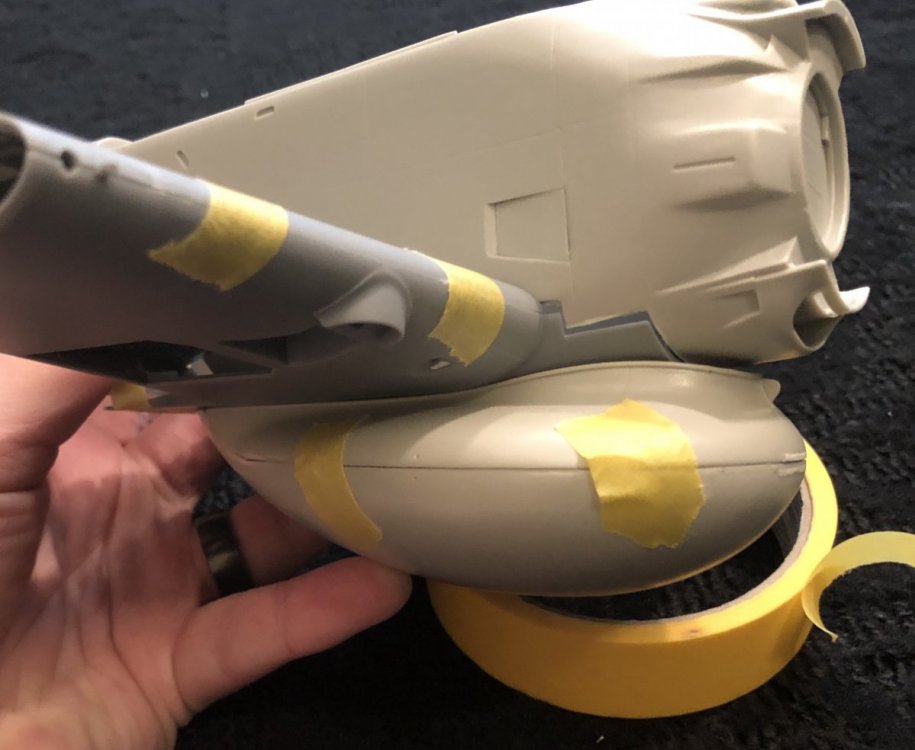
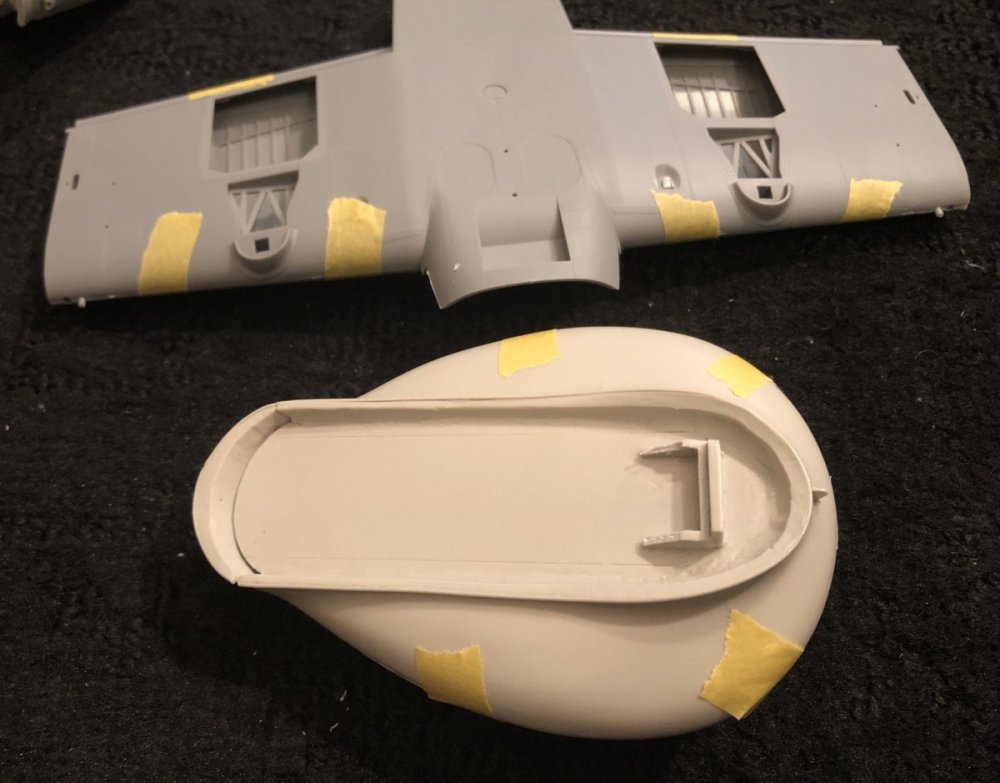
 Update 8/2/18 - work has begun! Normally I’d wait until I actually start working to write an in progress thread but I’m too excited to wait with this one. Fisher has not started shipping the AD-5W Guppy conversions just yet; decals haven’t arrived to them yet from Cartograf. Nevertheless Paul was kind enough to send the resin of the Guppy conversion my way so that I could get started. Initial dry fitting of major parts and the Trumpeter inner wings show near perfect fit. The massive Guppy radome is cast in two pieces to save weight and has “walls” fitting into the oil cooler recess of the trumpy lower wing to aid alignment. I trimmed the back end of these with sprue cutters to get perfect fit. The AD-5 will go in the fluorescent red scheme from Fisher’s decal sheet, but I will be fully arming it with two Tiny Tim rockets and a bunch of HVARs on the outer pylons. Maybe not technically accurate for the trainer scheme but there are photos of operational aircraft with that loadout and it looks too cool to pass on. Undecided on which Guppy scheme yet... This is going to be a fun project!!!
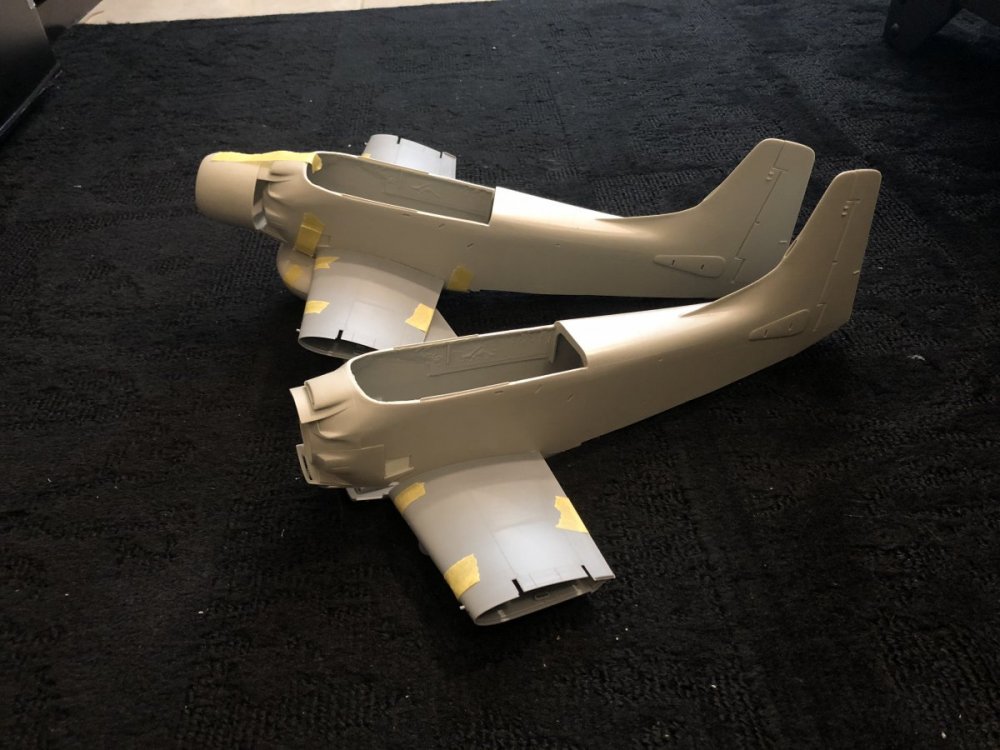
-

Interest for 1/32 VNAF (& 1 USAF) A-1E/G Skyraider decals?
ziggyfoos posted a topic in Vendors Board
With Fisher's big fat face A-1 conversions now out, what is the interest level for VNAF decals for it? I could do a full release sheet covering them but not committed to releasing yet. Potential sheet could provide eight VNAF schemes and a "bonus" USAF option (it kept the tiger face). Two periods of markings are provided for all airframes except one aircraft. I'm guessing cost would be in the $20-25 range? So, is it worth it progressing/finalizing? This is early look of pretty much what it would include, some tweaking would be done and some smaller markings added from show here:- 14 replies
-
- 3
-
-
- aoa decals
- aoa
- (and 3 more)
-
After reading K2's review of the kit and the thread about it, I decided to do something silly and start mine. The only thing that made this feasible is that I've manages to finish two of the four Spitfires that were on my bench. I've been working on it for about a week now and have to sy that I'm enjoying the build immensely. No inital box shot as I jumped in too quickly and the contents one would have been messy as I picked the kit up second hand and a lot of the parts had been removdd from their sprues. So, I actually started where the instructions said to and that's with the cockpit. I'm using HGW belts on the build as i prefer them to the moulded on ones. These were an older set which means you have to cut them apart yourself. A bit more extra work but at least they were cheaper.
-
Hello guys, I took these photos of a former VNAF Skyraider on display in Saigon. Incidentally the propeller blades on this plane are mounted backwards (back to front). Should they be mounted properly, I wouldn't have noticed this curious detail: a small angled 'ledge' running lengthwise on the trailing edge of the blade. Now that I know it's there, I can see it on several other Skyraider photos although it's hard to notice since the 'ledge' is located on the back of the propeller. Can you A-1 experts shed some light on this curious detail? Thank you Quang
-
Hi guys, I'm currently building the 1/32 A-1H Skyraider from Trumpeter. Can you tell me about the stick-like ordnance these A-1 are wearing? I read somewhere that they are practice dummies. I'd like to know more about them and maybe get a link to some close-up photos. Can you help me? Cheers, Quang
-
Hi guys, I'm currently building a Tamiya 1/48 Skyraider USN early 1960s with a bucket seat (as opposed to the later Yankee extraction seat). I searched long and large but cannot find a reference for the colour of the seat belts/harness. Can any of you Skyraider experts help me in that matter? Thank you in advance, Cheers, Quang
-
Now that the summer break has ended, AOA's next release is the previously mentioned VNAF A-1H (AD-6) Skyraiders. Turned out to be too many for one sheet, so there will be two releases, each one still also pretty full. The sheets cover overall 36440 grey, grey over white, overall 36473 grey, USAF SEA camo, and various VNAF style camo Skyraiders. 32-017 will have 10 schemes (8 aircraft) 32-018 will have 11 schemes Prices $20 each (free shipping in US) Printed by Cartograf Now in stock www.AOAdecals.com (Click images for larger views) 32017: 32018:
- 34 replies
-
- 6
-
-
- aoa
- aoa decals
- (and 5 more)
-
Hi guys, this was my summer project originaly planned for 2 months, but it took me more than 4 months to finish it. you can find WIP thread here kit: ZM A-1J + ZM weapon set 2 AM: Aires cockpit Videoaviation Wheel Chocks USAF Videoaviation MJ-1 bomb loader (early) Videoaviation Fire extinguisher HGW RBF stripes Overall nice build with no major fit issues. Painted with Mr. Paint and GSI C colors. Weathered with AMMO stuff (different panel line wash, some filters, streaking grime, fresh engine oil, black and airfield dust pigments). Seatbelts made from HGW material, antenna from EZ line . I have decided to finish it as airframe number 142058 (1972 configuration), because I just wanted to depict A-1J, with which Mr. Hukee flew at least once. I´m quite happy with results although I made several errors, the most visible are insignias which should not be at this particular airframe. Definitely l like USAF Spads with SEA camuflage, my favourite looks of A-1. thanks for looking, hope you like it jan thanks for looking jan
- 16 replies
-
- 11
-
-
- Zoukei Mura
- A-1J
- (and 1 more)
-
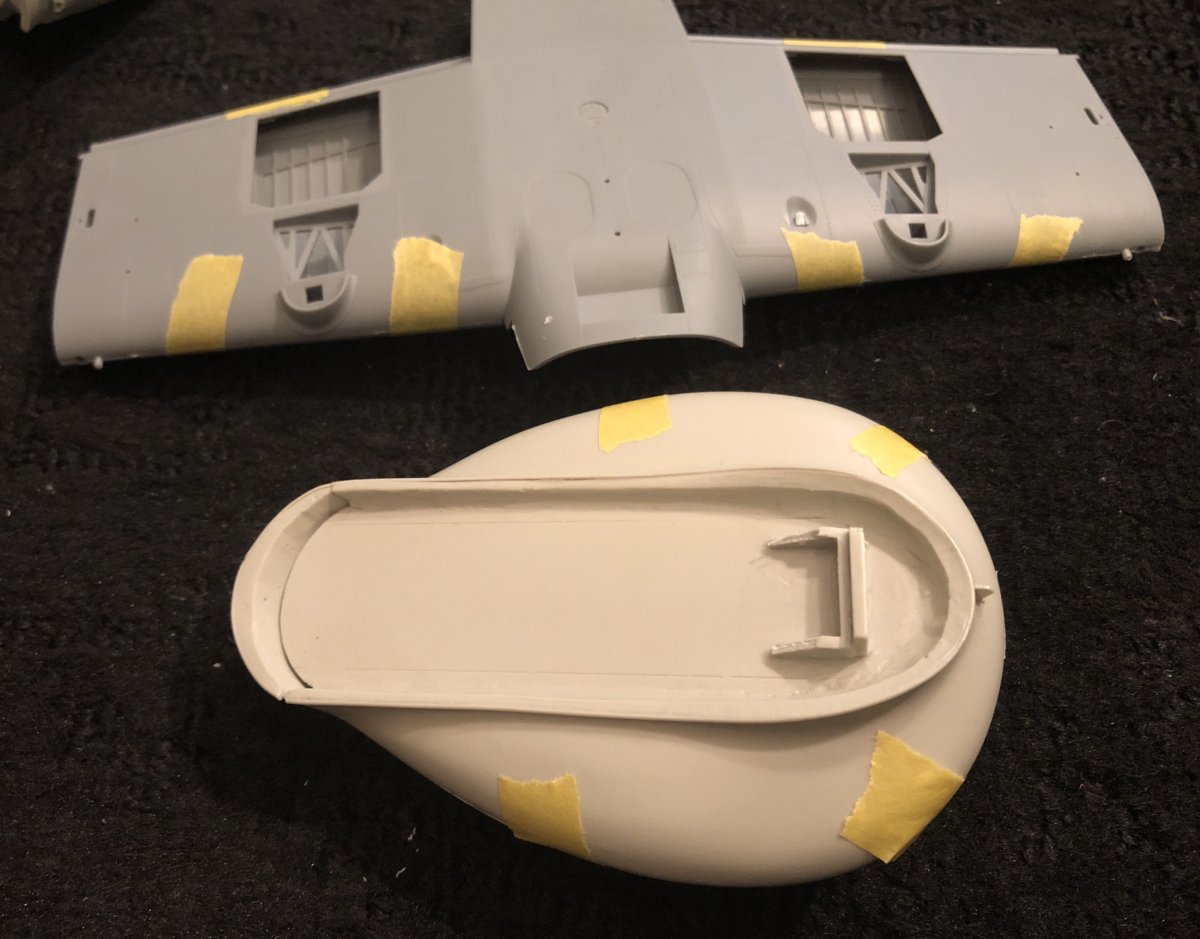
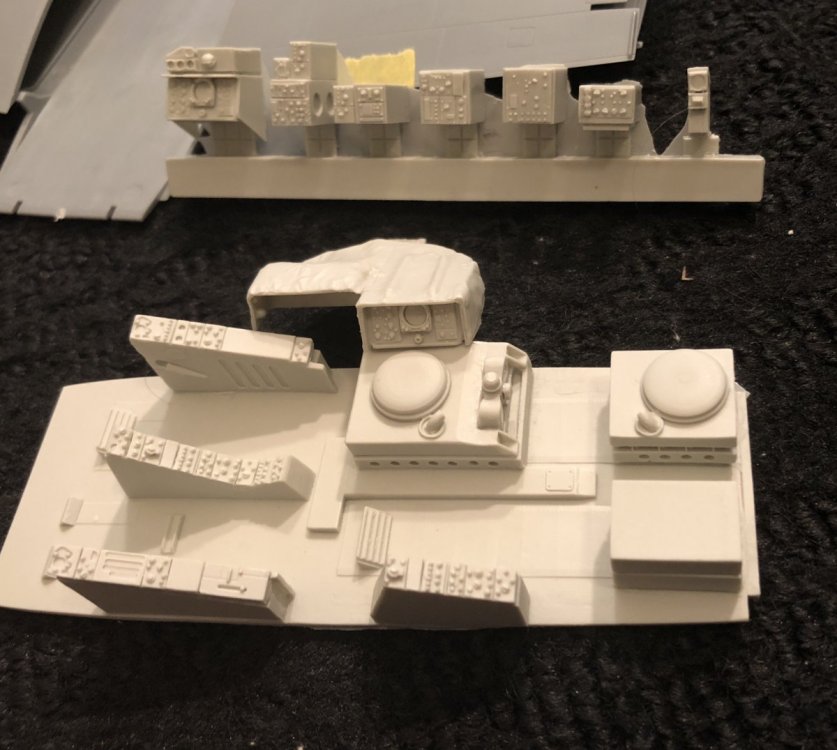
Hi guys, time to start another build. Was thinking about some real combat aircraft, so this one will be my first summer project. I bought this set for half the retail price (Aires A-1H cockpit included as well). My plan is to do fully loaded USAF Sandy with fire extinguisher and MJ1-A loader on the scene. Some words regarding the kit. Its truly amazing, full of parts. I didnt find lot of evidence (only 1 full review) of this second issue A-1 kit from ZM. Main difference between this one and earlier A-1H issue is, that you get all parts from the first one + new parts to cover A-1J differences, you get A-1H manual + new one just to cover A-1J option and 2 decals sheets (USN and USAF). So you can build even Navy bird out of it. The most important is that its made only from 1 type of gray plastic, so I think that this one is definitelly better choice, if you are looking for ZM Skyraider kit. I plan not to spend lot of time with not visible interior stuff. Will use only interior elements which are important in terms of the strength of the whole. I will focus on cockpit details, wheel bays, engine and overall clean build. The most important will be paint job and quite heavy weathering. And yes, weapons Will use Gunze C and H paints, and for the first time will try Mr. Paint stuff for the camuflage (I saw here in the forum some evidence of great results achieved with it) here we go... first - cockpit Aires interior and comparison of details resin vs plastic In the beginning I wanted to use original part and decal for instrument panel, but after comparison with the photos, I decided to go with PE one thanks for looking and any comments or advices are welcome. jan
- 71 replies
-
- 4
-
-
- Zoukei Mura
- A-1
- (and 1 more)
-
I wondered if anyone with a ZM Skyraider kit would be prepared to measure up the kits windscreen moulding for me? I'm sizing up a Trumpeter kit for an AEW1 conversion but withe the overwide Trumpeter kit parts, the differently shaped sliding canopy on this version is getting seriously overwide to look good. I think I will have to sort out the windscreen after all..... Thanks in advance Tim PS if I could borrow a canopy windcreen to measure, that would be even better! Promise not to damage it of course!!!
-
Cant seem to get away from the Korean war, so many interesting planes.... Started on the Trumpy skyraider, i really dig the dark blue paintsheme, hope i can do it justice it will be an A4D based on the Valley Forge 1951 i will try to cobble the decals together and make some of them myself
-
Flown by the 83rd Special Operations Group VNAF out of Tan Son Nhut during 1965. The Tamiya kit is superb, falling together with very little effort. ...and sitting in my cabinet.
-
Production Memo #1 There has been very much demand for the SWS production memos from the Japanese SWS Blog to be translated into English! These production memos introduced the Cut Model Skyraider. The creator is Mr. TAKE-san. It's written as TAKE but pronounced Tah-Kay! This time in the production memo, the cool areas are shown from the left part. * Engine cowl. Cockpit. Fuselage side. Wing machine gun parts. We'll show four cut parts of the model. Aside from just showing you how to do a cut model scale, we'll be introducing to you how to add more detail using the ZOUKEI-MURA option parts. Today you'll see the painted parts of the console and instrument panel. You'll see the beautifully molded areas once they're cleaned off. If there are any protruding areas, you can use a modeling chisel to sand them off. If there are any indentations in the area, you can use putty. Other auxiliary parts can be made brighter using lighter paints. ▼1/32 US Navy Douglas A-1H Skyraider http://volksusastore.com/webstores/scale/index.php?dispatch=products.view&product_id=277 Production Memo #2 Skyraider Model Production Memo (Number 2) Today's topic will be the fuselage area. Before we get to that, let's go check out the SWS Concept Note No. III! And it goes without saying that the important images have been put up! It looks like there are tons of wires, but there are only 8 of them! There are so many in the workings of the wires aren't there? Let's do our best to recreate this for our scale! The point of construction is to start from the A-4 partition wall and to end at A-38, which ends at the arresting gear. From start to finish decide where you would like to put 8 holes in. There will be 16 holes that need to be drilled. You can look at the picture and while doing so, you can carefully design the drilling position. A number 6 black wire is used for this. Look at the spacing between the wires which should be around 30cm for 8 wires. Tie the ends together and then finally glue it together with instant glue. Drill a hole through A-4 to A-38 bulkhead using a 1mm drill which will allow the wire to pass through the bulkheads without having the need to open holes in the center and allows lightening the holes. From the A-4 bulkhead to the A-3 frame, make sure to check each wire one by one on each side before continuing on. 4 wires on each left and right side. While looking at the Concept Notes, you can check the holes and to see which ones pass and do not pass. Make sure that the tension of the pin doesn't interfere with the partition wall. So how is this shot? It looks almost identical to the real thing doesn't it? While pulling on the pin, make sure that it is secure by crushing the aluminum pipe. If the tension is ok, you can use glue on the ends to secure it in place. ▼Concept Note No. III US Navy A-1H Skyraider http://volksusastore.com/webstores/scale/index.php… ‪#‎ZOUKEIMURA‬ ‪#‎Skyraider‬
- 15 replies
-
- 4
-
-
- A-1H
- ZOUKEI-MURA
- (and 1 more)
-
Usually i build models so that i can sell them on built up to pay for the next one. This one is a keeper! I love it. Its Trumpeters 1/32 A-1J. It has been built straight from the box with no faffing. I seem to have gone off weathering too. Im happy with just exhaust streaks. It is what it is , a plastic model. Great build with no problems at all. Im so impressed i am just starting a Trumpeter 1/32 A-1H , which again will be straight from the box but with gun bays open , engine shutters closed but cowling open and wings folded. I havent put the seat in this one yet , i will leave that for another day. I was too lazy to mask the camo so i just airbrushed it freehand.