

tomaszhajzler
-
Posts
143 -
Joined
-
Last visited
-
Days Won
4
Content Type
Profiles
Forums
Events
Posts posted by tomaszhajzler
-
-
Hi!
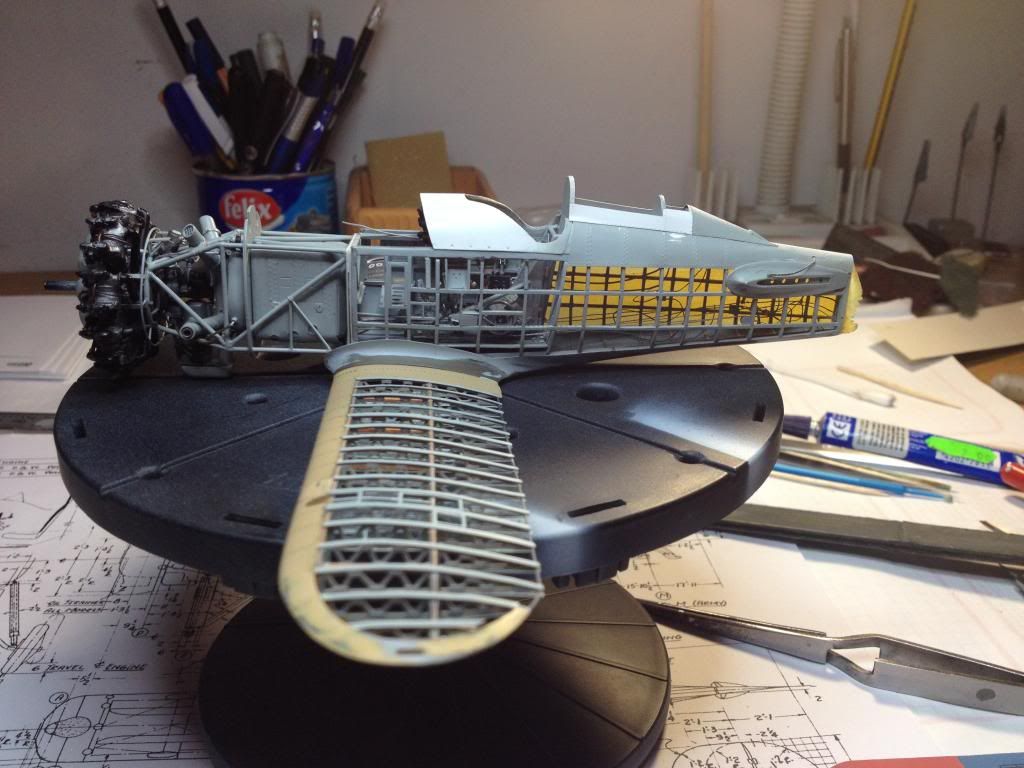
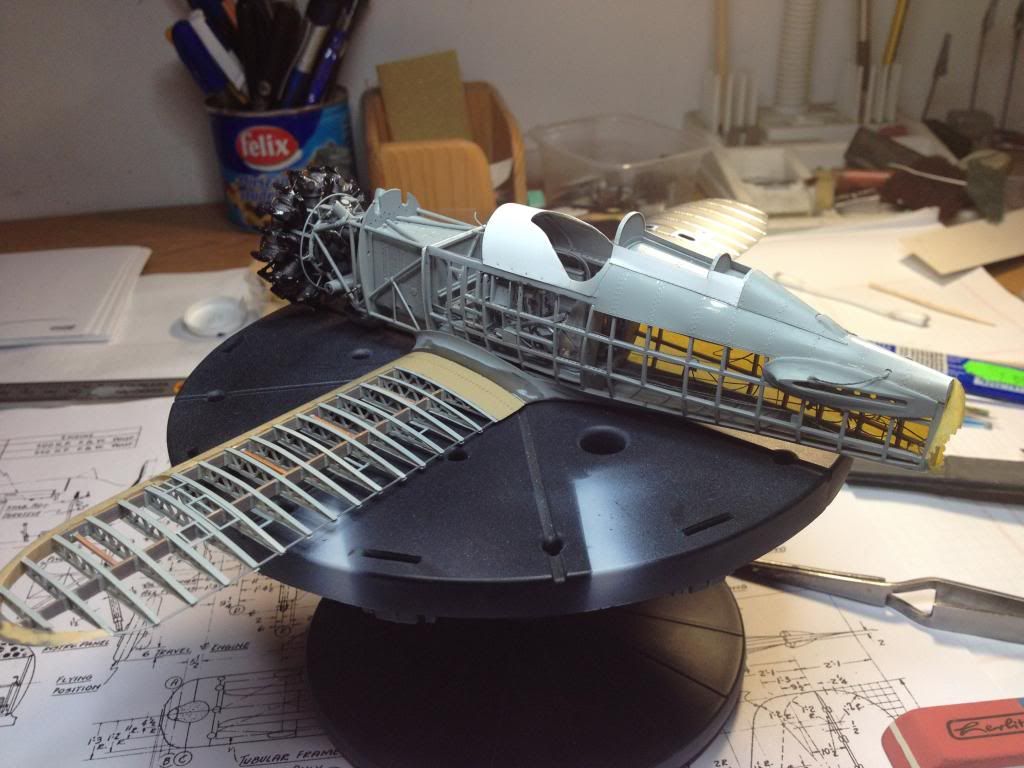
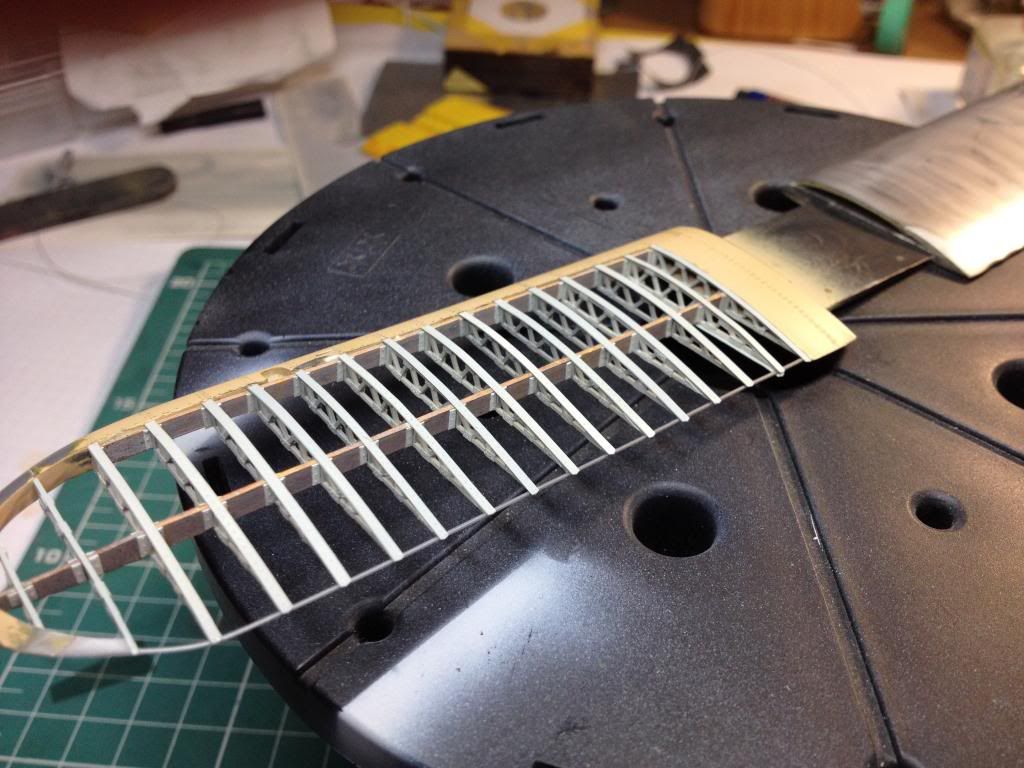
I took up struts because both wings are complex. I'd like to fit them first, before i add all details to wings. Open areas of both wings make this fiting more difficult.
I can't deny yourself to see my boeing with both wings.
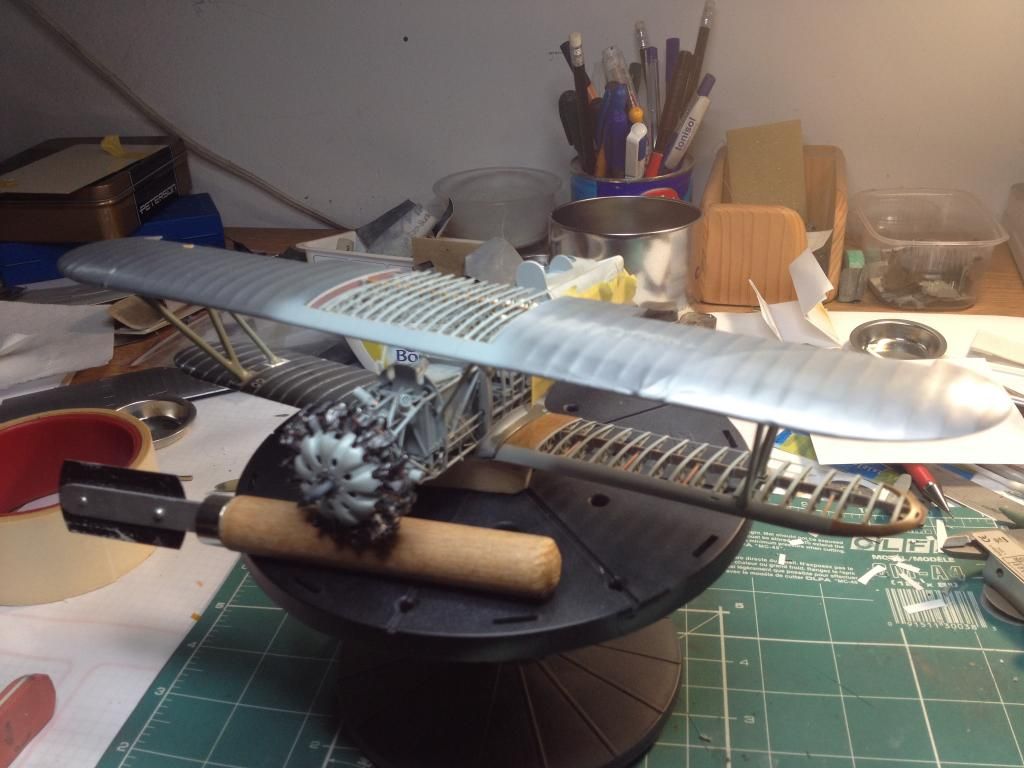
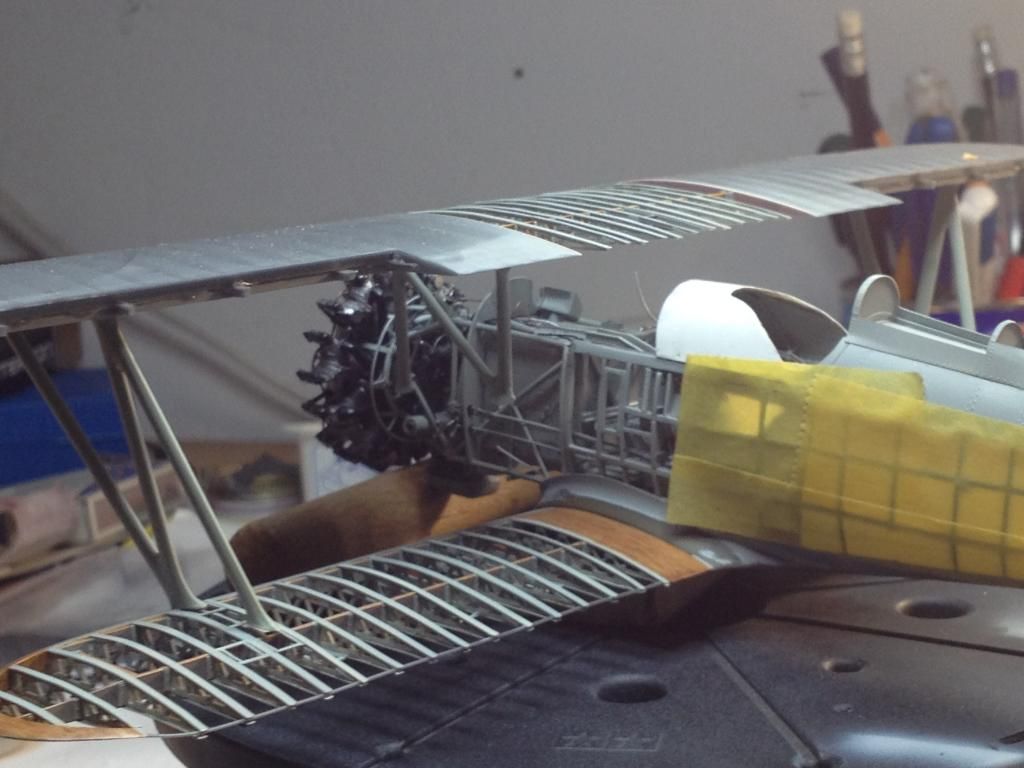
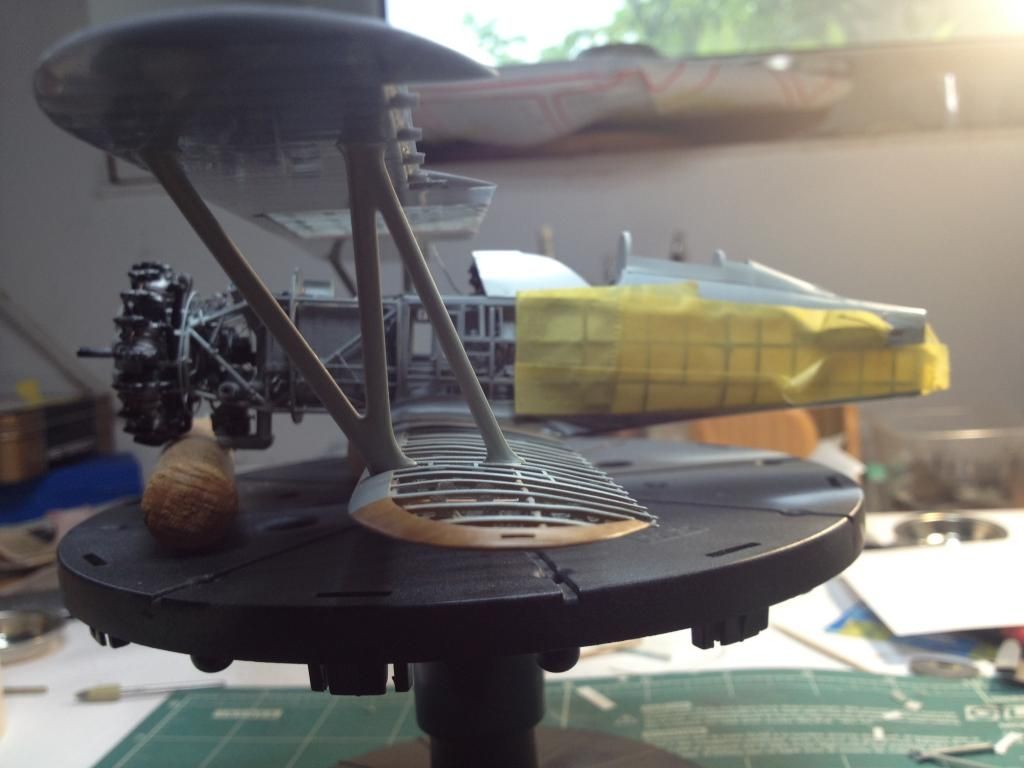
What a pity it's only test fiting.
Regards
Tomasz
-
Hi!
I'm glad you like it.
I know that is not a main stream, but so many kind opinions give me kick for further works.
that browning should be a master for resin copies so we can all get some!
Yes, Peter. I gave my brownings to my friend. I think he is able to make copies, but it could be difficult because they are empty inside and very crispy.
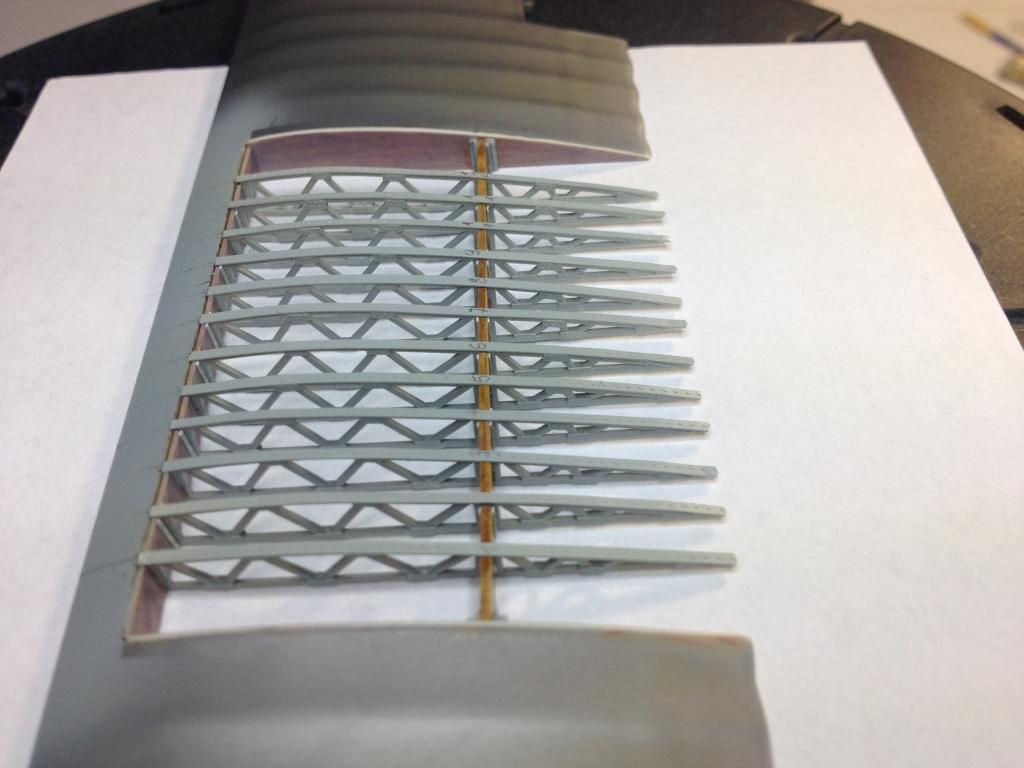
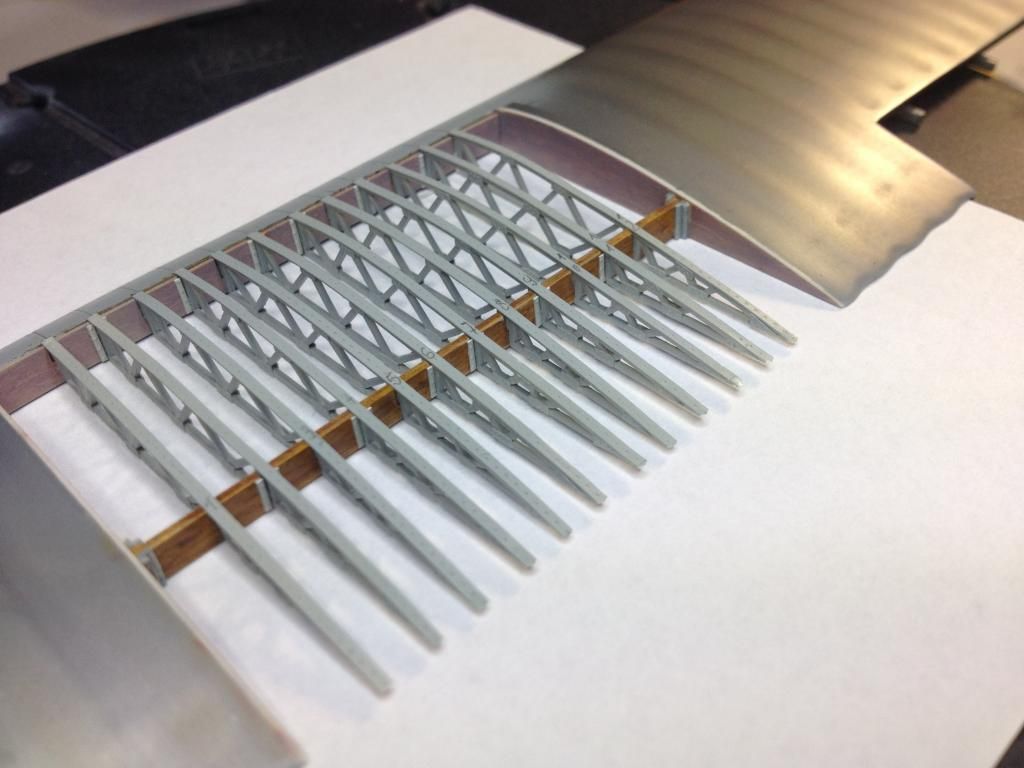
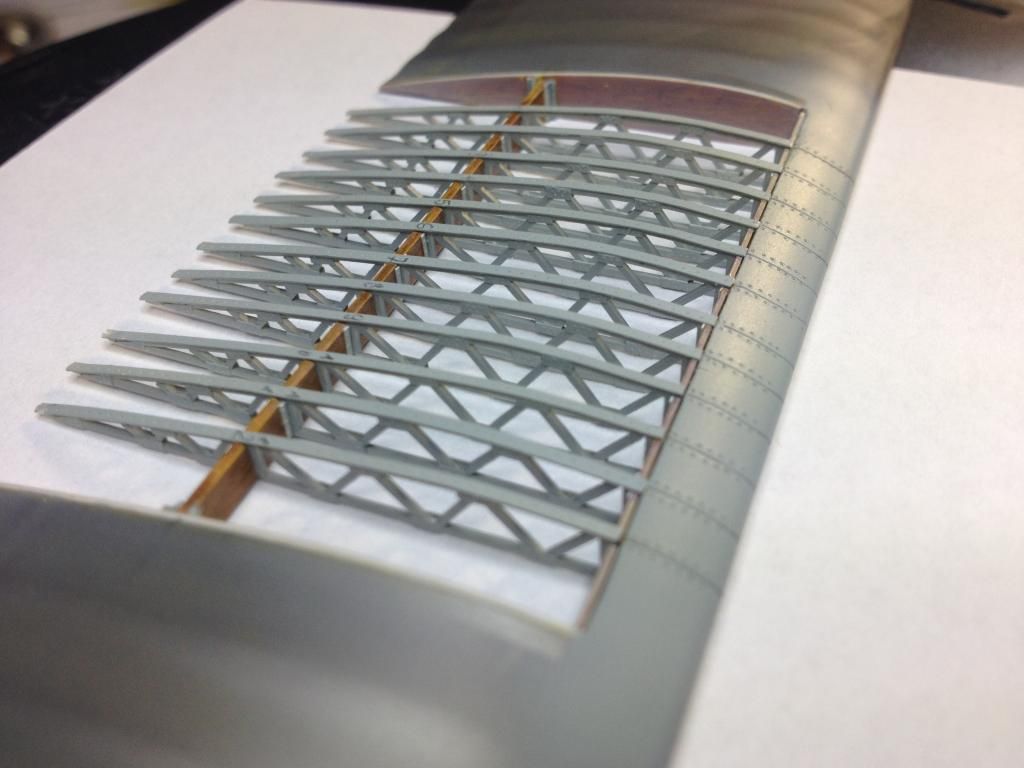
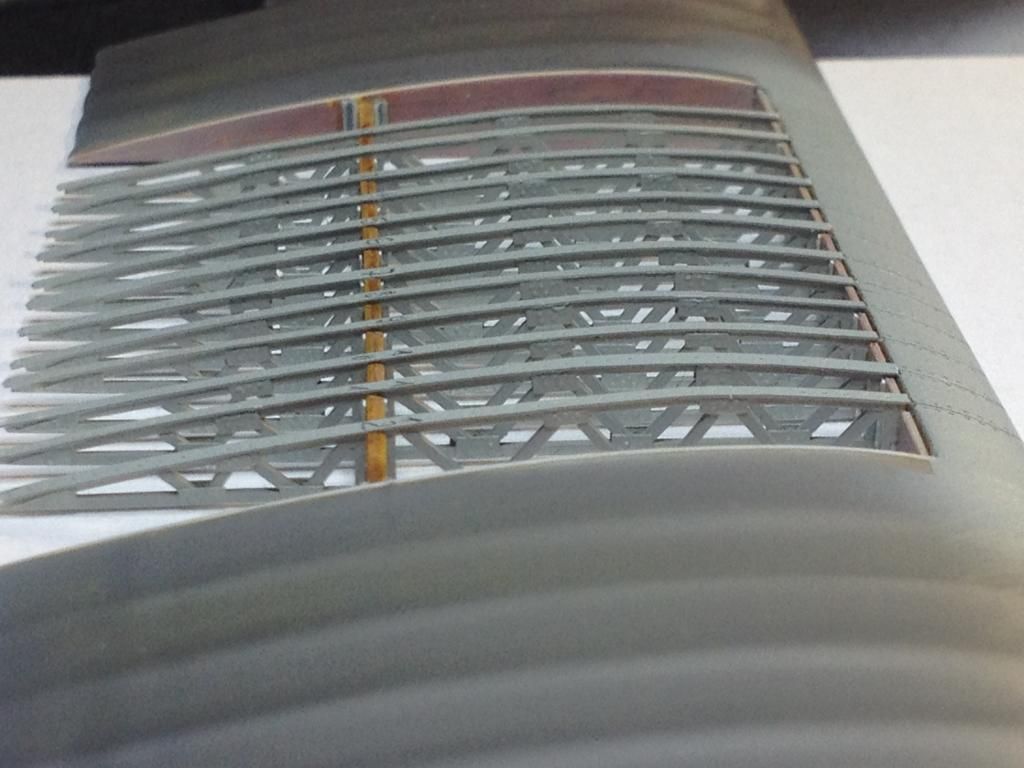
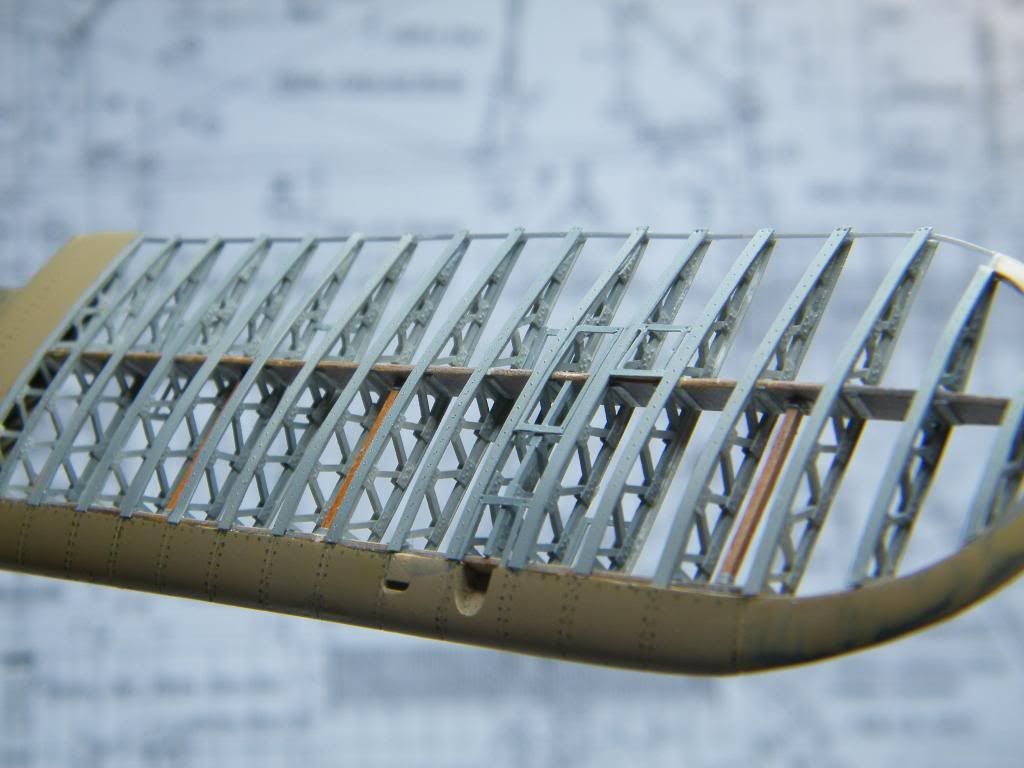
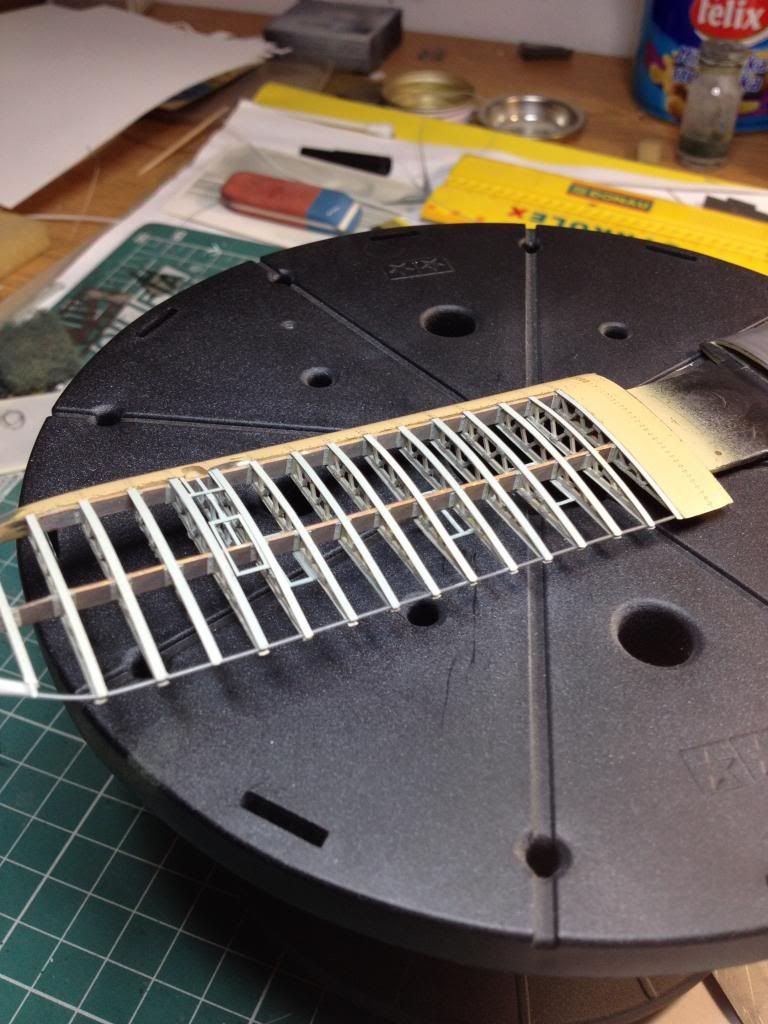
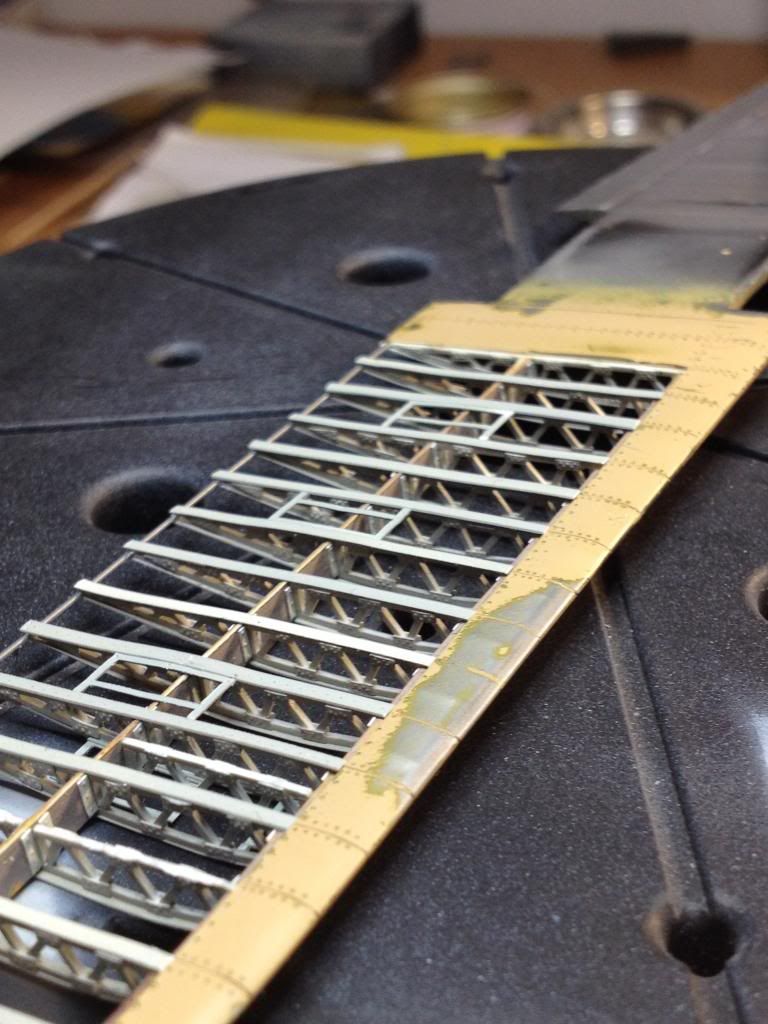
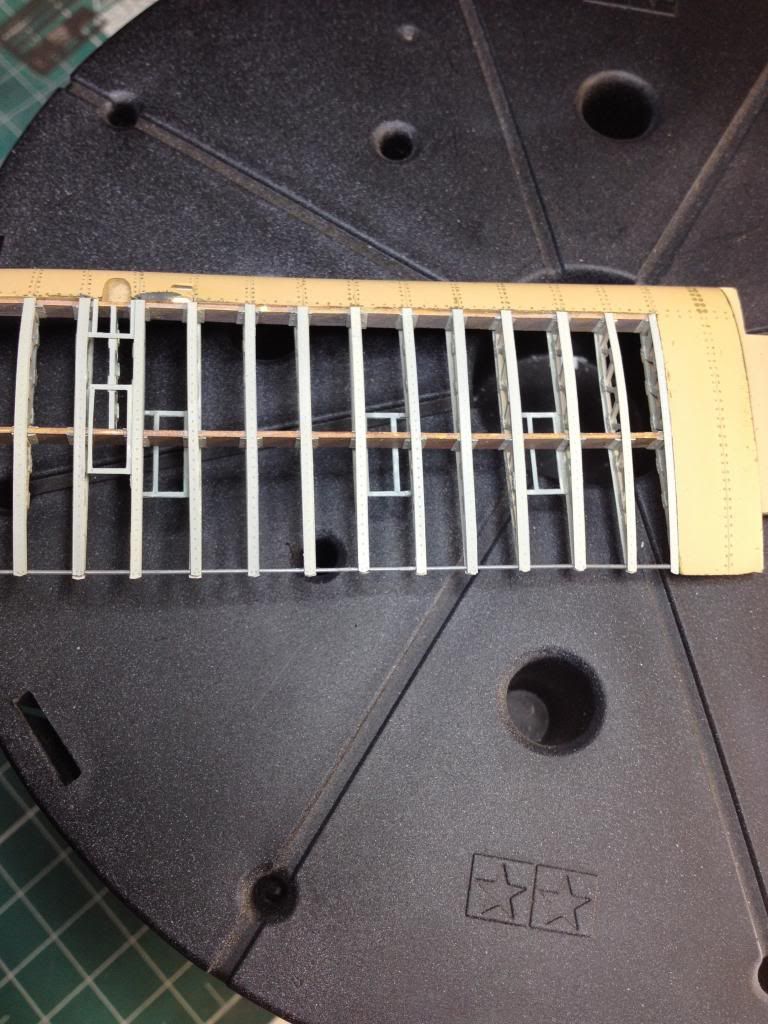
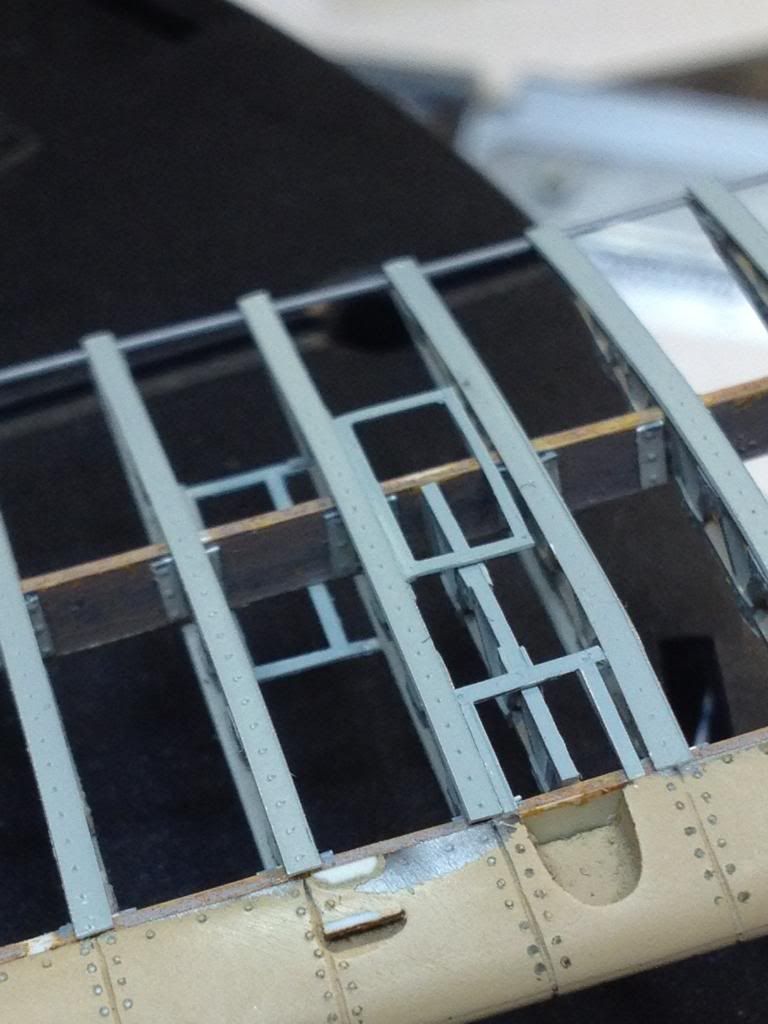
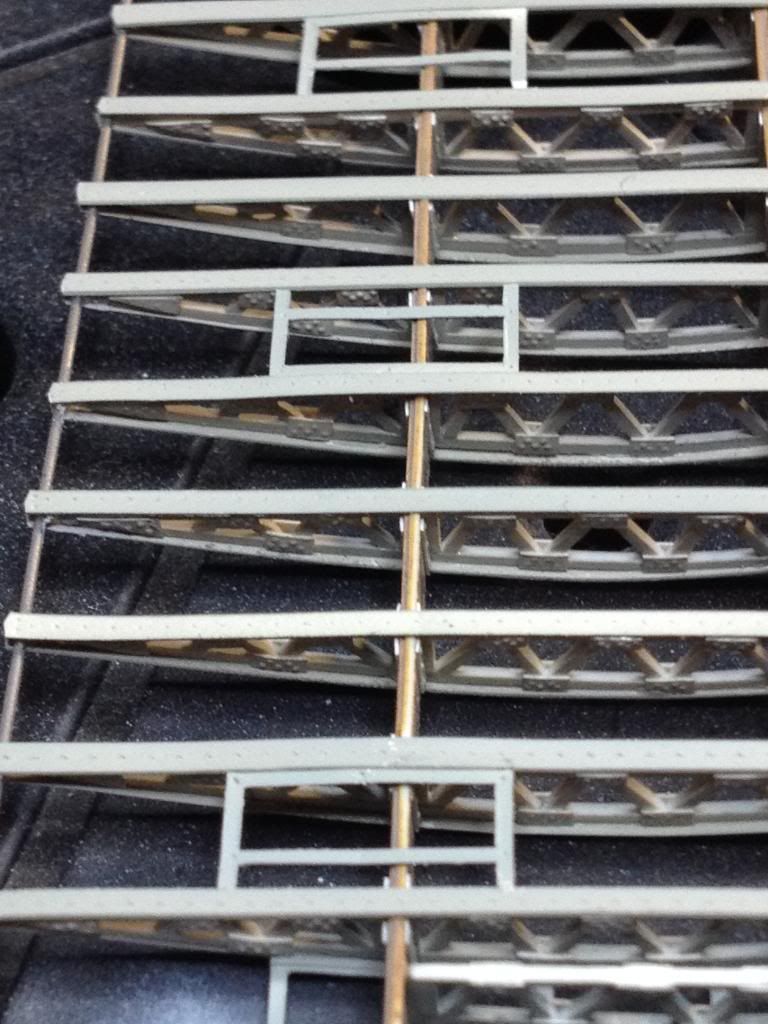
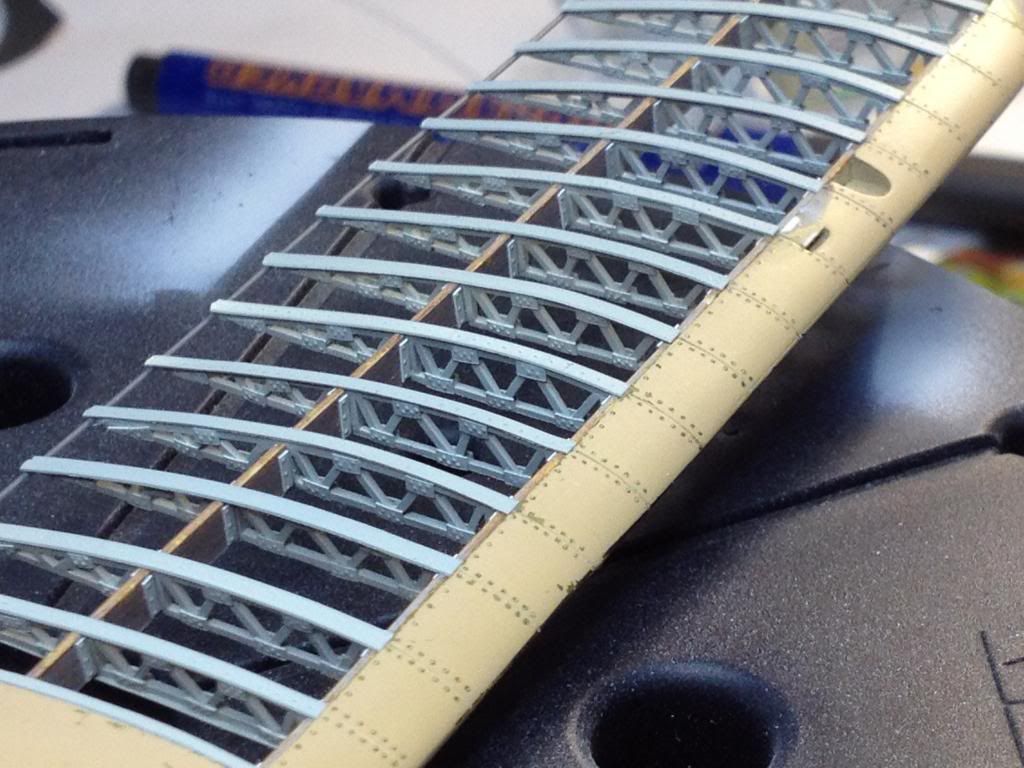
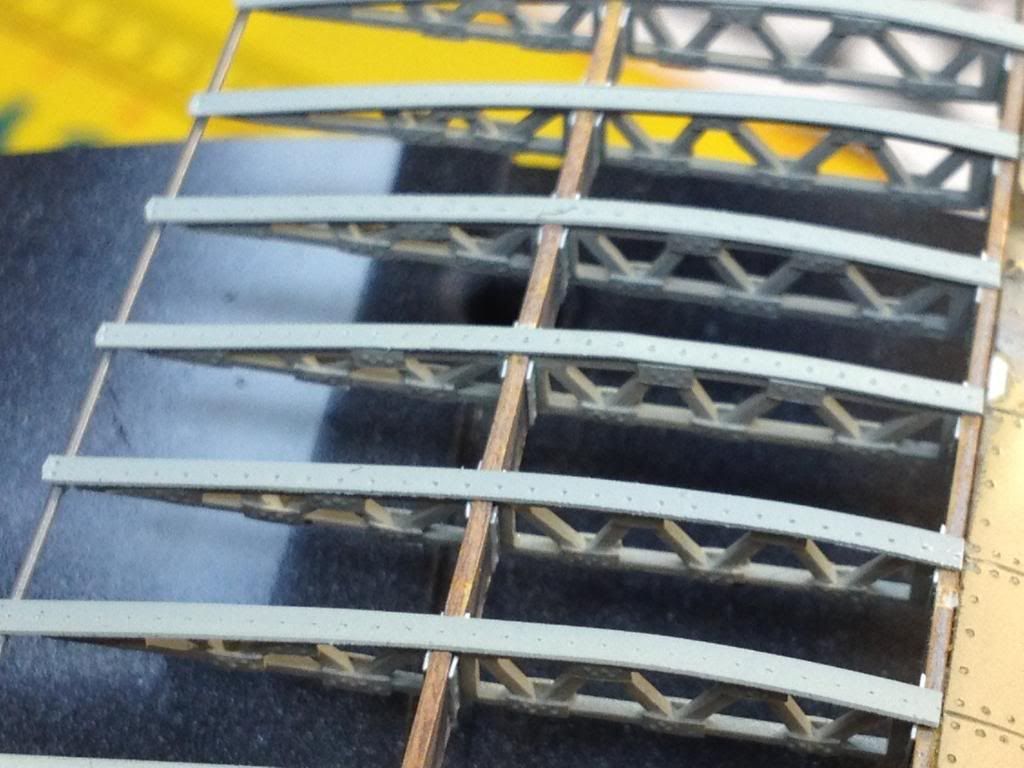
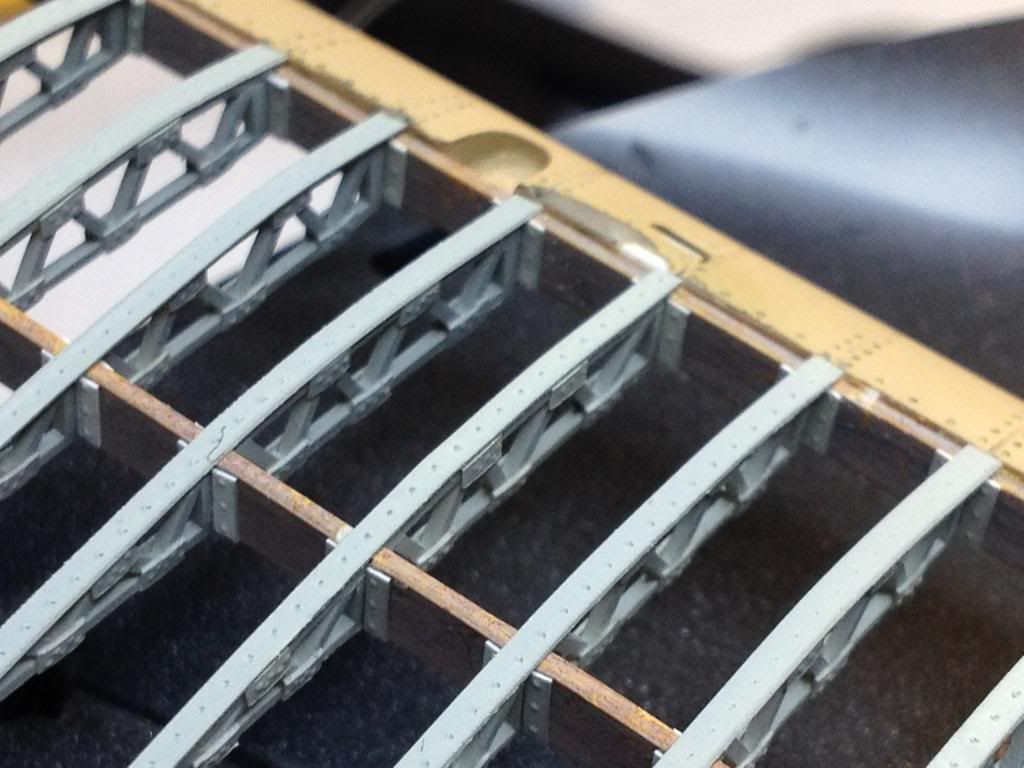
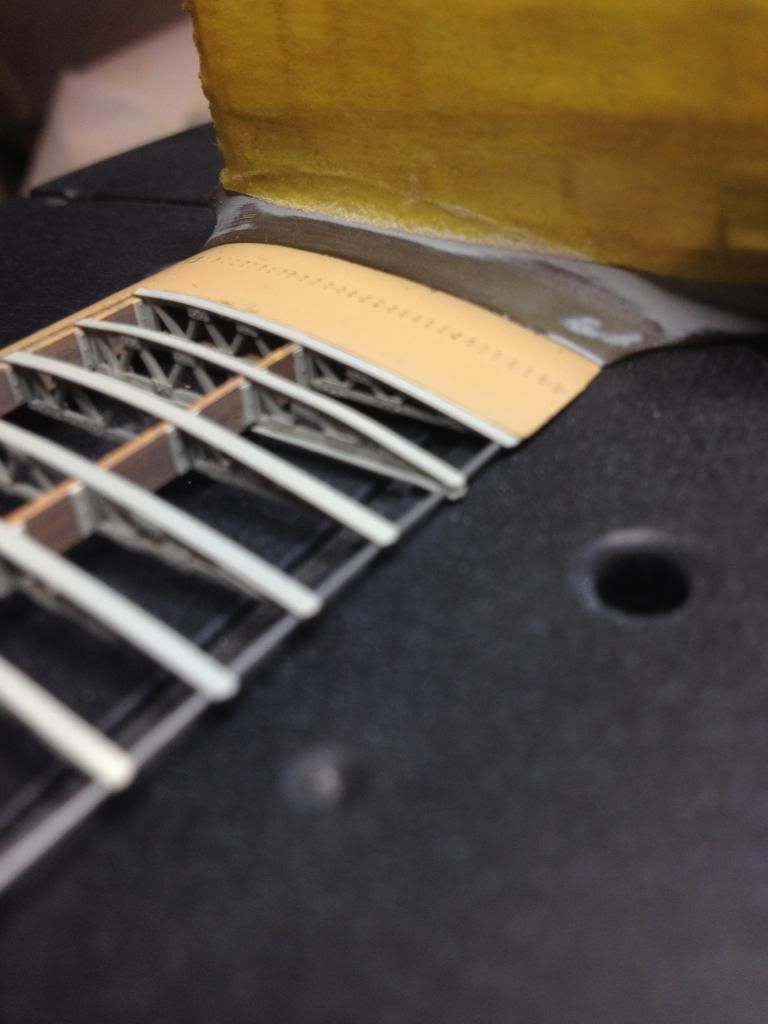
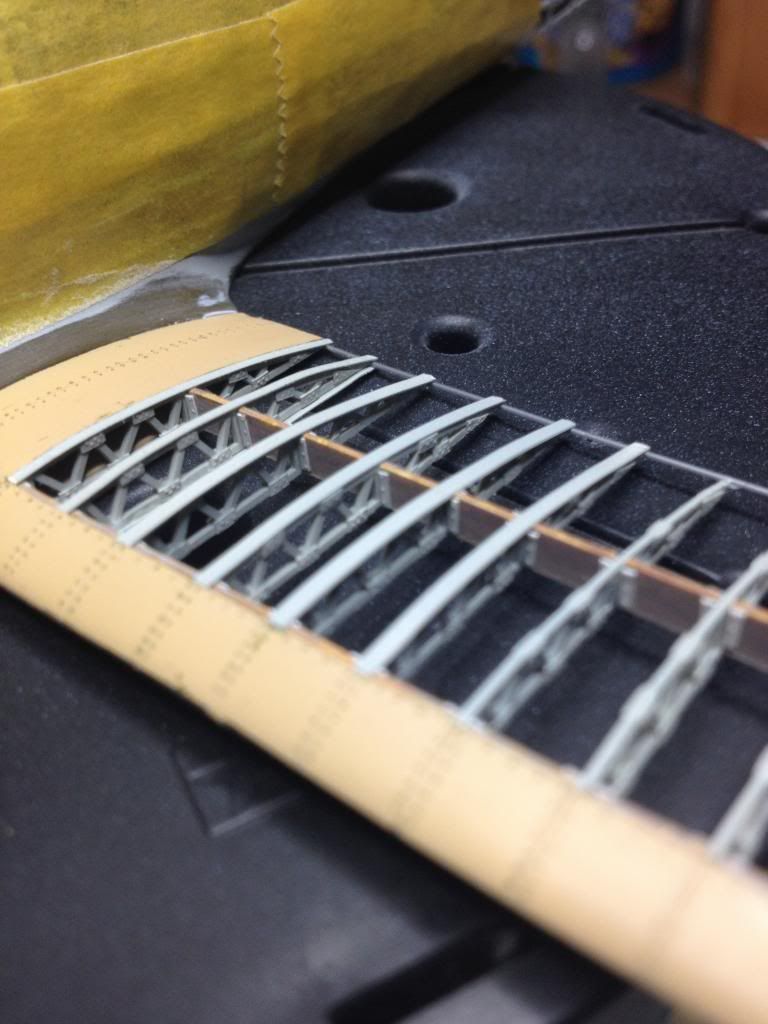
seeing those wing "ribs" reminds me of my balsa wood/tissue/dope control line planes I used t build.
what did you use as a template/guide for those "ribs"?
I cut the shape in telephone card and fastened to metal plate. I used 0.5 mm evegreen sprues and thin Tamiya cement to glue.
And now all ribs are on place.
Regards
Tomasz
-
-
-
-
Hi everybody!
It was long break in my posts, but works go on.
The third year of my project was ended on April.
I began the fourth with upper wing. I will make it the same way as lower, but central part will be open.
I wanted to use Aires brownings, but i changed my mind and decided to make my own. First I've got objections to dimensions of Aires product, I think they are to small. Second, I make them empty inside, because one of them will be exposed outside of the aircraft.
Start working.
I hope I can write posts regularly.
Regards
Tomasz
-
-
Hi gents!
Whatever you're paying your little alien helpers Tomasz...DOUBLE IT!


It was not good idea to talk about money. They demanded rise. I cuoldn't achieve their expectations, so they left me alone with this project. But I learnet a little.
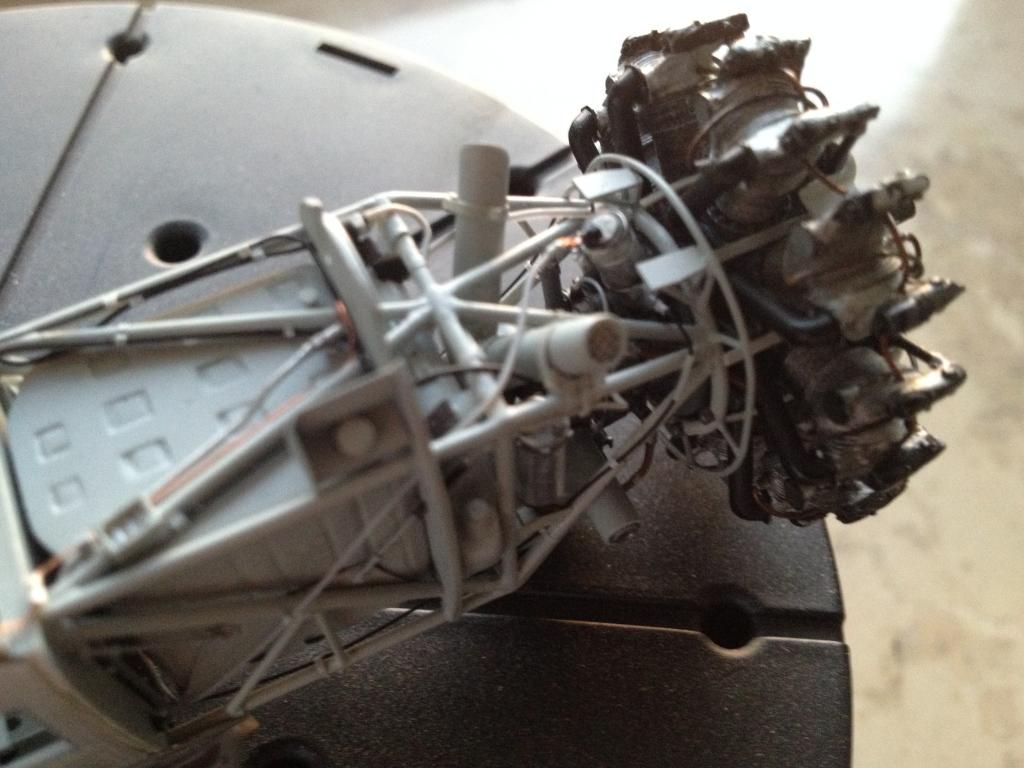
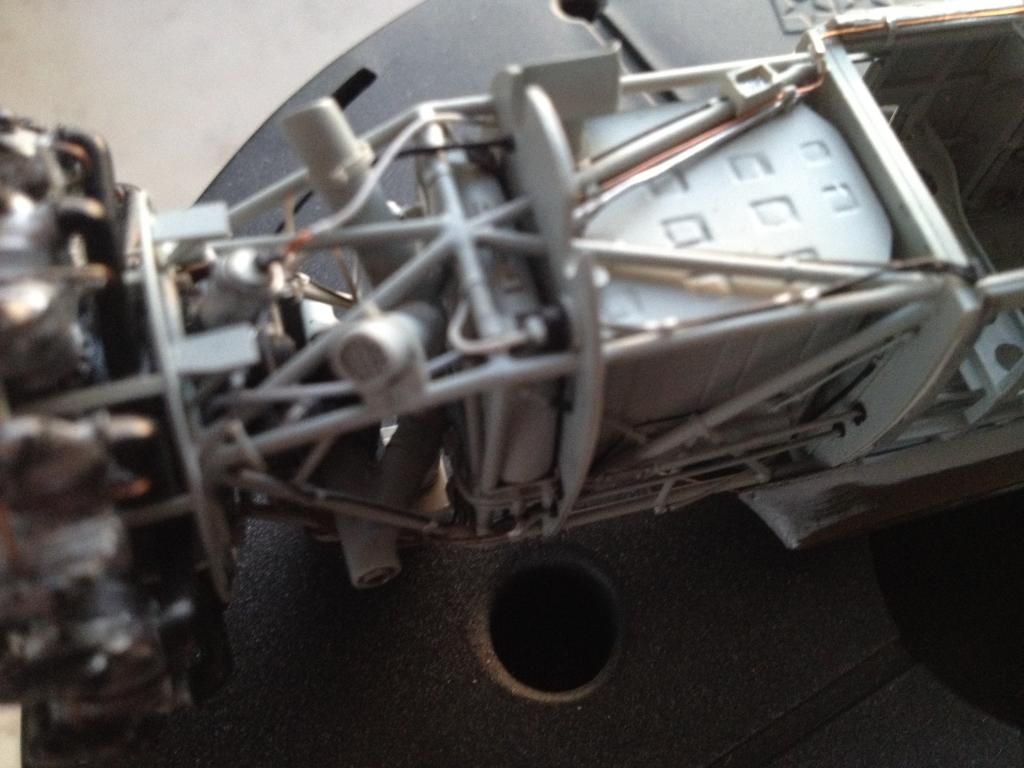
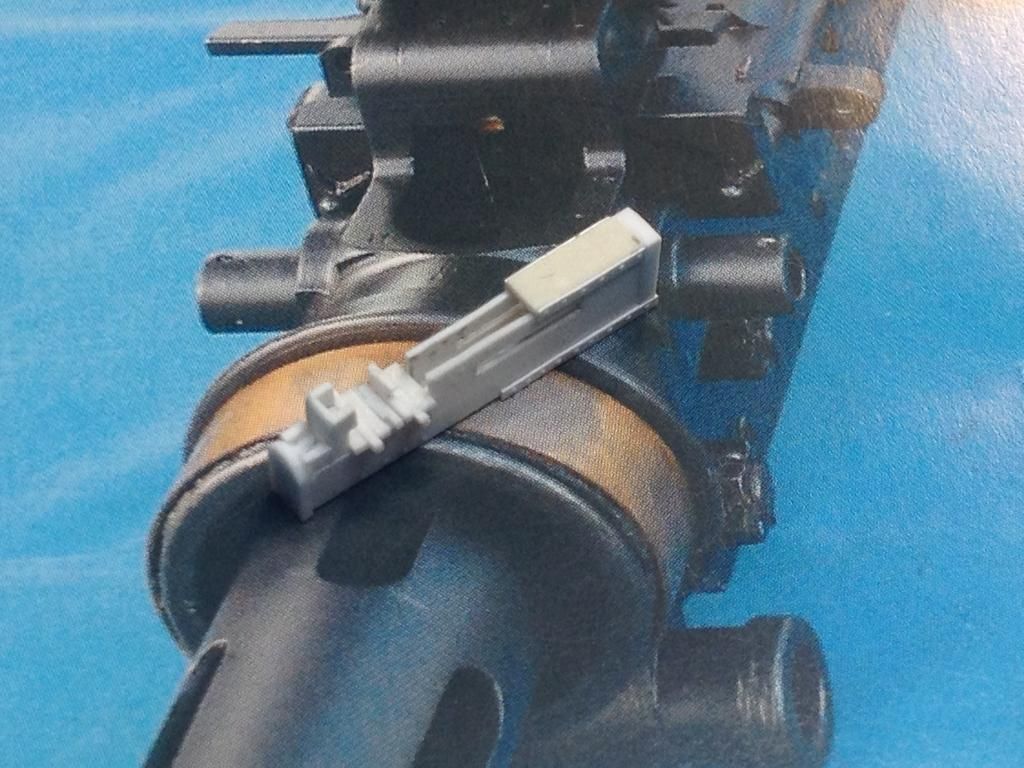
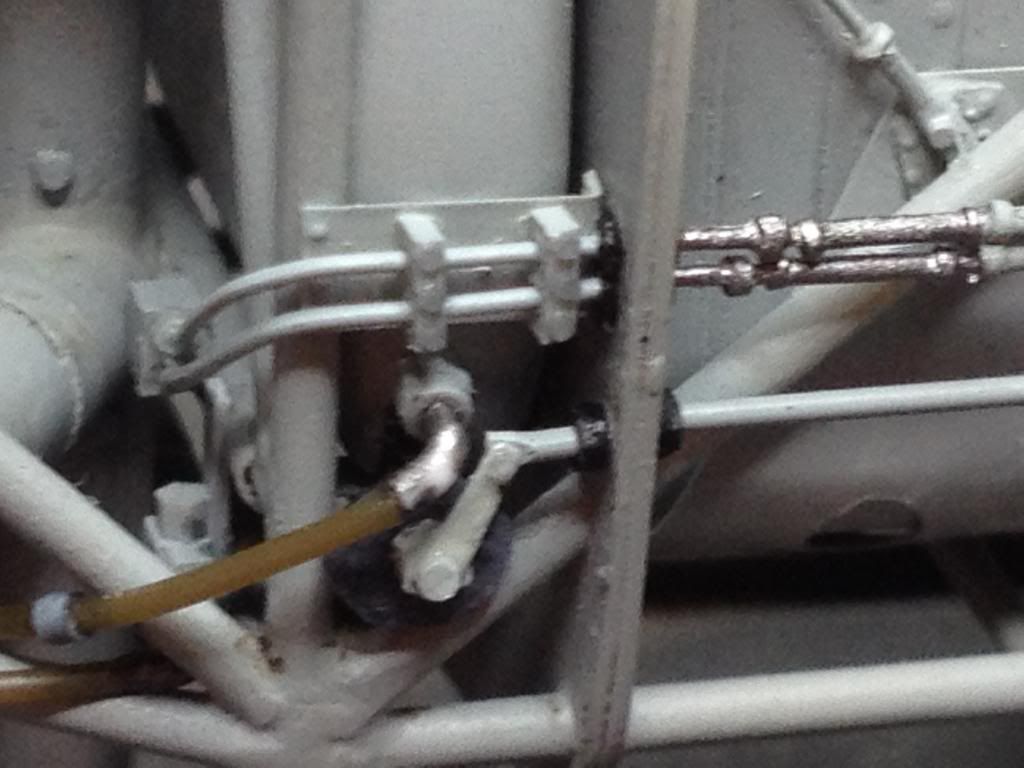
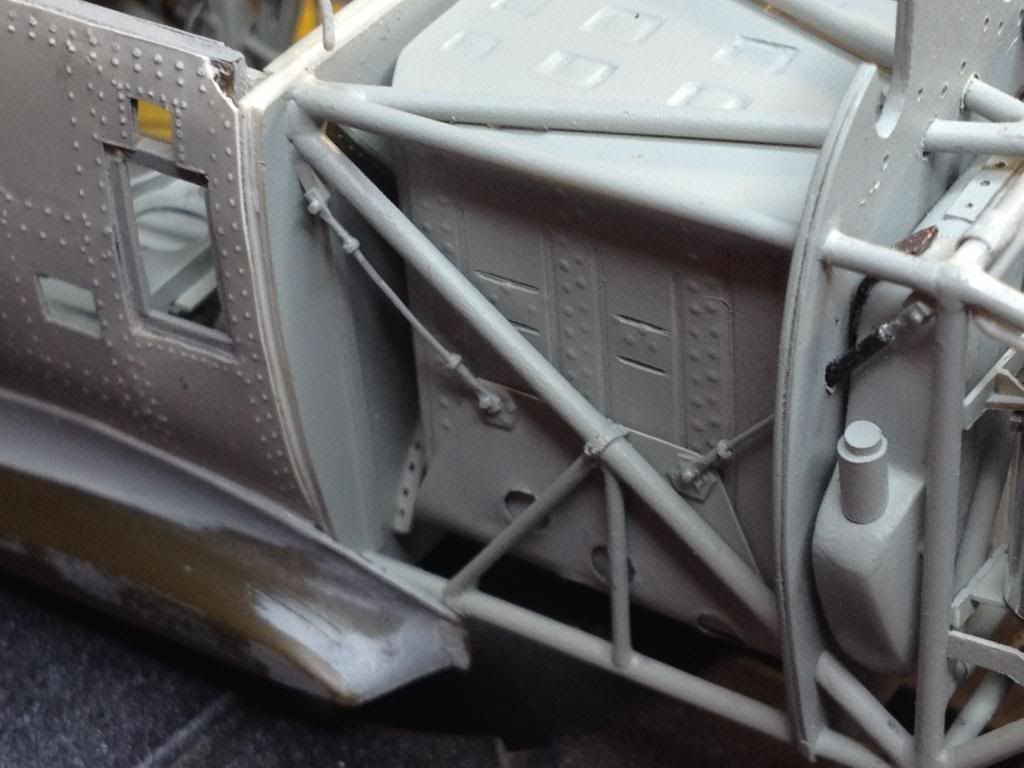
I added fuel filler. Some more wires, pipes, tubes. Clamping rings are made from cotton swabs tubes.


On the end, I think this is electrical box.
Regards
Tomasz
- Rdrunner, Lars Befring and Uilleann
-
 3
3
-
You see this is rubbish because Mr tomaszhajzler wants you to believe that he built this.... but I have seen and read about those tiny alien engineers, who very obviously are the real architects of this build....... because it is not humanly possible for a human to build something so jaw droppingly gorgeous

Hi everybody!
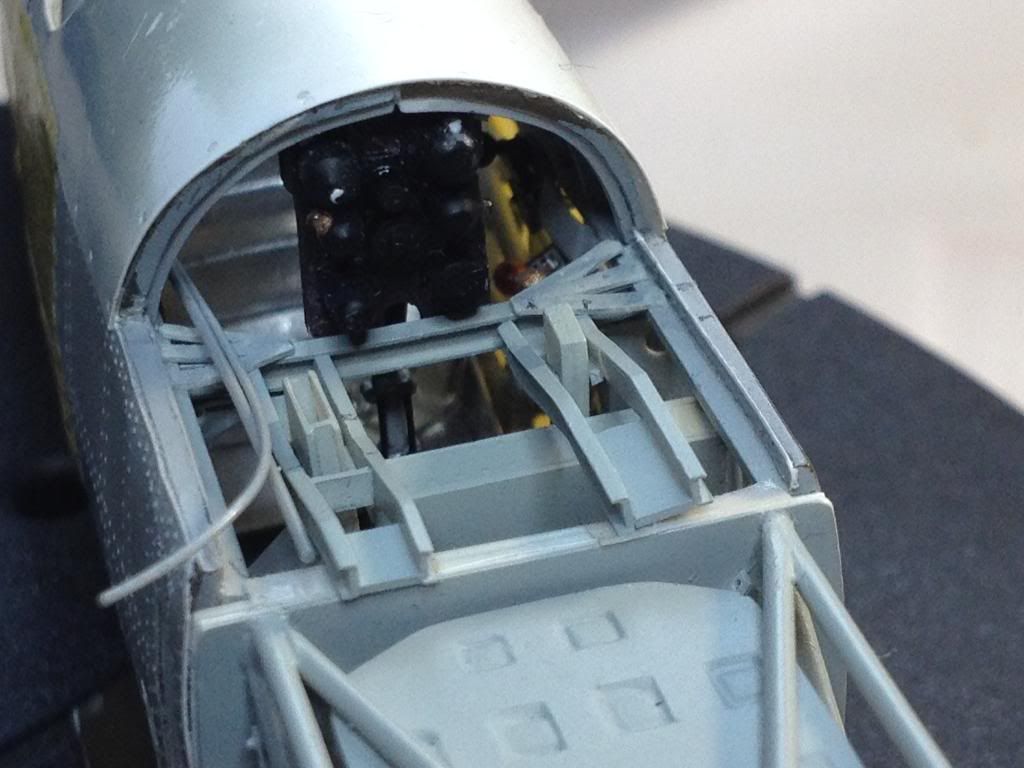
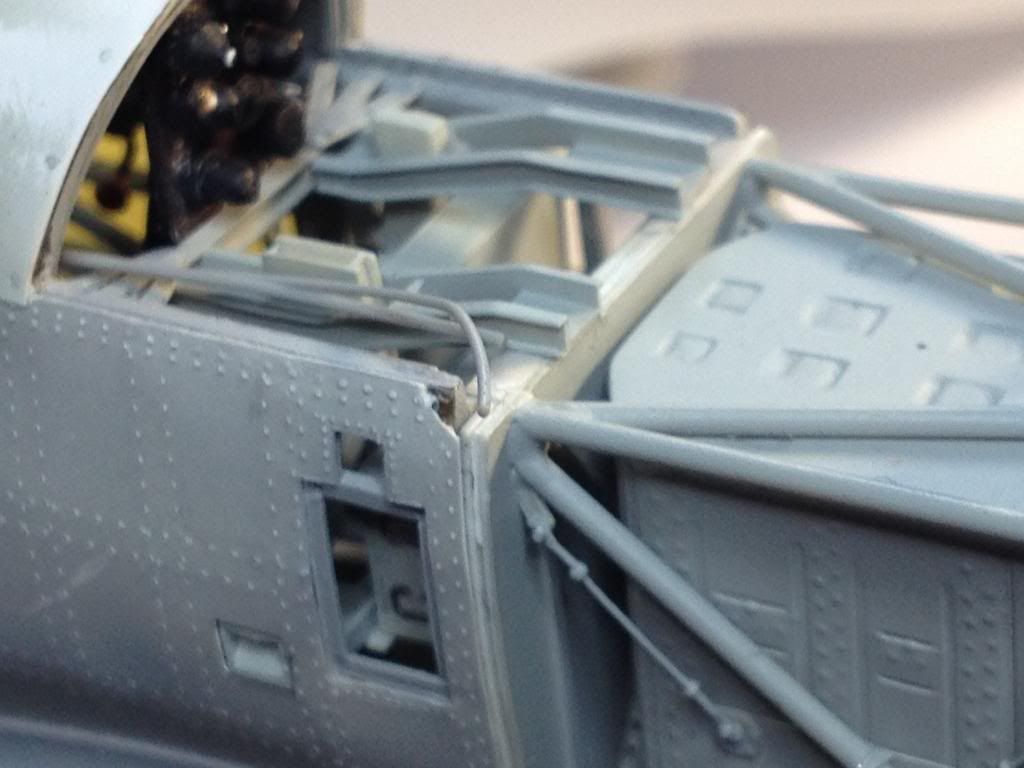
Unfortunatly I'm not able to hide this true longer. I'm happy that it lasted so long. I'm only reporter of this project and tiny alien engineers are the real authors.
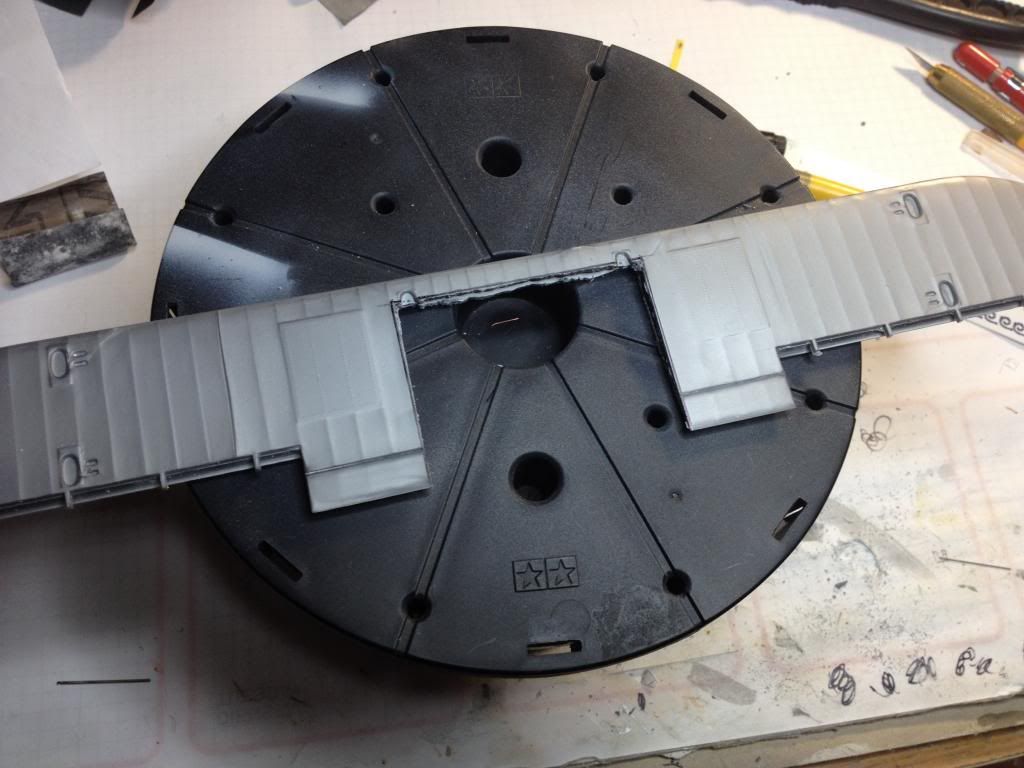
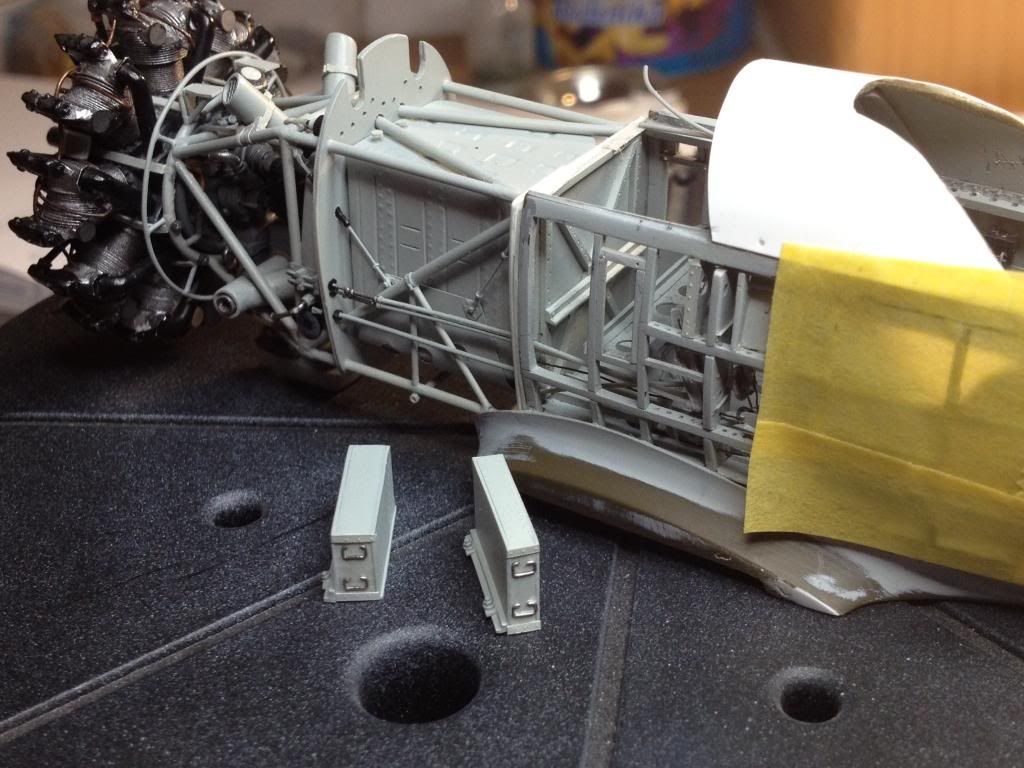
So what did they do during this week? Photos which they allowed me to take show test fitting of cradles with ejectors and ammo boxes inside fuselage. It was really tight, but all parts fit perfect.
Regards on behalf of alien engineers
Tomasz
- Rdrunner, Lars Befring and Uilleann
-
3
-
Thats impressive to say the less !!
I'd love to have a tutorial on how you did build tjose cradles, they are awsome

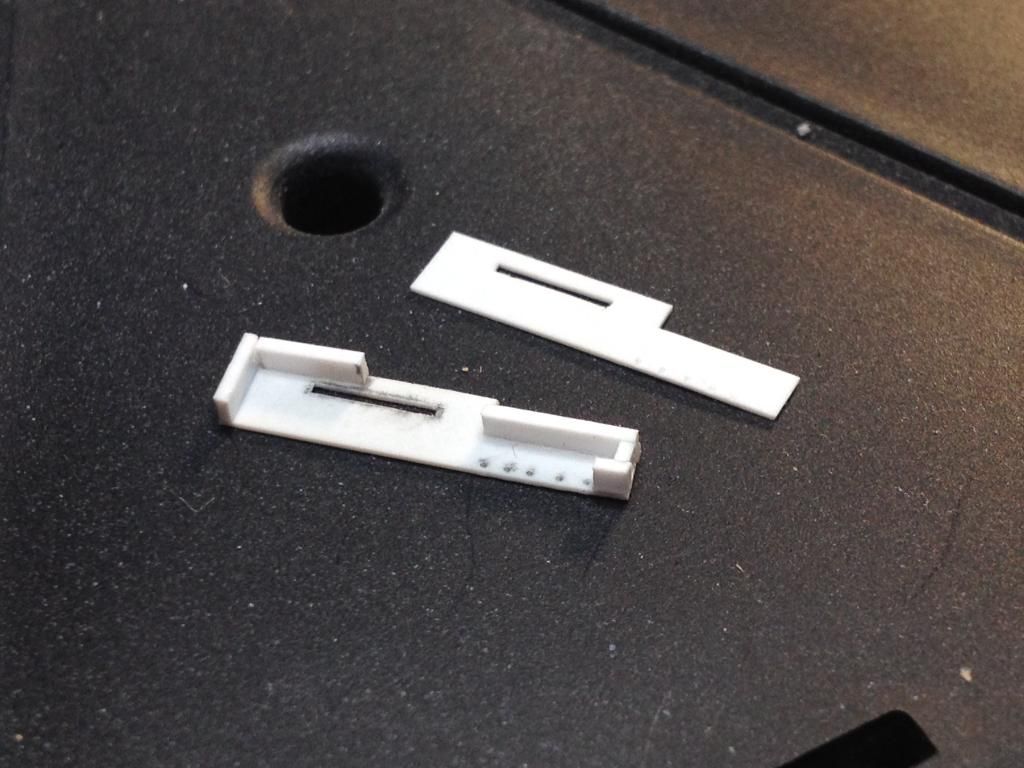
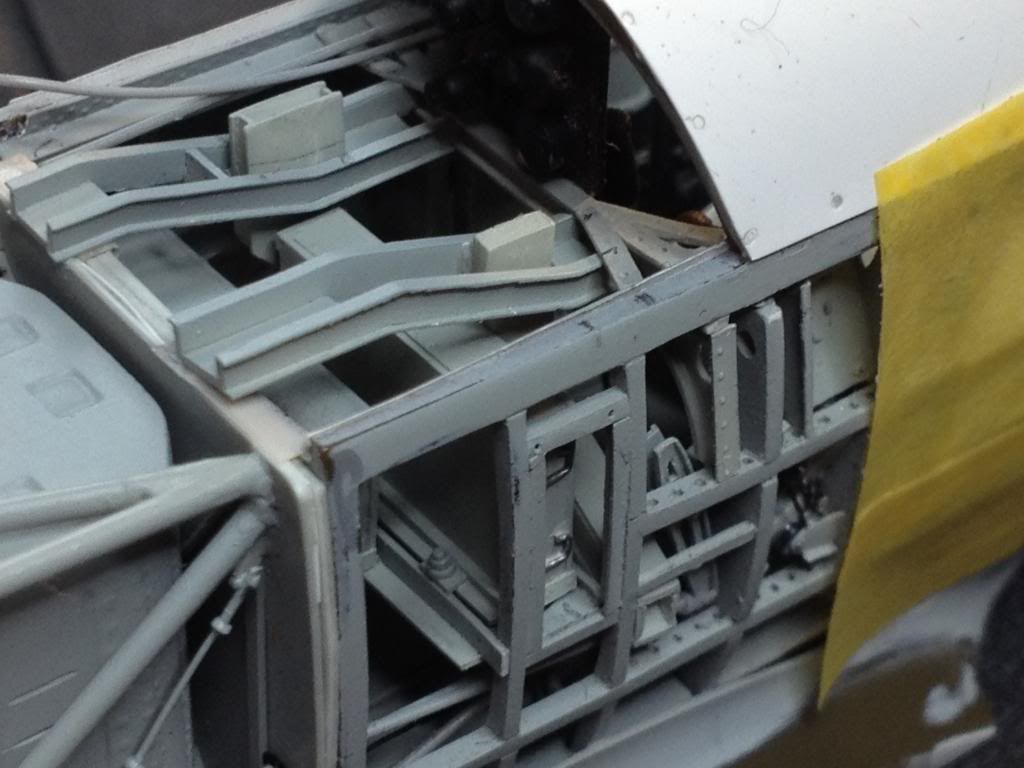
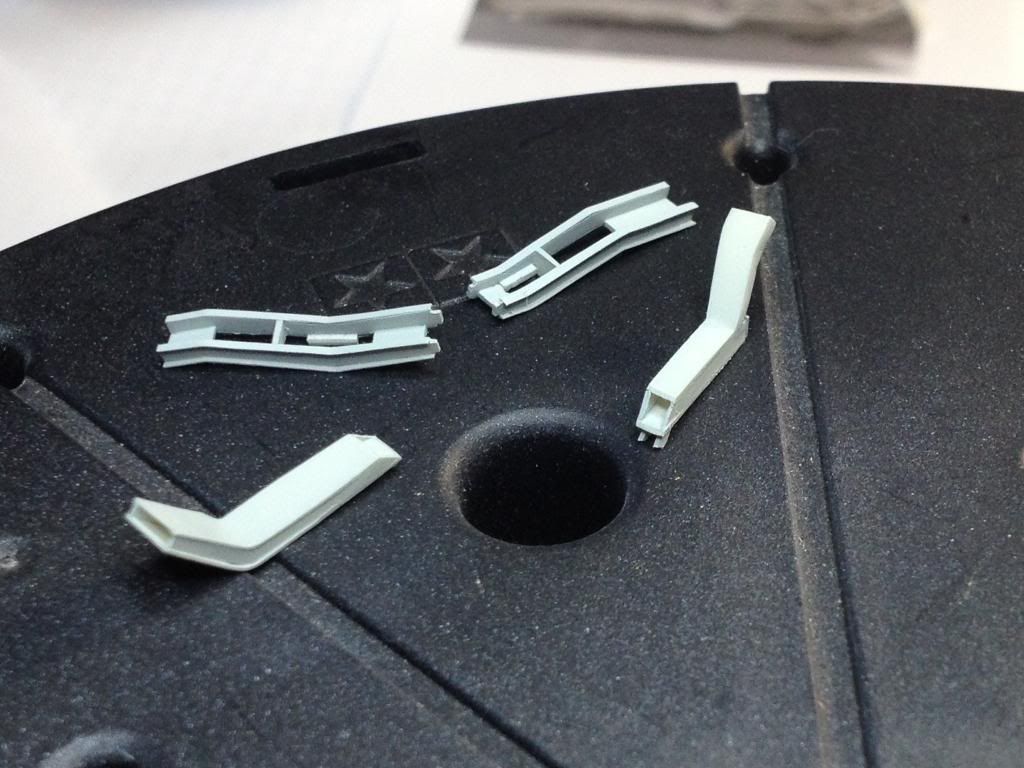
So few words about cradles. I've got two photos of this area from both sides. I used them as a template. I cut both walls first. Next I glued about 0,5 mm width strips from 0,1 mm styrene sheet. I used thin Tamiya cement. Joining lines disappeared because this cement delicate dissolved plastic. I added rest parts next.
Tomasz
-
Hi!
Thank's all for watching and nice comments.
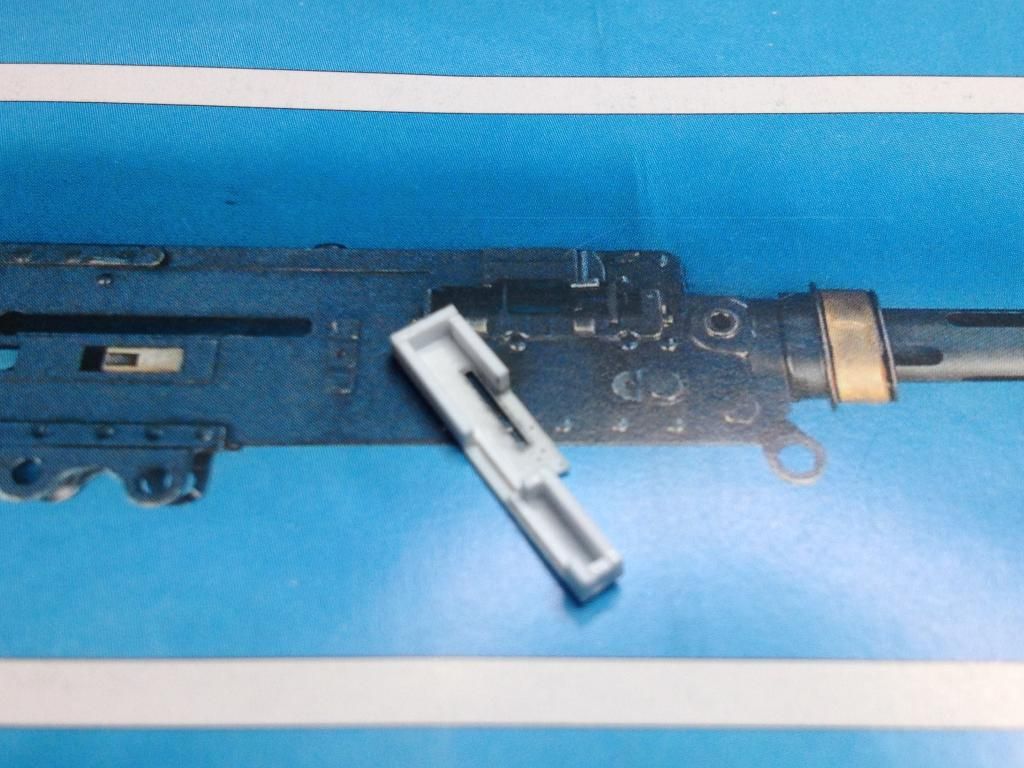
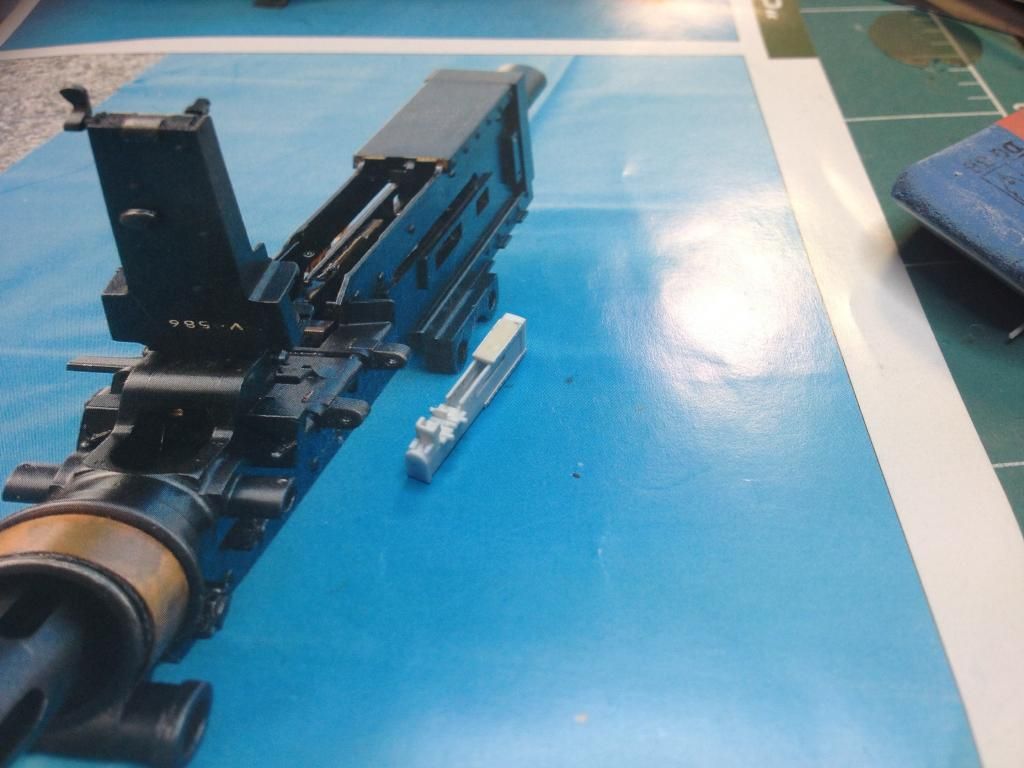
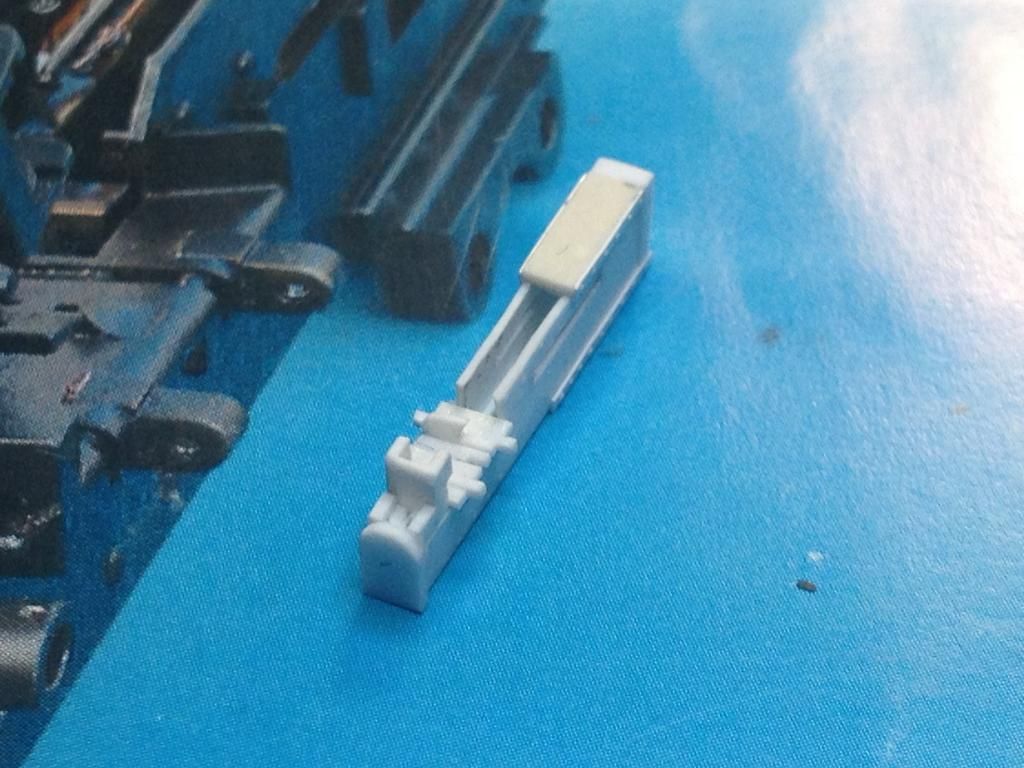
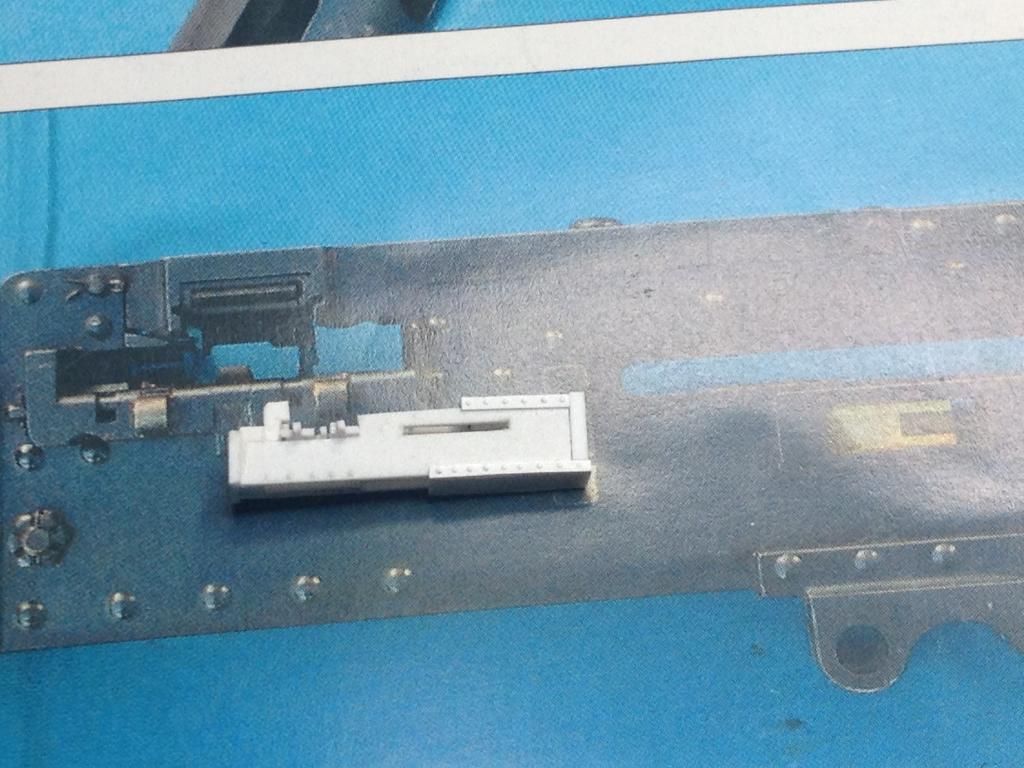
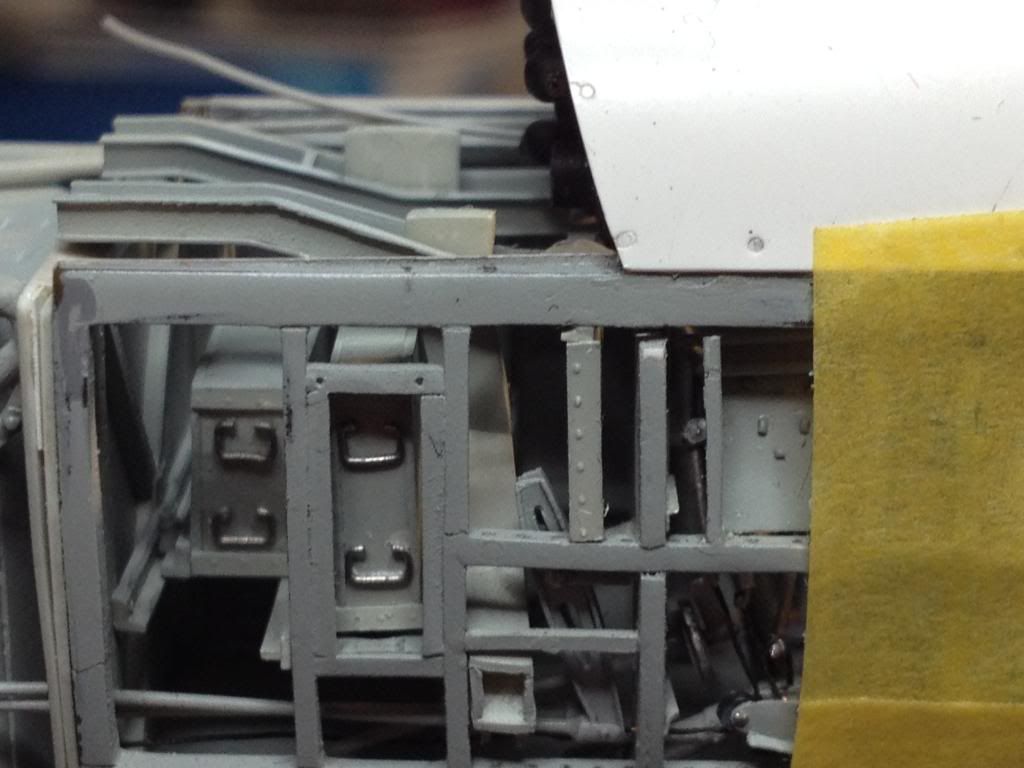
Time is ripe for armour. Ammo boxes first.
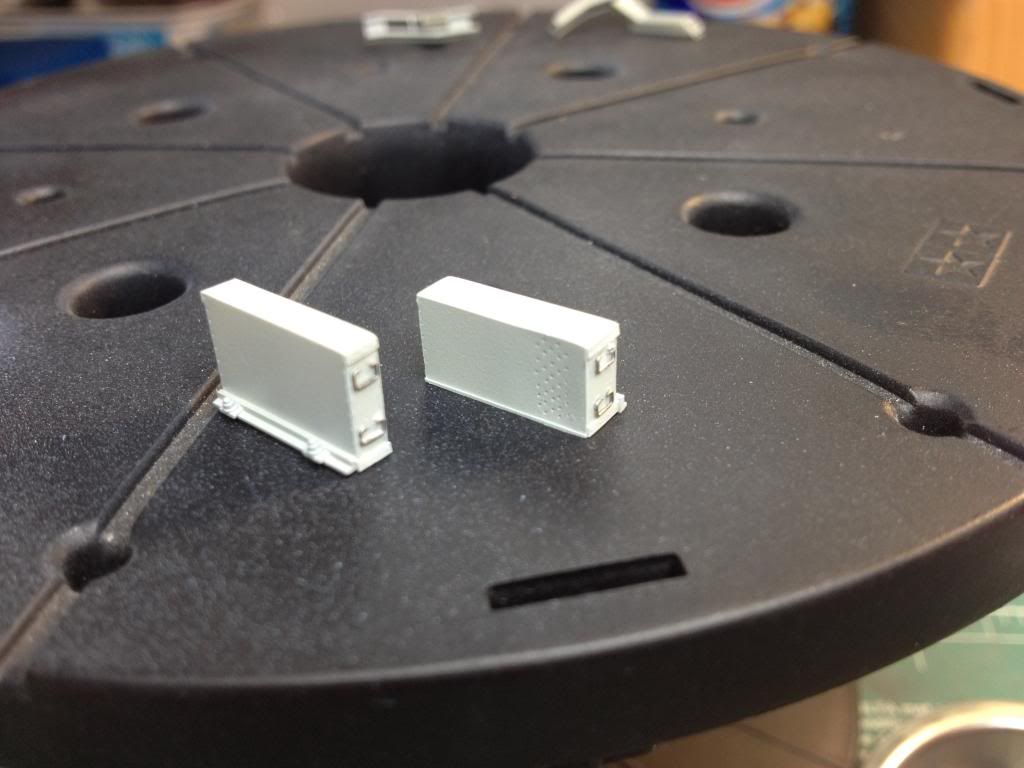
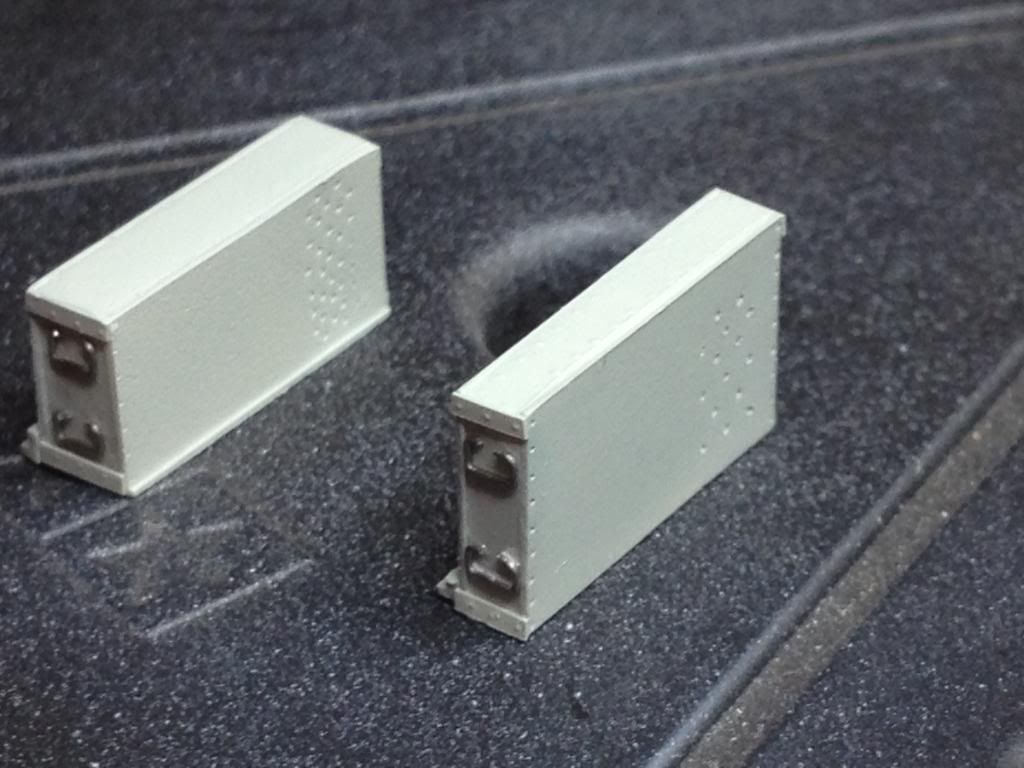
Machine guns have diffrent cradles, because they are displacemented. I made them according to photos.

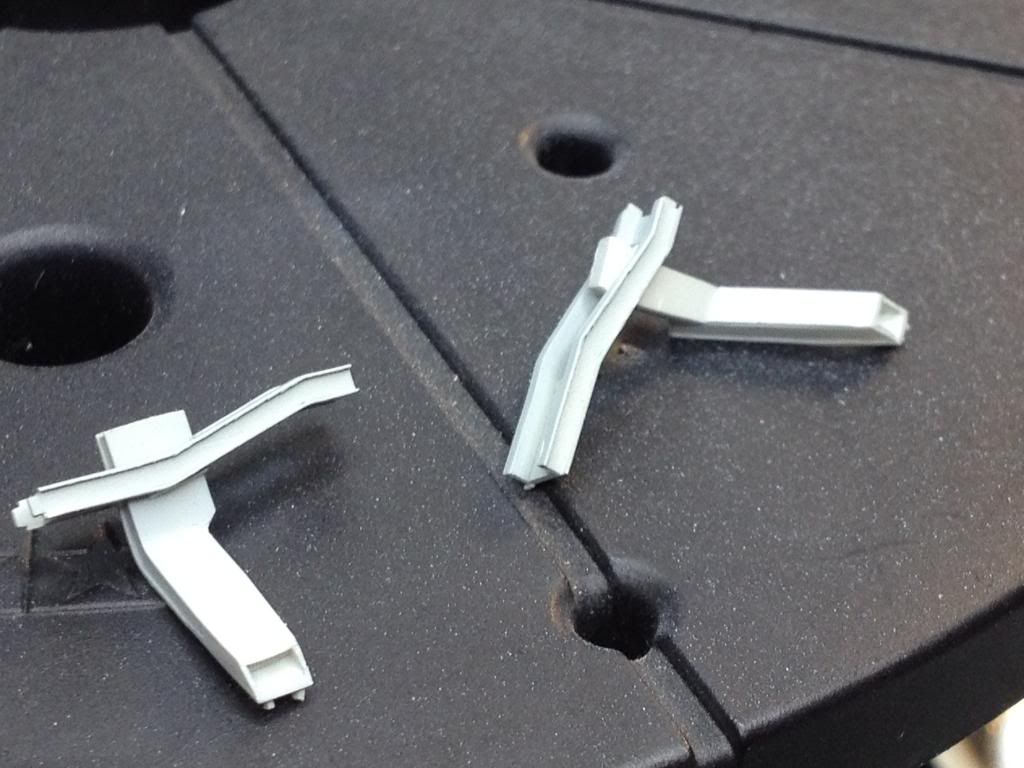
When cradles were ready I touched cartridge case ejectors. The lack of good documentation and drawings is my main problem in this project. I took photos of my model from both sides, scaled them to model dimensions and they used me as drawings to create ejectors.
Regards
Tomasz
- Rdrunner, Uilleann, Lars Befring and 1 other
-
4
-
Hi Loic!
This is true model making. It's pleasure to observe such threads.
Regards
Tomasz
-
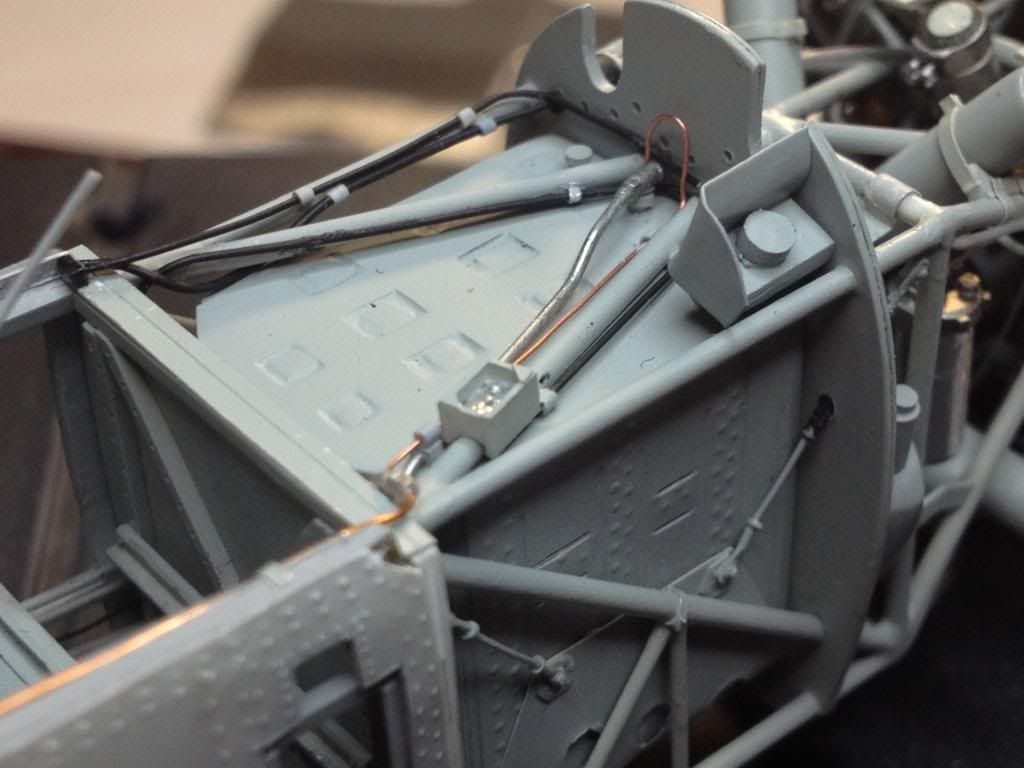
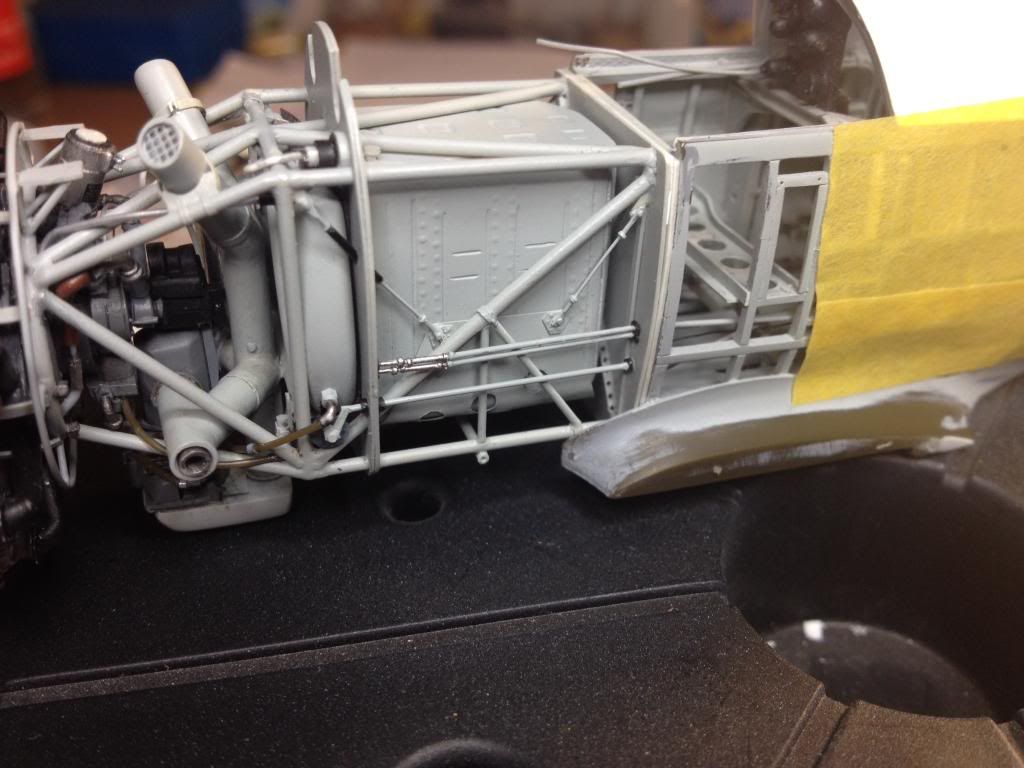
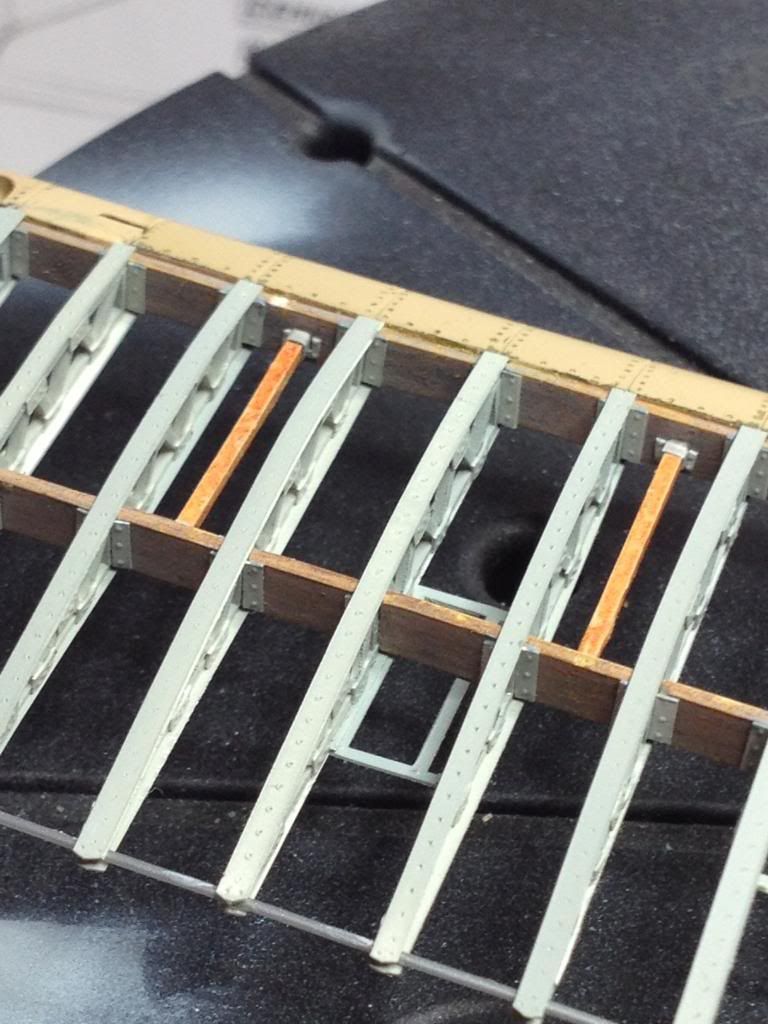
Hi after longer break!
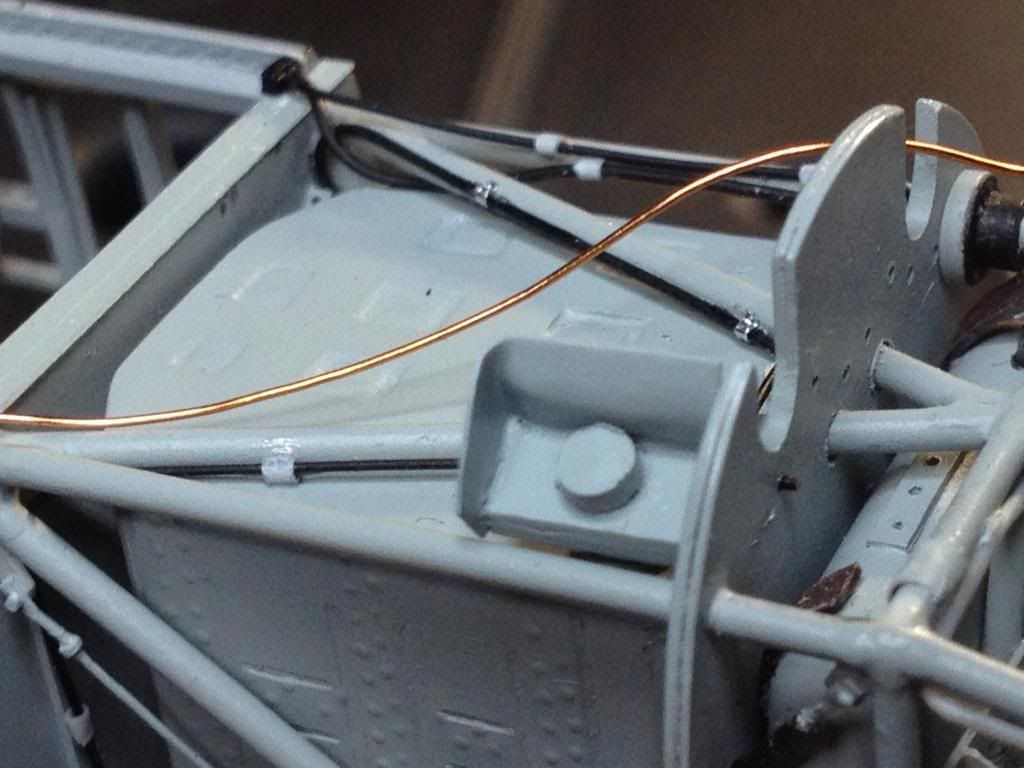
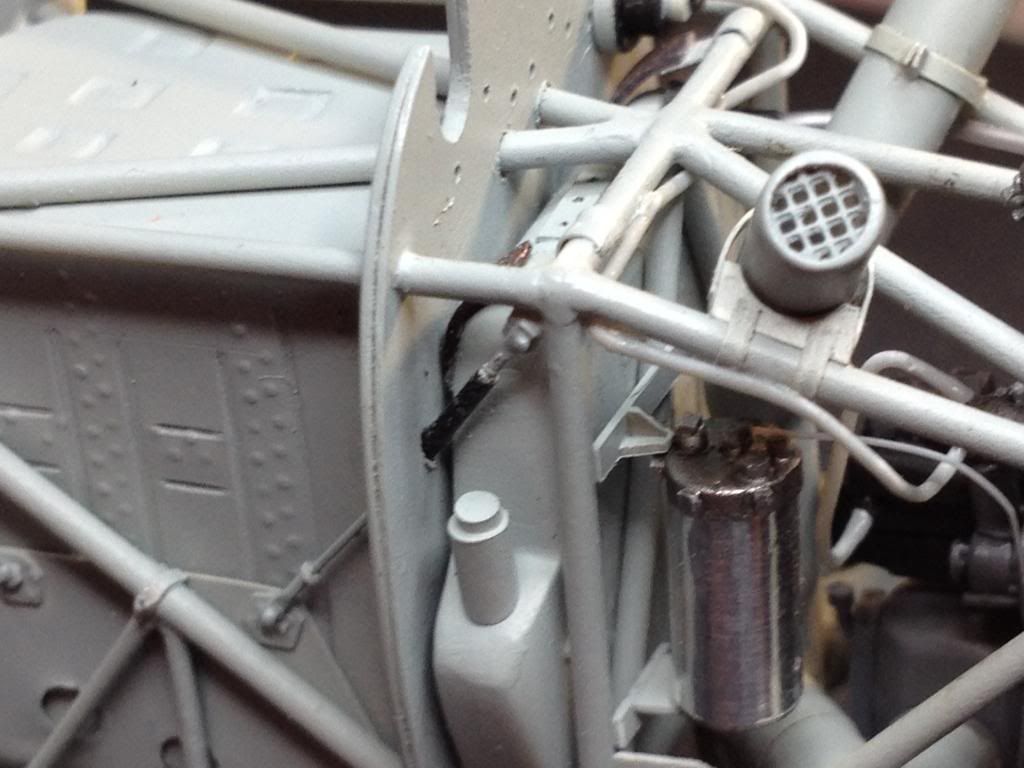
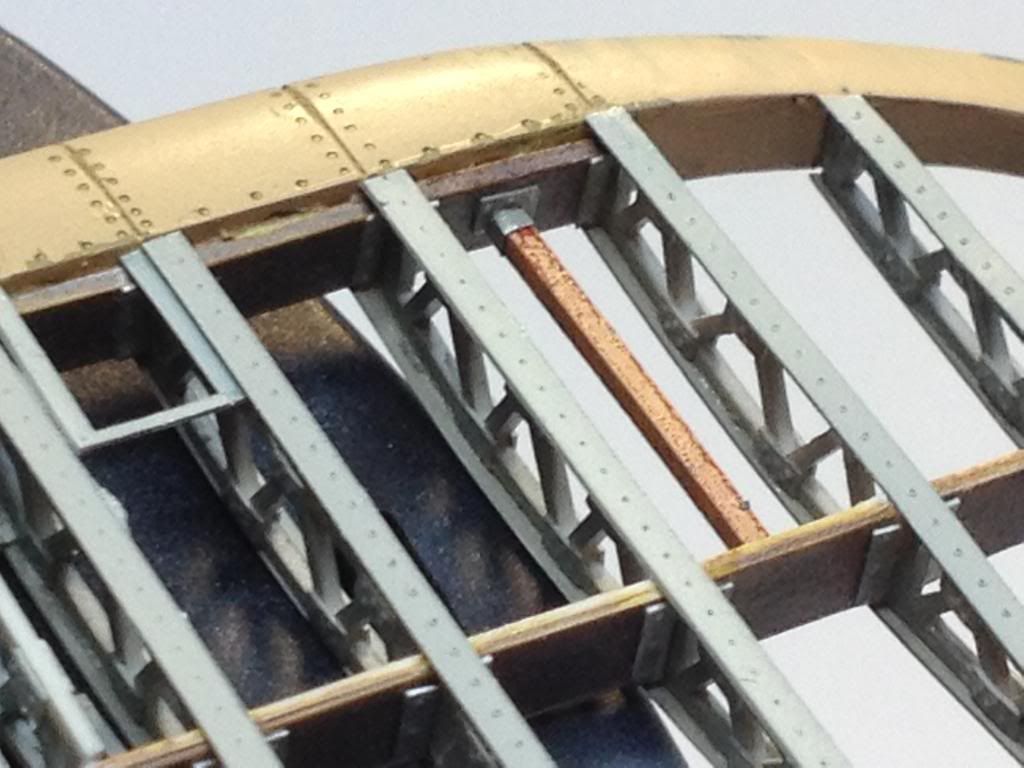
I had no time for update. Lot of work, many details, pipes, wires, tubes, etc but small progress on photos. Today i show you three horizontal tubes which i added last time. Two upper were made from streched cotton swabs above fire. They have diameter about 0,3 mm. Their construction on photo.
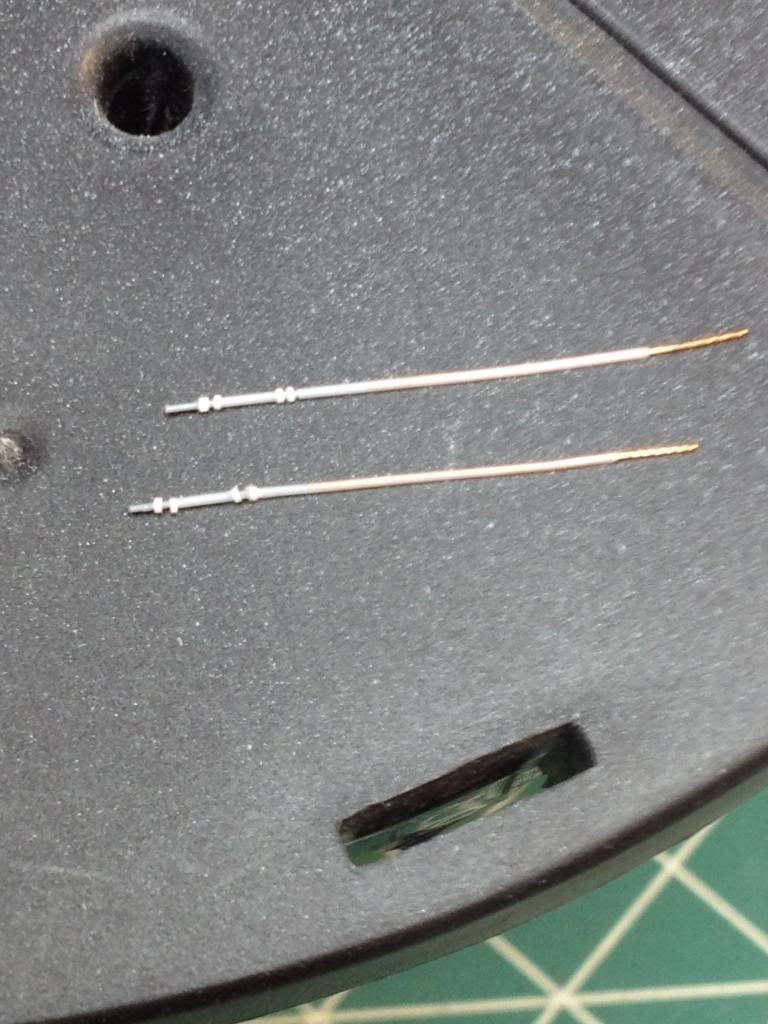
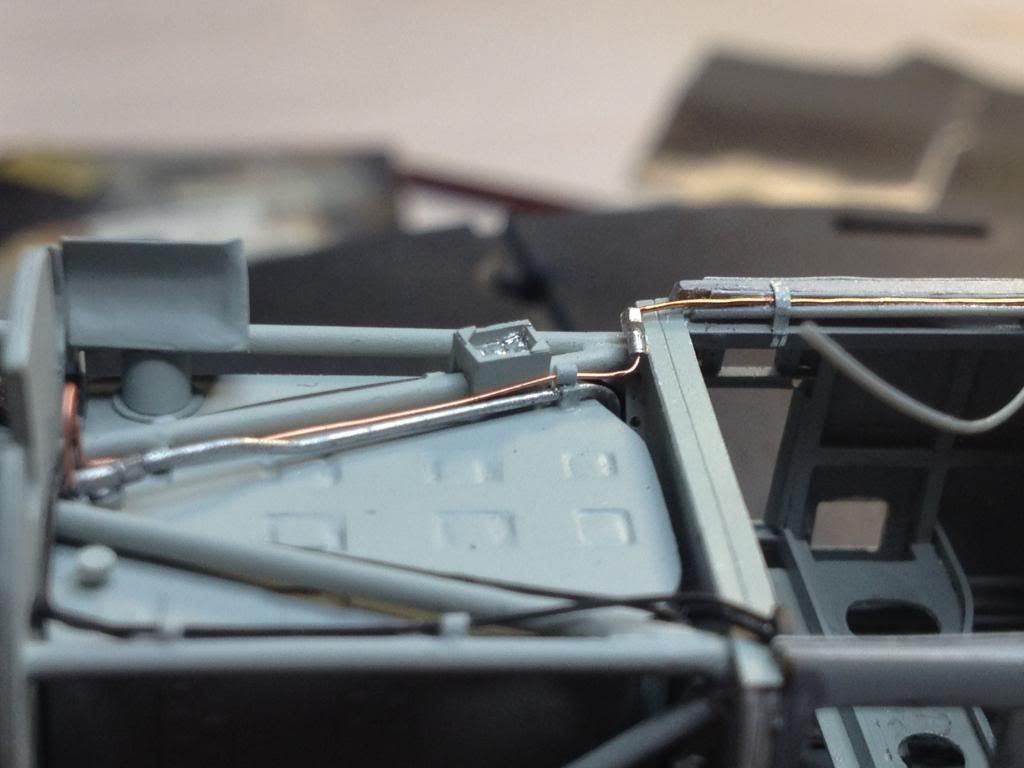
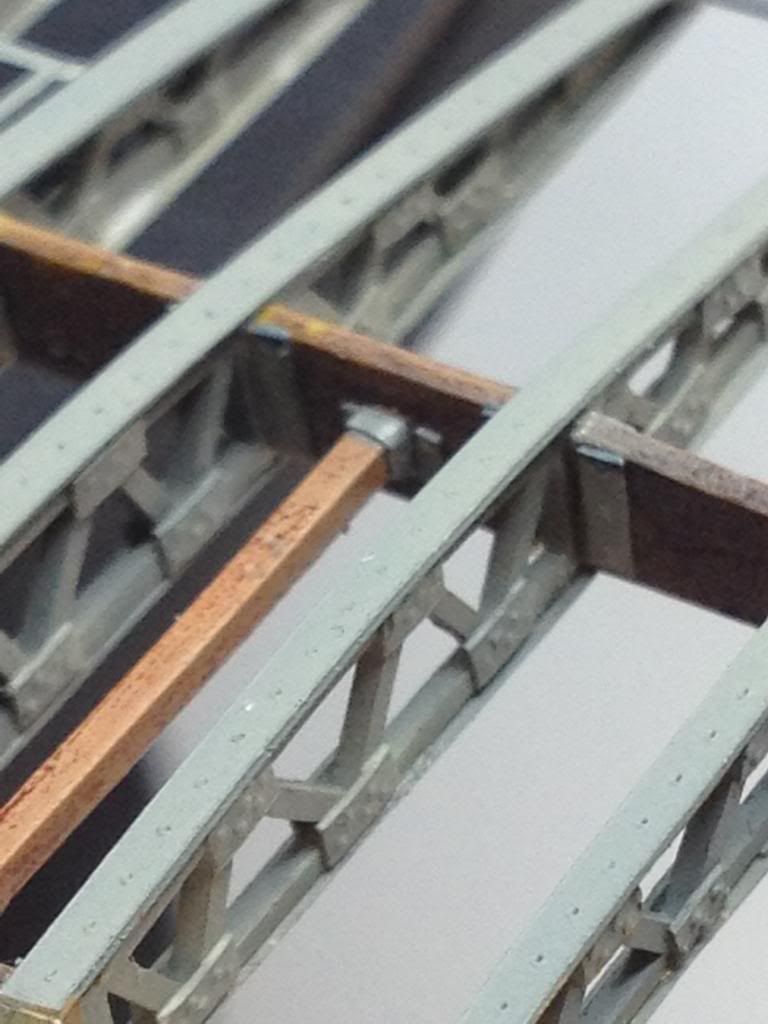
From right side I put inside copper wire, from left plastic bar with rings also from cotton swabs but bigger diameter.
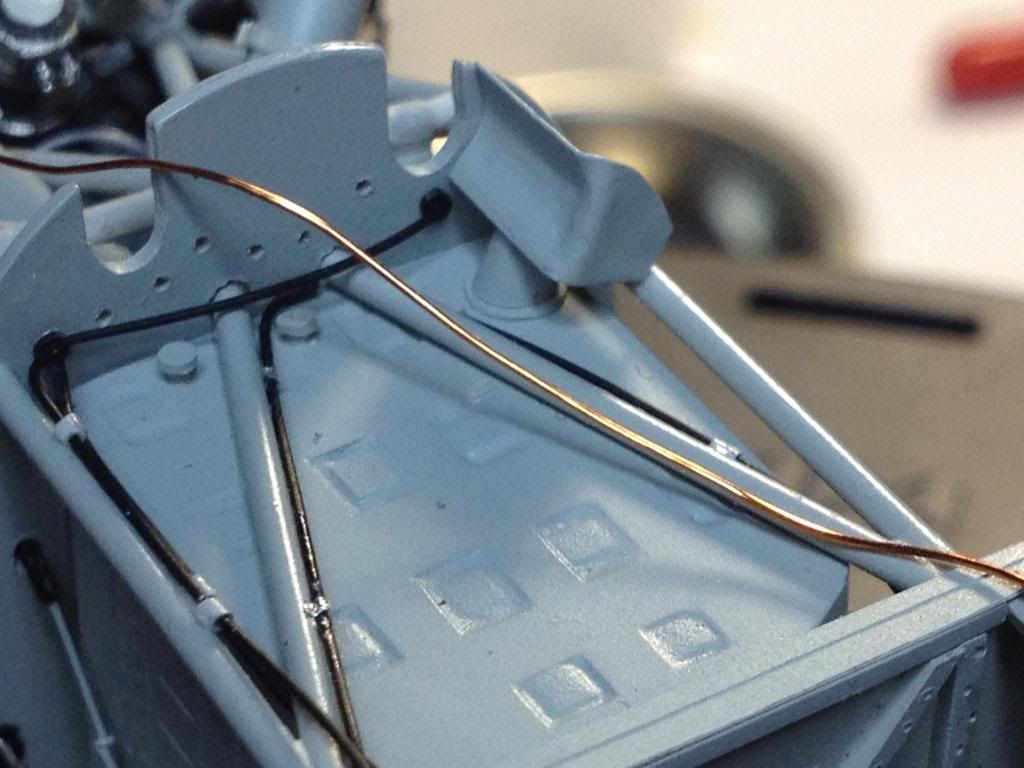
After mounting
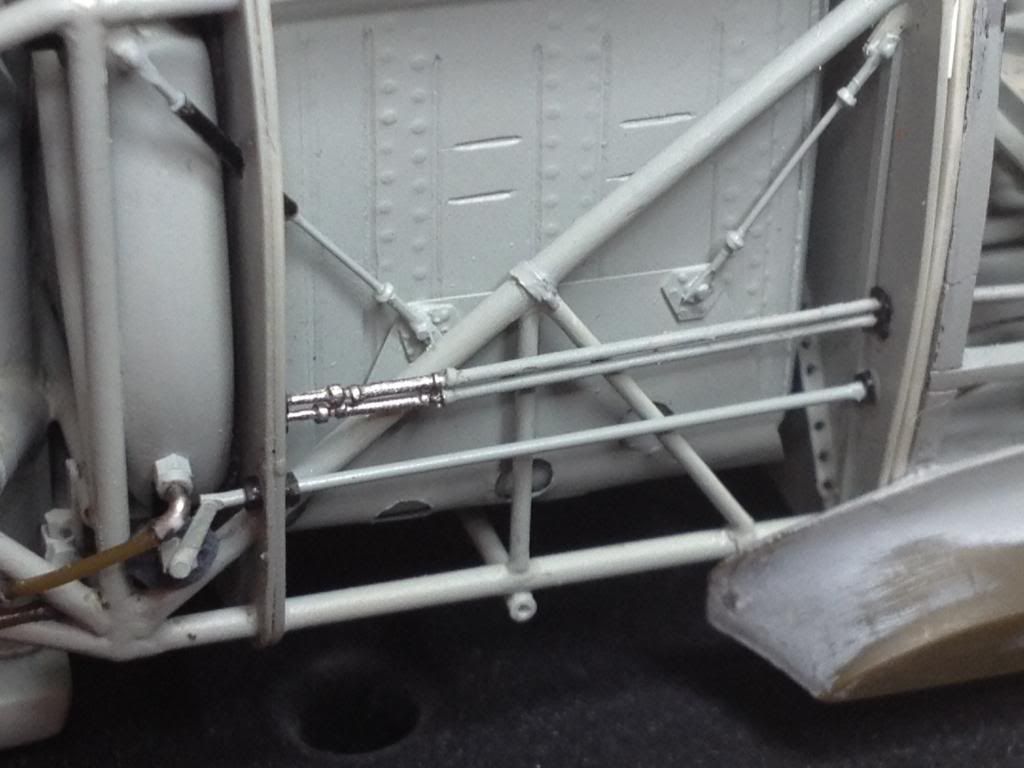
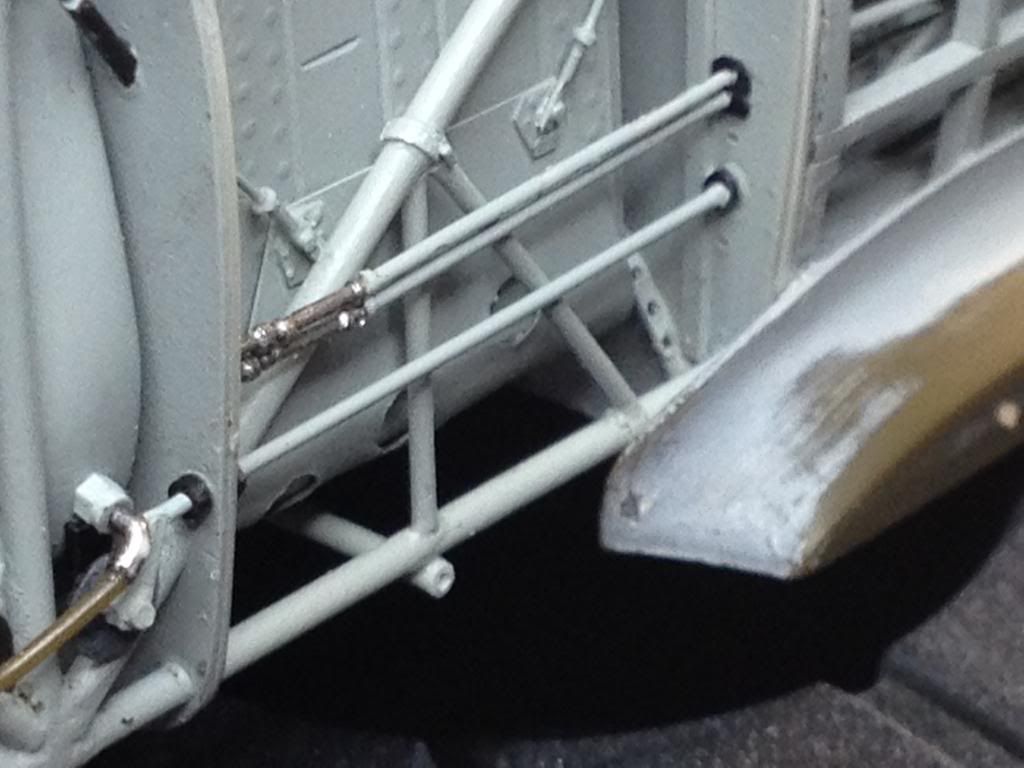
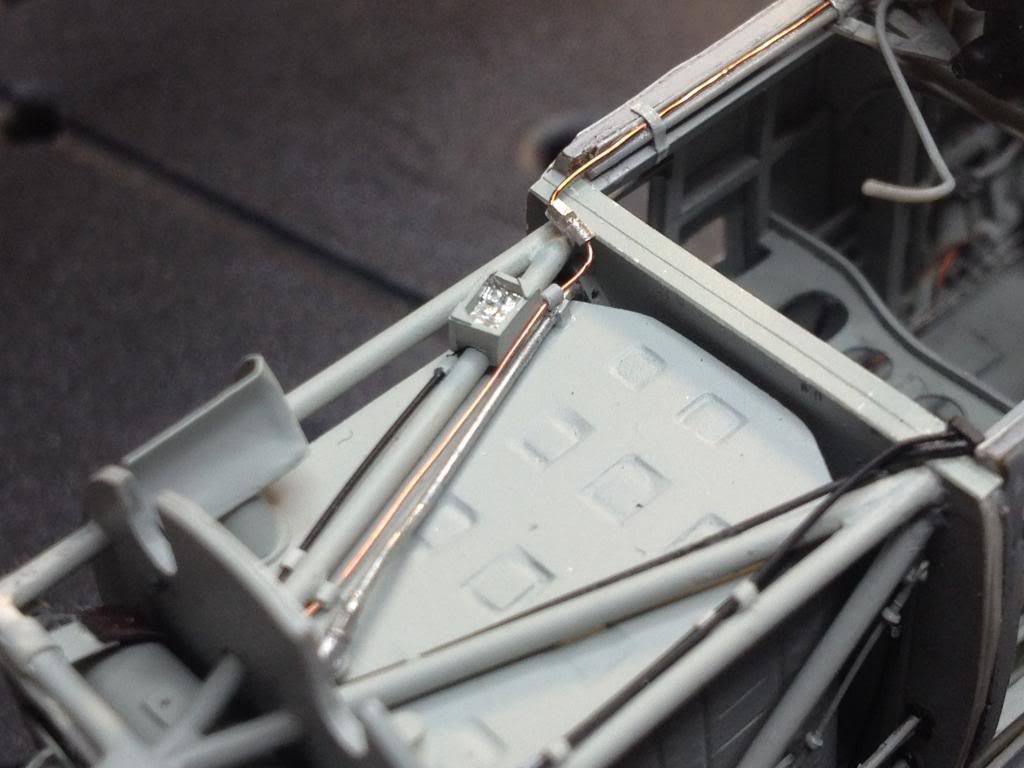
I made also detail which i added to the front of lower bar.
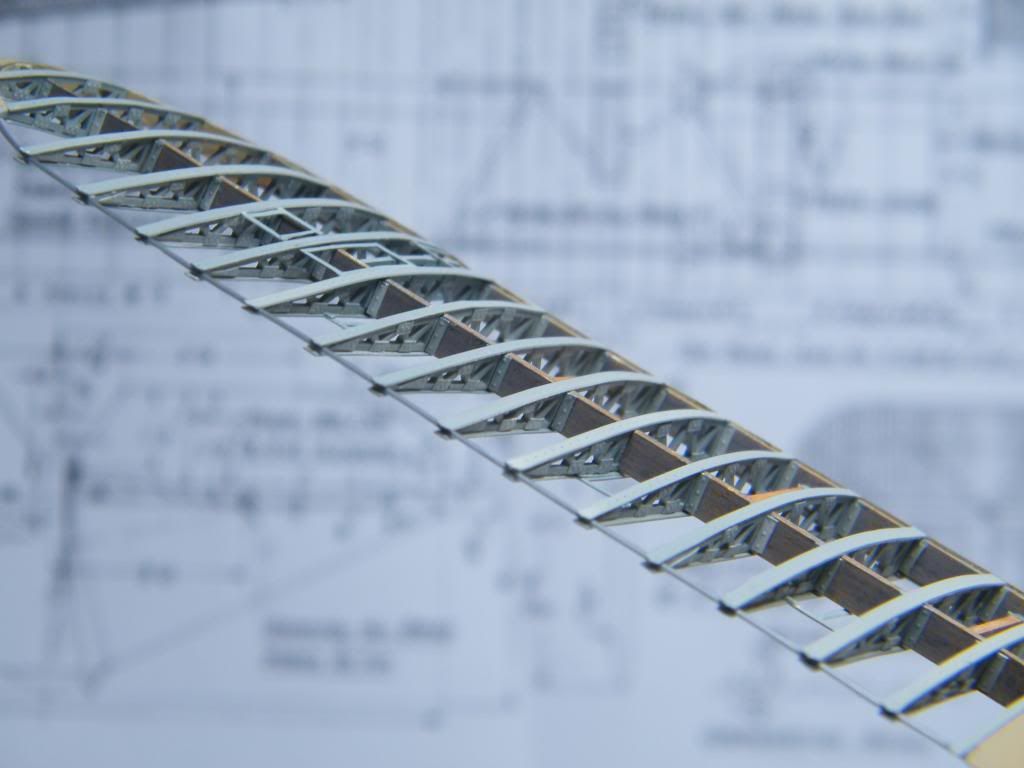
All together after adding front part of upper tubes
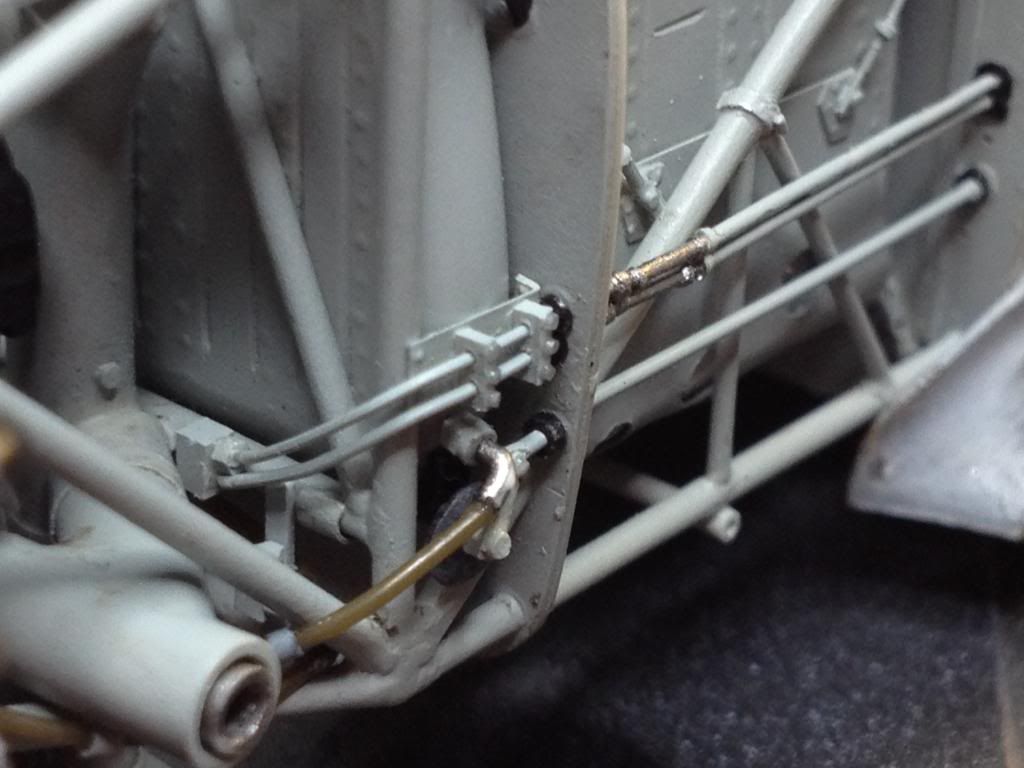
Regards
Tomasz
-
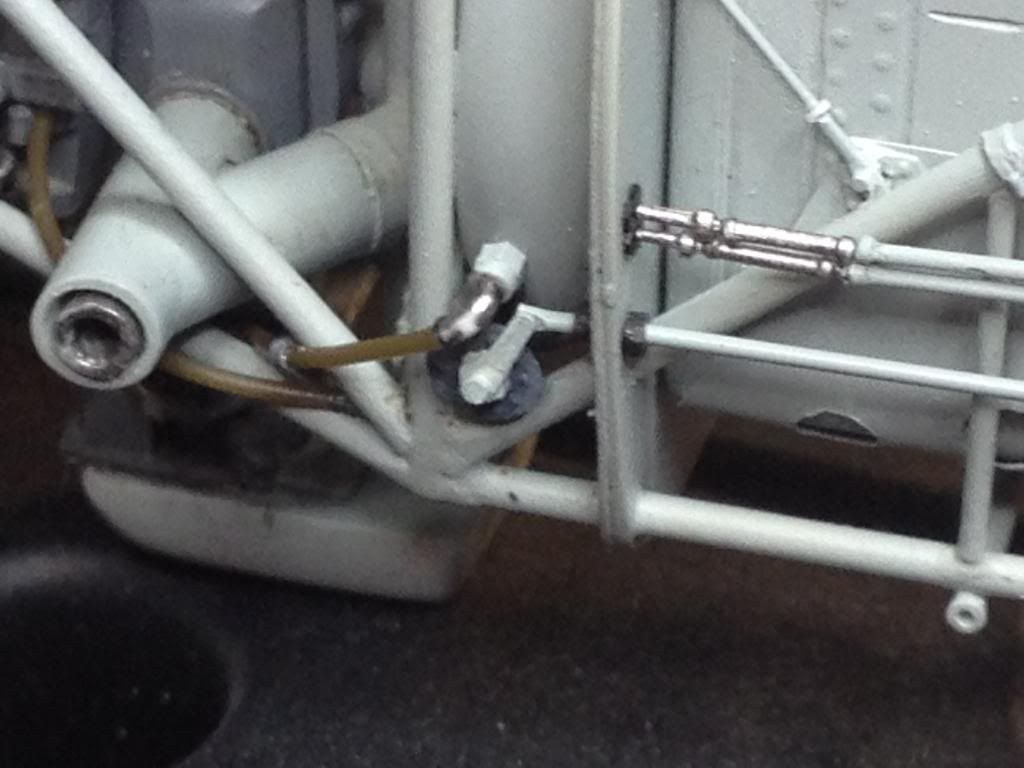
Hi Gent's!
I really appreciate your kind opinion. It's like a kick for further work. I also like to follow threads on this forum. This is our high school.
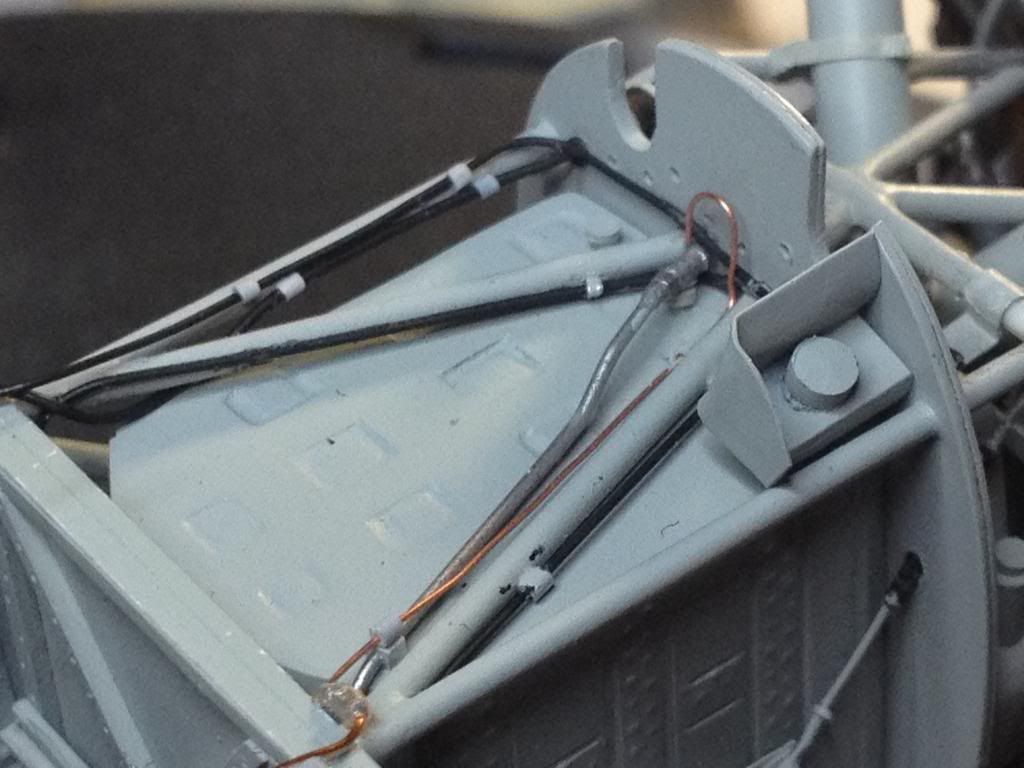
I returned to detailing front part. I made four elements fastening fuel tank support cradle. Each of them contains seven parts of diameter 0.2, 0.3 and 0.5 mm. I'll be constrained to do many so delicate parts in this space.
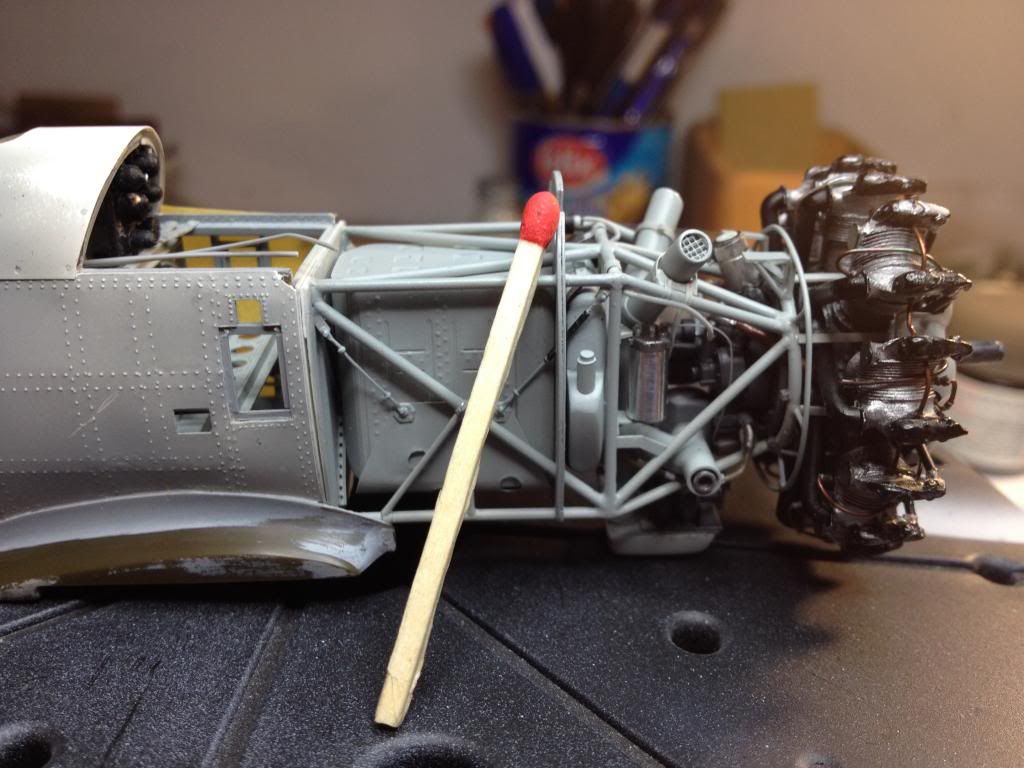
I've got special big match for such photos
Regards
Tomasz
- Rdrunner, Uilleann, wunwinglow and 2 others
-
5
-
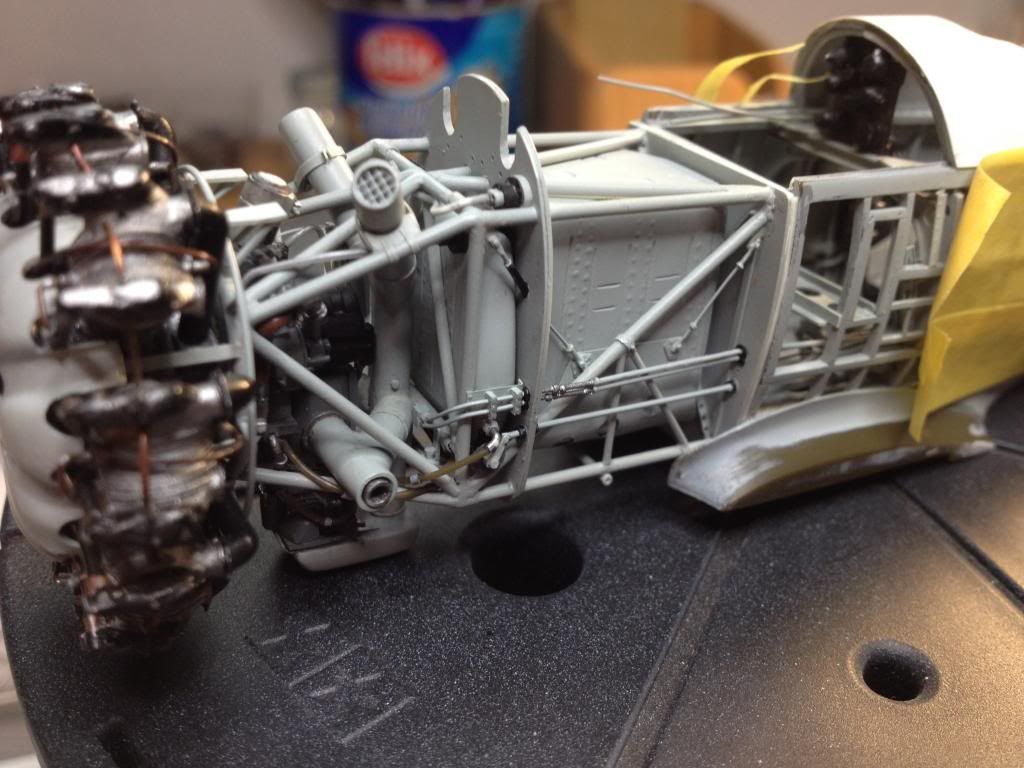
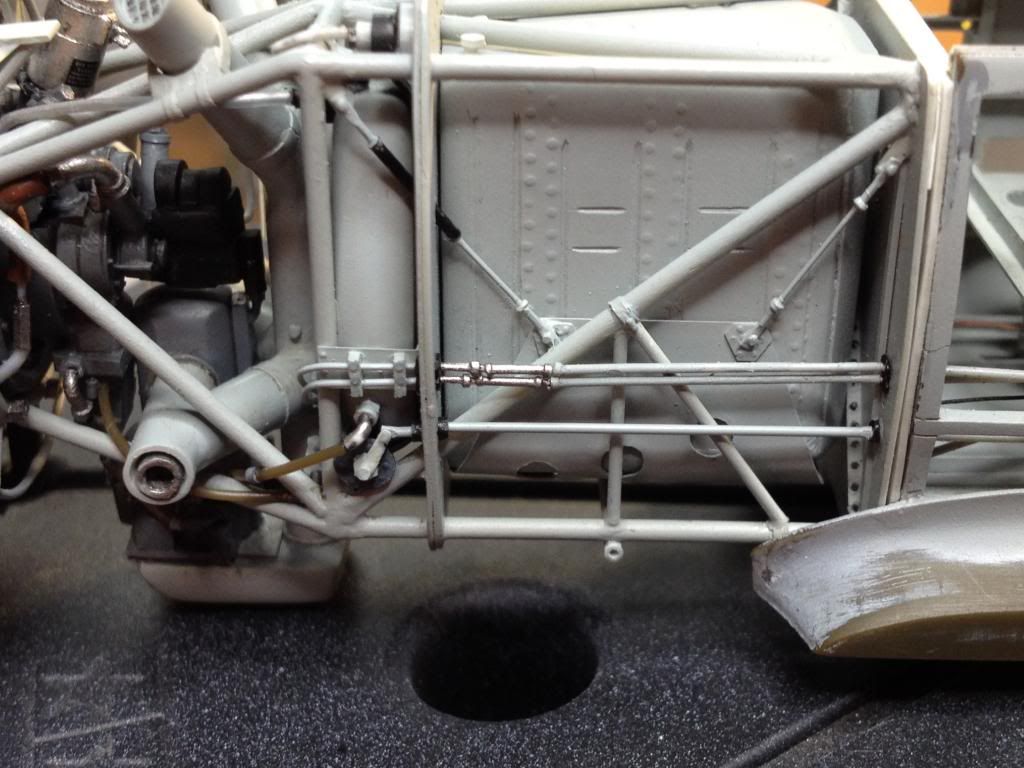
Hello!
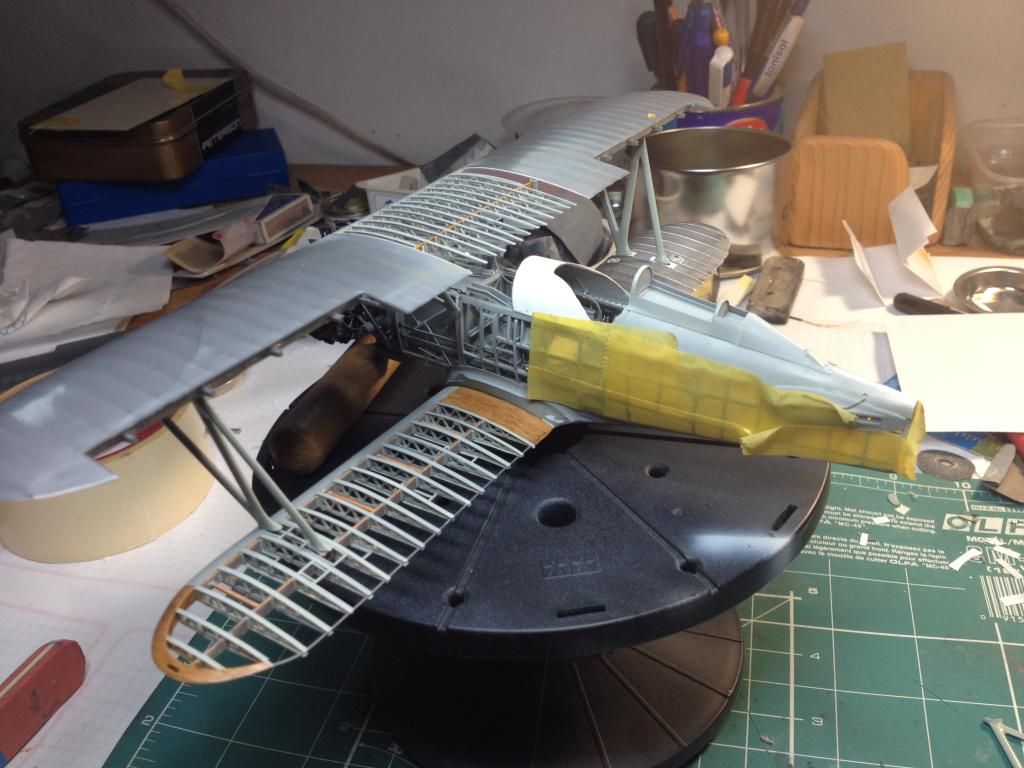
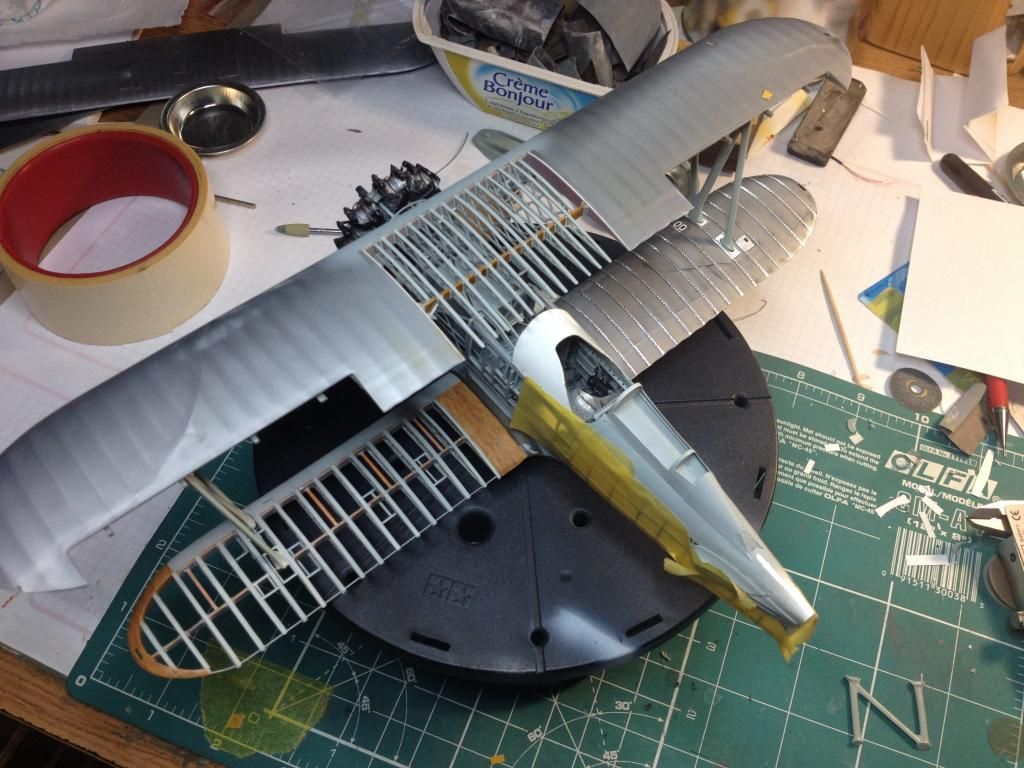
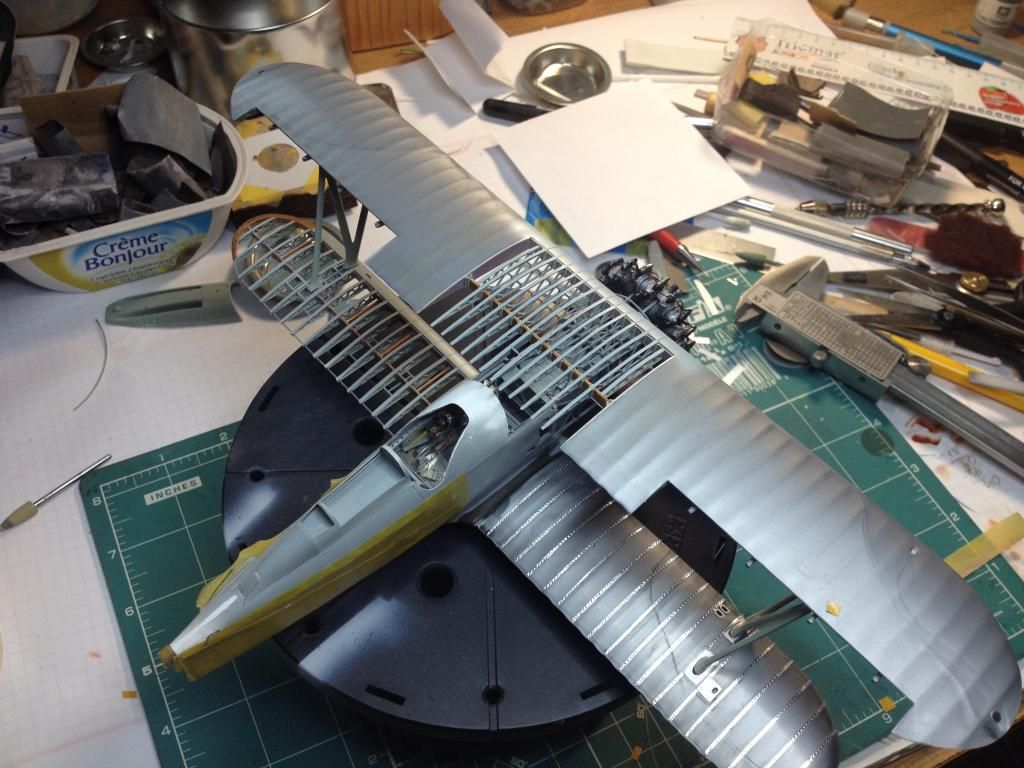
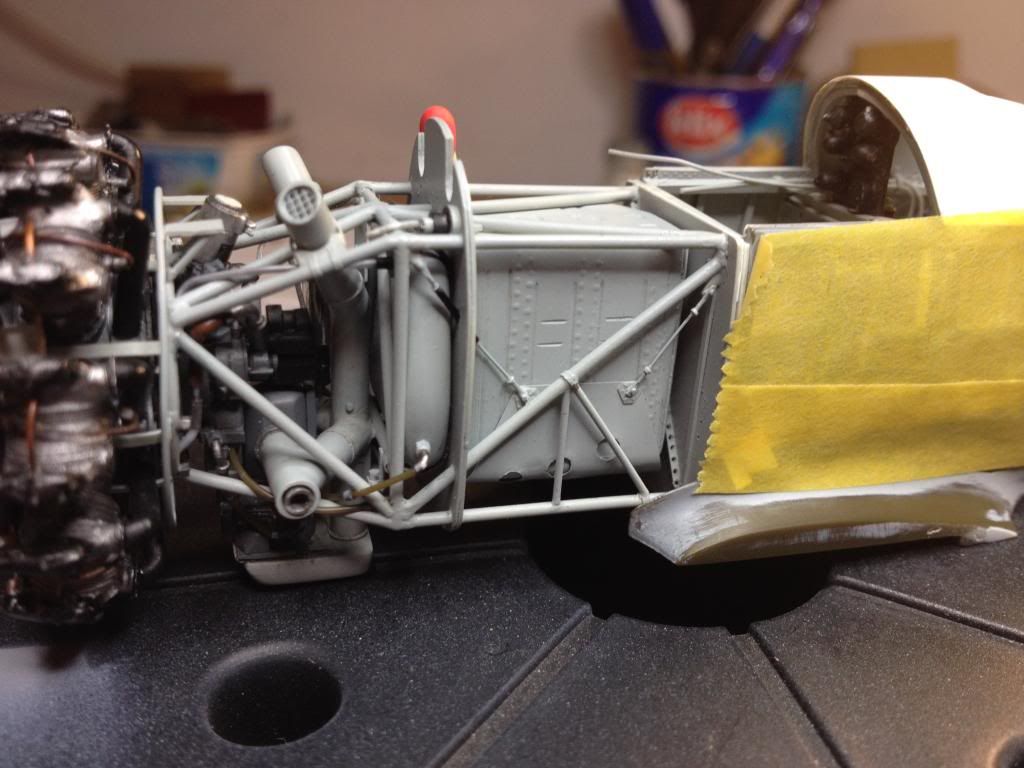
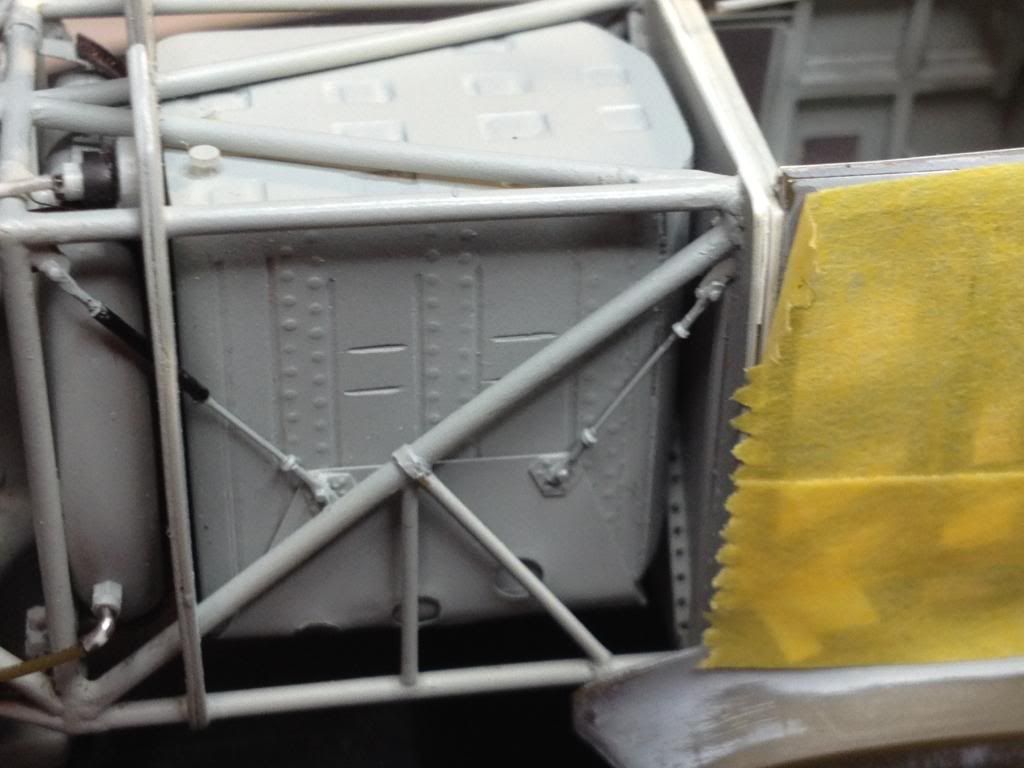
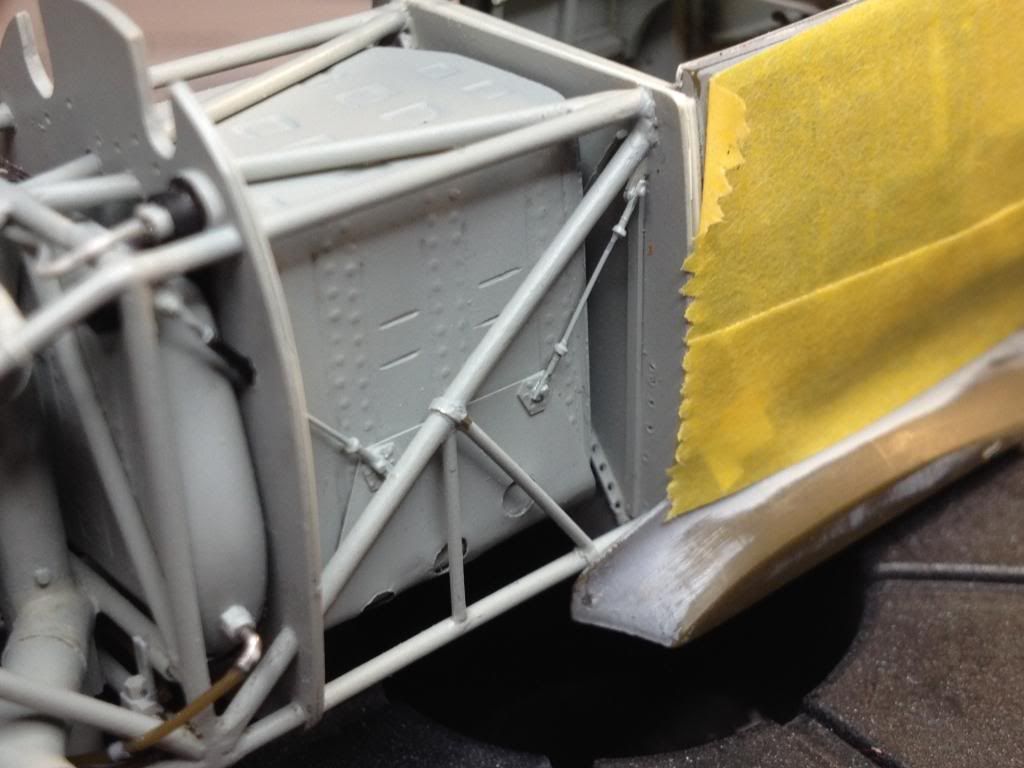
I consider lower wing done on this stage of project, so I decided to join front part with engine, fuel and oil tanks, with fuselage. It was big day. Photos with dry fitting wing.
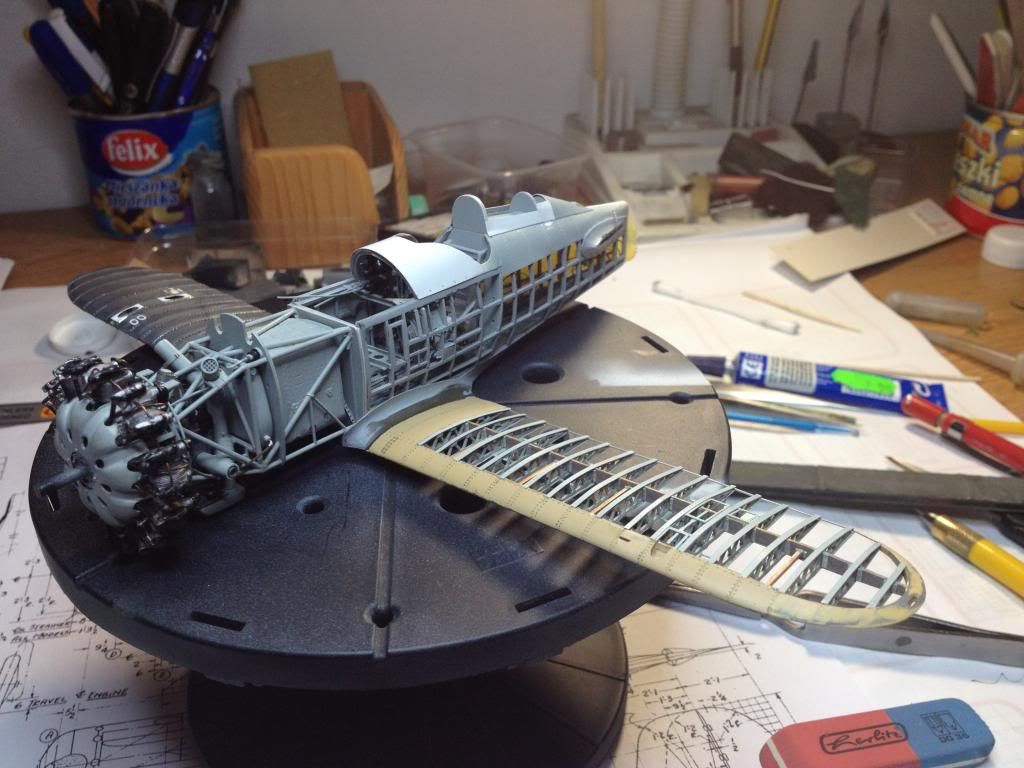
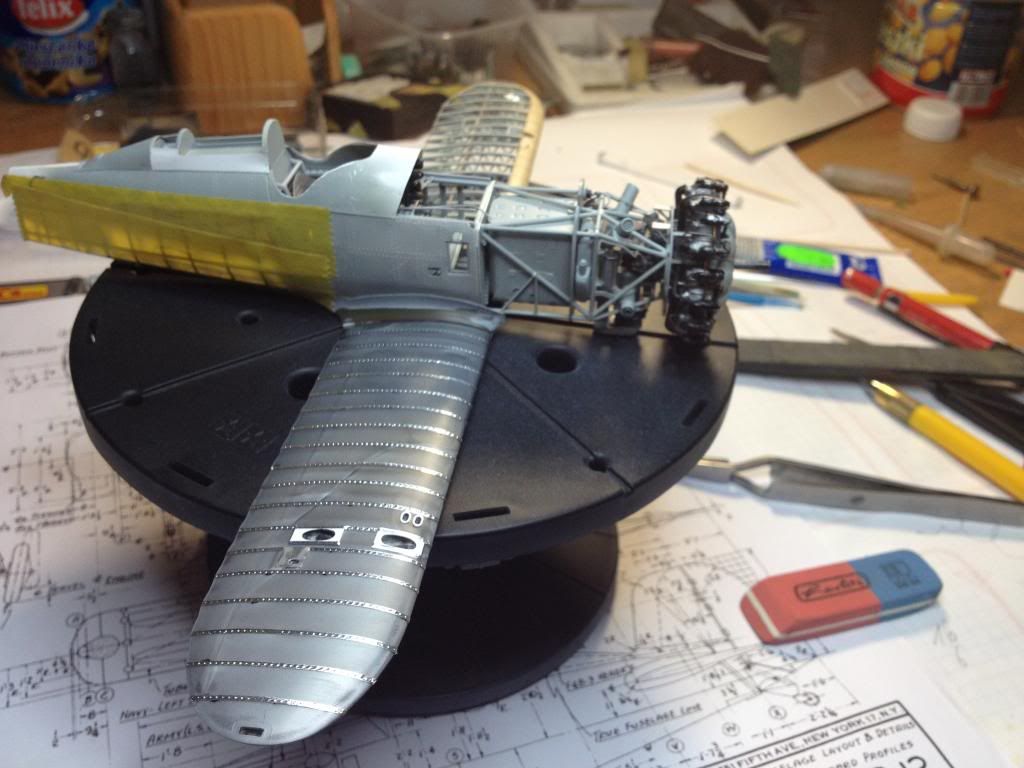
I plastered fuselage tamiya tape for protection
Regards
Tomasz
- Pfuf, Uilleann, Lars Befring and 2 others
-
5
-
Hi after New Year break!
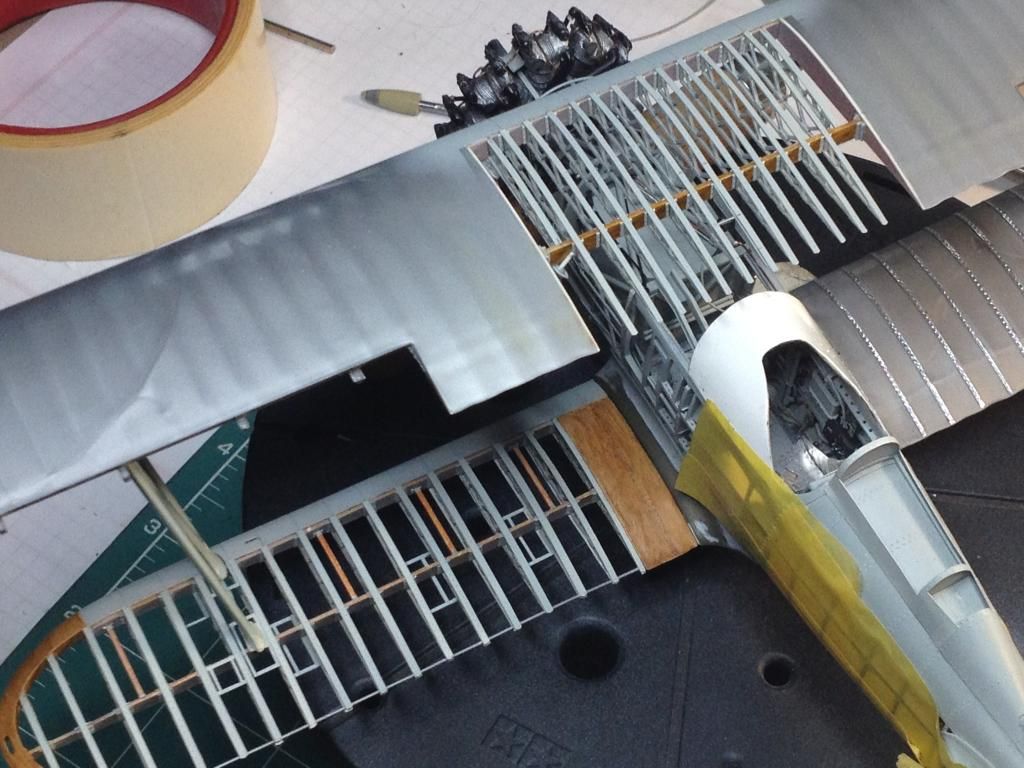
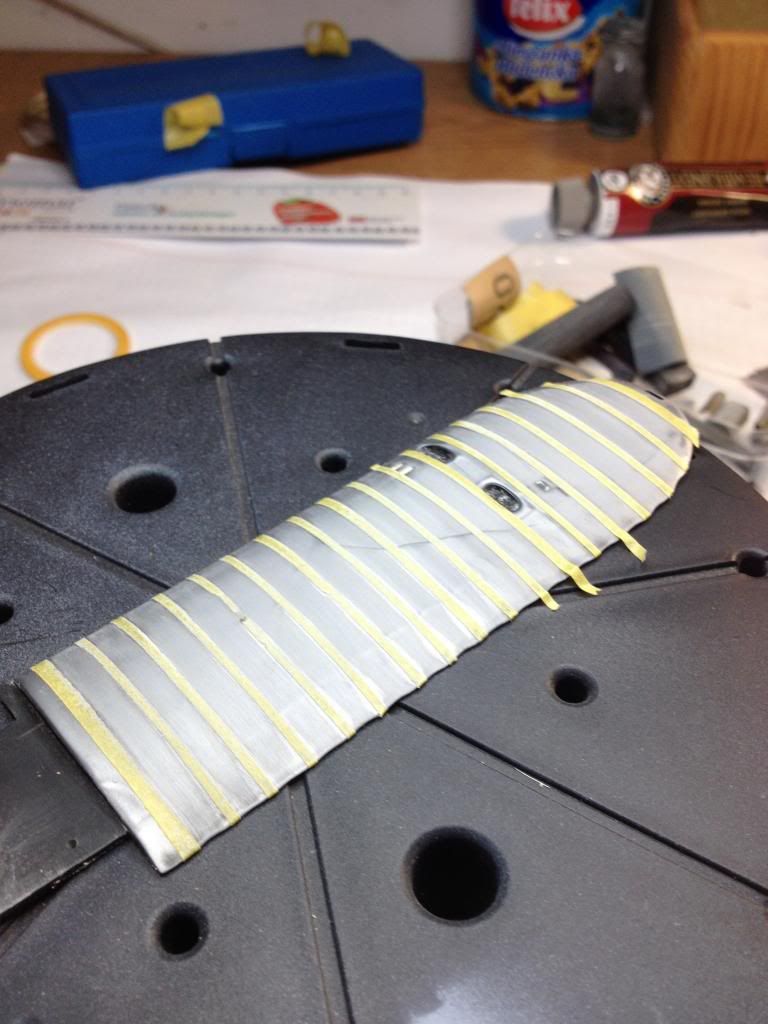
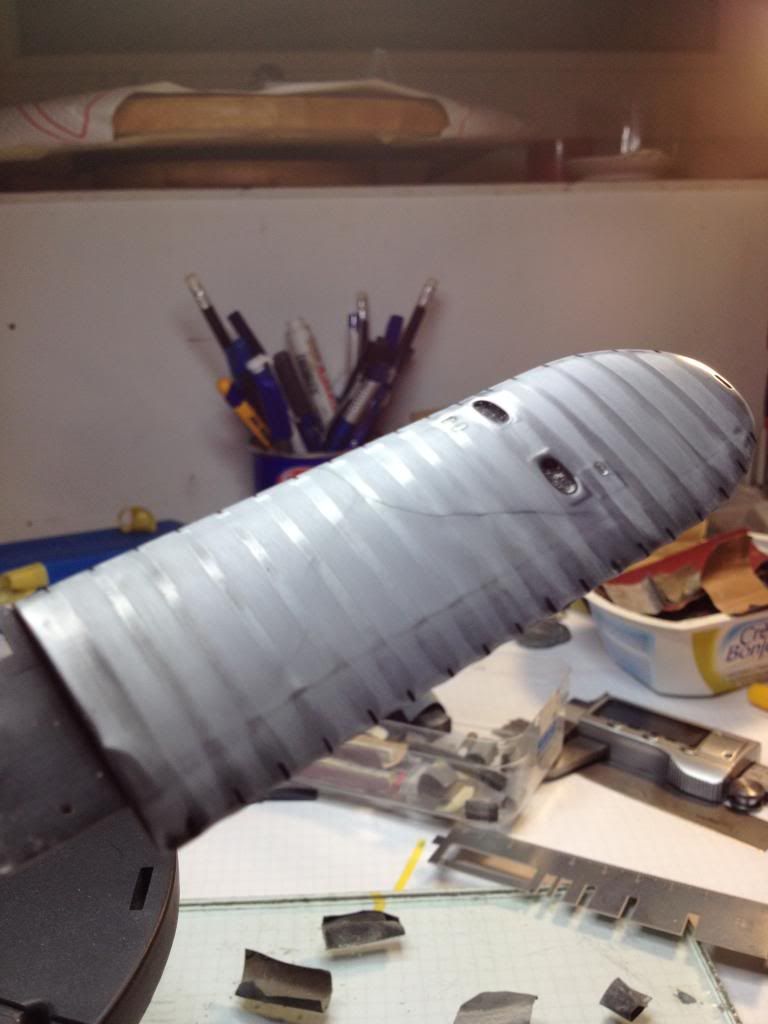
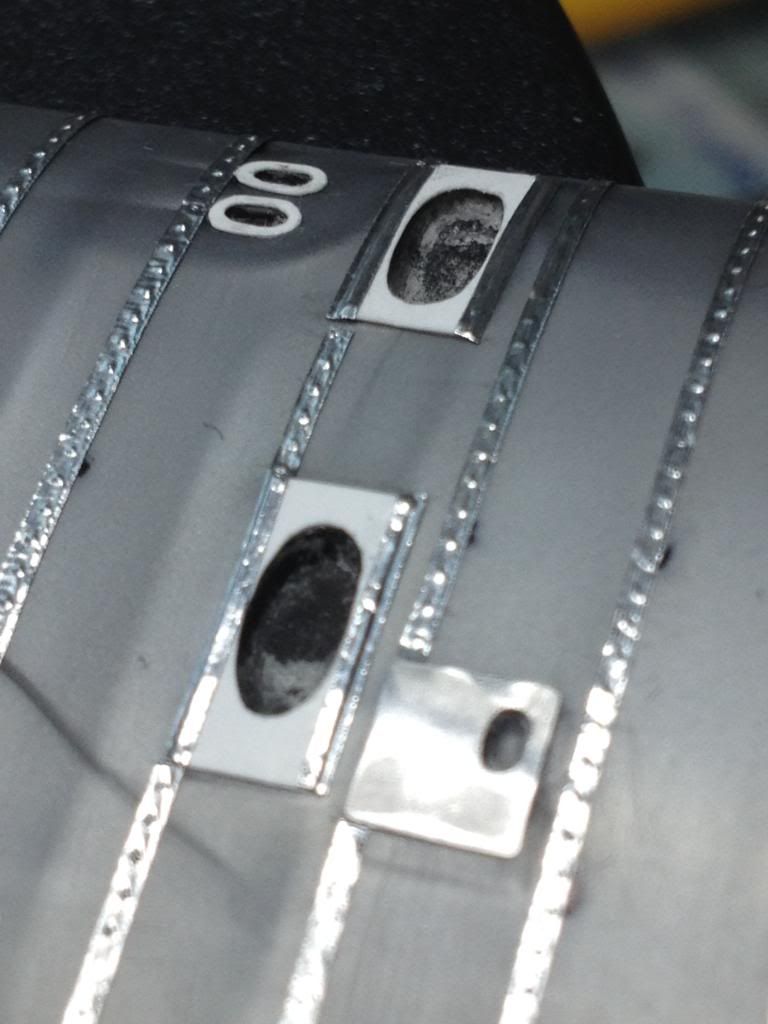
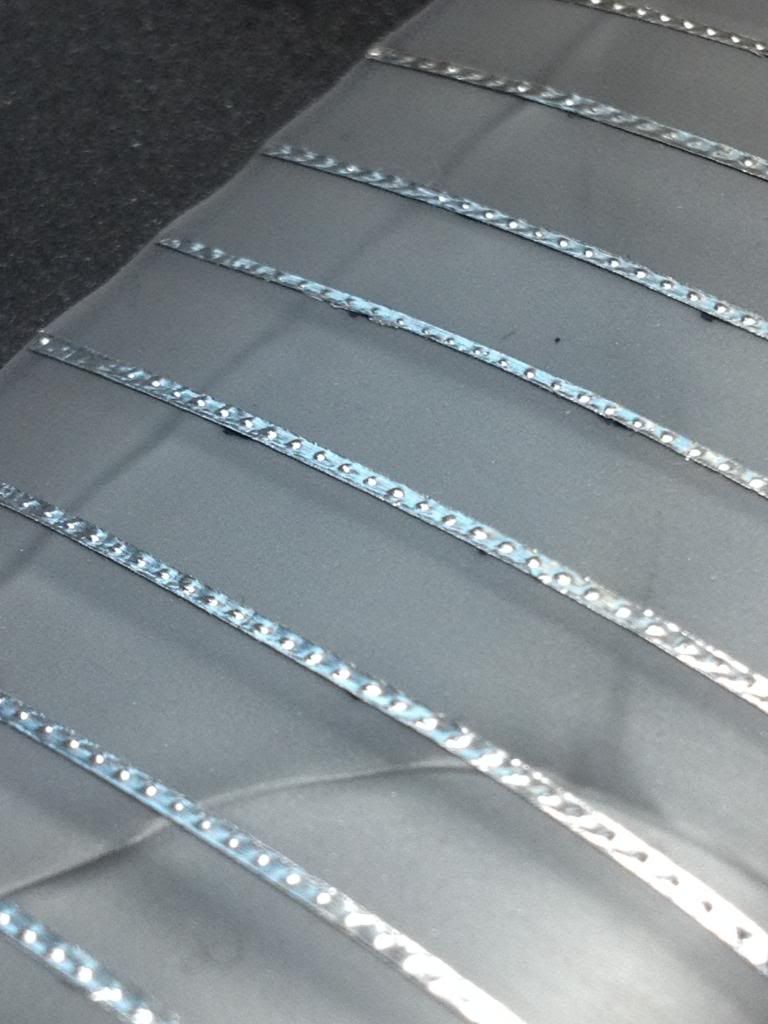
I almost finished left wing on the end of the year. So I started to work on right wing with new year. As I said earlier I sand off all surfaces of the wing to eliminate joining line both halves of wing and wrong placement of ribs imitation. Thereupon I had to make new covers, hatches etc., but first I decided to delicate ripple surface. I also reconstructed ribb tapes from thin self-adhesive aluminium foil.
Progress on photos

Regards
Tomasz
- Rdrunner and Mal_Belford
-
2
-
Good work!
I often watch your thread, it's pleasure.
TH
-
Striking camouflage perfectly done. Congratulations.
Tomasz
-
Hello everybody!
This is last update this year. i'd like to thank's all of you for your favourable comments and patient watching. Your support helped me to make satisfying progress this year. May be next year will be the last of this project? This is my own wish for 2014 and for all of you I wish HAPPY NEW YEAR.
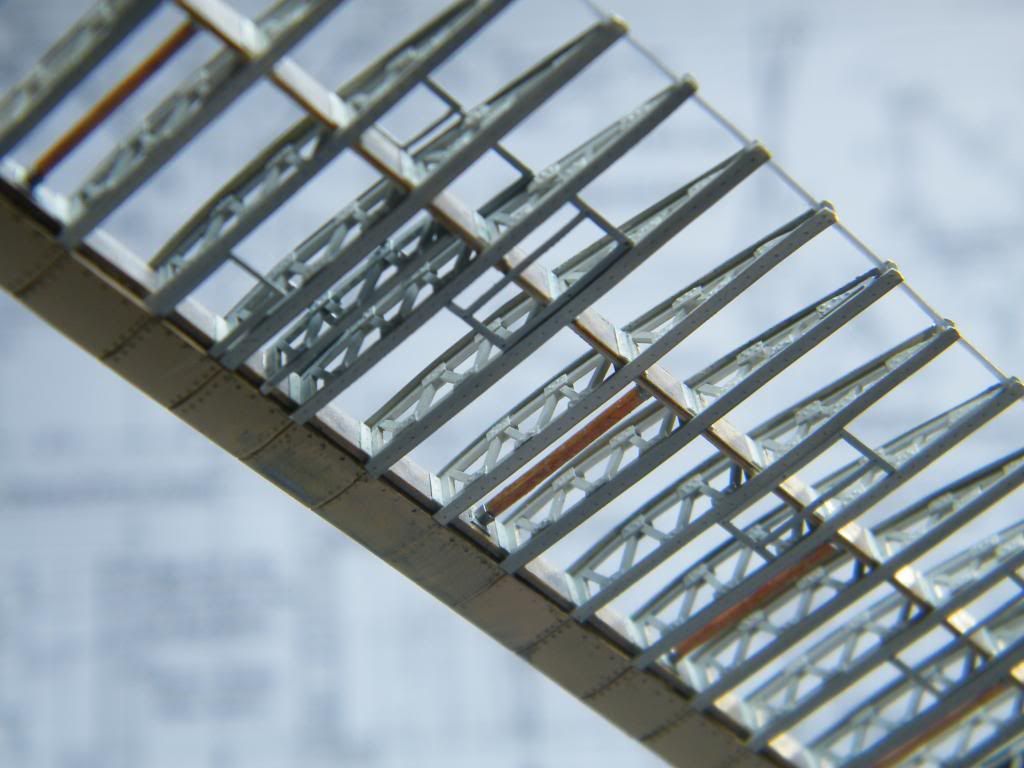
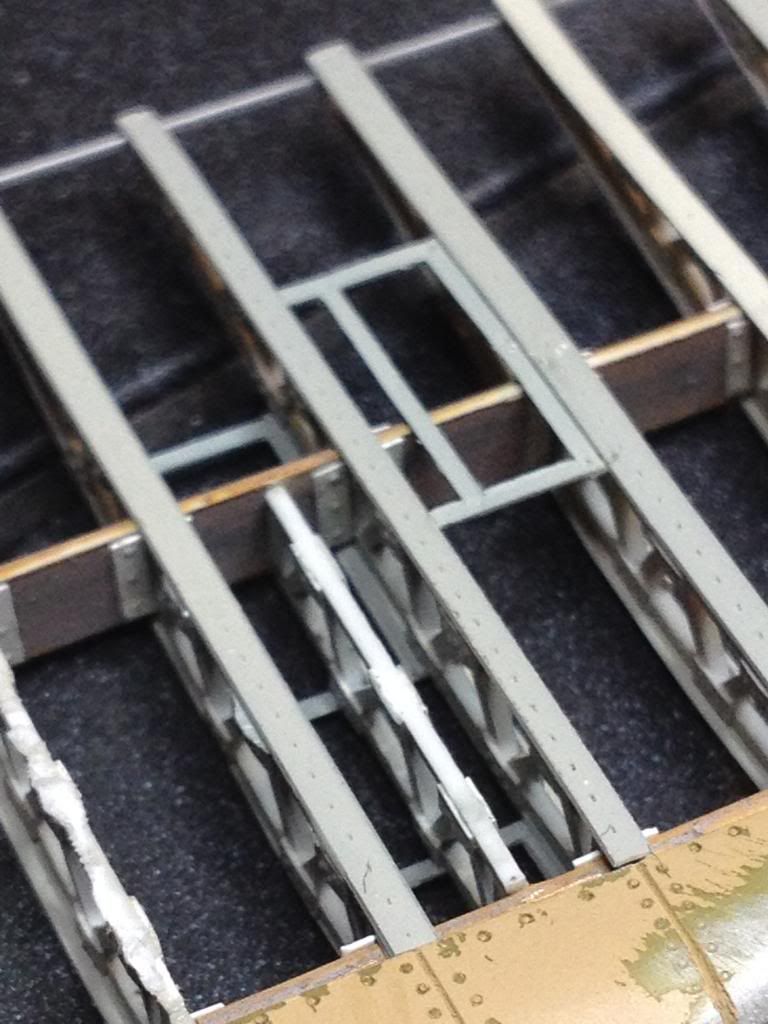
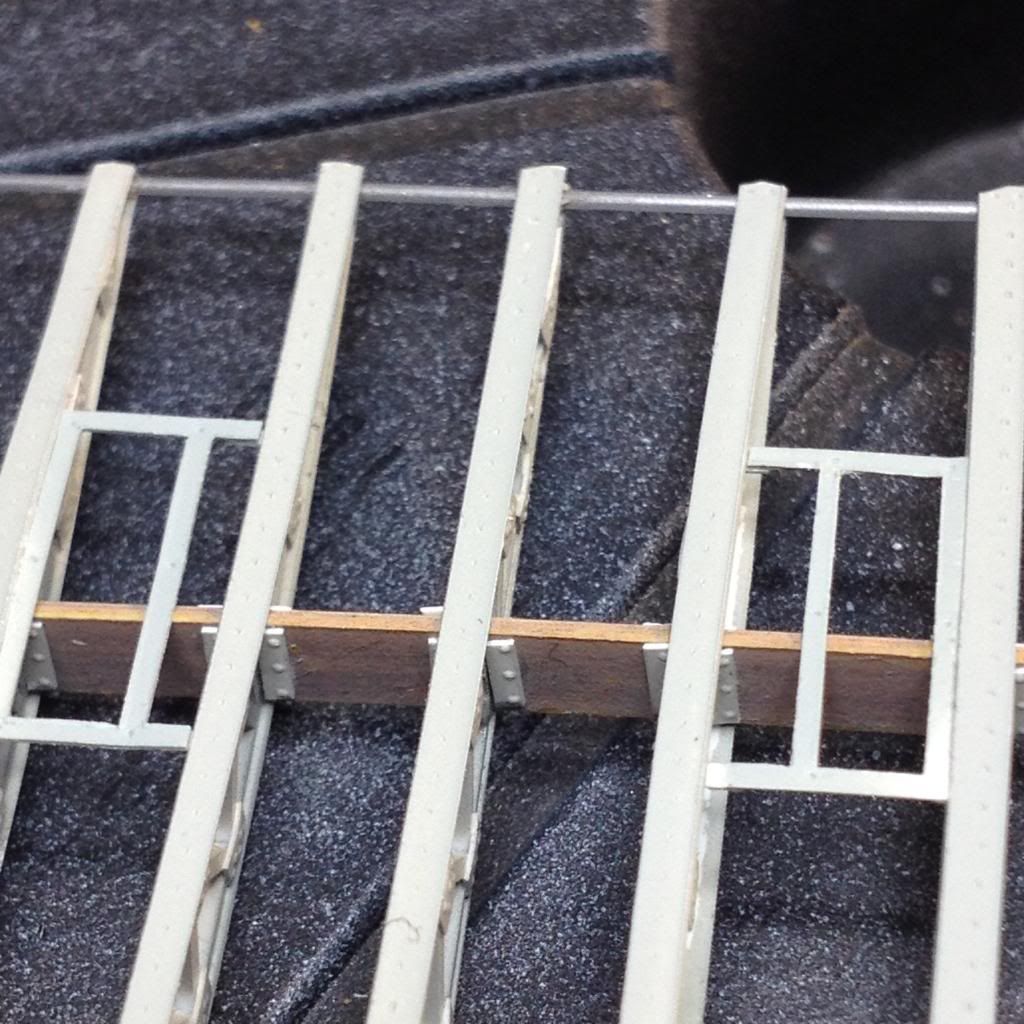
So come back to work. I added two missing frames of hatches first. Next I touched four compresion struts between spares. As always I made fixing to spares for them.
See you next year.
Regards
Tomasz
-
Hi everybody after Christmas!
Some progres. I started to mount reinforcements under the strut. First I had to made rib between spares. I cut insets from 0.1 mm sheet of plastic. I made reviewed hatches the same way.
I was afraid of effectes but I'm satisfied. I have to add few more.
Regards
Tomasz
- Rdrunner, Lars Befring and Jamme
-
3
-
Good afternoon!
Thank's a lot for your nice comments.
This whole project is friggen AMAZING! I'm speechless at what you've done with this 40+ year old kit! Reminds me of making PT-17 Stearman ribs in Aviation Mechanics School. This is all I can say at this time other than:

As worse kit than better for me. What could I do with Tamiya kit ? This old Hasegawa is only pretext to build this plane.
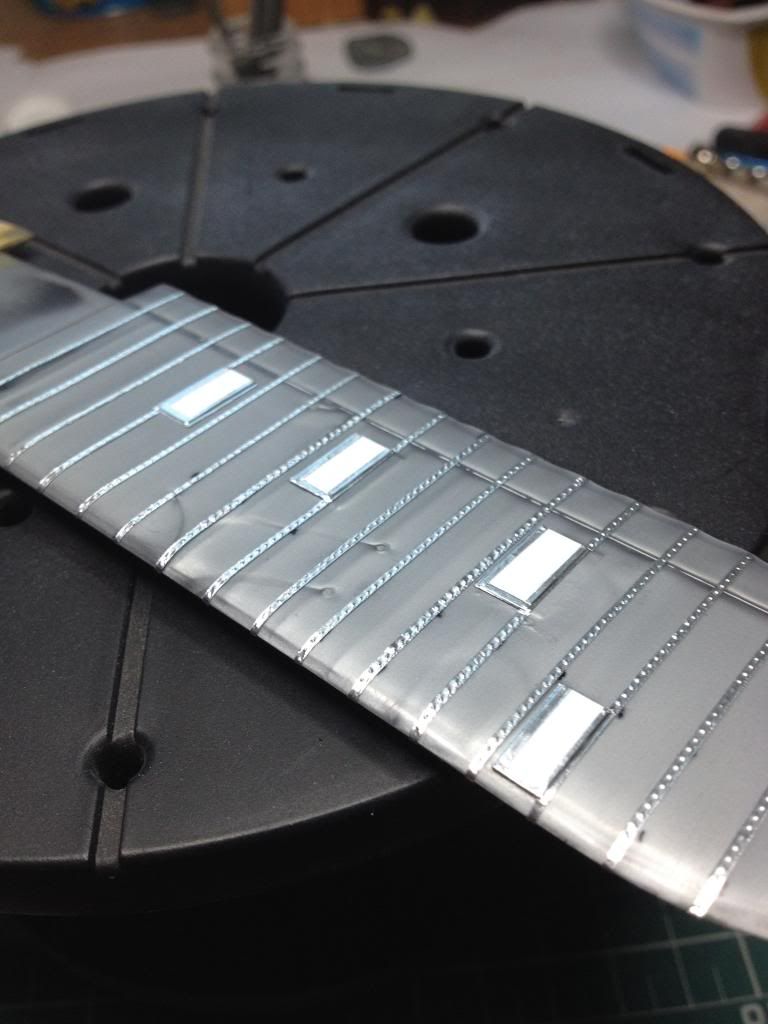
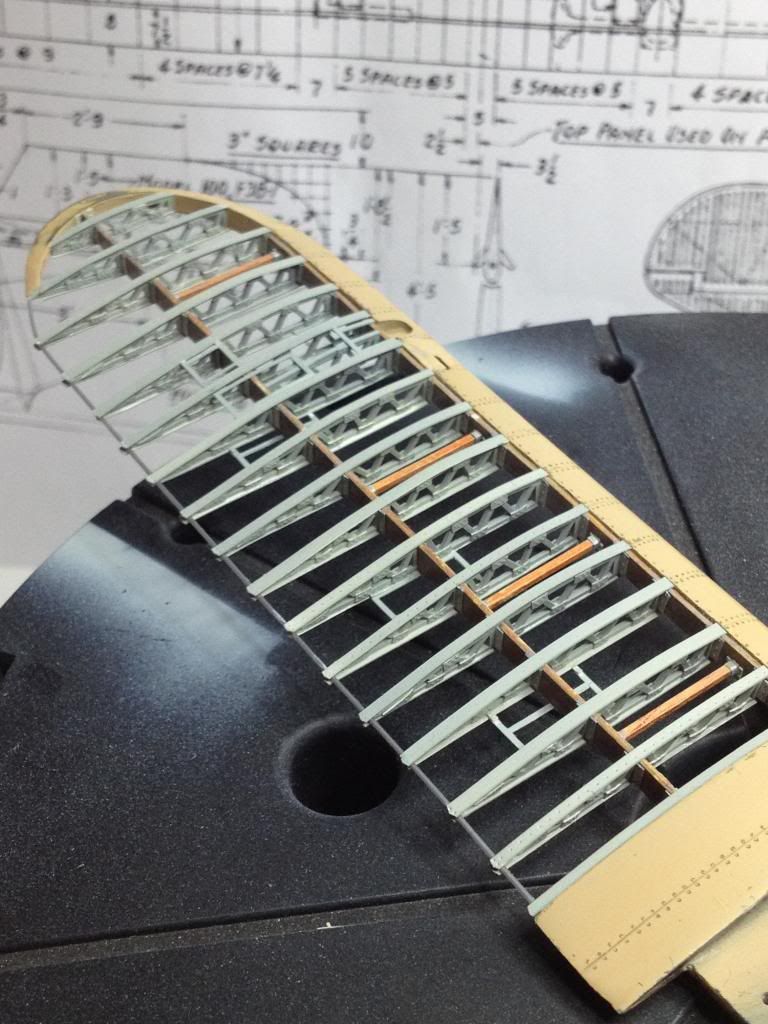
Top of the wing is almost ready. Slats on place.
Regards
Tomasz
-
Evening everybody!
Tomasz,
Absolutely amazing skill and craftsmanship my friend. Thank you for this build thread,it's quite the inspiration. Looking forward to seeing what tresures the next update has in store.
Highest Regards,
Gregory Jouette
Thank's Gregory!
Build threads are necessary to avoid discovery America every time.
Vundabar!
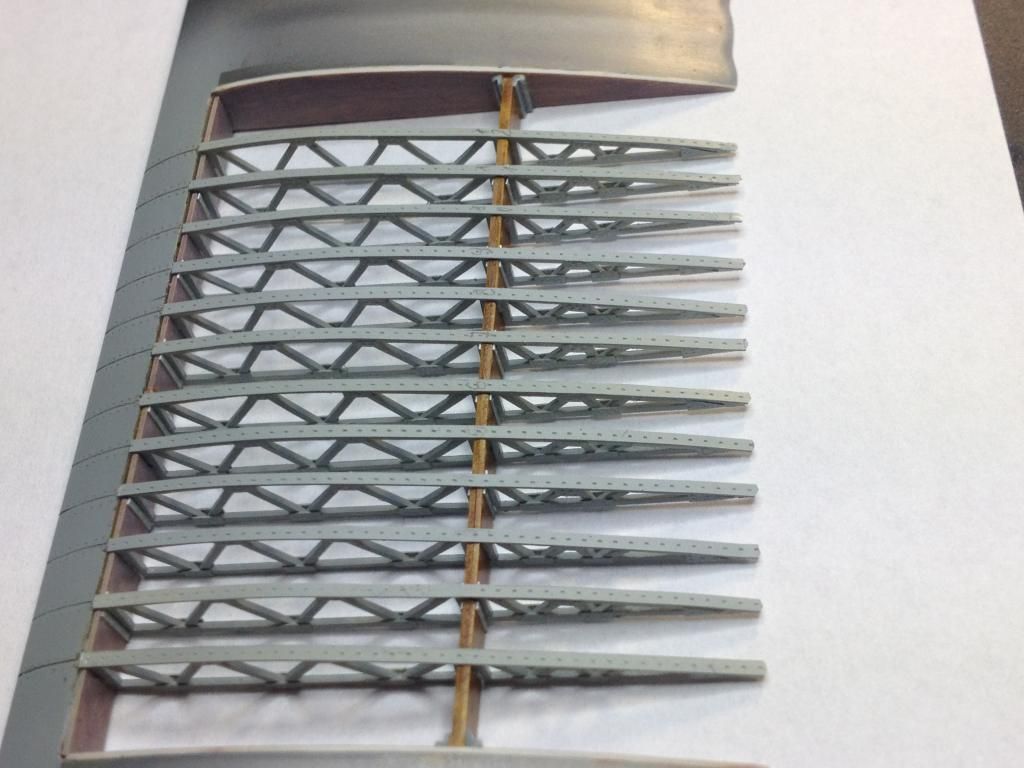
Out of curiosity, how long did it take you to put on all the raised rivet heads on all of the rib gussets?
Thank's Brian!
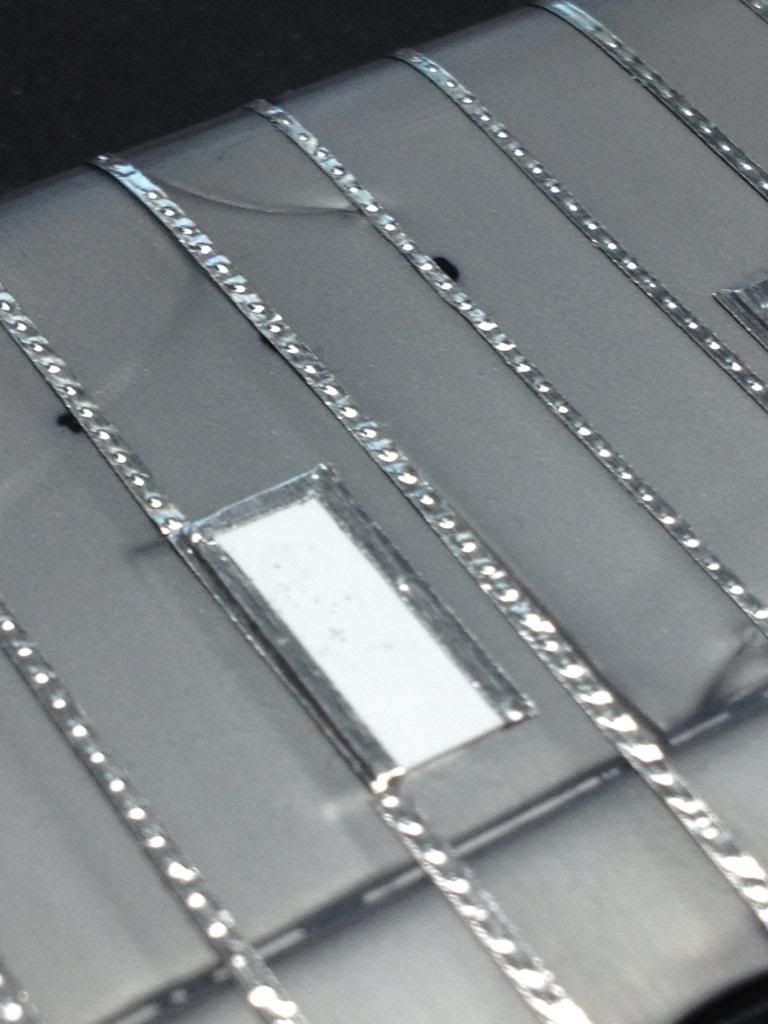
I didn't put rivet heads. I made it another way. I used rivetter or needle to make them on plastic sheet. I cut on straps and next cut to demanded dimension and glue on ribs. That's all. It's not so benedictine work as it appeares.
I started to glue straps on top and bottom of ribs with imitation of perforation for rib tapes.

Regards
Tomasz
-
Hi Peter!
Exellent work! When you've got good documentation, details can wipe out, but it is fascinating to jump through hoops. I wanted to ask you about wonderfull bolts and nuts which I saw in pilot seat, but you explained source in this post. Good luck!
Tomasz
-
Hehe... NICE! I have a few comments, in comparison with photographs, but nice :-)
Thank's for NICE ... comment .... hehe. I never say there's no doubt in such case.
Regards


1/32 Boeing F4b4 - almost naked
in Works in Progress
Posted
Hi!
Thank's for watching and coments.
Some progress. I added frames of hatches, compass, trailing edge line etc.
Regards
Tomasz