
LSP_Kevin
-
Posts
48,482 -
Joined
-
Last visited
-
Days Won
280
Content Type
Profiles
Forums
Events
Everything posted by LSP_Kevin
-
It's funny how much that looks like a tree branch! Kev
-
I'm not having any issues at the moment, but it appears that those of you who are, are all in the US, so it could potentially be a regional network issue. I am aware, however, that our server is having the occasional issue with extremely high CPU loads, which definitely grinds things to a halt. But this is only for a maximum of a couple of hours, maybe once a week. Kev
-
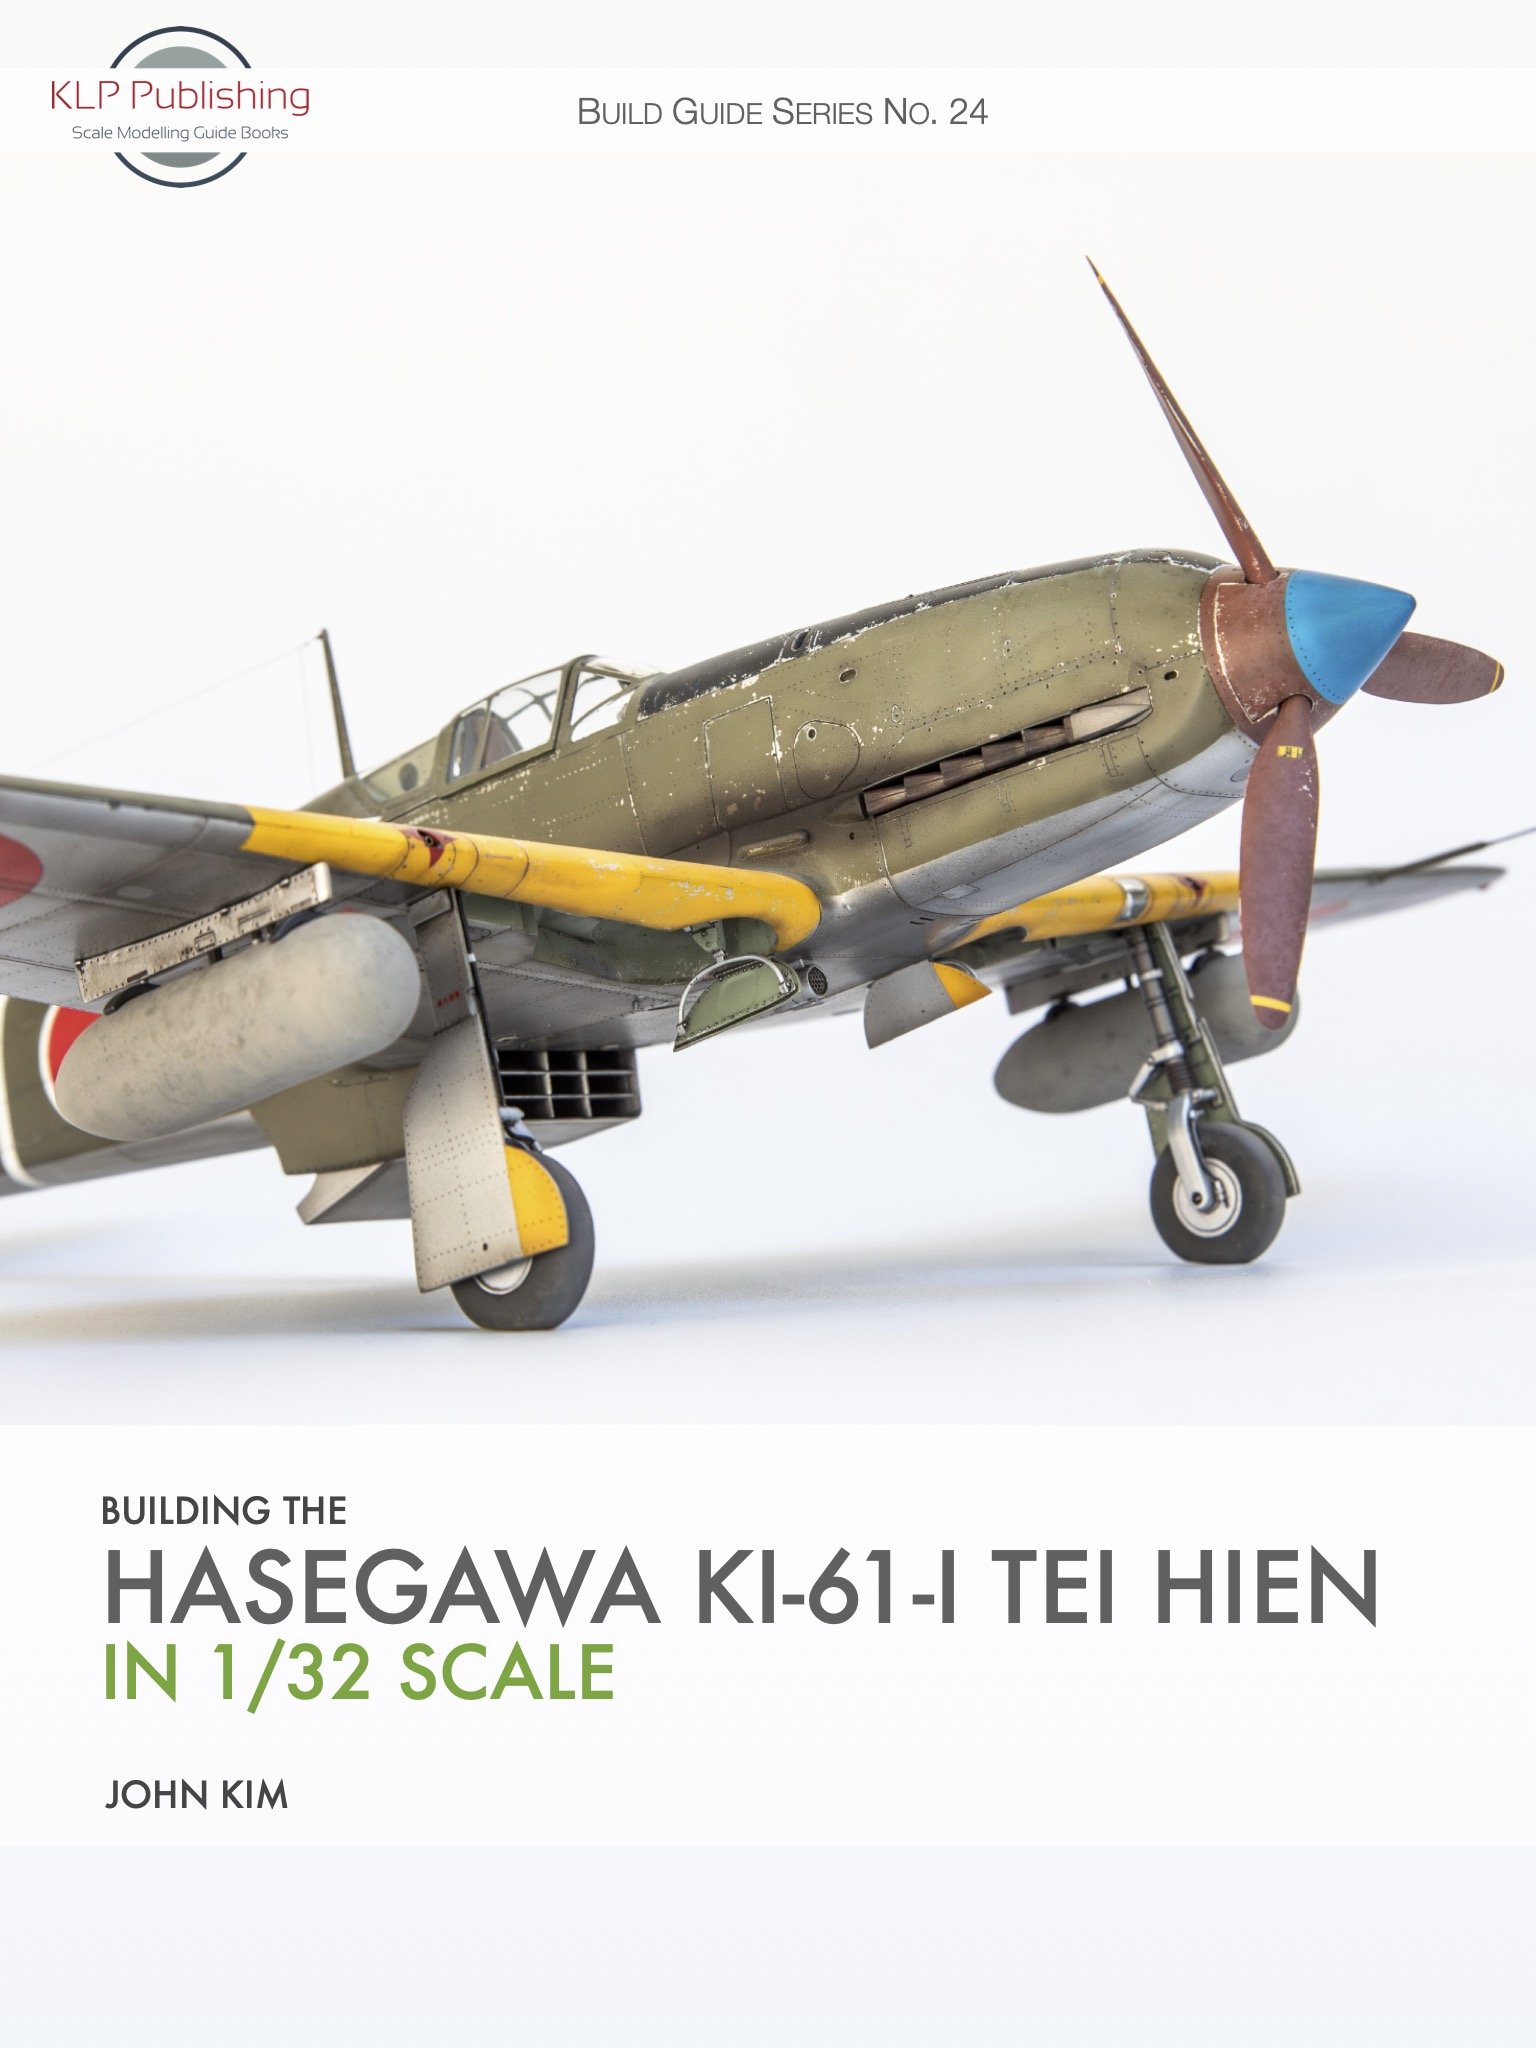
 I’m pleased to announce that Building the HpH Fw 189 ‘Uhu’ in 1/32 Scale has now been updated to v1.7. And to celebrate, for the next 7 days, it’s available for a mere 5 Australian dollars. Yes, FIVE! (Sale ends midnight, 17 June AEST.) This update includes the usual raft of minor layout and typographical improvements, along with adding the current version number to the cover. This is free for all existing purchasers. And of course, new purchasers will always receive the latest version of any of our books. You can check the version number of your previously-purchased copy at the bottom of the Copyright page (iii), or on the front cover to the right of the author’s name. In order to obtain your free update, simply re-download the book using either the original download link in your Order Confirmation email, or log in to your KLP account and download it from the Downloads section of your profile. If you don’t have either, please contact me and we’ll sort it out. Kev
-
- 1
-

-
Fantastic update, Derek! It really looks amazing at this stage. Sorry I missed you at Expo - would have been great to meet in person! Kev
-
Very nice work, Tolga! Kev
-
That looks amazing, Sasha! Kev
-
This looks fantastic, Tom! Kev
-
Not a post I'm looking forward to! Kev
-
Infinity died a couple of years ago, so nothing new there. I think this is legit, sadly, but I'd rather it was officially confirmed before calling it so. Kev
-
This is really sad news if true. I have several HpH kits in the stash, but so far haven't got around to building any of them. I must change that soon! I was also planning to purchase their Ar 196 catapult and canopy sets, but it now sounds like I might have left it too late. But before we hammer the last nail in the coffin, let's see if we can't get something more official than a compelling rumour. Kev
-
Love it, Jim! Kev
-
Howdy folks, I've just published this week's What's New update. Enjoy!
- 1 reply
-
- 8
-
-

-
That link takes me to the Imgur pages that hosts the image, rather than directly to the image itself. It also complains about my ad blocker, and won't let me access the page without white listing the site. (There's a reason I avoid the free image hosting sites after the Photobucket debacle.) Kev
-
I forgot most of it! With around 700 models in the competition, and probably 2000 when including the club displays, I really only saw a small fraction of what was there, in between gas-bagging. Kev
-
I also took a few snaps of some other things that caught my eye, but there was a lot of stuff I missed, and many great models beyond just these ones. This thing was gigantic! 3D print I believe: Some civil stuff: But the non-LSP highlight of the show for me was this gigantic-scale Back to the Future DeLorean, complete with animated lighting and a superb display: I really should have taken a video of it! Among all the other excitement of the day, the fire alarm went off at one point, and we all had to evacuate the venue, which ended up looking quite surreal from the outside: So there we have it! Good luck to all the entrants with their models in the comp, and hopefully next year I'll be in a position to not only attend more than one day, but also enter something! After all, someone needs to hold down that last place... Highlights: great models, great people, and catching up with the guys from Kotare; Lowlights: the food, and the trip across town. Kev
- 10 replies
-
- 20
-
-
-
Locals will already be aware the The Australian Model Expo is currently on this King's Birthday long weekend at the Sandown Racecourse. As I've mentioned elsewhere, I was only able to attend yesterday (Saturday), and have posted photos of the Kotare Bf 109K-4 and Spitfire Vb in the relevant thread. Here I'll show a selection of photos I took of some of the models on display. I didn't take many, and mainly focussed on the LSP stuff, so apologies in advance for that. So, let's look at those first: Airfix 1/24: Airfix 1/24: Kotare Spit: Kotare Bf 109K-4 test shot build by Sam Dwyer: Quite amazing to see two 1/32 Liberators on the same table, along with 3 Lysanders! Oddly, the only LSP jet I came across was this one: There was probably an entire table of them somewhere that I missed. The stand-out LSP entry of the show for many of us (including myself), was Les Applebee's amazing conversion of the HK Lancaster to an RAAF Lincoln: Suffice to say that my photo hardly does it justice. More in the next post... Kev
- 10 replies
-
- 17
-
-
-
Any news on the expected ship date for the Kotare 109K?
LSP_Kevin replied to Steve C's topic in LSP Discussion
Sorry about the duplicate image at the end of the post - the forum software won't let me delete it! EDIT I figured it out... Kev -
Looking good! And congrats on the new baby! Kev
-
Great project, Jim! About as old-school as you can get. It's amazing that we have builds like this here, alongside 3D-printed kits and other modern marvels. Vive la difference! Kev
-
Fantastic work on the rivetting, John! Kev
-
Lovely paint work, Sasha! Kev
-
Italeri F-104G Belgian air force, target tow
LSP_Kevin replied to Grunticus's topic in Works in Progress
Nice progress, Leon. Great hobby room, too! Fire away on the 3D printing topic. Kev -
***Finished*** 1/32 Fisher Models - Hawker Sea Fury FB.11
LSP_Kevin replied to Tolga ULGUR's topic in Works in Progress
Fantastic result, Tolga. And so fast, too! Kev -
Any news on the expected ship date for the Kotare 109K?
LSP_Kevin replied to Steve C's topic in LSP Discussion
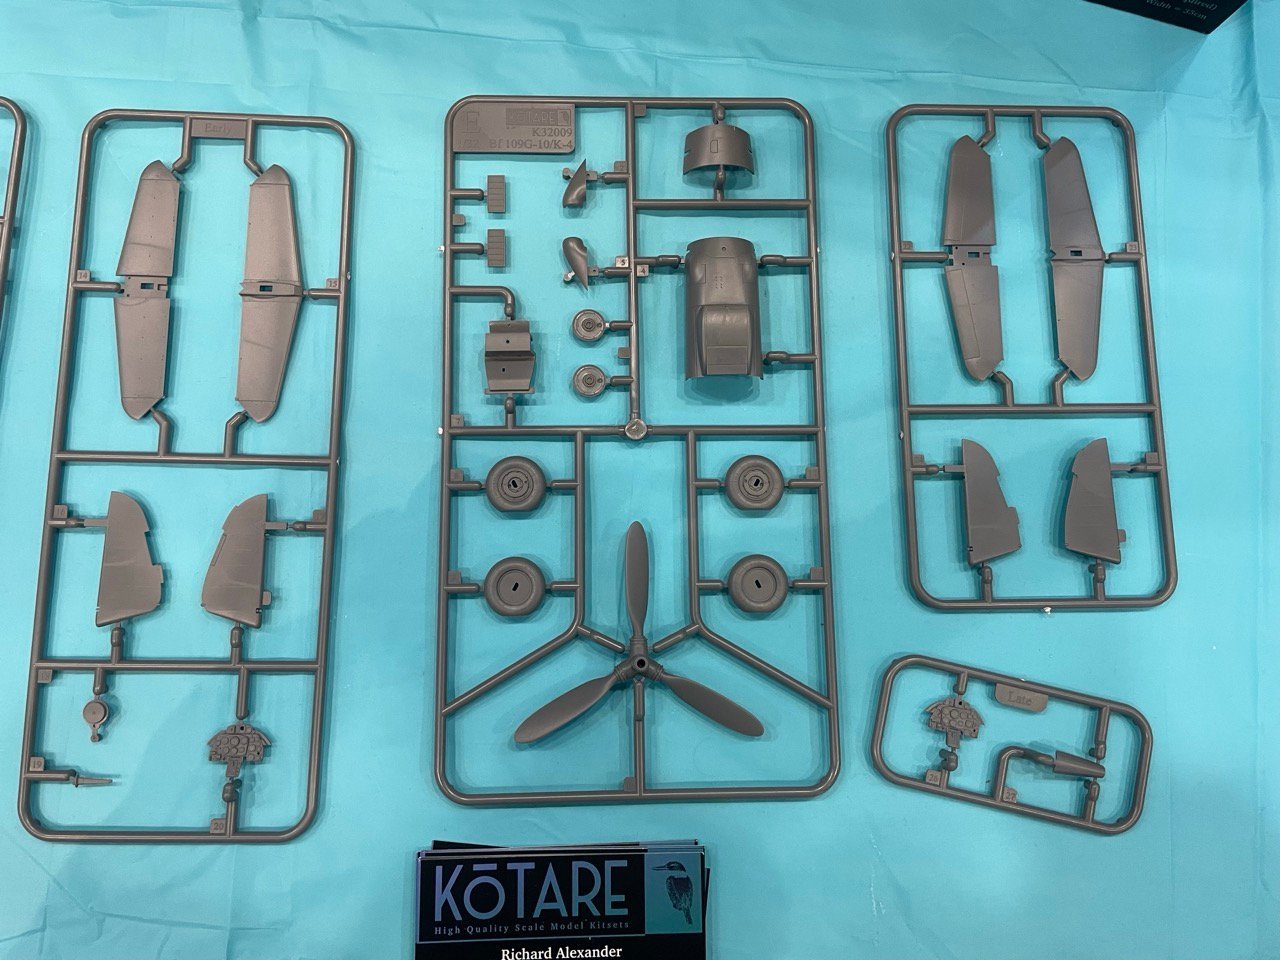
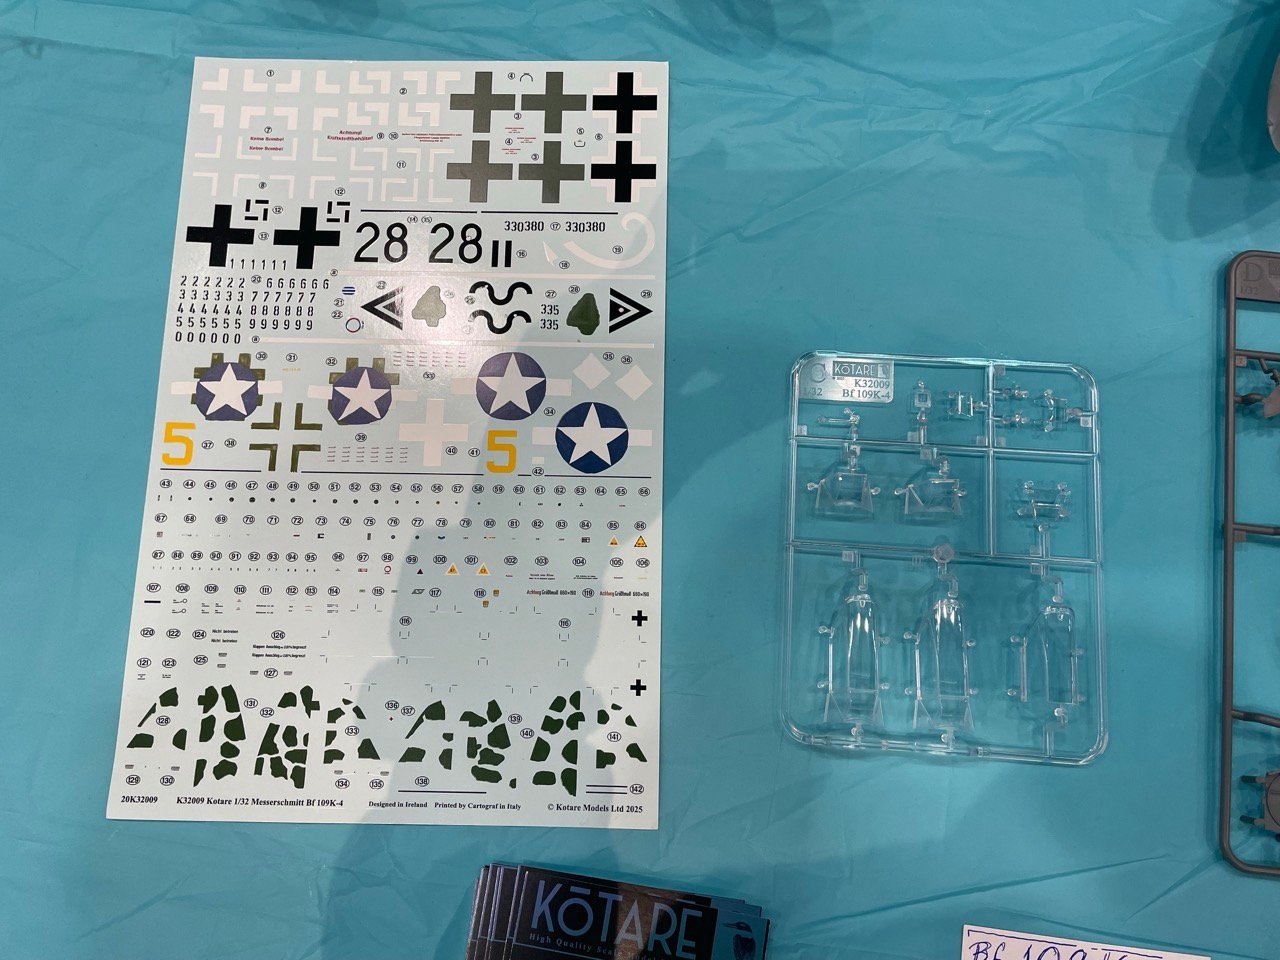
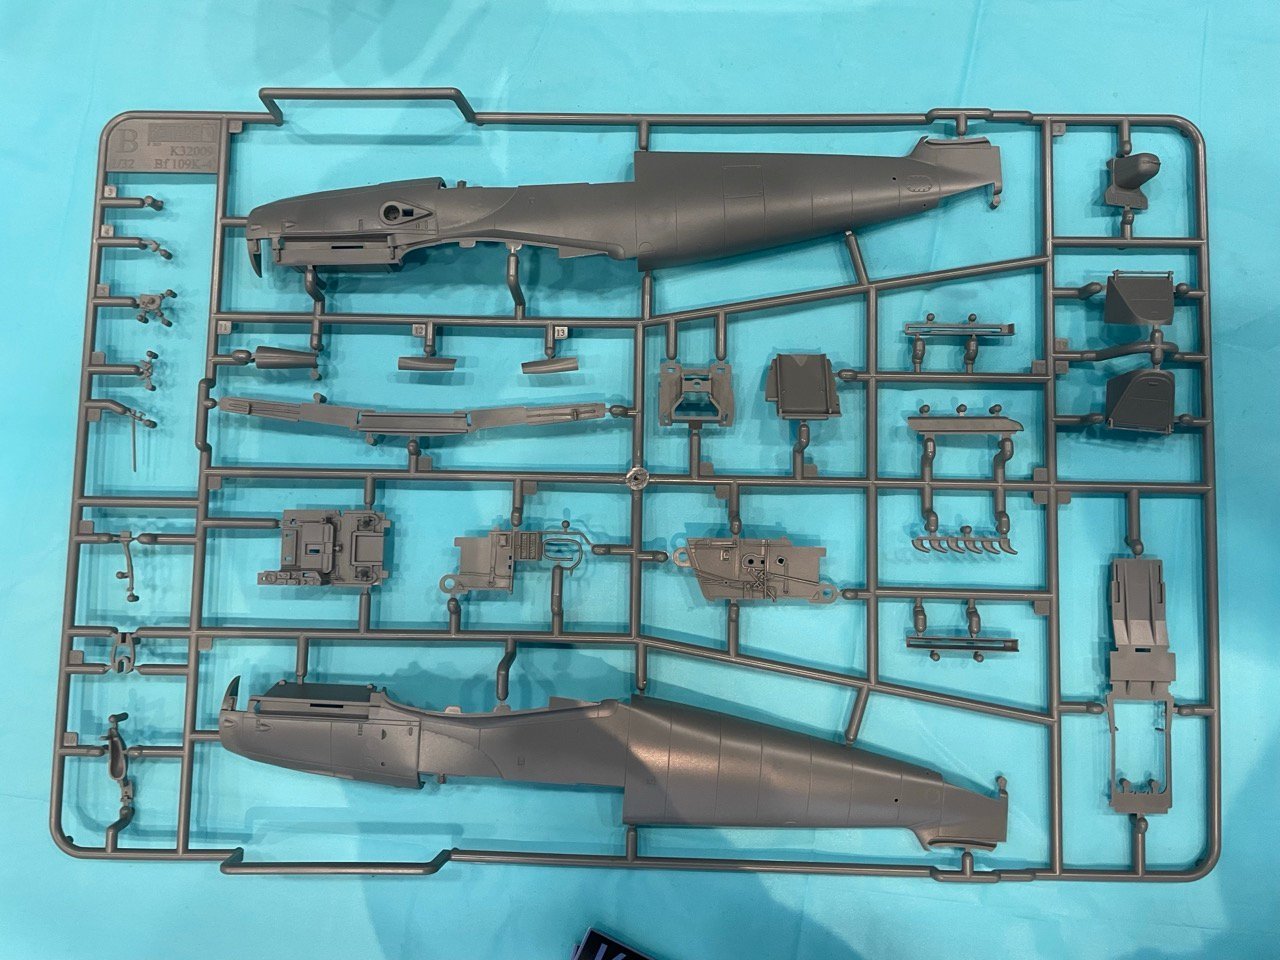
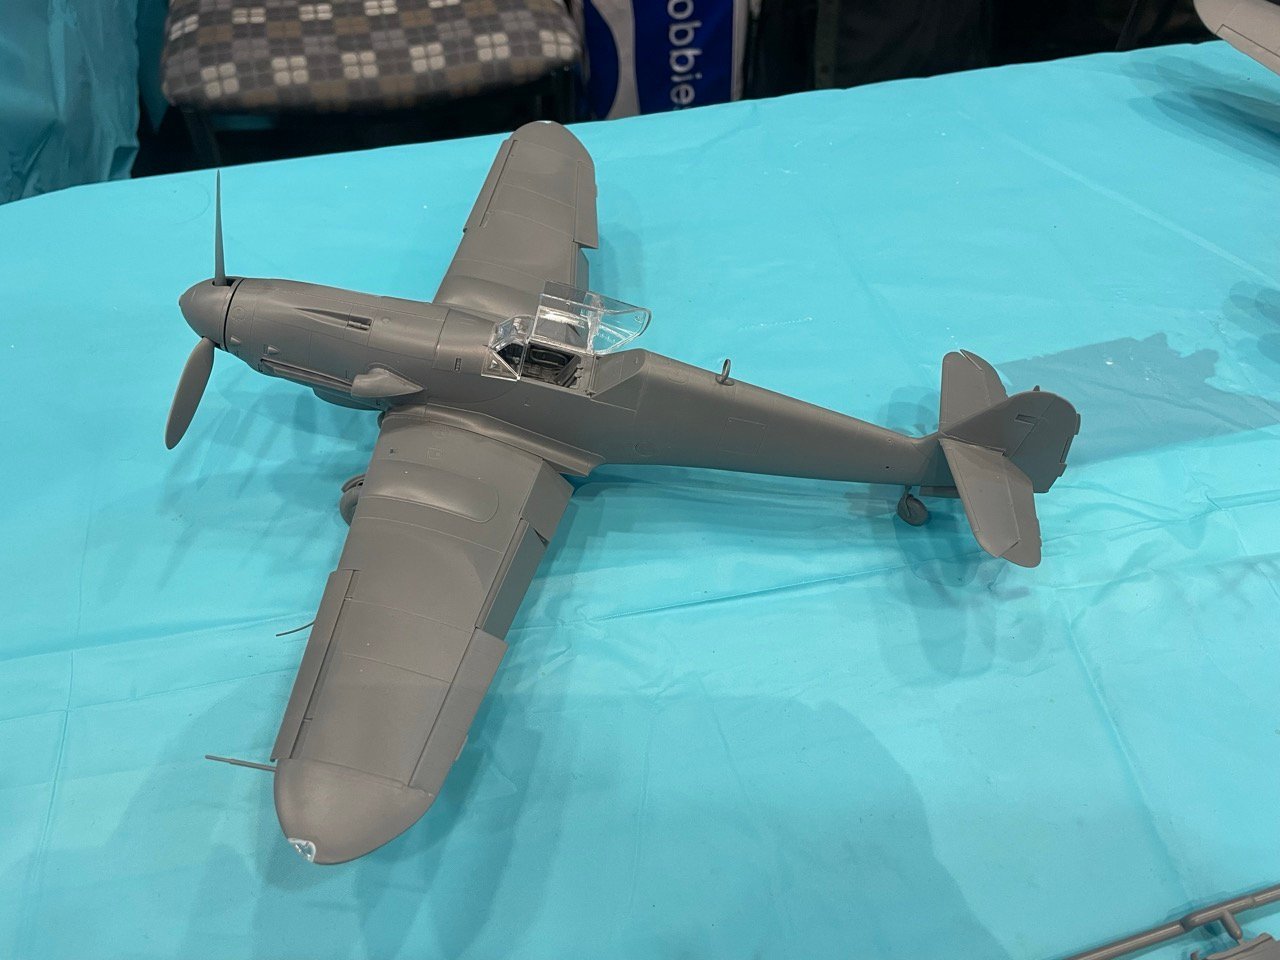
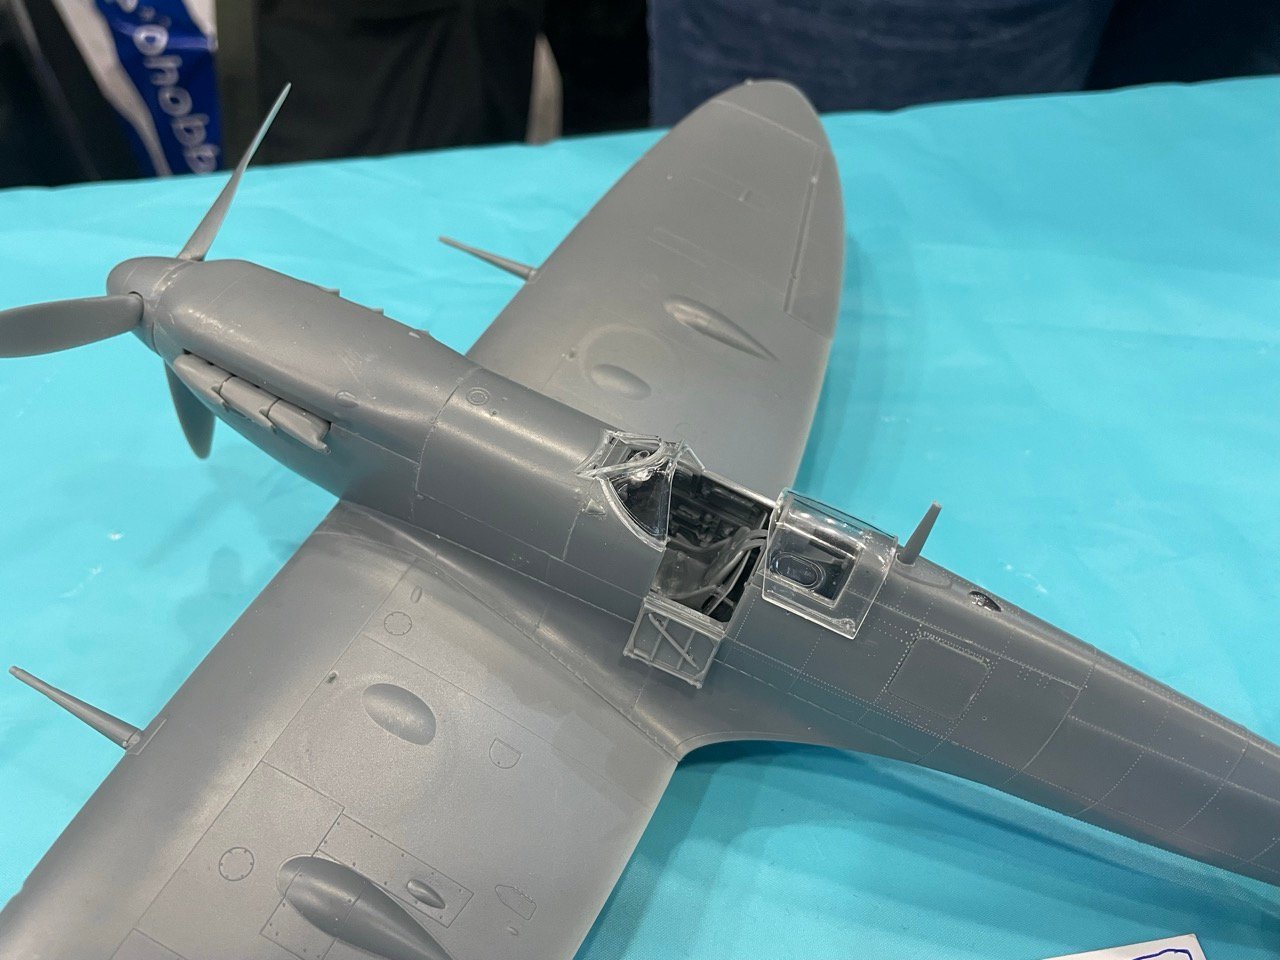
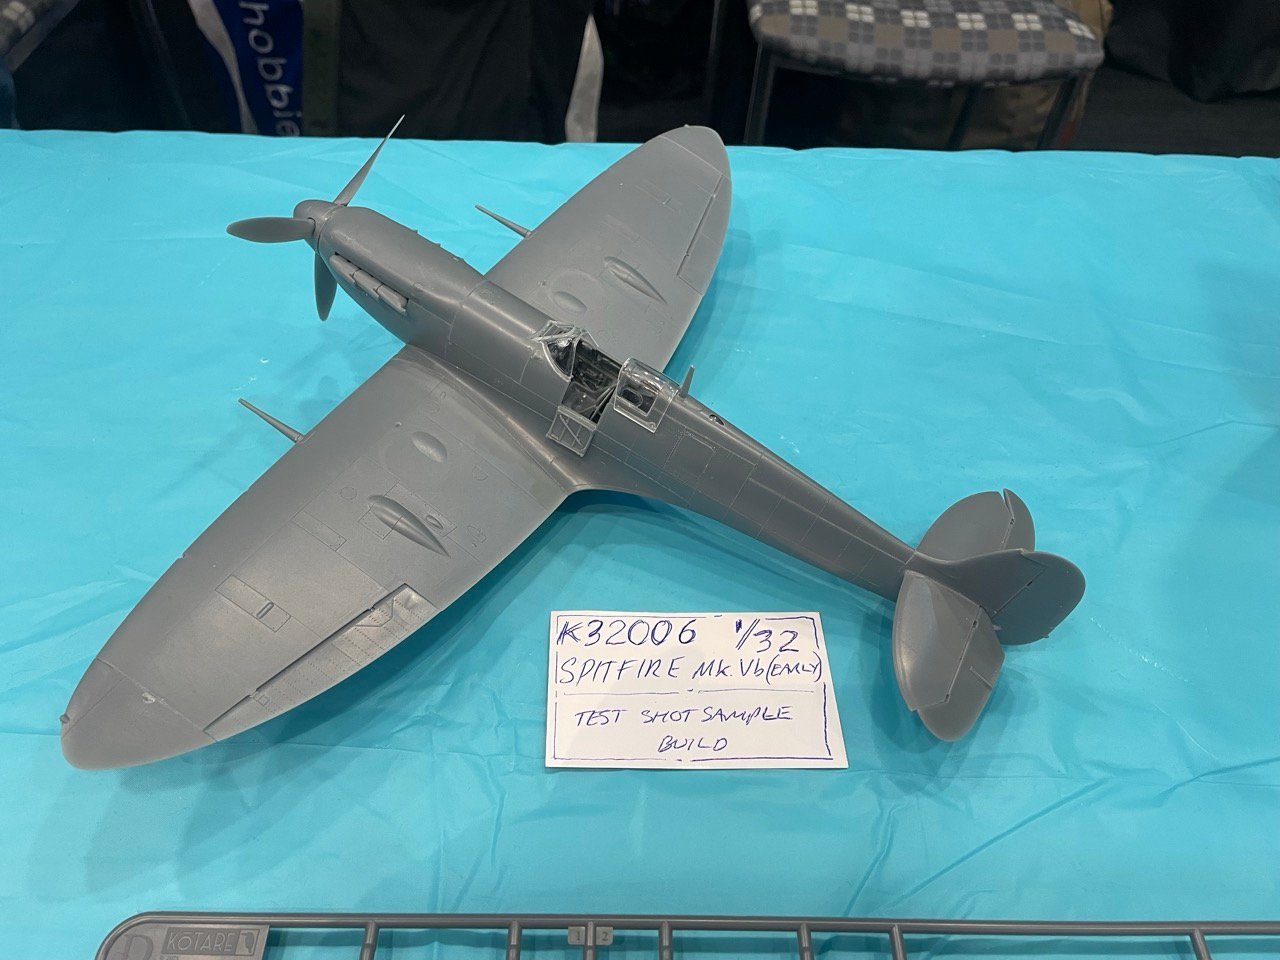
OK, here's the update. Model Expo in Melbourne is a 3-day event that takes place over the King's Birthday long weekend, but I was only able to attend yesterday (Saturday). Even so, it was a great show, with many magnificent models on display (not the least of which was Les Applebee's 1/32 Lincoln conversion). More pertinent to this topic however, was that I was able to speak not only to Richard Alexander about the status of the K-4 release, but also to Mark Robson (Kotare owner), who made a surprise appearance at the show. The official word is that the kit is now in production, with the exact release date down to the vagaries of that production schedule, along with the logistics involved with shipping them hither and thither. But for now, they're on target for the end of this month or early next for the kit to hit the streets. Here's a few (admittedly poor) photos of the production sprues: And finally, a sneak preview of the Spitfire Vb (early) kit: I was very pleased to hear that Mark is a fan of LSP, and he is of course a member here. Perhaps forums aren't dying after all! Kev

- 30 replies
-
- 19
-
-

