ivanmoe Posted December 22, 2022 Share Posted December 22, 2022 So, I've got a set of lozenge-pattern decals for use on a Wingnut Fokker D.VII. However, it's not completely clear from the instructions how to join the decals for the top and bottom of the wings. Is the idea to have it be a simple "butt-joint" at the leading and trailing edges, or should there be a bit of overlap? My concern is that I'm gonna end up with gaps between the top and bottom segments. Link to comment Share on other sites More sharing options...
jeroen_R90S Posted December 23, 2022 Share Posted December 23, 2022 (edited) I'm by no means an expert, but when I did my D.VII I joined them at the front (leading edge) as neatly as possible, lower sides first. The trailing edges will overlap, but are annoying anyway, because of the scallops on a D.VII wing. I used Mr Mark softer on the protruding parts, this kind of melts/hardens the stretchy Aviattic decals and will allow better cutting. I did end up with some gappery on the training edge, and mixed up some oil paints to match the (blue) rib tapes. This also kind of eats into the decals and unless viewed really up close it's not noticable at all. I'd rather have a tiny gap that can be touched-up rather than overlap as these are transparent and an overlap will create a darker area. It sounds more complicated than it is I found the hardest part to make sure the decal don't stretch out too much, as well as getting the wing tip ends to confirm properly, especially on the top. I ended up with some wrinkles there. Note I did overspray the sides and tops with a brown-clear varnish mix as suggested by WNW to tone down the gaudy colours. Of course this becomes harder if your subject has lozenge rib tapes... Decalling is one of my less liked things in modelling, so I'm still kind of amazed I did a model covered in 75% of them! Jeroen Edited December 23, 2022 by jeroen_R90S D.B. Andrus, europapete, Uncarina and 5 others 6 2 Link to comment Share on other sites More sharing options...
jeroen_R90S Posted December 23, 2022 Share Posted December 23, 2022 And be sure to check if the separate parts match up to the rib tapes on the model -I had to trim about 0,5mm off the side without the rib tape to make sure they aligned. Might be I used an older set and this is no longer the case, as it's been a few years since I did this model and Aviattic always seem to be improving their products europapete and Greif8 1 1 Link to comment Share on other sites More sharing options...
Greif8 Posted December 23, 2022 Share Posted December 23, 2022 Jeroen's advice is spot on, and it is easier than it sounds. Make sure to use plenty of water or Micro set if you use that, to ensure the you can move the decal around better and avoid possible stetching. If the wing tips end up with a small wrinkle or two I would not sweat it as the actual aircraft had wrinkles in that location quite frequently. Ernest jeroen_R90S, europapete and ivanmoe 1 2 Link to comment Share on other sites More sharing options...
ivanmoe Posted December 23, 2022 Author Share Posted December 23, 2022 Jeroen, Thank you so much for sharing your experience with the decals. Your suggestions make perfect sense and I'm certain that I'll benefit from your insights. BTW, I DO have decals with the "lozenge rip tape," so that will be an additional challenge. Thanks again! jeroen_R90S 1 Link to comment Share on other sites More sharing options...
ivanmoe Posted December 23, 2022 Author Share Posted December 23, 2022 10 hours ago, Greif8 said: Jeroen's advice is spot on, and it is easier than it sounds. Make sure to use plenty of water or Micro set if you use that, to ensure the you can move the decal around better and avoid possible stetching. If the wing tips end up with a small wrinkle or two I would not sweat it as the actual aircraft had wrinkles in that location quite frequently. Ernest Hi Ernest, I've sprayed the wings with Tamiya fine-surface primer, white of course, and am gonna follow-up with a couple of gloss-coats. I'm hoping that will make it easier to position and adjust the panel transfers. Speaking of which... When decaling the upper wing, would it be better to start in the middle and work outward, left and right, with the additional segments? I ask because I wouldn't want to be sailing along, working left to right, thinking it was going great, only to run out of decal at the tip of the wing! In digesting that question, please bear in mind that I've NEVER used decals to cover surfaces this extensively before! Greif8 and jeroen_R90S 2 Link to comment Share on other sites More sharing options...
europapete Posted December 23, 2022 Share Posted December 23, 2022 Yes, gloss coat the crap out of it! Make sure the surface is nice and smooth n shiney! And YES, work from the center out to the tips. Regards, Pete in RI. Greif8, ivanmoe, dutik and 2 others 4 1 Link to comment Share on other sites More sharing options...
ivanmoe Posted December 24, 2022 Author Share Posted December 24, 2022 56 minutes ago, europapete said: Yes, gloss coat the crap out of it! Make sure the surface is nice and smooth n shiney! And YES, work from the center out to the tips. Regards, Pete in RI. Thank you Pete, What really got me thinking about the process was the fact that the tape-border is on the outboard side of all the panel segments. It appears that, if you've gotta lose some decal, that it should come off the non-taped border. I should note that Jeroen alluded to this in his second post, above. Hey, though, thanks to everyone who responded. I'd looked for a YT video on the finer points of applying the Aviattic decals. Regretably, I couldn't find anything of the sort. Definitely might be as useful, or more so, than detailed written instructions. Greif8 and jeroen_R90S 2 Link to comment Share on other sites More sharing options...
europapete Posted December 24, 2022 Share Posted December 24, 2022 Hey! all the you tube competenant forum members take note! Greif8, jeroen_R90S and ivanmoe 3 Link to comment Share on other sites More sharing options...
Greif8 Posted December 24, 2022 Share Posted December 24, 2022 14 hours ago, ivanmoe said: Hi Ernest, I've sprayed the wings with Tamiya fine-surface primer, white of course, and am gonna follow-up with a couple of gloss-coats. I'm hoping that will make it easier to position and adjust the panel transfers. Speaking of which... When decaling the upper wing, would it be better to start in the middle and work outward, left and right, with the additional segments? I ask because I wouldn't want to be sailing along, working left to right, thinking it was going great, only to run out of decal at the tip of the wing! In digesting that question, please bear in mind that I've NEVER used decals to cover surfaces this extensively before! Sorry for the late reply man, I missed your question when you first posted it. With Aviattic decals I always start with the center section and work outwards from there. I also always decal the bottom of the wing first and let that dry overnight to ensure it is bonded well before decalling the top of the wing. Europapete is spot on about having a really smooth surface to decal on. I always buff the gloos coat with a 4000 grit buffing pad to get it glassy smooth. I saw that you asked a question about cutting the decal at the rib tape to avoid overlap. You are correct. I do this with a new (or nearly new) scapel blade and stragiht edge to ensure a nice straight and fresh cut. Ernest europapete, jeroen_R90S and ivanmoe 2 1 Link to comment Share on other sites More sharing options...
ivanmoe Posted December 24, 2022 Author Share Posted December 24, 2022 Thanks Ernest! On the matter of a video, I'm a little surprised that Aviattac's proprietor has never made one regarding the finer points of working with his decals. As much effort as I put into trying to communicate some of this stuff in writing, I still feel as though other readers struggle with my meaning...if they can't see my hands! Hey, though, thanks again Link to comment Share on other sites More sharing options...
jeroen_R90S Posted December 31, 2022 Share Posted December 31, 2022 I also second Pete' suggestion, gloss like crazy or you'll get silvering all under transparant decals I can also second Ernest and Pete's reccomendation to work from the center outwards -as an added bonus, on the top wing, once the middle part has dried you can add 2 pieces in one decal session for a single part. (I always wait a day before doing the next session) Mixing some paint to somewhat match lozenge rib tapes is a bit more work, but due to the irregular looks you could get away with a bit more, too. By the way, I used "normal" Aviattic bolts for the fuselage, I simply photocopied the WNW decals for a template. Although I don't know what kit you have, nor what scheme you have in mind Good luck! Jeroen (not youtube-competent ) ivanmoe and Greif8 1 1 Link to comment Share on other sites More sharing options...
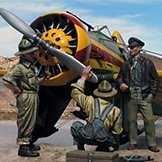
jeroen_R90S Posted December 31, 2022 Share Posted December 31, 2022 Fuzzy and rather poor image (I'm not a decent photographer...) but this also hopefullyshows where the parts should align, especially on the top wing, which is curved on one side and flat on the other. Greif8, Uncarina and ivanmoe 2 1 Link to comment Share on other sites More sharing options...
ivanmoe Posted December 31, 2022 Author Share Posted December 31, 2022 3 hours ago, jeroen_R90S said: I also second Pete' suggestion, gloss like crazy or you'll get silvering all under transparant decals I can also second Ernest and Pete's reccomendation to work from the center outwards -as an added bonus, on the top wing, once the middle part has dried you can add 2 pieces in one decal session for a single part. (I always wait a day before doing the next session) Mixing some paint to somewhat match lozenge rib tapes is a bit more work, but due to the irregular looks you could get away with a bit more, too. By the way, I used "normal" Aviattic bolts for the fuselage, I simply photocopied the WNW decals for a template. Although I don't know what kit you have, nor what scheme you have in mind Good luck! Jeroen (not youtube-competent ) Hi Jeroen and thanks for your help. I've got the Wingnut/Goering D.VII F and was going to try and convert it to a plane flown by Erich Lowenhardt: Ostensibly a plane built by Fokker, I selected these decals for the job: I really want to get the leading edge matched up as best as I can. There's a small amount of scalloping baked into the trailing edge on this set, so, fingers-crossed, that can work out as well. However, the big challenge is gonna be at the margins where the panels join. I put it that way, because the "lozenge-pattern-tape" would appear to be a genuine bear to match! Your model is gorgeous; Thanks for sharing your pics! Greif8 1 Link to comment Share on other sites More sharing options...
Greif8 Posted January 1, 2023 Share Posted January 1, 2023 I think you will find the decals are pretty easy to work with. The ones you are using have already been cut to size and shape, and joining the individual decals will be pretty easy. I have used Aviattic lozenge decals of this type on three previous builds and thought they were all easy to work with. Ernest jeroen_R90S and ivanmoe 1 1 Link to comment Share on other sites More sharing options...
Recommended Posts
Create an account or sign in to comment
You need to be a member in order to leave a comment
Create an account
Sign up for a new account in our community. It's easy!
Register a new accountSign in
Already have an account? Sign in here.
Sign In Now