Thunderbolt Posted July 13, 2013 Author Share Posted July 13, 2013 Thanks for the encouraging replies everyone! I'll keep you posted. Link to comment Share on other sites More sharing options...
Thunderbolt Posted July 15, 2013 Author Share Posted July 15, 2013 (edited) Tim and others: Your build is excellent, and strikes me as a faithful interpretation of the well-known photo of 500570. The details of the color photo are well reproduced in your model. I disagree however that the fuselage was finished with 81 in the rear and 83 (dunkelgrün) in the front. So many builds of 500570 exhibit that color scheme. The research I read about Mimetall-built Doras in the Japo book seems to contradict that sort of paint scheme. A wavy 81 was applied on the whole fuselage by Mimetall, as well as the W3 underwing 81 painting. Perhaps 83 was applied on the field? I still think that 81 runs the whole length of the fuselage and the difference in appearance owes to the difference in lighting. Or perhaps another factor? See interesting note below. I'm a bit unsure about the shade of 81 to use. There's really three: the super brown kind, the brownish-violetish kind, and the green kind. The green kind is currently applied to the port wing on my current model. It's Gunze. The color photograph of the fighter seem to suggest "super brown" kind of RLM 81 was used on this AC, it especially looks this way to the rear of the canopy. The closest approximation is that made by Hannants in acrylic. It's really brown.The gear doors don't look as brown; they're more the brownish-violetish kind (my favorite shade of RLM 81). In my honest opinion, it appears that all three shades of 81 are present in this very picture (but not necessarily this aircraft): Rear fuselage: super brown 81 (Hannants Acrylic) Forward fuselage: green 81 (Gunze Lacquer) Gear doors: brown-violet 81. (Model Master Acrylic) OF INTERESTING NOTE: it is possible that "super brown 81" was applied on the fuselage and exhaust staining darkened the forward part of the fuselage to make it look like RLM 83 in the most popular photo of 500570, in combination with lighting differences, since light reflected off the differently shaped fuselage surfaces at different angles. Hmm... Thoughts, gentlemen? Edited July 15, 2013 by thunderbolt1988 Link to comment Share on other sites More sharing options...
Thunderbolt Posted July 27, 2013 Author Share Posted July 27, 2013 Update: Been plumbing the engine: port firewall as it stands now. I used brass tubing, hex nuts and lead wire to produce the cuffed hoses/wiring. Should I keep the cuffs and nuts brass or paint them silver? Researching this proved difficult. Link to comment Share on other sites More sharing options...
alberto49 Posted July 27, 2013 Share Posted July 27, 2013 (edited) Great job so far! I don't have any specific knowledge on the subject, but in my business life I learned many things about rubber hoses, if we are talking about them. Rubber hoses are made of rubber, so they are black while the end fitting are very, very often in steel and very, very seldom in brass. In modern industry steel hose fittings are protected against corrosion with zinc plating (so silver colour) but by then I don't know if they did this costly process or left the steel in bare condition. With reference to the above picture, the yellowish colour could mean that those fittings probably were zinc-chromate, still a zinc plating with some chrome added. I hope the above can be of some help. Alberto Edited July 27, 2013 by alberto49 Link to comment Share on other sites More sharing options...
Thunderbolt Posted July 29, 2013 Author Share Posted July 29, 2013 (edited) Thanks alberto, that makes sense. I'll paint them silver soon. Meanwhile, here are some update pictures: I painted the upper wings using my Aztek A470 fitted with the 0.40 mm general purpose nozzle. Camouflage was sprayed freehand without any masking unless a perfectly sharp line was desired (stbd aileron, both wingtips). Both the RLM 76 and 81 are my own custom mixes of Gunze Mr. Color Lacquer. I am satisfied with the overall one of both colors, as well as the finish of the Eduard national insignia mask. My RLM 81mix was roughly 1 part gloss brown: 1 part RLM 75 3 parts: RLM 81. My RLM 76 mix was roughly 3 parts RLM 76 to 2 parts flat white. The gun camera rebuilt using a section of hose from my Aztek airbrush. I crack that thing open a lot, and I know the little blue hose well. When I was thinking about what to use to simulate the gun camera protrusion that I sanded off finishing the leading edge of the port wing, I knew just what to use... Don't worry, my airbrush still works! The wing camouflage was painted after this little bit was glued in place. I will overspray this with RLM 81 as soon as I get a new batch. I made the mistake of thinning Model Master Acryl with water rather than the thinner that was designed for it. This made spraying RLM 84 a very arduous task. The port fuselage repaint attempt came out horribly so I removed the paint with my fingernail and re-did the rivets with the MDC rivet tool. I was careful not to punch through the thin wall from the Eagle Parts Resin Cockpit. Edited July 29, 2013 by thunderbolt1988 Link to comment Share on other sites More sharing options...
LSP_Kevin Posted July 29, 2013 Share Posted July 29, 2013 Very nice progress mate! This is going to look super when it's done. Kev Link to comment Share on other sites More sharing options...
dsahling1 Posted July 29, 2013 Share Posted July 29, 2013 nice work so far Link to comment Share on other sites More sharing options...
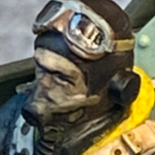
Thunderbolt Posted July 30, 2013 Author Share Posted July 30, 2013 Thanks guys. Here's some more: Link to comment Share on other sites More sharing options...
Martinnfb Posted July 30, 2013 Share Posted July 30, 2013 Ho,hooo I almost missed out this spectacular build. Way to go! Cheers Martin Link to comment Share on other sites More sharing options...
Thunderbolt Posted July 30, 2013 Author Share Posted July 30, 2013 That means a lot coming from you, Martin. Your Dora ranks highly among those that I consider the standard to aim for. Link to comment Share on other sites More sharing options...
Out2gtcha Posted July 30, 2013 Share Posted July 30, 2013 Wow! Great looking build! Really like the looks of your Dora so far. Link to comment Share on other sites More sharing options...
Thunderbolt Posted August 1, 2013 Author Share Posted August 1, 2013 Thank you! Link to comment Share on other sites More sharing options...
Thunderbolt Posted August 1, 2013 Author Share Posted August 1, 2013 A question for any and all who are following this: do you have a pair of the smooth-tread tire wheels that come with the kit? I lost one pair of halves and my kit wheels are useless. This particular a/c had smooth tread tires and the ones from the kit would be perfect. If anyone has a set they didn't use because they used a resin substitute, I'd be willing to pay $5 for them. Wheels from either the A-8 or D-9 kits will be perfect. Thanks in advance! Link to comment Share on other sites More sharing options...
Thunderbolt Posted August 6, 2013 Author Share Posted August 6, 2013 (edited) updates! I had to scratchbuild a part, but I don't know what it's called. It's part of the front engine cowling and it's really curvy. It isn't included in the Aires detail set for some reason. It really adds to the detail of the engine. FM Details includes it in 1/48; once I saw it my 1/32 Aires detail set felt very incomplete. I used the Fw 190D-9 Parts List to make it: It's barely visible in the list and it's only on one page that I've shown in the picture below. I had to print it, trace the scant outline with a marker, scan the image, resize it, print it, cut out the tracing, glue it to plastic card, spray over it, remove cut paper tracing, then use x-acto knife and dremel to cut it out and sand it smooth. Four hours. Well spent! I also removed all the cowl flaps, bent them to a much more ellicptical shape and glued them all back on, one by one. The cowling is much improved now. The keen observer will notice the scotch tape i laid over one of the flaps to decrease the size of a gap Edited August 6, 2013 by thunderbolt1988 Link to comment Share on other sites More sharing options...
Nic C.D. Posted August 6, 2013 Share Posted August 6, 2013 That is really impressive work on this dora. I like the engine plumbing a lot. This enigine is going to look fantastic! The work you are doing and the photos you are posting are going to help a lot of modellers. I plan to build a D9 one of these days, and this build will be a good guide ! Looking forward to the finished kit! Nic Link to comment Share on other sites More sharing options...
Recommended Posts
Create an account or sign in to comment
You need to be a member in order to leave a comment
Create an account
Sign up for a new account in our community. It's easy!
Register a new accountSign in
Already have an account? Sign in here.
Sign In Now