
LSP_Kevin
-
Posts
48,529 -
Joined
-
Last visited
-
Days Won
281
Content Type
Profiles
Forums
Events
Everything posted by LSP_Kevin
-
If I remember rightly Russ, it's a reboxing of the Hasegawa kit. I think all the Frog 1/32 kits were. Kev
-
Two. Days. Two Days? I wish I could build like you Rick but I'm not you, so I'll have to stick to taking months to do what you can do in...wait for it...two days! Holy excrement Batman! Kev
-
Go for it Rick. Line 'er up and kick 'er off! Kev
-
Only if you spell it correctly Keith! Kev
-
Yeah, the Aussies won the Americas Cup, in eighty-something. They turned up in a contraption made of empty beer cans (XXXX among them), and towed behind a '74 Torana. Bob Hawke proclaimed it National Hangover Day and the boat was subsequently cashed in at the recycling depot for $47 - that's 11 slabs in eighty-something money (a slab = 24 beer cans/bottles). We haven't won one since. In fact, I don't think we've ever been invited back... Russ, anything but Telstra. Kev
-
They certainly look pretty good in the photos Loic! Great work mate, and great perseverance too! Kev
-
That is so cool Russ! Subtle mods indeed... What's happening with the pancake buddy? Kev
-
Wonderful work Barry. I can't believe how good your deployment frame looks! Kev
-
Lovely work Matt, it looks really nice. Something a little different as well. You have a nice touch with weathering too. Kev
-
Wow Bekim, I am speechless! Do you have a milling machine at home, or access to one at work? The results are amazing. Kev
-
Good work mate. It's nice to see such courageous builds. Kev
-
Very nice indeed Den, just as we've come to expect from your excellent builds. Kev
-
Well done Peter, it looks great! You're the first of us failures to redeem himself! Kev
-
 Wow, a late entry, but a very interesting one! I can hardly believe the difference in detail between the kit wheel bay and the resin one. You're certainly not scared of a challenge! Kev
 -
Great work Harv! I'm looking forward to following this one closely. Welcome to the GB! Kev
-
Wonderful result Russ, just wonderful. I can only echo what everyone else has been saying about the speed and quality of your builds. Great job mate! Kev
-
Lovely work Russ. Who's getting this one? Kev
-
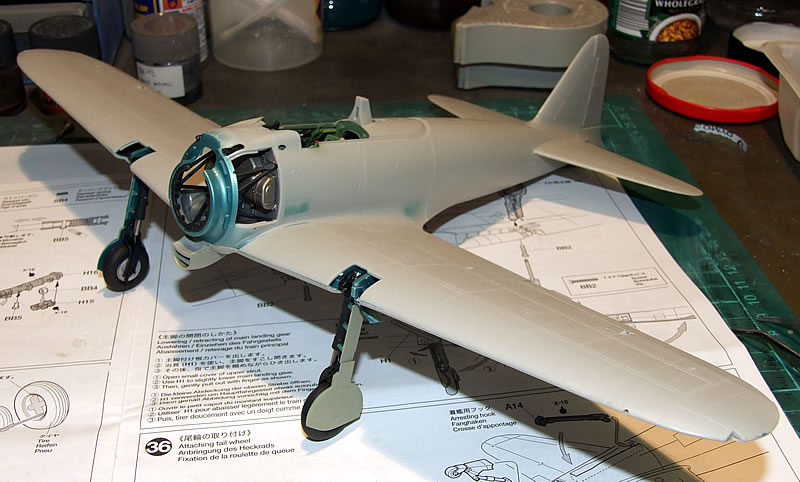
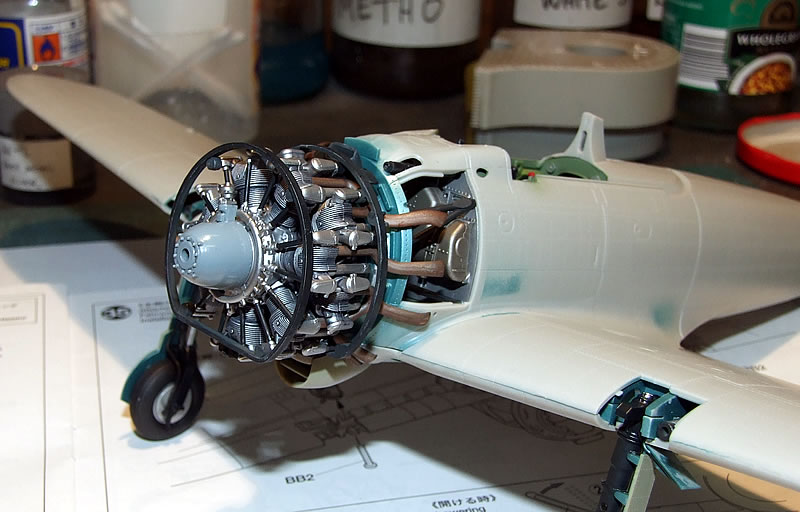
OK, one last update before this is flipped over to the new GB. I've been working on it sporadically, and have achieved more than I thought since the last update. Here's an overall shot of the current state of the thing: Front on: Here's a shot with the engine test-fitted: And a close-up of the landing gear detail: Still needs some touch-ups here and there, but for anyone who hasn't built this kit, the engineering of the landing gear is astounding. The oleo is actual metal, embedded into the plastic wheel fork. A spring and a nut are mounted inside the compression leg, and once it's all assembled and the retaining pin inserted (a rather tricky procedure!), the legs will actually compress on their oleos when the model is sitting on its undercarriage. Even the scissor links work. The legs also rotate into their respective wells, and the gear doors close in a fashion that mimics the real thing. Amazing. Simply amazing. Kev


-
Cool, another Bearcat. See you on the other side Russ! Kev
-
A Mustang - you're a brave man Russ! In a couple of days we'll all be migrating en masse to Dave's new GB, so I'll look for you there! Kev
-
Love it Matt. Kev
-
Hmm, Lucky Model here I come! Kev
-
I hope that's an anomaly Steve! The suggested price in Euro/US Dollars is way less than that (though I can't remember exactly what it is). I reckon we should be able to get it locally without the '1' in front... Kev
-
Go for it Harv. Your only impediment now is time! Kev
-
Very nice cockpit Rick, very nice indeed! Kev