
BloorwestSiR
-
Posts
6,521 -
Joined
-
Last visited
-
Days Won
38
Content Type
Profiles
Forums
Events
Posts posted by BloorwestSiR
-
-
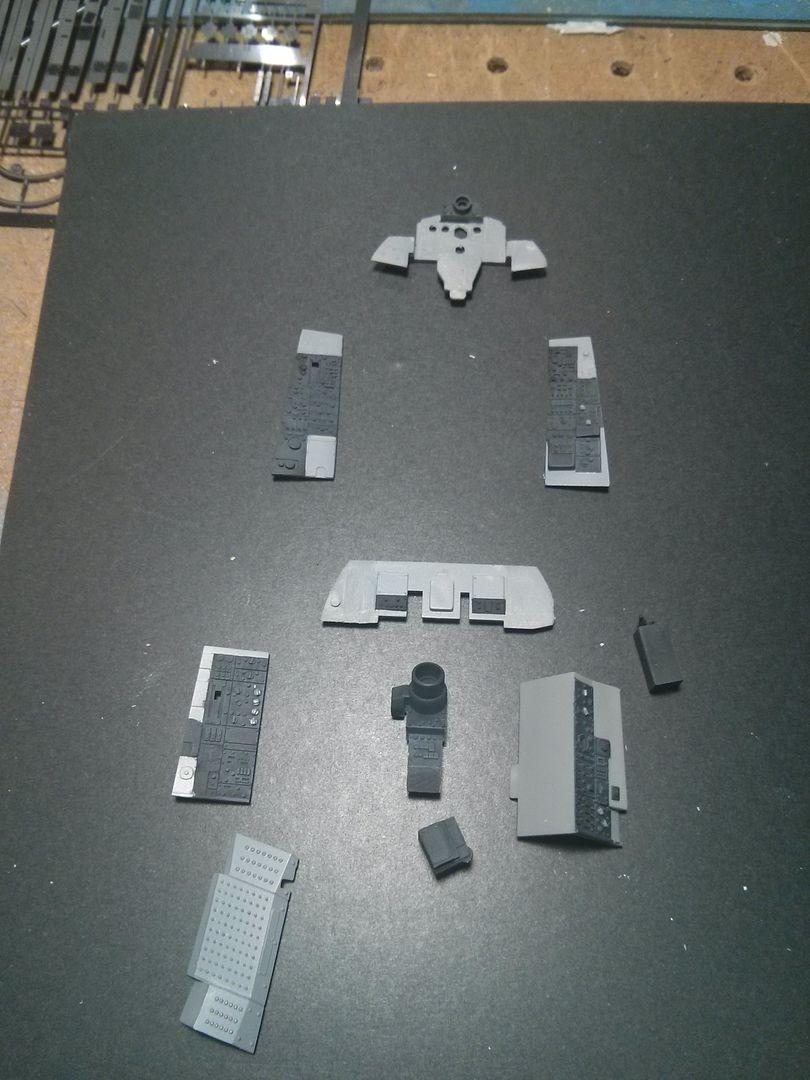
I airbrushed on Tamiya Nato Black thinned with their lacquer thunner.
Here they are with the tape removed:
Now for the reason I haven't made any progress over the last 3 days...
...It's not as bad as it seems...
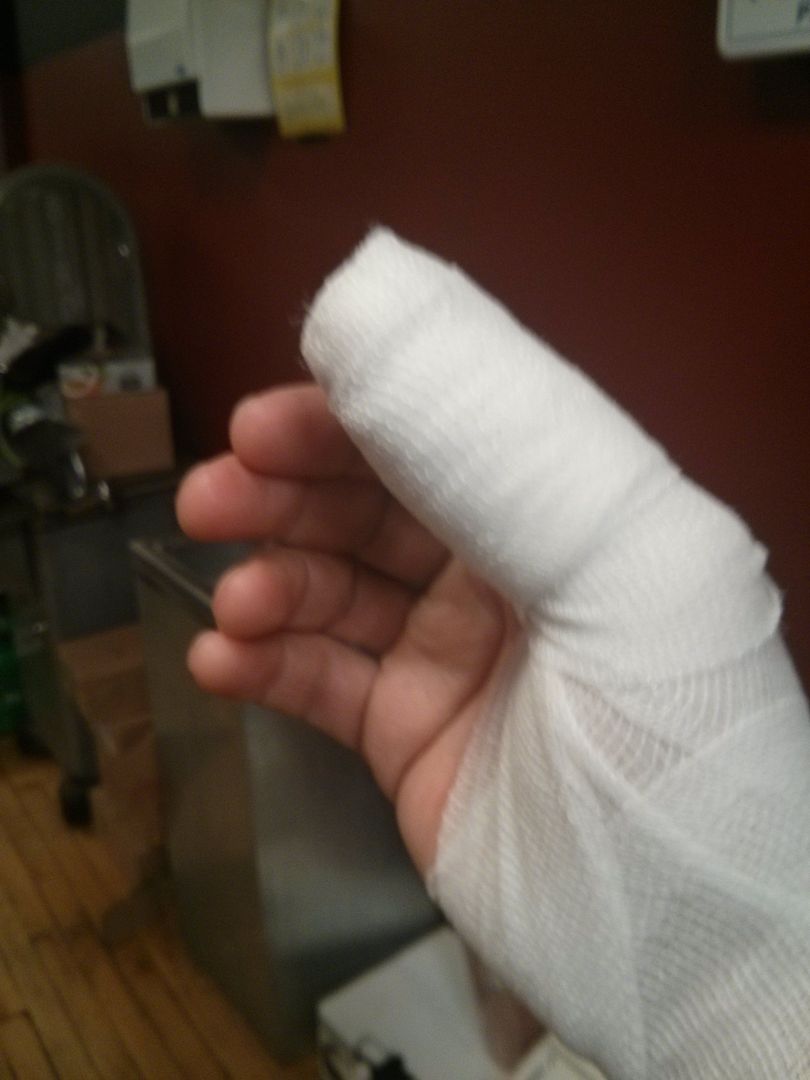
I still don't know how, but I managed to give myself a nice 1" long cut down my thumb. The odd part is I was holding the knife (a 12" scimitar for butchering) in the same hand when I cut myself. Of course I had a chainmail glove on my left hand to prevent cuts. Go figure.
The good news is it is healing well so I should be back at the bench later this week I hope since I'm really getting into this build.
Carl
-
Thanks Harvey, your F-4 in the Vietnam GB is great. You're certainly fixing and adding more details than I plan to.
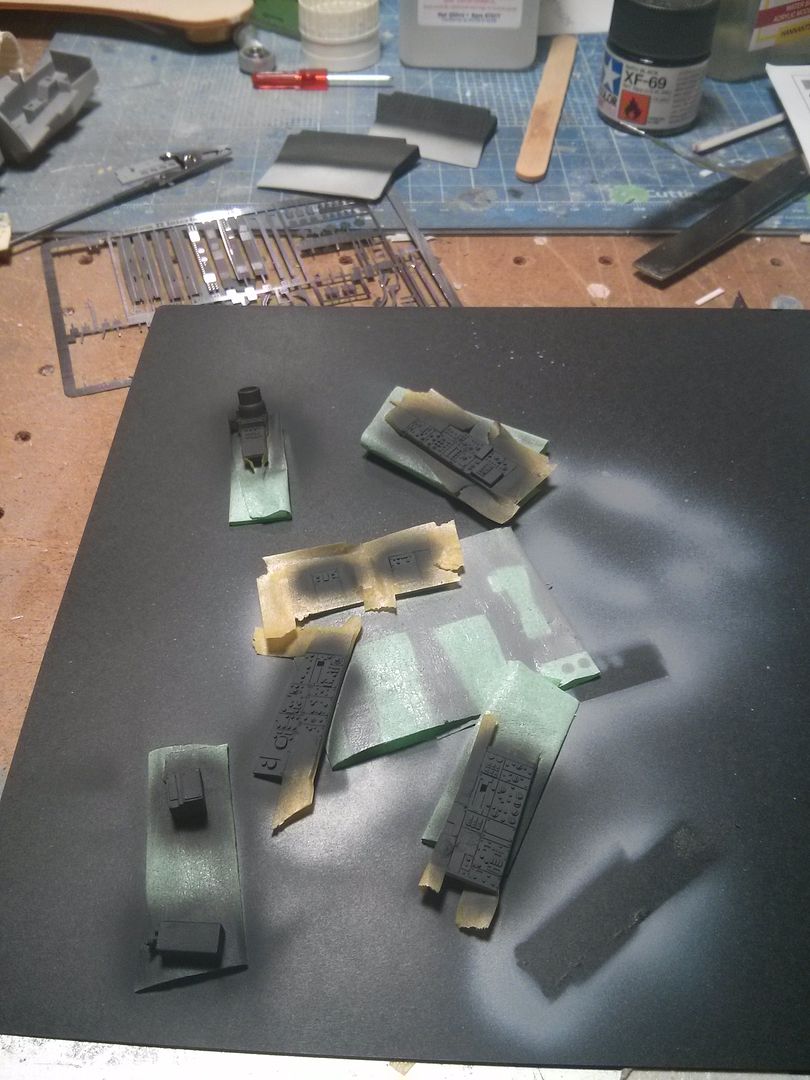
Here's a quick update from work I completed a few days ago.
I attached the MLG bay walls to the lower wing. I had to add a couple shims at either end of the moulded in bulkhead to fill in the gaps.
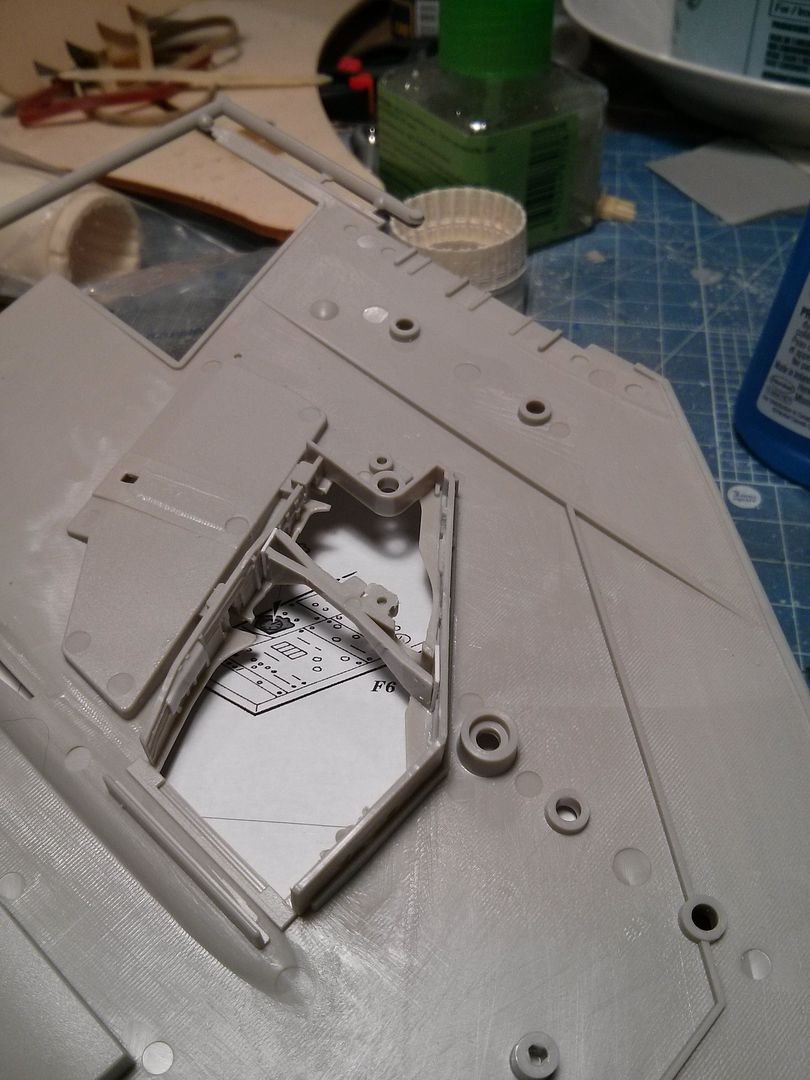
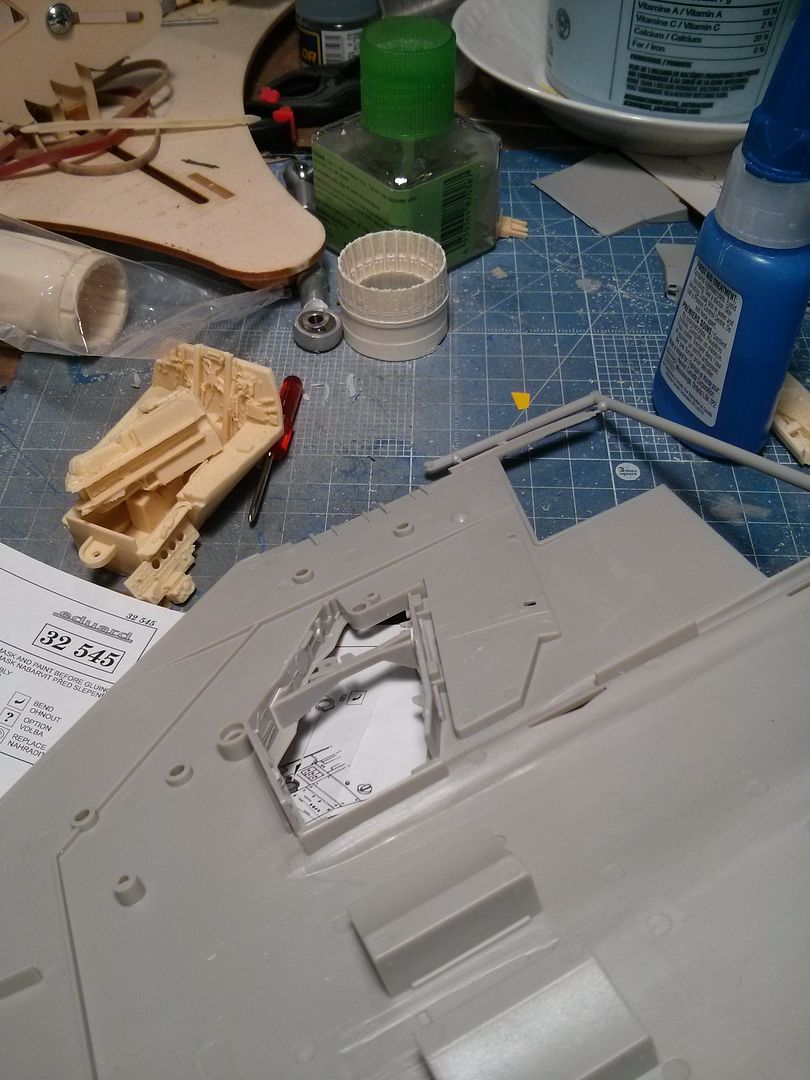
Following the Eduard instructions, I removed some of the raised details from various cockpit panels.
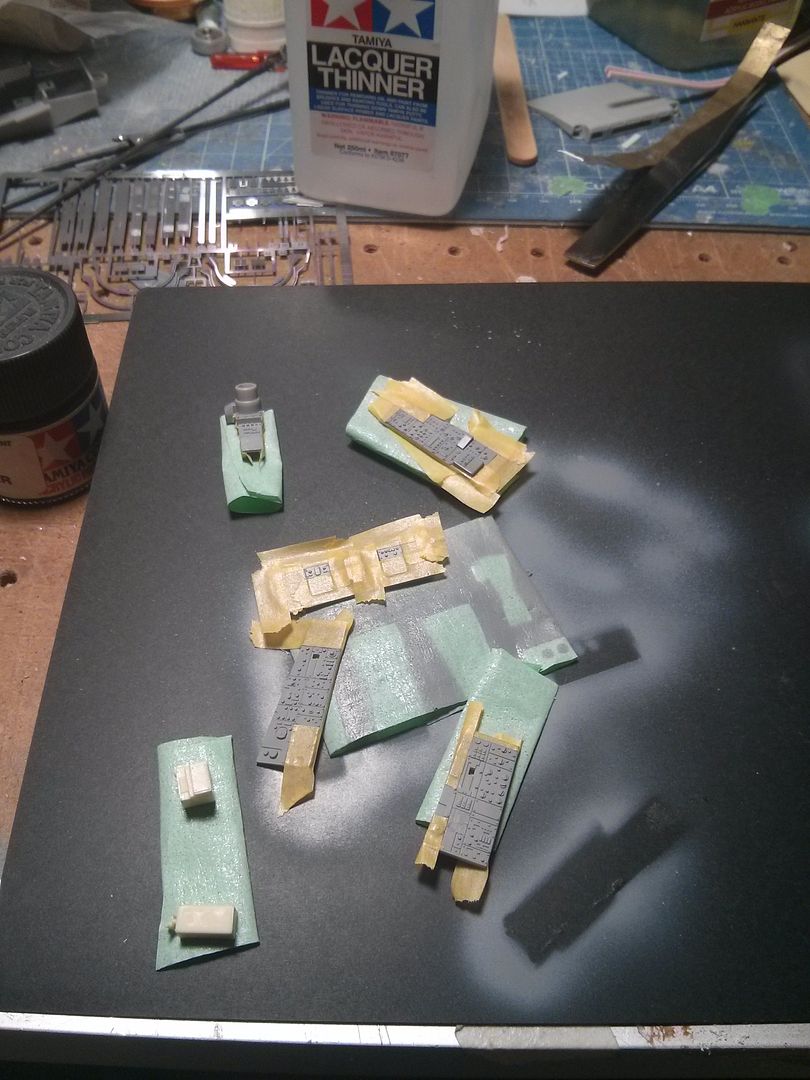
I airbrushed on a coat of Xtracrylics Neutral Grey as it seems to match the grey on the Eduard PE. Then I masked off the panels in preparation for the black sections. This was done using various widths of Kabuki tape.
-
Hasegawa scans are sent to Jeroen...

Thanks, I haven't had a chance to get mine scanned so I'm glad someone else did.
Carl
-
Hobbycraft went bankrupt a couple of years ago. From what I understand, some former staff took over what was left and brought it back to being a distributor. I haven't heard if they plan on re-issuing any of their kits.
Carl
-
Hi Jeroen,
Nice review, I have the Hasegawa kit so I will try and scan the instructions for you tomorrow.
Carl
-
With what you have, I'd be inclined to go with using the Cammet low back conversion set with the PCM XIV kit. That way you have the correct rudder in place already and just need to deal with the spine. Plus I believe the low back conversion was designed with the PCM IX kit in mind.I'd be interested to see any completed low back Mk XIVe's in 1/32, and details on how you did the conversion. I really want to build the one that raced in Cleveland in 1949 as Race #80. I've picked up a couple of the PCM XIVc's, a PCM IXe with the Cammett XVI conversion, a Tamiya XVIe, a Hasegawa Vc, a Revell Mk I/II, Matchbox / Revell Mk 22/24's, and the GMF XIVe conversion, and the Mk 22/24 upgrade. Hoping to be able to produce something acceptable out of that pile of plastic and resin. I thought the GMF resin pieces looked quite nice, but their vacuform canopy was a bit of a let down. It's got some striations that are visible, and a little bubble that looks like there's a pock mark in the mold. They sent me another canopy when I mentioned the problem, but it was the same as the first one.
How would you get just the clear sprue for the Tamiya XVIe? That might be the best way to do this, combined with the GMF resin and the PCM XIVc. Since the racer had the weapons removed and faired over, I'm not that concerned about the "E" wing vs. the "C" wing.
The wing on the PCM XIV kit has the cannon bulges as separate pieces from the wing so just install them in the outboard position and do the same with the cannon barrels to make an "e" wing.
As for the Tamiya canopy, if you're in the US, contact Tamiya America directly and they will sell you the clear sprue separately.
Hope that helps,
Carl
-
-
Thanks Harvey! It lookes like your well wishes worked since I haven't recovered this quickly from a chest cold in years.
I managed to get some more work done on the kit. Not a lot, but it is progress.
Anyways, I added the panel that covers where the Navy refueling probe goes and filled in the seams with a bit of CA. It's all smooth and ready for a quick coat of paint before I install the intakes and the splitter panels. This should make painting the rest easier.

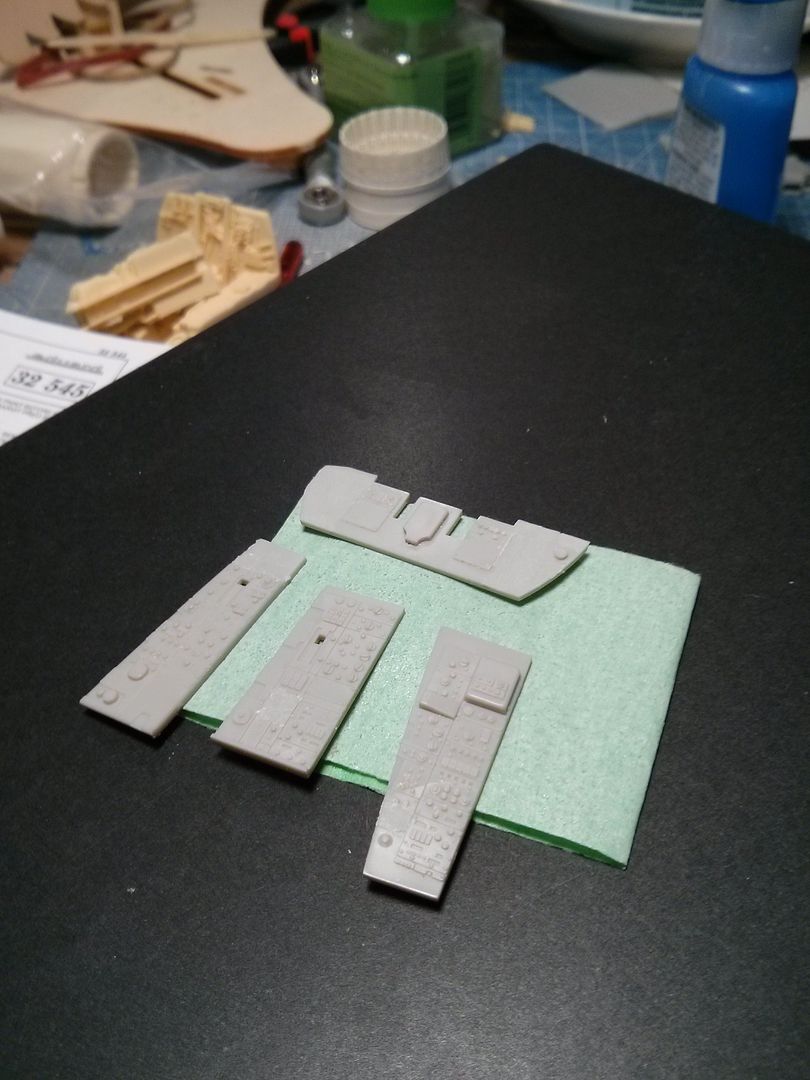
I also sanded down the IP panels in preparation for the Eduard printed ones. At the same time, I added the ones that go on either side of the cockpit tub near the crews' feet.

Now off for a bit of Halo Master Chief Collection (ducks for cover)
Carl
-
She is a brunette Carl ... or at least her hair is darker in shade than the one on the Left ... nice weathering too!
Rog

Goes to show what happens when you're colour blind.

Carl
-
I had the Testarossa kit they did in the early'90s. I made a complete mess of it when I decided to repaint the body (the body was three different shades of red)and cover the seats in thin leather as the molded on texture was horrid.
There is a build thread on Britmodeller of the Lambo that might be worth checking out.
I'm currently very tempted by the 1/12 Porsche 956 that's coming later this month from Model Factory Hiro but with shipping and tax, it's close to $800CDN.
I usually go for brunettes but here, I'll have to go with Clunk and Rog on the pit crew.
Carl
-
Thanks everyone for the comments. Sadly, I haven't had a chance to work on anything the last couple of days due to a bad chest cold. Won't get into the gory details but I'm going to have to stay away from the work bench for a couple more days until I'm better.
Carl
-
Maybe, but that doesn't make sense in light of them having their own new-tool P-39 kit. Perhaps they were re-boxing the Monogram for the Japanese market prior to developing their own.
Kev
That was probably the case. You're right in that I can't see them doing it once they had their own kit.
OK, so in 1/32, have we any concerns? 1/48 is so ...not 1/32.
Maybe the old Matchbox kits that Revell has the molds for? But I think most people know which ones those are.
Carl
-
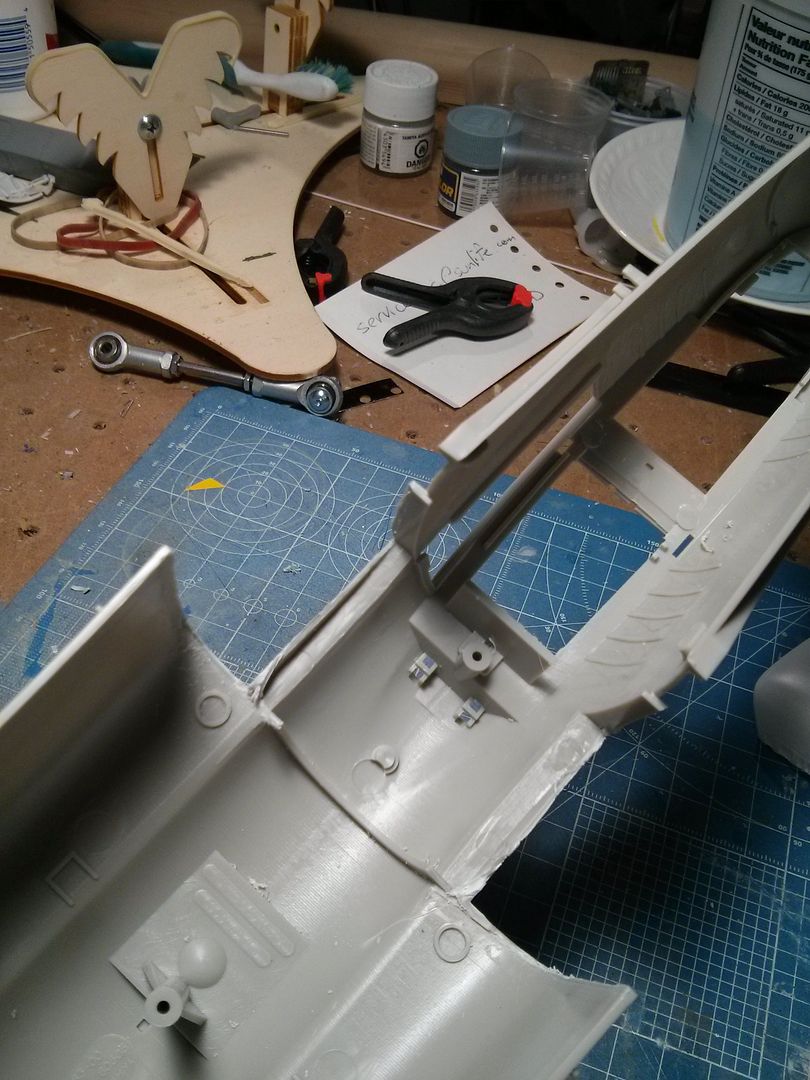
I started with the fuselage by removing most of the BDR patches and panels. I used an X-acto to scrape the raised panels off and then sanding sticks to finish and smooth the fuselage.
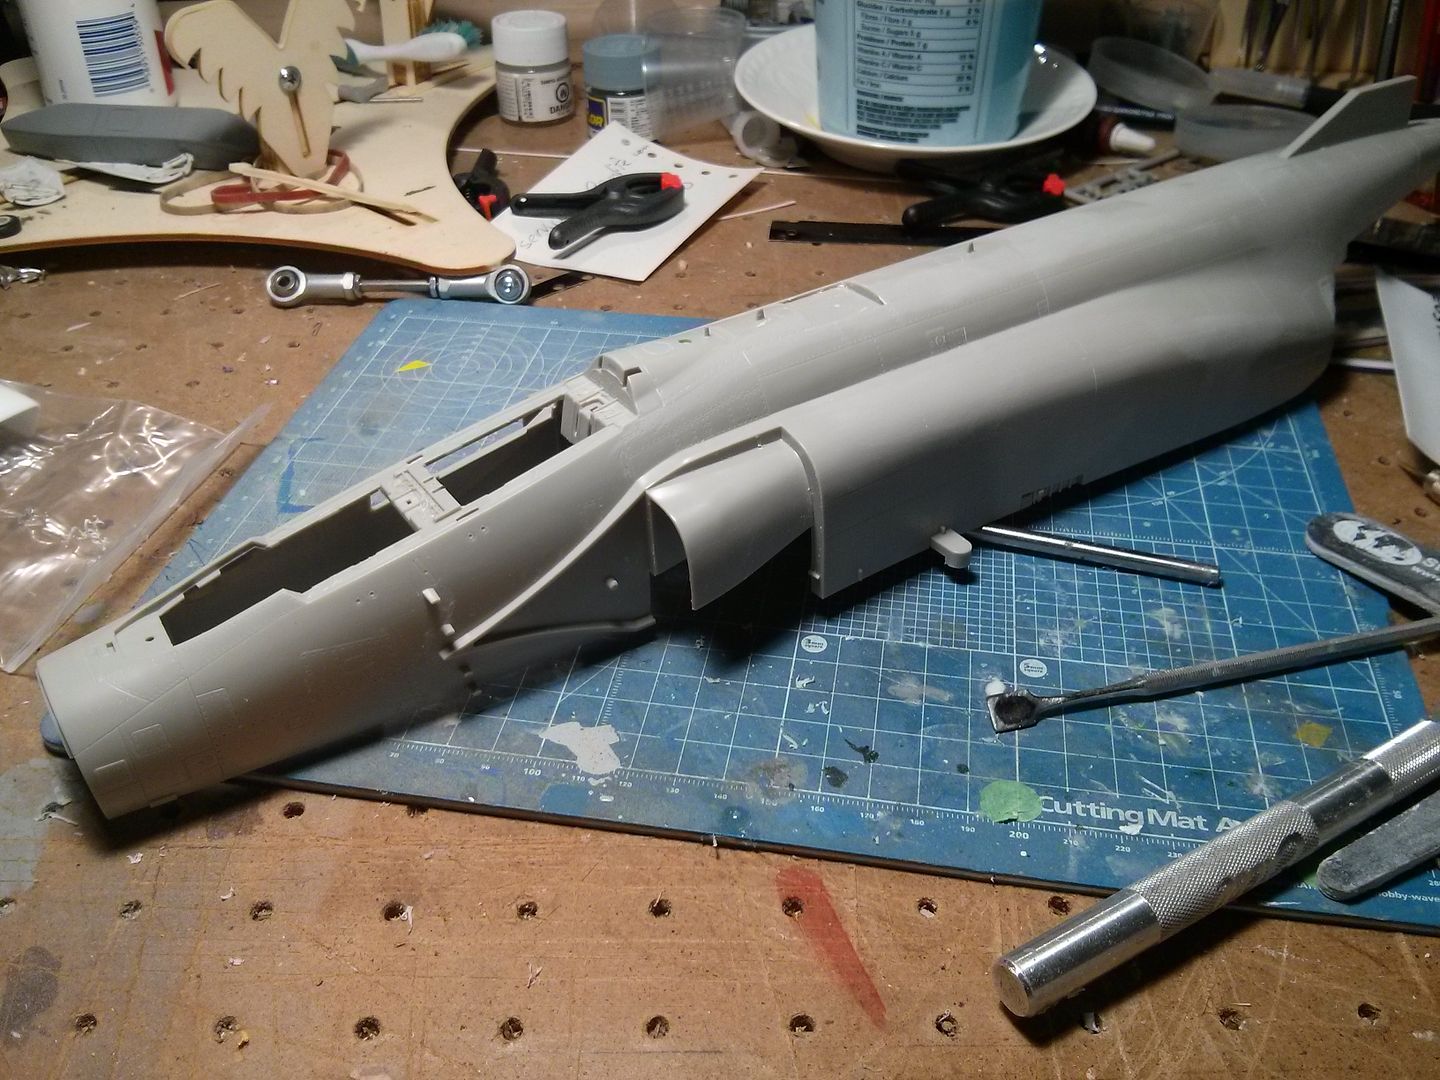
I then proceeded to remove the kit intake trunking in preparation for using the seamless intakes. I used an panel line engraver to slowly cut through the plastic from behind. This seemed to give me the best control as well as cleaner results compared to my last time when I used a razor saw.
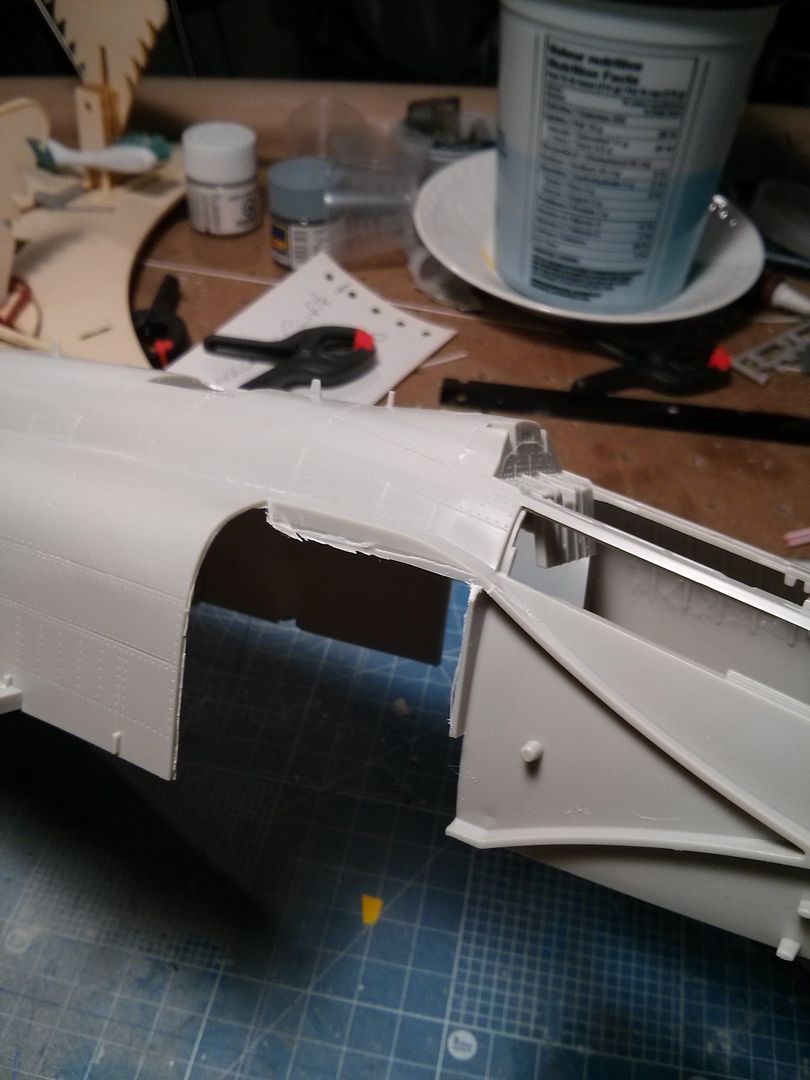
I was even able to get them out in one piece:
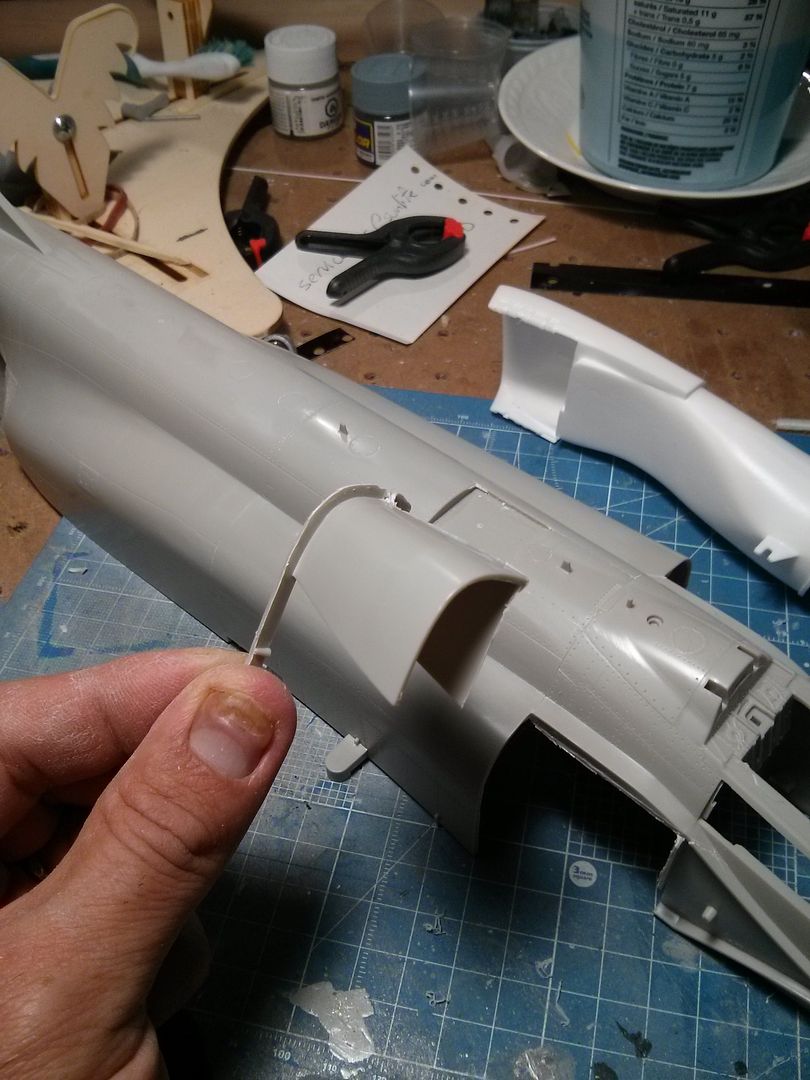
Where I ended up after 45 minutes of work:
Now back to the UH-1 tonight.
Carl
-
Well, since it looks like I'll be able to finish the UH-1 in time, I've decided to start a kit that at least I have some familiarity with how it goes together.
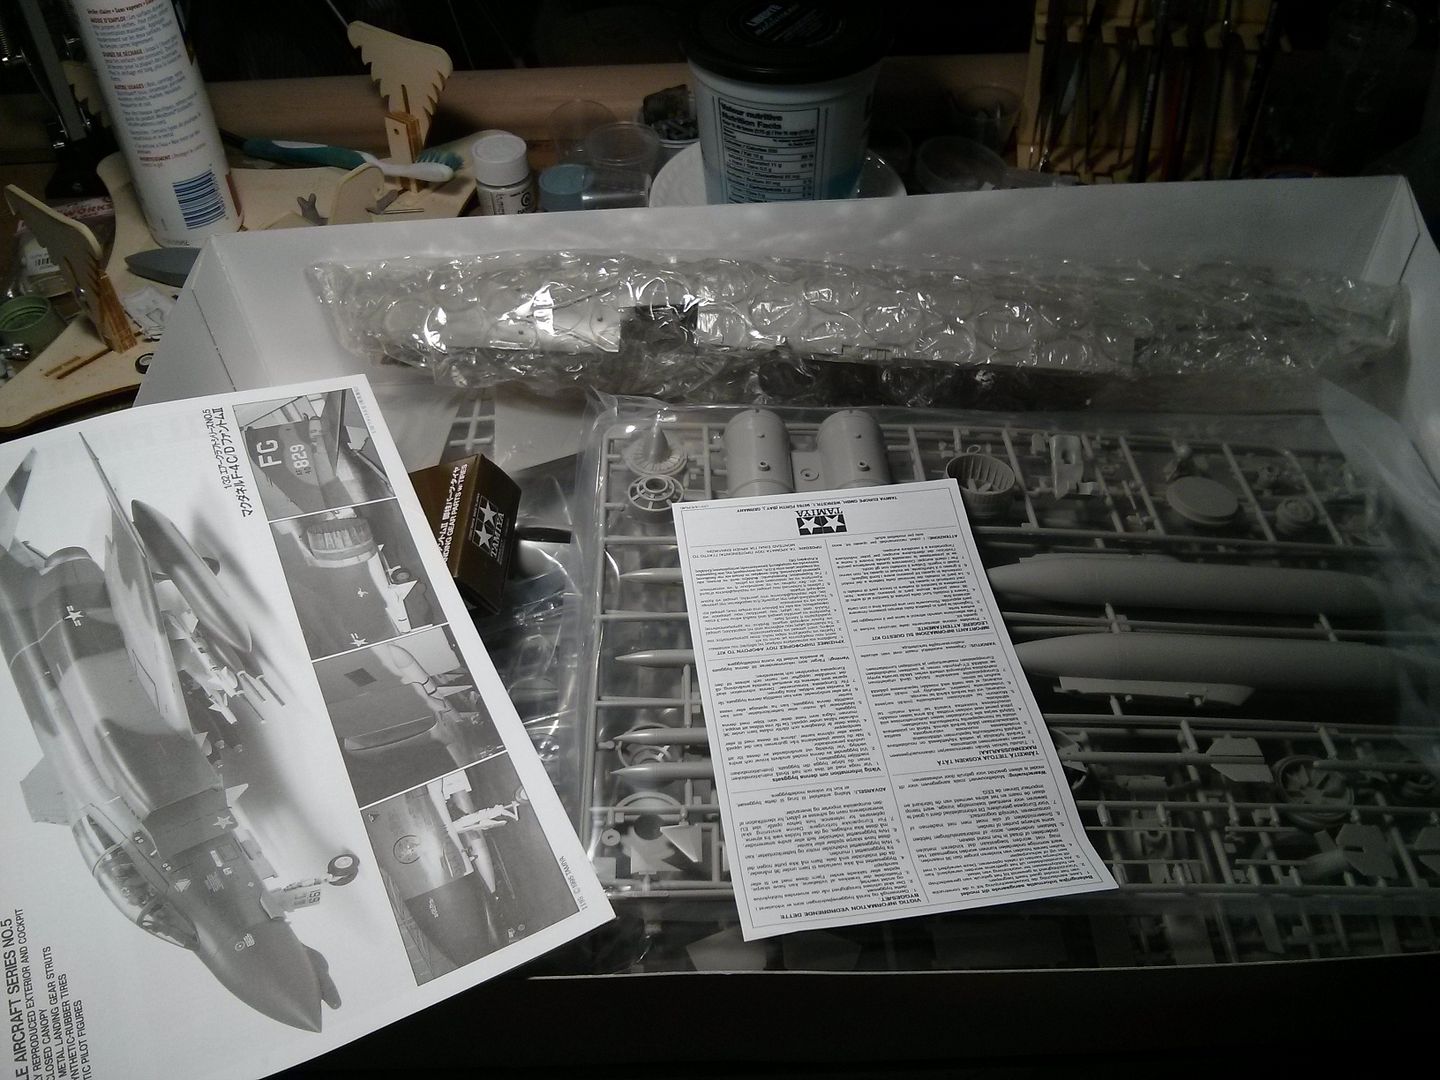
This will be my third Tamiya Phantom and my first D model. I plan to work on it during the down time while the UH-1 is drying or when I want something a little more painless.
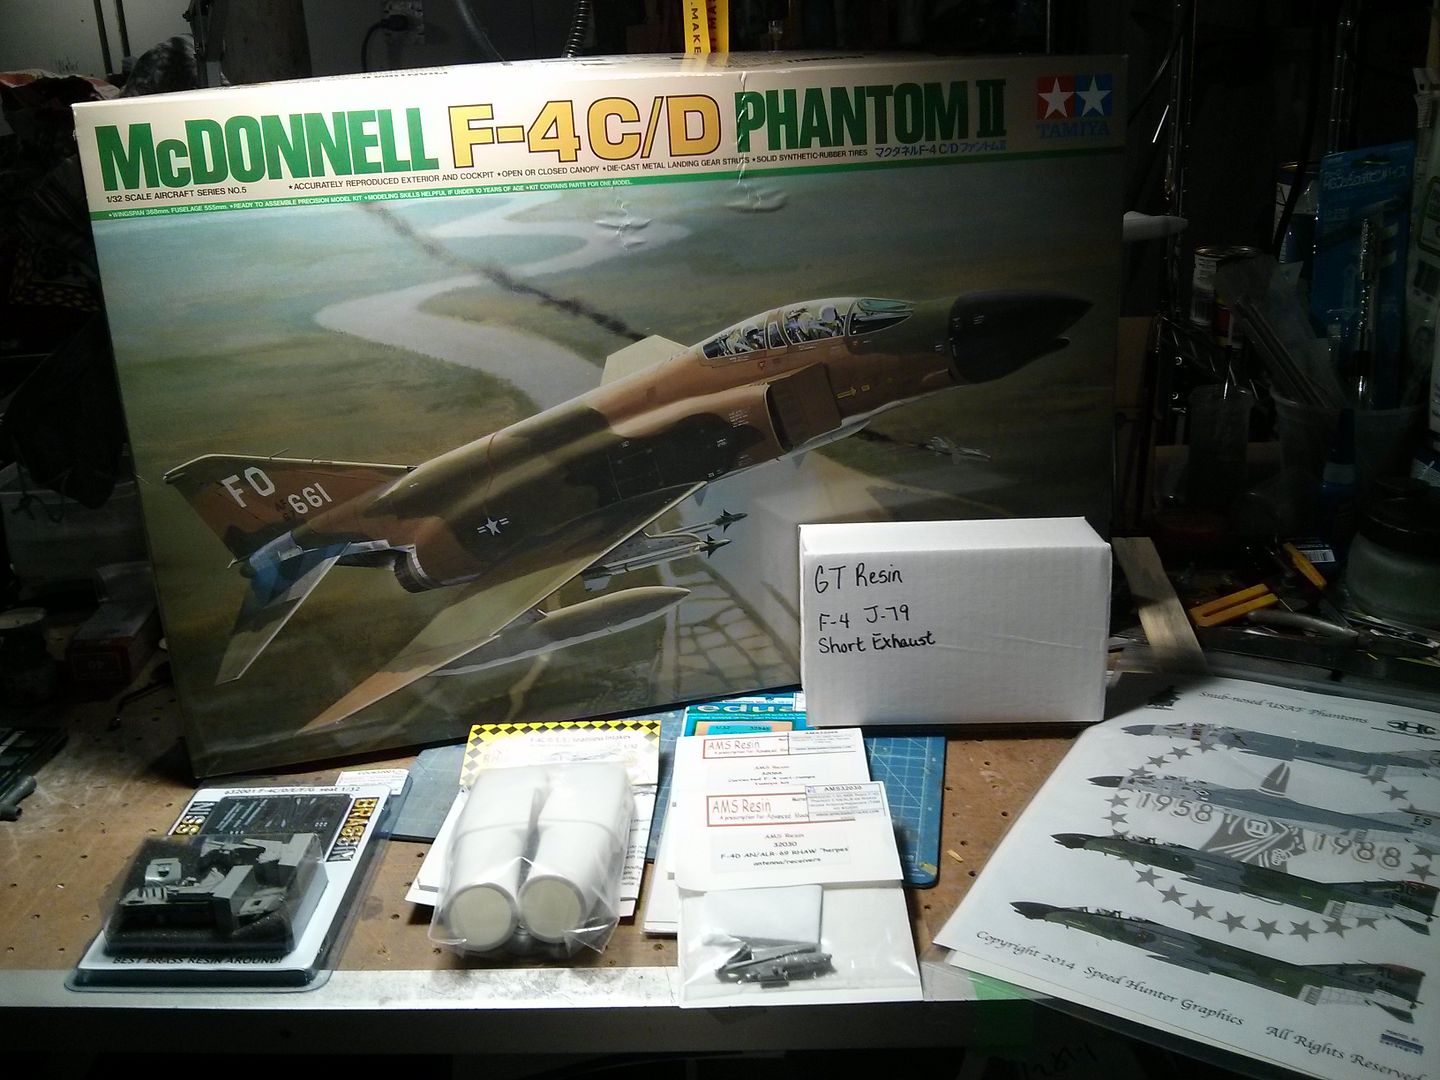
I will be building it as the London Int'l Airshow version as I was fortunate enough to see the plane in person. In addition to the Speedhunter decal sheet, I have Rhino intakes, GT Resin exhaust cans, Eduard bang seats and cockpit PE, and AMS splitter ramps and chin pod.
Carl
-
Yeah, I don't recall Hasegawa ever releasing the old Monogram P-39.
Kev
I don't either but it is entirely possible that it was for the Japanese domestic market. I believe that Hasegawa is the Japanese distributor for Revell/Monogram and will often re-box their kits with new box art.
As for the original topic, as long as I know what I'm getting I don't mind a re-boxed kit. Hopefully the added bonus is a lower price.
Carl
-
-
-
All that's left is to make the excavator arm for the back and I'll be done just in time for tomorrow.
Carl
-
Our 18 month old decided to check out what I was doing and helped himself to a kit on the shelf.

When my wife saw the photo, I told her there's enough in my stash he won't need to buy any kits. I don't think that brought her any relief.
So back to the costume, I cut out the eyes and mouth from think card and covered those with white vinyl:

I used screws to attach the arms to the dowel so they could pivot.

-
Thanks everyone! My boys certainly keep me on my toes that's for sure. My wife loves how I make use of my model building skills and tools on something for the boys.
I made a lot of progress last night but couldn't get into the website for some reason.
However, I did start off with a slight technical malfunction. The bottle of PVA glue I'm using ended up with a blocked nozzle. This meant that when I squeezed the bottle instead of glue coming out of the nozzle, this happened:

Thankfully it all wiped up but I can only imagine the carnage if that had been cement on a plastic model.
I made the front blade and used paint stirring sticks as the arms.

-
-
Here's the main body in the midst of being covered with vinyl.

I'm using blue to represent the open sections of the cab.
Since Scoop has a dozer blade on the front, I decided to reinforce the smaller front box and drill through it for a wood dowel.


This will also allow me to make the dozer blade move up and down.
-
Using our nice China as a template, I cut out four circles for the main wheels.

My wife keeps wondering why she's finding plates on my workbench.
I then used adhesive vinyl to cover the cardboard. I then cut out some additional circles to be bolts and hub.

The nice thing about the vinyl is that it makes the costume weather proof.
-
Next, to be able to join the two boxes securely I added a couple of cardboard braces. These give me a large gluing surface as well as act as guides for attaching the smaller box.

This is the two boxes held together by friction over those braces.


Where are Hobbycraft kits?
in LSP Discussion
Posted
I think Wheels and Wings in Toronto had the Sea Fury kits in their basement. You could email them and ask. Ivan from the store is on here to do you could email him as well.
Hope that helps.
Carl