Zorro Posted November 9, 2022 Author Share Posted November 9, 2022 Day 38 of my build, I created NVG compatible Cockpit Map Lights for both the Pilot and Co-Pilot stations from scratch. I will add the switches and decal labels and mount them. LSP_Kevin, Landrotten Highlander, Greg W and 2 others 5 Link to comment Share on other sites More sharing options...
Zorro Posted November 10, 2022 Author Share Posted November 10, 2022 Day 40 Hardware Installation. Added the extended H-Bar making it ready for the Fast Rope. Added the Cockpit Map Lights and tubing and wiring that surrounds the center windshield. Next, I will drill the three holes and add the clear dump tubes to the transmission cover. I still need to add a few black and white electrical boxes and wiring harness ties. I plan to add the clear access door above the GN's head, and a whole bunch of communications and steel cables. Adding layers to this onion has been fun, even if it has taken me over a month. Rockie Yarwood, Landrotten Highlander, LSP_Kevin and 2 others 5 Link to comment Share on other sites More sharing options...
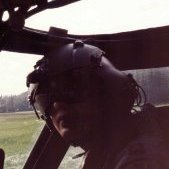
Zorro Posted November 11, 2022 Author Share Posted November 11, 2022 I took this photograph of my MH-60G Pave Hawk II during Operation TASK FORCE HAWK circa June 1999. Rockie Yarwood 1 Link to comment Share on other sites More sharing options...
Zorro Posted November 11, 2022 Author Share Posted November 11, 2022 Day 41 adding the transmission dump tubes. I filled the tubes with Brer Rabbit Molasses to stain them making it look like used fluids and rain water being dumped overboard. Sasha As, matt_1185, Rockie Yarwood and 4 others 7 Link to comment Share on other sites More sharing options...
Zorro Posted November 12, 2022 Author Share Posted November 12, 2022 Day 41 transmission panel dump tubes installed and combined, next seal and paint. Greg W, Landrotten Highlander and Rockie Yarwood 3 Link to comment Share on other sites More sharing options...
Zorro Posted November 20, 2022 Author Share Posted November 20, 2022 (edited) Day 50 of my build, I decided to scrap the previous attempt and build from scratch the actual collection point for all three tubes. I particularly like the way the dump tube retaining clamps came out, they literally attach the dump tubes to the cabin ceiling and appear exactly like the real thing, even thought nobody will later notice during exhibition. Next, more paint. I also added the plexiglass cover with actual retaining knobs over the gunner's head. I left it open, as that is the way we always flew it (the knobs never worked). These challenges are fun, time consuming, but fun. More to follow... Edited November 20, 2022 by Zorro Grammer Errors LSP_Kevin, Landrotten Highlander and Greg W 3 Link to comment Share on other sites More sharing options...
Zorro Posted November 20, 2022 Author Share Posted November 20, 2022 (edited) Day 50 a forest of parts is appearing in my studio. I am excited about making them come to life. The best part about this build is the memories that it brings back from the real thing. "These Things We Do, That Others May Live." Edited November 20, 2022 by Zorro Spelling Error Greg W, LSP_Kevin, Sasha As and 1 other 4 Link to comment Share on other sites More sharing options...
kike_gt Posted November 20, 2022 Share Posted November 20, 2022 On 11/11/2022 at 5:12 PM, Zorro said: I took this photograph of my MH-60G Pave Hawk II during Operation TASK FORCE HAWK circa June 1999. Have you already found the correct nose cone for your particulary Pavehawk? the one with the kit is not correct AFAIK Link to comment Share on other sites More sharing options...
Zorro Posted November 20, 2022 Author Share Posted November 20, 2022 I have not found the correct nose cone. I may need to make it from scratch. If you know where I can order the correct scale nose hood that would allow the radar dome to be added, is greatly appreciated. Zorro Link to comment Share on other sites More sharing options...
Zorro Posted November 20, 2022 Author Share Posted November 20, 2022 18 hours ago, kike_gt said: Have you already found the correct nose cone for your particulary Pavehawk? the one with the kit is not correct AFAIK I have the correct color radar dome. I do not have the faring that connects it to the avionic hood. Link to comment Share on other sites More sharing options...
Zorro Posted November 20, 2022 Author Share Posted November 20, 2022 Day 51 and the cabin ceiling is coming along slowly but much more accurate. I added the connecting valve for the drain tubes. Next the white safety straps and steel cables. I also have to add the NVG cockpit light, Fire Handles, and Fuel Transfer Levers (not to mention all the switches on the overhead panel). Landrotten Highlander, scvrobeson and matt_1185 3 Link to comment Share on other sites More sharing options...
jmel Posted November 21, 2022 Share Posted November 21, 2022 Really cool stuff!! I love all the additional details you're adding. Jake Zorro 1 Link to comment Share on other sites More sharing options...
Zorro Posted November 21, 2022 Author Share Posted November 21, 2022 55 minutes ago, jmel said: Really cool stuff!! I love all the additional details you're adding. Jake Jake, Thank you. I have enjoyed taking my time. I have given myself over 300 days to complete this build. It takes the pressure off and allows me to experiment with creating parts from everyday items. My last build was an RC World War II, K Class British Destroyer. I built the entire working model from scratch, circa 1987 - 1988, it took me 11 months to build. Zorro Link to comment Share on other sites More sharing options...
Zorro Posted January 4, 2023 Author Share Posted January 4, 2023 Day 94 and I finally got a chance to return to my build. Continued work on the Center Console. scvrobeson and LSP_Kevin 2 Link to comment Share on other sites More sharing options...
Zorro Posted January 4, 2023 Author Share Posted January 4, 2023 (edited) Day 94 corrected an error with the Kitty Hawk kit. Instructions are wrong depicting the Master Warning Panels to be placed on top of the Glare Shield. I placed them in the correct location which is beneath the Glare Shield. Next, I will add the wiring harness that is also attached to the bottom of the Glare Shield. Edited January 4, 2023 by Zorro spelling errors LSP_Kevin, Landrotten Highlander and scvrobeson 3 Link to comment Share on other sites More sharing options...
Recommended Posts
Create an account or sign in to comment
You need to be a member in order to leave a comment
Create an account
Sign up for a new account in our community. It's easy!
Register a new accountSign in
Already have an account? Sign in here.
Sign In Now