mattlow
-
Posts
2,629 -
Joined
-
Last visited
-
Days Won
2
Content Type
Profiles
Forums
Events
Everything posted by mattlow
-
Brian I think that is the most realistic rendition of the DB I've ever seen in any scale - its actually more realistic than some of the real restored DBs that are missing large chunks of plumbing and wiring. This is going to be a real beauty when finished.
-
Smotti You've really done the Eduard cockpit set justice. It looks gorgeous! I've got one in the stash - how fiddly is it to put together? Matt
-
Batur Very nice so far, will keep an eye on this thread. Matt
-
Dave That's a beauty! Captures the elegant but business like look of the Wurger. Matt
-
How good is the 21st Century 1:18th FW 190D-9?????
mattlow replied to mattlow's topic in LSP Discussion
Thanks guys Sixgunns - I'm not aware of the 1/18th message board - where is it to be found? Steve - a tweak list would be very useful. Thanks Matt -
Very nice tidy job - looks the business. Matt
-
Hi all I've been looking at these on eBay and wondering "can you make a decent accurate 190D out of this?" I suppose what I'm really asking is are there any really bad issues regarding shape etc that'd make it a non starter for detailing? Any comments/links to reviews etc would be warmly recieved. Matt
-
Looks good to me. Matt
-
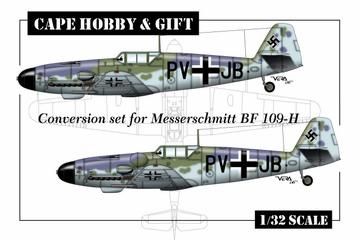
Hi all Two things.... Firstly, there appears to be another 1/32 resin conv. kit for the 109H in the pipeline. Cape Hobby & Gift 109H Don't know any more about this one? Secondly, just to say its interesting that these machines don't appear to have been captured on film. I'd always assumed at least some of them were converted G-1,3 or 5s as they were already pressurised?? Matt
-
HI Manu How about cutting off the intact side parts and making a new centre section from clear sheet or something? This may allow you to make the extra width (if thats what you were after)? Matt
-
Chris Astro32 is right, the Cutting Edge cockpit does say it'll fit with a little work. The instructions state that the instrument panel is slightly oversized to accomodate both kits. It does appear to dry fit into the matchbox fuselage quite well. The set is really nice, much nicer than Verlinden's and well worth getting (in my opinion). Don't know about the wheel wells? But you could do this yourself anyway as the Matchbox wells just need walls and roof detail added. My opinion is that the Matchbox 109E is miles better than the Has. one. The panel lines are deep but a good sanding of all surfaces seems to reduce the effect. Everything seems pretty accurate, though some small problems around the oil cooler housings and associated area on the flaps. Exhausts appear too thin, as are the openings for them in cowling - need Moskit or resin replacement. U/C legs look even more fragile than most 109s, though admittedly due to Matchbox trying to make them more like real thing! Wheels are a bit of a no no - need a set of 109F wheels from aires, tail wheel may be usable. One of the worst parts is the canopy - not necessarily the shape, but the thickness of the plastic and all of my examples (5) have very prominent flow marks in the plastic - really needs either vac'd one, possibly spare from Aires 109F (think its the same for later square framed Es or maybe beg spare from Hasegawa E as these are quite nice and thin and Has. provide both types so people out there will have spare. All in all, I'd rather be starting off with the Matchbox than Has kit. Hope of help. Matt
-
Jerry Welcome to the site. Very nice 262, I particularly like the gun bay detailing and weathering. Look forward to seeing more. Matt
-
Please ignore, just another 109...
mattlow replied to Chris Hannover - Germany's topic in Works in Progress
Chris I particularly like the drop tank - given the dented and well used look. Its another one of those small things that really adds to the authenticity. Looking forward to seeing more. Matt -
Thanks Steve I've got some of this stuff. Never knew what it was actually called thought it was a sort of plasticised tracing paper. I assume from what you say that the resin doesn't stick to the drafting film? Thanks Matt
-
Hi Steve What is drafting film? Matt
-
Manu Excellent work, nice attention to detail. I think the word you were after is 'cotton bud'. Cheers Matt
-
Jean Many thanks Matt
-
Jean Looking really good. This polyurethane foam you use, what is its consistency? How well does it sand? What purpose is it normally sold for? I'm intigued by this material and may want to have a go with it. Sorry for all the questions. TIA Matt
-
Really nice use of contrasting surface finishes. Really looks the part for late war subcontracted component finish. NICE! Matt
-
Lovely job Radu. Nice to see some foreign service 109s. Matt
-
Hi all Thanks for the positive feedback, it really does help keep the motivation up! Derek to answer your questions: 1) Where is it available from? (I'm in the UK). I got mine from a signmakers (I'm in UK as well). They use for all sorts of signage, everything I got (I've only used a small part of what I have) was free as its just bin bound offcuts to these guys - and they charge the customers for the whole sheet, so no skin off their noses. 2) How is it to work with? (is the material density sufficient to handle, cut, shape and glue to without distortion or denting?). Firstly I should say that (to me) the name foamboard is a bit of a misnomer. I think Radu described it best as a cross between plastic and balsa wood. You can barely see the cellular structure. Its pretty solid stuff, no problems handling it, can be sawn, cut with craft knife, drilled and sanded to a pretty smooth finish (not as smooth as plastic you'd get on a kit mind you). It can be heated and formed quite easily. I've glued the stuff with superglue without hassle - not sure about epoxy? Milliput, Squadron green and primer/filler all appear to happily bond to it. 3) Is there a product link anywhere so that I can assess this product a little more? I've not come across one. To be honest as you can pick the stuff up for free - find a signmaker and ask for some. Again, thanks for the words of encouragement. I'll try to step up a bit and get more updates. Matt
-
Jamie - thanks, I just hope I've got the will power to finish it before it finishes me! Brian - currently using Halfords auto primer/filler which goes onto the foamboard without any problems. As I'm mostly using 80 grit sandpaper it'll need several coats of this stuff to get the smooth finish needed for scribing, riveting and painting. The board isn't too 'open' in structure and sands quite nicely to a smooth surface with fine paper. Matt
-
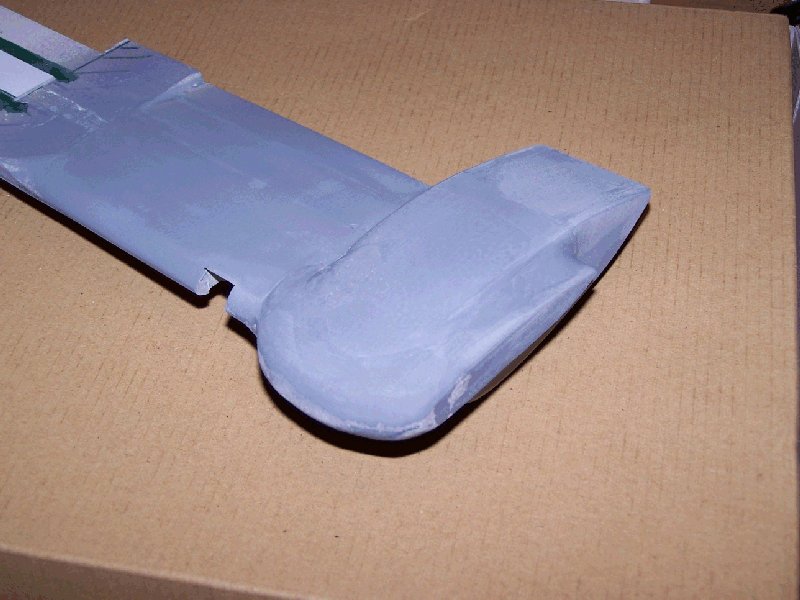
Underside. Still lots to do!

-
Side view. Poor piccy but you get the idea of the shape.

-
And here's one I made earlier.. Its still at quite a rough stage, trying to get all the curves right. This side of the wing actually has its airfoil roughed out as well. The cutout is not a landing light! Its for me to attach the u/c later