

Barry
-
Posts
4,041 -
Joined
-
Last visited
-
Days Won
5
Content Type
Profiles
Forums
Events
Everything posted by Barry
-
Great products, Lost Wax casting allows for excellent detail and superior strength. It has been used in the Model Railroad industry for many, many years. Now where's that 1/32 F-4 set Ernie? Barry
-
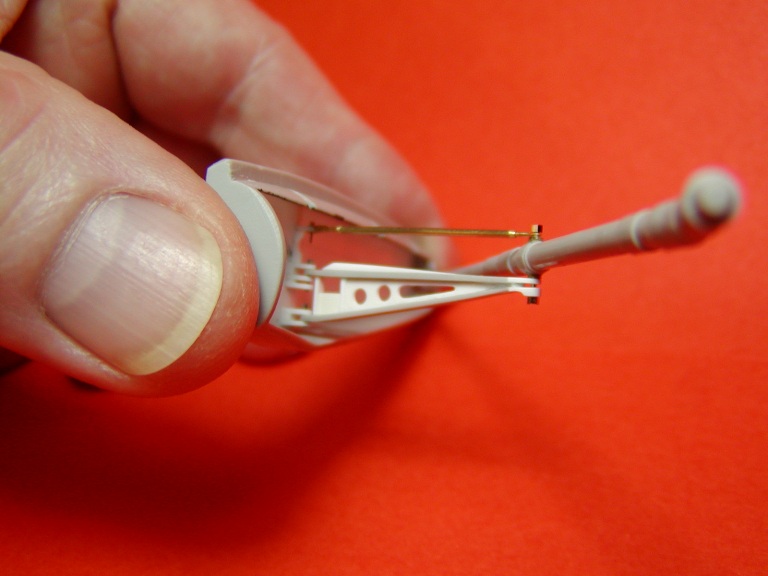
As you know I think the seat looks GREAT !!!!!!!! I've included a shot of my IFR Probe, Trapeze and Bay. I will post more tomorrow on my Trumpeter F-8 Build Post Barry
-
Excellent work, looking forward to seeing the finished product. Barry
-
Nice work Astro Barry
-
Added control linkage and arms.

- 492 replies
-
- 2
-

-
- F-8 Crusader
- Trumpeter F-8
- (and 1 more)
-

Trumpeter A-7D, Updated 12/14/15, Seeking Your Opinion
Barry replied to Barry's topic in Works in Progress
Another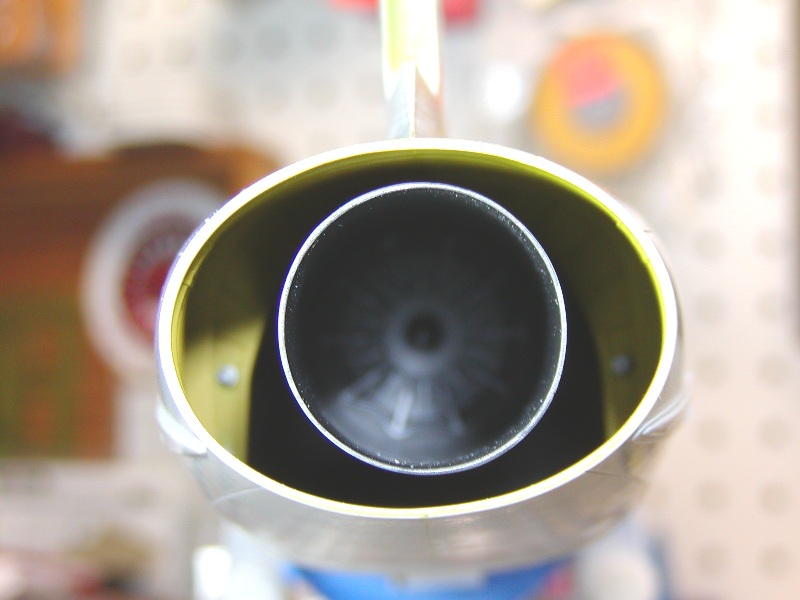
-
Trumpeter A-7D, Updated 12/14/15, Seeking Your Opinion
Barry replied to Barry's topic in Works in Progress
Here are a couple with that view at least nearly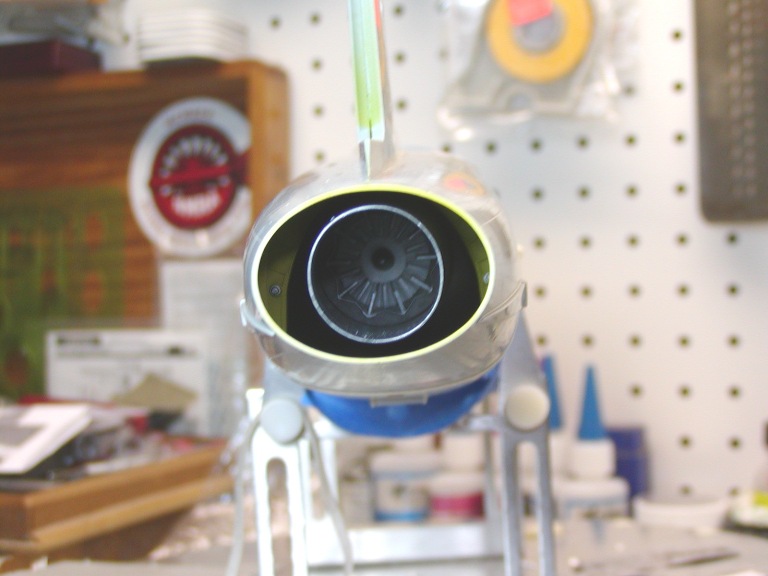
-
Trumpeter A-7D, Updated 12/14/15, Seeking Your Opinion
Barry replied to Barry's topic in Works in Progress
Toughest part was trying to close up the model seam in the stiffening structure (bands) inside the tail section. I added the bulkhead and the mounting bolts/nuts for the aft mounting points of the horizontal stabilizer. Great phoots of this area in the Verliden A-7D, Lock On no. 9.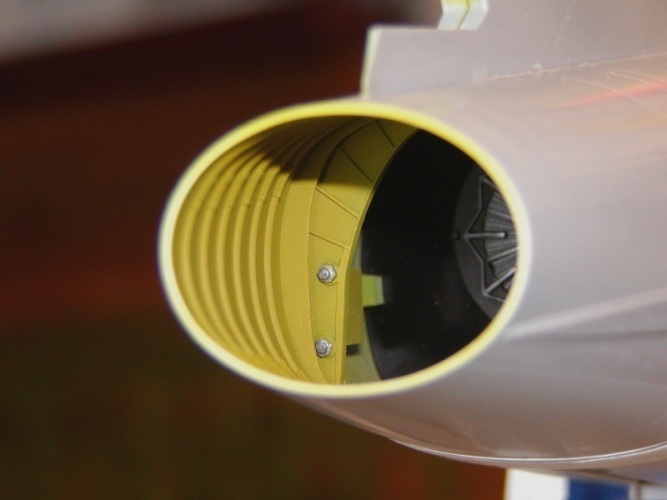
-
Trumpeter A-7D, Updated 12/14/15, Seeking Your Opinion
Barry replied to Barry's topic in Works in Progress
The exhaust section of the A-7 has some interesting details. A couple of photos of my offering.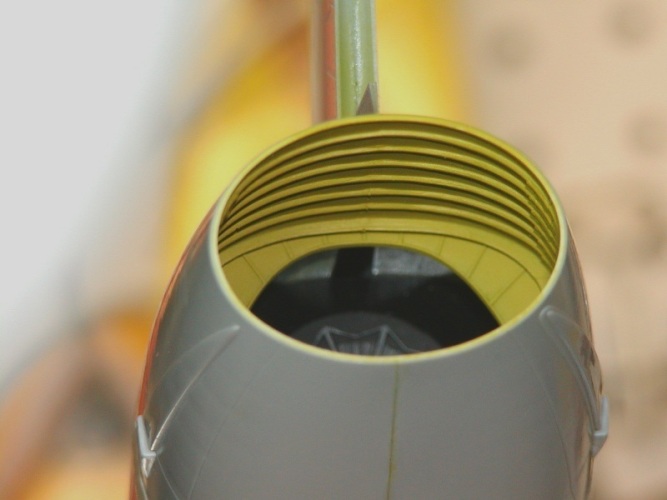
-
Ummmm Could Be !! Barry
-
I agree Steve, I compared my Hasegawa kit when I was first looking over the Trumpeter offering and though the panels are raised I also saw the fairng and the more rounded radome. I think the Hasegawa kit is more accurate in this respect though not completely so. The vent panels on the Hasegawa kit could be easily be brought into line with a little judicious sanding. Do not over look the raised radome latch detail just above the intake lip either. I hope to make more progress on my burner over the next couple of days. Barry
- 492 replies
-
- 1
-
-
- F-8 Crusader
- Trumpeter F-8
- (and 1 more)
-
Looking good there Rob!! The jet noises just add to the realism right? Barry
-
Your cocpkit looks like it would work if turned on. Very ,Very nice work!! Did you say you used the Eduards Knobs? They look really great. I like the Aires pit but the console control heads in the Eduards set are quite nearly perfect. The data on the control heads adds tremendously to the final look but the lack of knobs have been my issue with them. Keep up the excellent work and keep the pics coming. Barry
-
Photo of F-8 Nozzle.

- 492 replies
-
- 2
-
-
- F-8 Crusader
- Trumpeter F-8
- (and 1 more)
-
Well I made a little progress today of the burner nozzle.

- 492 replies
-
- 2
-
-
- F-8 Crusader
- Trumpeter F-8
- (and 1 more)
-
I've started adding the structural stiffeners to the burner petals. I desided even thou this will be an inflight build that the burner would need some added details. The details is styrene strip .010x.010 and .010x.020. The four on the left have been sanded to shape. Nice photos of both earlier and later style burner petals in Squadron's F-8 Walk Around #38, pg 45. If your build requires the earlier style and want a more detailed burner you might consider the F-102 style burner from Master Details. Back to the bench, Barry

- 492 replies
-
- 2
-
-
- F-8 Crusader
- Trumpeter F-8
- (and 1 more)
-
And that's what counts. Nice Work!! Barry
-
Main structures taped up. Gear doors, gun bays, IFR door fitted. As I am going to display inflight and have desided to go with copper tubing or acrylic rod up the tail pipe. I am going to have to engineer internal structure to support the weight. I am going with the kit cockpit to help reduce the weight it should paint up into reasonable rendition but I will be using AMS's resin seat when it become available. Aslo by eliminating all the wheel wells, landing gear and gun bays internal details this will get me a reasonable weight to work with. I am hoping that Master Details (Steve said he was) will bring out a Naval Aviator for the Vietnam period for the pilot figure. So here's the photo of the initial mockup. Photo was prior to nose fairing addition.

- 492 replies
-
- 2
-
-
- F-8 Crusader
- Trumpeter F-8
- (and 1 more)
-
Thanks Jack, I will do my best but I am not a prolific builder. I only wish to produce the most accurate recreation I can. I will sacrifice schedule for quality anytime. That is why my A-7 has taken nearly 3 years now. Next effort will be the afterburner and getting what will be visible in the cockpit area up to par. Still not commeted to the refueling probe and speed brake. Will be in touch, Barry
- 492 replies
-
- 1
-
-
- F-8 Crusader
- Trumpeter F-8
- (and 1 more)
-
Crash, Your photos are further conformation. The close up of the L/H side is great. The F-8P incorporated all of the E refinements plus the double droop leading edges. No doubt at all now that the fairing of the raised panels on the kit is the correct answer. At least in my mind. I believe Trumpeter has ealier versions at least planned and the raised panels would make it very easy to eliminate them. If they had created the fairing then it wouyld have required a larger change to their molds. My thoughts only no proof to back it up. Just between all of us I do not know that much about the F-8 either. I do know that it is/was a sleek pure fighter. I'm an Phantom Phanatic and I am getting my skills tuned up for my first 1/32 F-4 build. Barry
- 492 replies
-
- 2
-
-
- F-8 Crusader
- Trumpeter F-8
- (and 1 more)
-
Guys, In the second close up photo. Take a look at the access panel just aft and below of the vents. Look at the forward vertical edge of this panel. Is it not obviously curved from bottom to top? I am glad you guys sent me to Airliners.Net looking. I am now convinced the fairing of the panels is correct. Now does anyone know when the AIMS Altimeter system was incorporated into the F-8. You will see second Pitot/Static Probe located aft of original Pitot Probe. This probe contained both Pitot and Static sensor capibility. This was a requirement of the AIMS Encoded Altimeter system. I know that the USAF A-7s did not receive this modification until after 1972/73. Thanks, Barry
- 492 replies
-
- 1
-
-
- F-8 Crusader
- Trumpeter F-8
- (and 1 more)
-
Closer shot.

- 492 replies
-
- 2
-
-
- F-8 Crusader
- Trumpeter F-8
- (and 1 more)
-
Jack, Rob, I have found a couple of shots from Air Liners. net They are of French F-8s.

- 492 replies
-
- 2
-
-
- F-8 Crusader
- Trumpeter F-8
- (and 1 more)
-
Is it not great that we all have nothing better to do than this, Man I Love this hobby! Jack, I concurn with your latest photo Jack, it is most assuredly a E/J. I would call your attention to the very obivious curvature of the radome at the point in intersects the fuselage. If you look for the fairing from that point back into the fuselage I believe you can see it though not as well as in the other photo. Having Fun, Barry
-
Jack, Take a look at page 60 and 61 of Naval Fighters #16. Looking at the view of the nose profile on the plan view, view looking down. Compair the profile of the C model on page 60 with that of the E model on page 61. You can see the bulge of the fairing below the line of the windscreen of the E as compaired to the nearly flat profile of the C. You can also see where the nose profile curves back into the radome on the E compaired to the C. I am sure either way you will have an excellent model. Best Regards, Barry
- 492 replies
-
- 1
-
-
- F-8 Crusader
- Trumpeter F-8
- (and 1 more)