
Dpgsbody55
-
Posts
3,073 -
Joined
-
Last visited
-
Days Won
3
Content Type
Profiles
Forums
Events
Everything posted by Dpgsbody55
-
Whatever your struggles with this kit, your perseverance has paid off. Your Walrus looks great. Cheers, Michael
-

DeHavilland Vampire F Mk.3 - Finished
Dpgsbody55 replied to Dpgsbody55's topic in LSP Silver Jubilee
Yes, so I've just re- read in my book. It's been a while since I read it. The FB5 was intended more for lower altitude work and ground attack as experience with the F3 showed it wasn't so good at high altitudes. It was felt that the Meteor, being faster and having a better climb rate, should be used as the interceptor, so the Vampire was developed more for low altitude. I think the squared off wing tips helped with airflow around the ends of the wings. Cheers, Michael -
DeHavilland Vampire F Mk.3 - Finished
Dpgsbody55 replied to Dpgsbody55's topic in LSP Silver Jubilee
Thanks. But there's plenty of time for me to mess this up . I've done a little more work on the wheel well and it's opening in the floor, and it looks a little better now. I've mixed up a colour I call "off black" It's a bit like a creamy white, but actually black with a bit of light gray added. This should make it look a little worn and be a bit easier to make out any detail that goes in this thing. Yes, brick red as on a rexine seat was my first thought too. But it didn't even vaguely match the FS colour code in the instructions. I've done some more research and from what I can see, dark earth is almost spot on, so it's now painted that colour. Cheers, Michael -
Those engine pipes... I found the thick white pipes caused problems later as they won't bend well and cause breakages and fitment problems when connecting them all. I found I had something better left over from another kit which had more flex in them, but still ended up shoving wire through them. You may want to take a look back at my build here, but I'm sure there's a better way. As to the thinner black pipes, Italeri's suggested length I found to be too long and I wish I'd not connected them to the header tank on the firewall until I'd got the fuselage together with the engine in place. I'd suggest attaching them at one end for now, then feeding them past the engine mounts and fine tune the length when you connect them to the header tank. Otherwise, they'll stick out and cause you headaches when you come to fit the engine cowlings. They are visible if you leave off the undercarriage bay tins as I did when you look up through the U/C bay. I like what you've done with the added ribs in the wing root area and your now painted additions to the IP and seat belts. Nice work. Cheers, Michael PS. Yes, those ejector pin marks... They're in all the wrong places too.
-
DeHavilland Vampire F Mk.3 - Finished
Dpgsbody55 replied to Dpgsbody55's topic in LSP Silver Jubilee
I've made a start at putting this together and my first impression is that I can see why others have not finished their builds. It starts with the instructions being a little vague, then I moved on to the parts not having any clear fitment pins or indentations, and so far, also having any notion of fitting into each other. I started with the main wheel wells which at least have an area of inner wing structure to place the parts. But here the fitment is vague at best. Here's the result I think it might look quite good when painted, but I'm not yet sure if it fits with the lower wing. Next was the nose wheel well. There's four parts here, but I had no idea if the sides fitted onto the outside of the top pieces or inside the top pieces. One will be short and fat, the other narrow and tall. Looking at the lower fuselage gave me the thought that I go for the narrow and tall option, then looking further at the instructions confirmed this, as there;s a hole in the cockpit floor for the nose wheel bay to slide into. The next problem was getting all this to fit and I spent almost an hour reshaping the sides and one of the top pieces to get it all to fit. So the inside of this will be painted aluminium and the top will be painted black as it protrudes through the floor. Well, it does after filing out the hole in the cockpit floor..... I think I've got the placement of the forward top part right as it seems to fit into the lower fuselage half after I ground out a little of the plastic in that where the guns might poke out. . The gap probably is for the fitment of the forward wall of the cockpit. Maybe.... I'm still cleaning up the main parts of the wings and fuselage and I think I'll be installing alignment tabs to help putting these parts together. Then maybe a little paint and I can start on the cockpit properly. Cheers, Michael -
DeHavilland Vampire F Mk.3 - Finished
Dpgsbody55 replied to Dpgsbody55's topic in LSP Silver Jubilee
The Vampire was fitted with the Goblin engine, and was originally known as the Halford H1. The Ghost was basically an upscaled Goblin. Both were deigned by Major Frank Halford who had previously designed the Napier Sabre engine. Allis-Chalmers license built the Goblin as the J36, but I'm not sure that engine became a production reality. It was supposed to have powered the Lockheed P-80 but production delays caused a switch to the Allison J33. It was also license produced in Sweden by Svenska Flygmotor. As to whether I use the engine in this model, it's looking less and less likely. I may be able to get it to fit, but without the jet pipe, but I think I'd have to build some of the inner structure which may be doable, but a bigger issue is cutting the fuselage open due to the thickness of the plastic. I've done a little research and found it is very close to RAF dark earth. It's for the seat colour. It might look interesting with the black cockpit. Cheers, Michael -
DeHavilland Vampire F Mk.3 - Finished
Dpgsbody55 replied to Dpgsbody55's topic in LSP Silver Jubilee
They also did a Vampire FB Mk.5 which is outwardly different to the model I'm building and I think has an ejector seat. Cheers, Michael -
DeHavilland Vampire F Mk.3 - Finished
Dpgsbody55 replied to Dpgsbody55's topic in LSP Silver Jubilee
Yes, please do join in the fun. I've just been having a look back at what WIP's I can find on this kit, and I can see what you mean about battling the kit into submission. Alas not much in the way of F.3 Vampire builds here, so more research to do, starting with finding out what is "Special Brown" in the paint guide. The mind boggles on that one... Cheers, Michael -
In retrospect, I think it was mostly the aftermarket addons that made the model more difficulty and the unexpected fragility of some of these. What's in the box does have some issues, but these are relatively easy to overcome. The kit is very complete as is, though next time I will still use some aftermarket stuff, but perhaps not as much. And I'll do the exhausts differently too. My tolerance with many things is not that great, but after almost seven decades on this planet, I'm finally learning to walk away and take a deep breath in situations like this. Personal development is a wonderful thing . Cheers, Michael
-
That's a great looking motor. Nice work. Cheers, Michael
-
Solution found to getting your mojo back
Dpgsbody55 replied to Stevepd's topic in General Discussion
So what we have here is really a massive failure of management in not dealing with the actual problem of lazy and dirty employees. Obviously, that might take some effort, so easier to deal with the complainant. Perhaps they went to the British Leyland School of Management. I can see why you're not sorry to be out of there. Good luck finding something better. Cheers, Michael -
This will be my next project, which hopefully is silver enough . I plan on doing the Canadian version so no aftermarket decals. I do have other addons, however, in the form of some brass etch, masks, wing lights and a nose weight also by Infinity Models (would that still be considered after market??) plus a set of seat belts by someone else I don't really like. But I'll try again, anyway. Ya never know; I might finally figure out this type of seat belt. Aiding me in this project will be this book, and I've marked some pages which will help add detail to the cockpit. Given that my last project, Italeri's Macchi C.202, caused me some grief, I'm expecting the air to turn blue in my modelling room during many occasions during this project. However, both this and the Macchi are models I've wanted in LSP format and I've already read a few reviews which indicate the limited run nature of the kit, so let the persistence and swear words begin. First task was to take the main pieces off the sprue and tape them together. The first observation is that the surface detail is reasonable, the plastic has the thickness and feel of a limited run resin kit, and the fit of the parts is attrocious. Pretty much what I expected, really. This is as tight as I could get the parts to fit. So I spent an hour or so with files and Dremel grinder and this is the result, which is a big improvement. There's still a lot of work to do on the parts, as there's a certain amount of flash to be cleaned up too. Take a look at those gun casing ejector chutes!!. Presently, I'm working my war around each of the sprues, tidying things up a bit and getting ready to paint the interior parts. This is the wheel well sides that I'm drilling out. I'll probably start here first. I may also try to add an engine to this, as I have one in my spares box that was removed from an old D-H Venom model that has been consigned to the bin. I have no idea if it will fit or if I have time to do this given that there's a deadline here. Also, the thickness of the plastic may mean cutting the engine cover out is going to result in damage to the rest of the model that I can't fix. My first priority is to get a good result with the rest of the model, so this is just a "nice to have" option. I do know that the jet pipe is too long, so that will need attention. So this will be my next three months. Next up, interior paint, wheel wells and some cockpit work. Cheers, Michael
-
Nice work here. Your instrument panel looks great and that switch box lifts it a little. The San Giorgio type C sight was fitted as standard only to the last production batch for Serie XIII. It seems very likely that they would also be retro fitted to earlier models too. That's a good idea to use foil for the seat belts. I'll give it a try perhaps on my next project. The stock kit belts don't quite cut it in my view... Cheers, Michael
-
Thanks a lot. I'm now viewing this as the trail blazer for the other two Macchi's that Italeri have in the pipeline. I've learned a bit with this one. Looking forward to your progress on your model. You're already off to a good start. Thanks Ernest. Sometimes it felt like it was not worth the effort, and in some areas the kit is not up to modern standards. Then again my previous project was Airfix's excellent Spitfire Mk.IX, so it was always going to suffer in comparison. Thanks Dennis. Despite the issues, I'm now very glad to have a good model, exhausts aside, of this excellent Italian fighter. It's great to see our choice in LSP's is broadening. Perseverance, you say?? Wait until you see my next project, which will be for the Silver Jubilee GB. Cheers, and my thanks to everyone who has contributed and encouraged my progress with this model. The RFI is now here. Michael
-
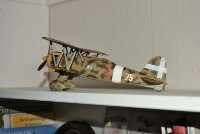
This is my attempt at Italeri's Macchi C.202. It represents a Serie XI machine built in late 1942 at the Breda factory and is painted in the Serpentini camouflage style and was operated by the 353rd Squadriglia, 20th Gruppo, 51 Storm in early 1943 and is believed to have been based at Ciampino at this time. The model has taken me about three and a half months to build, and it's not been all plain sailing and I'm not entirely happy with my results, especially the exhausts. I used many of the Aircraft in Pixels 3D resin parts to improve the detail. These parts are very delicate which is part of what gave me some of the problems I encountered with the model, but I still think they were worthwhile including in the build. I shall be building the next two Macchi models Italeri release, and I will include many of the same or similar AiP sets when that time comes. My biggest issues were around the exhausts of which I made something of a mess. You can check my WIP, here, should you want to know the gory details. I also ran into problems with the AiP landing gear set as one of the legs shattered during construction, but I managed to to a mix and match using some of this set and the kit undercarriage. The kit itself is not bad at all, though the surface detail is not up to modern standards. On the other hand, the cockpit, engine and radiators are very well done. The box contains the plastic kit, etch brass details, 3D decals for the cockpit and a choice of marking for eight different planes, Some of the details wrong it gets wrong, but this may well be that Italeri were using an older restoration of a C.202 as their guide. Since there are only two in existence, not including a couple more that were upgraded to C.205 standards, this is possibly excusable. Thankfully, there exists an excellent guide to the kit's issues by Maurizio Di Terlizzi although I can't remember exactly where I found it. A search for the build guide shouldn't be too difficult and is worth the effort. I'd also recommend having a read of the excellent book on the Macchi fighters by Luigino Caliari. There's lots of good photos here, some in colour, and a well written history of these planes including information on the few surviving planes. So on to the model and some pictures. Engine detail. Cockpit Detail Undercarriage and the view into the wheel wells and rear of the engine. Top and bottom, with the cowlings on. Overall, the model came out passably well and I'm pleased I've now got a good model of one of Italy's finest fighters of WW2. I look forward to the release of the next two Macchi's by Italeri. Cheers, Michael
-
Update time again, and this is the last one. Why, I hear you ask?? That's why . But I'm jumping ahead a little. After my last update, I had the undercarriage doors to put on, so I started with the outer most doors, and very glad I did too. They're quite small and not so easy for my butter fingers to get into place and the etch part shown in the last update has to attach to the undercarriage leg as this bracket pulls that last door closed. A few deep breaths later and it looked like this. The next job was to add the lower doors which should have just slotted into place. I had already removed the paint from the oleo legs before putting them in place, but it was not quite the doddle it should have been as the doors needed a small amount of filing on their top edge to fit neatly into place. Not much of a big deal really, but symptomatic of some of the parts on this model. So I can finally put this on it's three feet as this is the last job for the undersides. The next job was to try to make that broken exhaust stack look a little better. It's number five, in the above picture, in case you're wondering. After giving this a little thought, I tried a few ideas including a little brass sheet fabrication which came to nothing, then I looked through my stocks of plastic rods, flats, squares and other shapes and found a short length of L section would do the job. This needed a little filing to thin it and cutting to shape, but I managed to get it into place then painted it up to try to match the rest of the exhausts. My fix is not brilliant, but it disguises the broken part well enough. So at this point I paused and took a look back through the instructions to see what I had not yet fitted, aside from the obvious. I deliberately miss out some parts as I build the model as I don't want them on while I'm painting, or I'm worried about knocking them off during final assembly, so I highlight these parts and come back to them. There was very little not to add except for the canopy, a ring and bead sight and the prop, then I could get on with weathering and fancy schmancy pictures. The canopy needed to have the release handles added ( painted a while back but still on the sprue) to the insides so this was done first and put aside to dry, then the ring and bead sight added. The kit only provides the ring part of the sight, so after drilling out the paint, I drilled the paint off thenotch in the windscreen and added this. Next job was the bead, so this was made from 0.5mm stock rod and the mounting spot drilled slightly to add this. I did, of course, check my references before placing the bead, and once dry, it was painted matt black. Next job was to add the canopy after touching up the release handles. Here it is at that point. Please excuse the slightly dislodged gun cover. Incidentally, one more screw up I should confess to is the interior colour of the canopy and windscreen frames. I was still reading my way through this book at the time and hadn't got far enough. My model is a Breda built example and I should have done the canopy frames in the same colour as the cockpit. This also applies to any C.202 built by SAI-Ambrosini. Only Macchi built planes should have black painted cockpit canopy frames. The last part that went on was the prop. Here it is complete, after dirtying it a bit. More pictures from the upper sides. A couple of things I noticed looking at pictures in Liugino Caliari's excellent book on these planes. Firstly, most of the pictures show very little noticeable wear and tear like worn and scratched paintwork. Secondly, the exhaust stains are slightly different in pattern from left to right side, so be careful of that if you weather yours. I presume it's due to the airflow around the air intake, but exhaust staining on that side is slightly lower up the side of the fuselage than the right side. These stains were often cleaned off too, so don't go mad here. So I've added some oil and exhaust stains, but I now realise that I should have added any stains behind the oil cooler before I put the inner wheel doors on. Another OOOPS moment. I've also added a few scratches around the airframe, mostly on the leading edges of the prop and wings, plus a little on the fuselage where the pilot stick his feet into the steps provided in the fuselage, and a little on the wings and gun covers to show where armourers attended to the guns. Underside views. Panels removed. Unfortunately,the exit pipe from the brown oil catch can broke while I was trying to put the engine cowl back on some time back. I had it perfectly aligned with the hole in the cowling too. At this point, it was impossible to drill out and fix too. So another one is done, though it was touch and go there for a while. This is the first Italeri kit I've built and while I could have hoped for better, I will build another two for sure. I made a lot of mistakes on this and ran into difficulties with the very brittle 3D printed resin bits I added, but I've learned a lot so I'm certain I can make a better job of the two upcoming Macchis when I eventually get them on my workbench. I hope I've explained some of the traps with this build too. But whatever the kit's faults, I'm very glad Italeri have released this kit as it covers a very big gap in depicting in LSP model form of another famous WW2 fighter. Decent LSP models of Regia Aeronautica planes are few. I've seen older builds of the now out of production PCM kit and I think this kit is better. Some things are very well done, others not so good and Italeri have relied on etch brass to provide a lot for the exterior detail. The surface detail of the plastic is perhaps the biggest let down, and the depth of the panel grooves between the fuselage and wings is not consistent. I'd also strongly recommend anyone building this model take a look at a guide by Maurizio Di Terlizzi to this particular kit highlighting it's faults and detail improvements that can be made. I think from memory it's on the BritModeller site, but do a search in case I'm wrong. So that's my take on this model, and it's one I've wanted for a long time. Those of you who can remember me posting images of this plane on the many wish lists that have appeared on this site will be glad to know they'll be spared any future such posts in the future. I will be posting an RFI, but probably in a day or two's time. Cheers, Michael
- 129 replies
-
- 13
-

-
Thanks Richard. I'll make use of that before I get to my Spitfire Mk.VIII, which will of course have both the cockpit sets added to that build. Cheers, Michael
-
That explains the simplicity of this model. It does not align with the rest of the HKM range. Yes, I see now why you say the possible Hellcat kit would look more like the Havoc which I think looks great. I was very happy with the choice of a Mk.4 Meteor, largely because I built a 1/72 Frog Mk.4 as a kid and really liked the look of it, so sentimental reasons for me. But I do think a Mk.8 would have been better. Thankfully for me back when I built my Mk.4, conversions were available and the kit was cheap enough, so I'm still very happy with my choices. Cheers, Michael
-
That's a struggle, but you've done well with it. Perhaps the best solution for the inner wheel well wall might be thin sheet brass? Cheers, Michael
-
Nice looking instrument panel. I had the Eduard set but went with the kit 3D part because I felt that it was more appropriate for a two gun Folgore. The IP was changed when wing guns were fitted and I think the Eduard offering better matched that option. I like your idea to mix and match the various IP's. You're right to ensure the compass and gin sight space is not at all restricted. I fitted the Sam Giorgio type B gunsight which is more correct for a Folgore, yet curiously not mentioned in Italeri's instructions. They only mention the type C gunsight which is more appropriate for the Veltro. However, it's likely some later Folgores were fitted with the later sight. Both are provided in the kit. However, mounting the compass and then the type B gunsight gave me some problems, which I solved by mounting the gunsight on a strip of brass slightly further to the rear. Looking at my model now, this may have been a good thing as it has not a lot of clearance with the windscreen. Cheers, Michael
-
I've figured out that there would be a shock when removing a part. You get that with plastic too. You can reduce that shock by using a sharp pair of cutters or knife, where appropriate, as you rightly point out. I've found that some parts are better removed by clipping well away from the part but some of the finer parts are better removed by carefully clipping them off the tree very close to the part starting at one end to reduce the bend on the part caused by removing them. But there doesn't appear to be any guarantee you'll get them all off without breakage as far as I can see. With this model, I've wondered if the creator of the 3D part has actually tried to assemble their offering. Really fine parts are something of a lottery to remove, though I've found I can then usually assemble them once removed. Three D resin is very brittle. Getting them off their print tree or sprue is very much a learning experience, but I think worth persisting. I've decided that the best way is to cross your toes and anything else you have free, hold your breath and clip them off with the best clippers you can find using the remaining uncrossed fingers . It will look even better with the prop added . Cheers, Michael
-
It would definitely be more expensive if coming from GWH, but if it's like their P-40B, I could be tempted. I'm OK paying a bit more for a more complex kit as it's a more expensive option to bring to market, but it keeps me occupied for longer which means equal value foe money to me. I hasten to add, though, that the cost still has to be reasonable. Money is always finite. I'm not sure I can agree with you regarding an HK Tempest. Their Meteor Mk.4 is pretty good, but fairly basic with no engines, and it's pretty cheap by today's standards, so if they did one in a similar fashion to that, I don't see it as needing to be more expensive. I have the Airfix car door 1/24 Typhoon on my shelf of done, so I don't have the room. However, since neither of the Airfix LSP kits are available these days (as far as I can see), then you could be onto something. Cheers, Michael
-
I think there's two schools of thought on this. You could finish on March 5th so start six month's early as you have to build a plane before you can fly it, and that date marks the start of the Spitfires career. Alternately, you could start on March 5th finishing the usual six months later, taking the viewpoint that the date marks the beginning of all the different marques that came after. It's a bit six of one, half a dozen of the other to me, so what everyone thinks is fine by me. Just so long as we have a group build to mark the occasion as the next significant date is March 5th, 2036. I'm not sure I'll be able to attend that party. Cheers, Michael
-
It was a relief to find that a) my idea worked; and b) I can drill straight into the oleo leg and not have a wire pointed out of the top at a silly angle. Thanks. It's a relief to see the fix worked and capable of taking the weight of the plane. As opposed to my other fowl tempered trick of applying a fist to it. I'm glad you're getting something from my ramblings. This is the reason I write my updates in depth as I appreciate it when others do the same. It's also good to have this as a note to self when I do Italeri's upcoming C-205 and C-200. This is the first Italeri kit I've ever built. They do things.... errrr... differently??? Still, I'm glad they have released this kit. Cheers, Michael PS. The undercarriage doors are on now. The upper doors are a bit of a pfaff, but it looks good. I hope to start on a repair for the broken exhaust tonight.
-
Looks good. Keep going . Cheers, Michael
