

RJS
-
Posts
30 -
Joined
-
Last visited
Content Type
Profiles
Forums
Events
Posts posted by RJS
-
-
That's a great build mate! Would be interested to hear your opinion of the SAC undercarriage. May I publish it on the website?
Kev
Hey Kev
The SAC undercarriage to be honest is a disappointment. I used it purely for the weight of this model, and would not buy again. It was an inferior casting of the kit part, no improvements at all, and for the money I expected more..
Feel free to publish on the site. Thanks.
-
HI All,
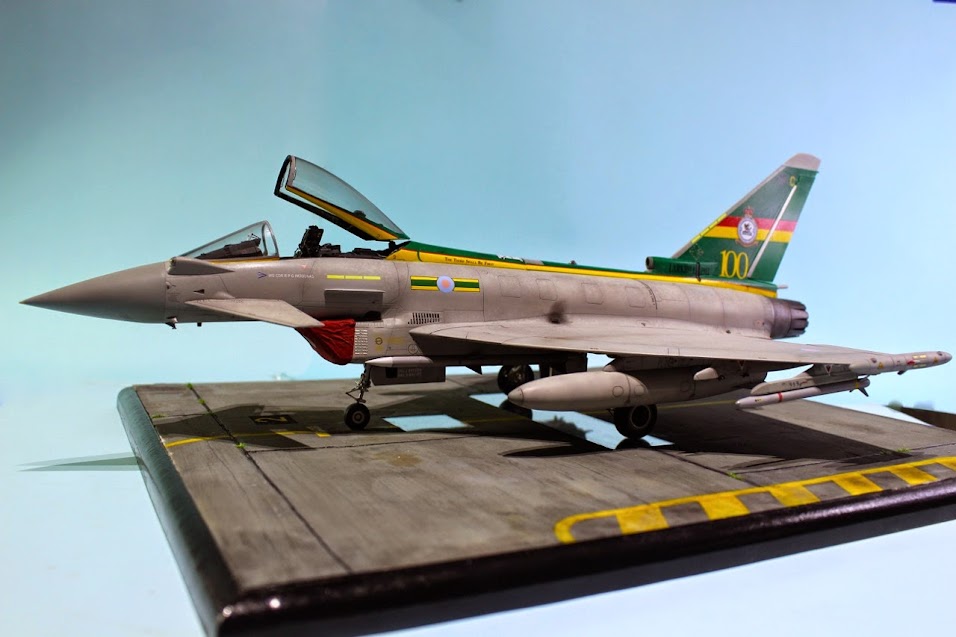
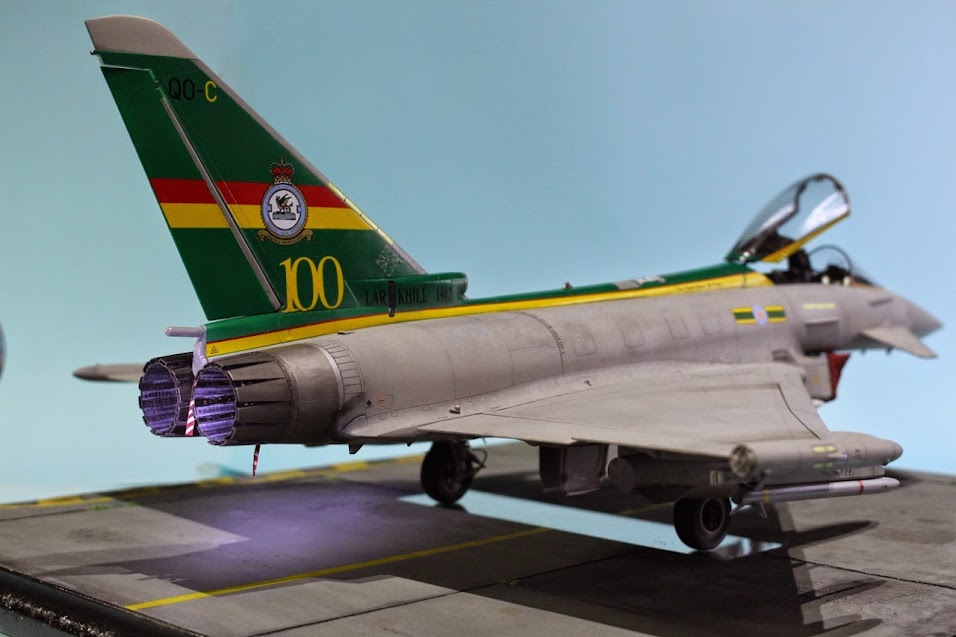
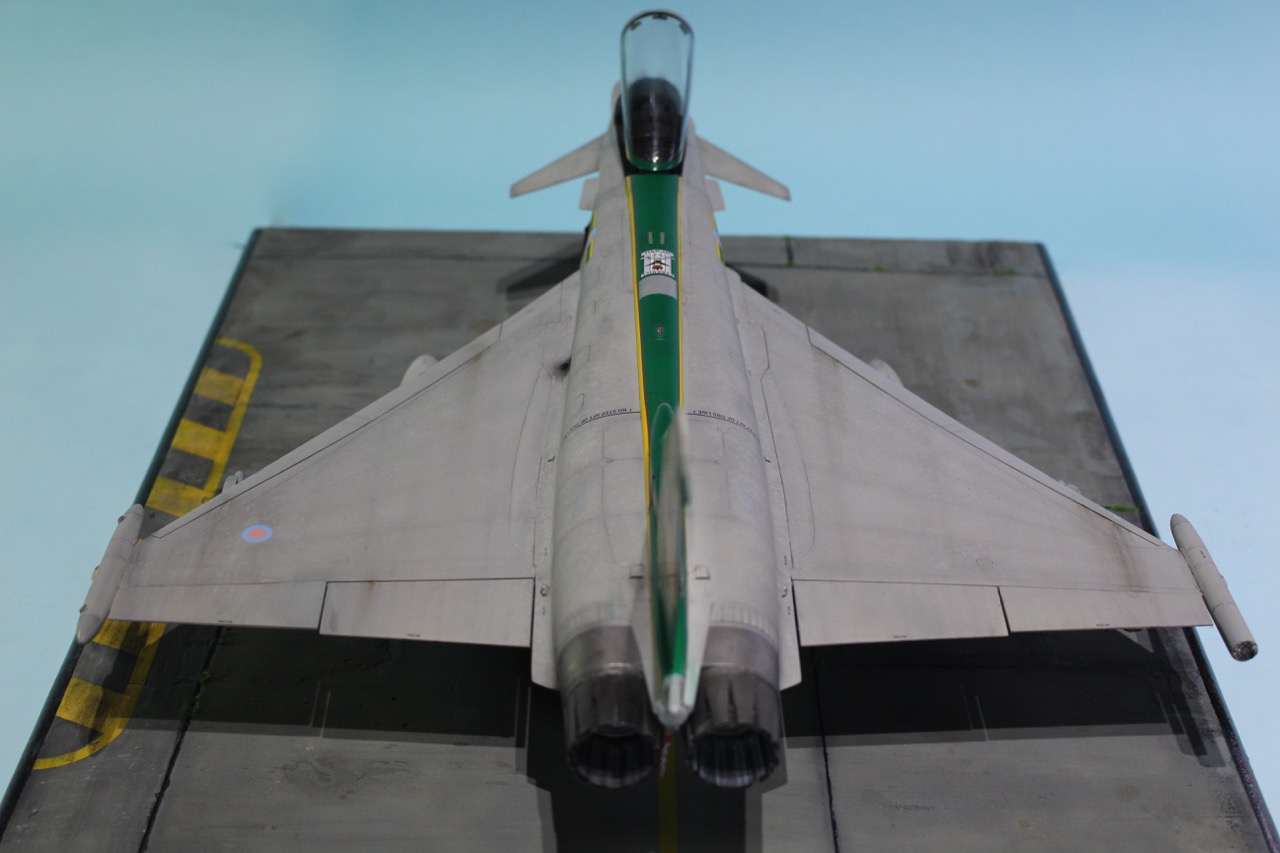
Here is my latest, a 1/32 Revell Eurofighter Typhoon.
Aftermarket includes Aires Cockpit, Wheel Wells and Exhaust. SAC metal undercarriage.
Hope you like it.


- Tony T, dutik, geedubelyer and 5 others
-
 8
8
-
Beautiful work and a great diorama ! How did you do the grass? Was it one of those mats you can buy ?
Thanks Thomas,
The mat used was a Premium Line "Steppe Spring". I tweaked it a bit with different washes, highlights and added flowers that I made.
-
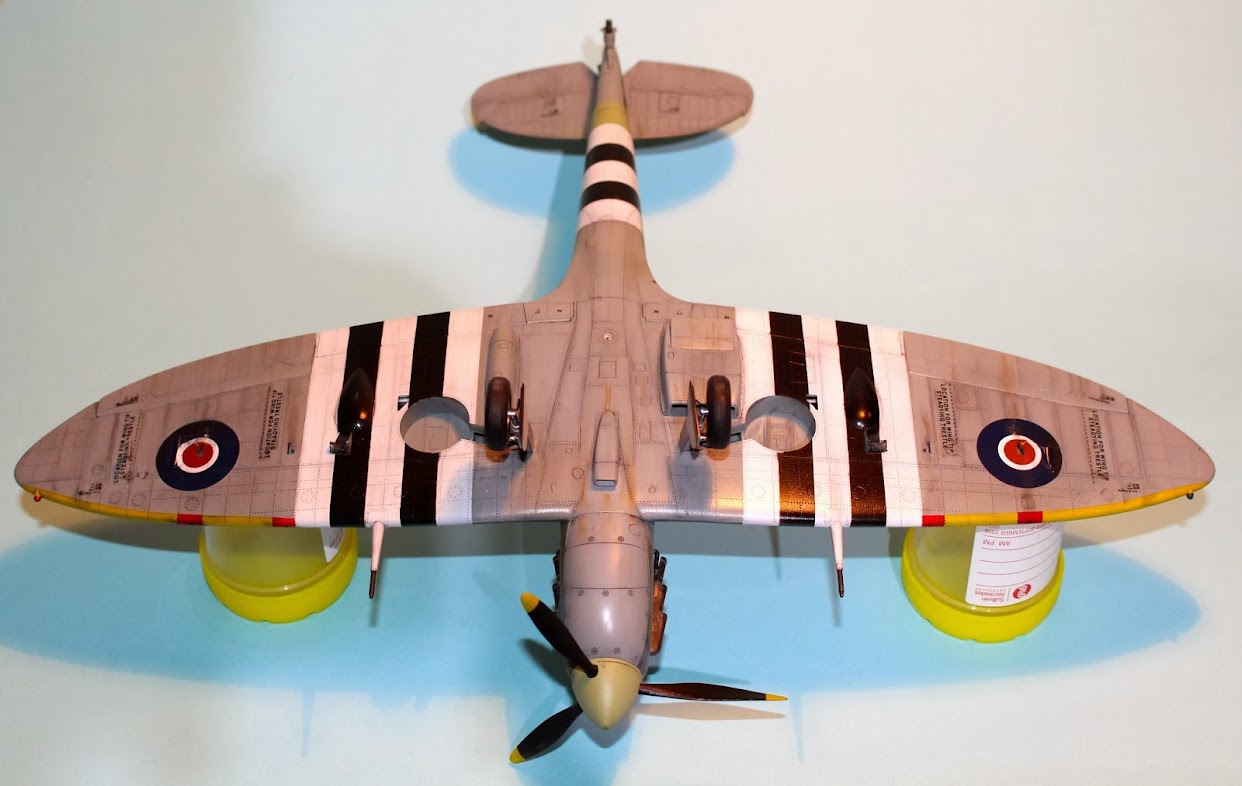
RJS, the dihedral, maybe heat very gently with hair dryer and try just bend them gently? Looks like you don't need much. Was looking at it again, really like the way you did the patchy grass, looks very good!
Thanks, I'll have a go at this today. I forgot to add that they are they Quickboost resin ones to fix the incorrect molding by HB..Worst case I gently pry them off and refinish..won't take long. After all of the effort, would be a pity to not have an accurate spitty! I'll post photo's once done.
-
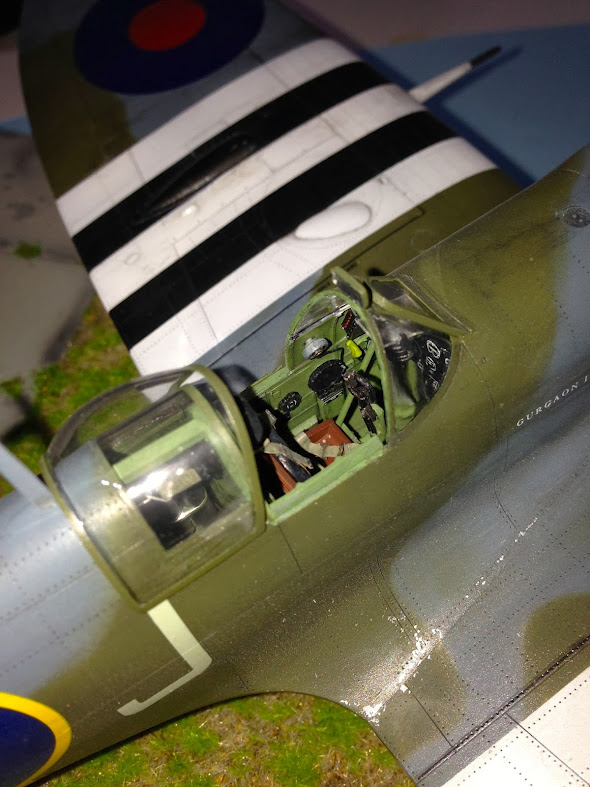
I was wondering if I should point that out.
Incidentally, Barracudacast makes a super door with removable crowbar - which looks great!
Agree, I've used it on this build.
-
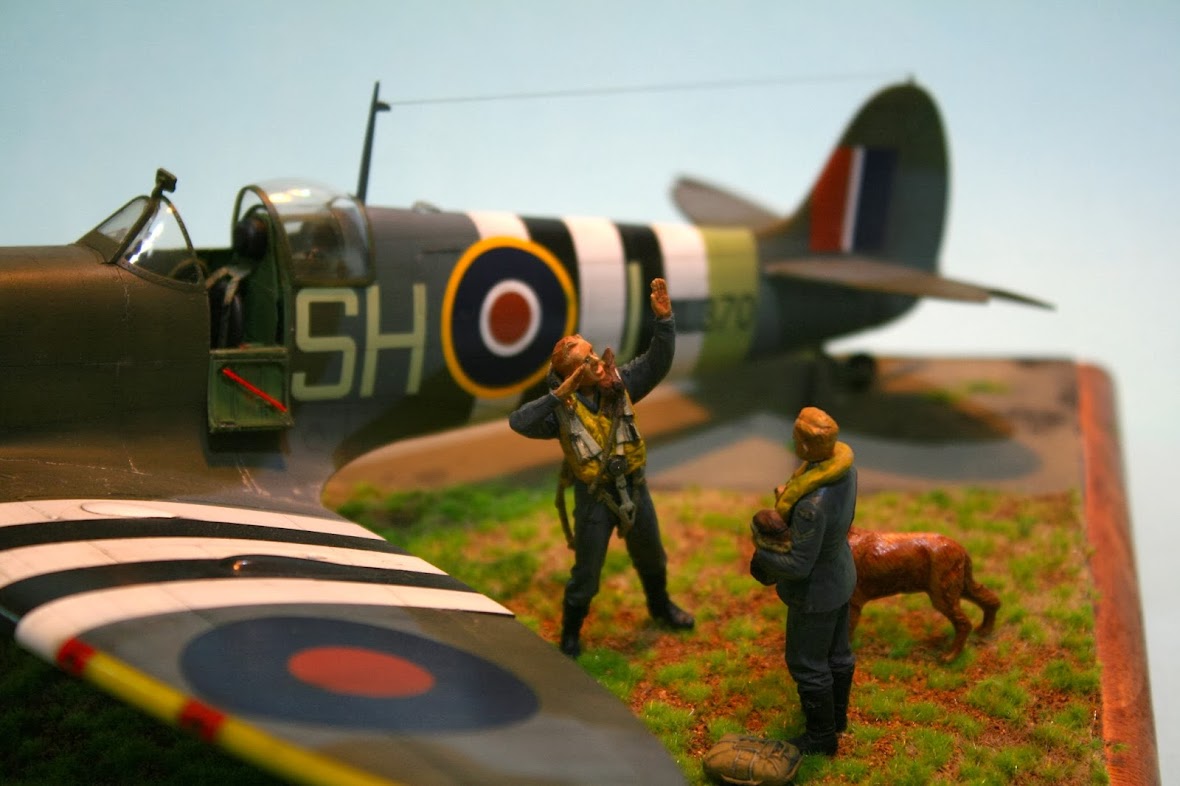
After reading the conversation on the cockpit crow bar/canopy breaker, I would like to check something on this brilliant diorama job. It is so nicely done. So one thing that drew my eye a bit, is what appears in the photo, to be positive dihedral on the tailplane? Normally the tailplane has none.
Thanks for picking this up. I'm unsure how I can fix this as they are both CA'd in place. The guides on the fuselage are actually angled slightly up, so the parts when placed just follow the natural line. I'll have a think and see what I can do.
Cheers for the kind words!
-
From what I have read from people who know what they are talking about it should be steel or
cockpit grey greensee below.Whoops, here's a discussion on the matter, Edgar who knows quite a lot about Spitfires reckons natural steel or Army Bronze green, not red or interior Grey Green.
Cheers
Dennis
Thanks Dennis. Consider it painted.
-
That looks great, I love the base and the figures, and it just shows that the Hobbyboss kit can be built up into a nice looking Spitfire, shame about the red (post war) crowbar though
Cheers
Dennis
Thanks Dennis..
That's why I post here, to get advice.. Should it be the same green as the cockpit?? My reference photo's had a red crowbar, but was a restored spit so that's where I went wrong.
-
That's excellent mate! Great stuff. May I publish it on the website?
Kev
Hi Kev,
Sure thing mate.
-
Hi Guys,
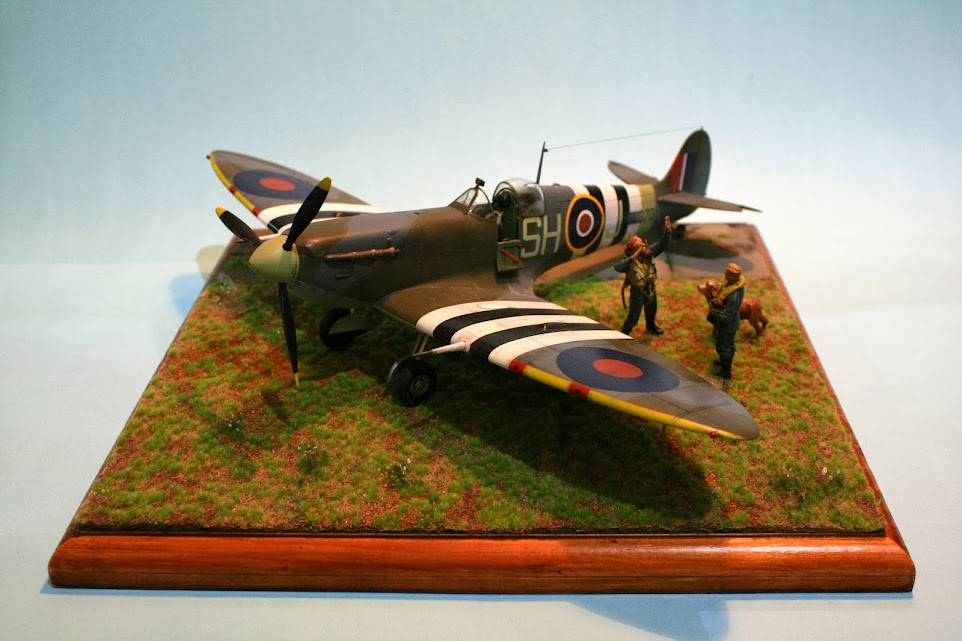
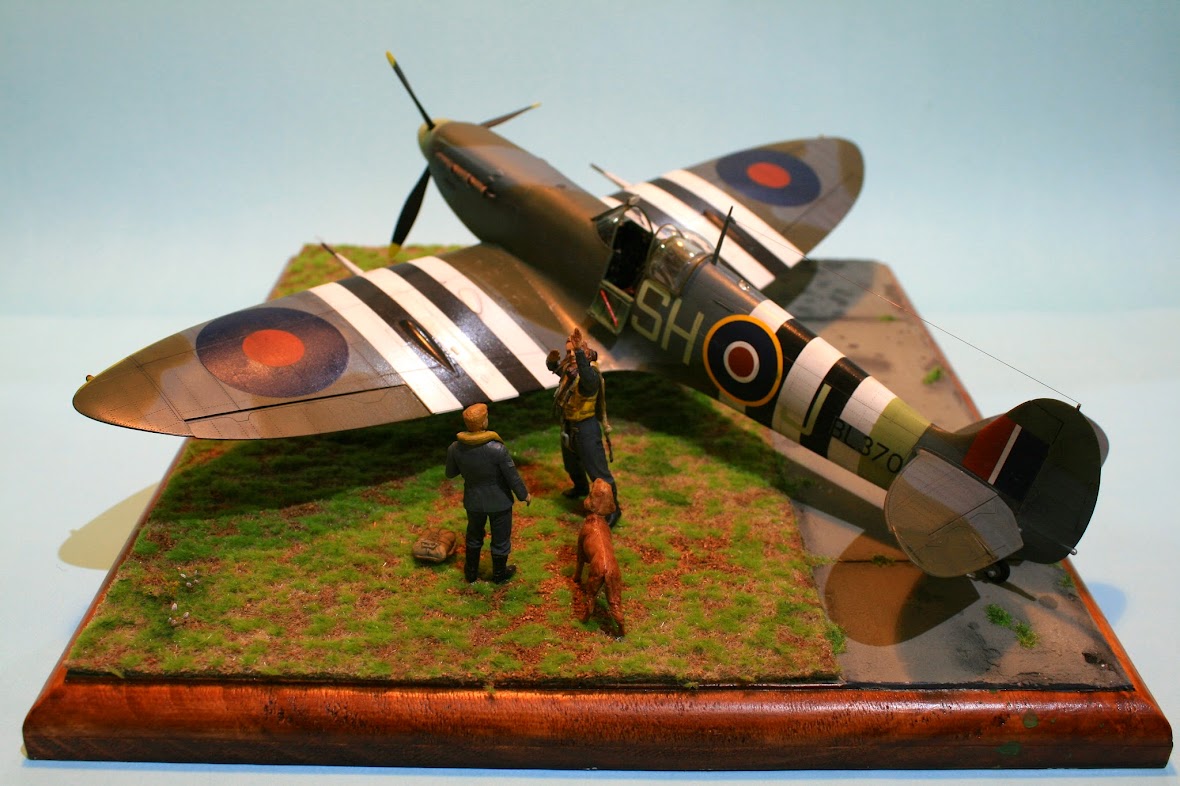
Here is my latest Diorama based on a 1/32 Hobbyboss Spitfire mk VB. I'm calling this one "Reliving the encounter"
I've added the following aftermarket to the Spitfire.
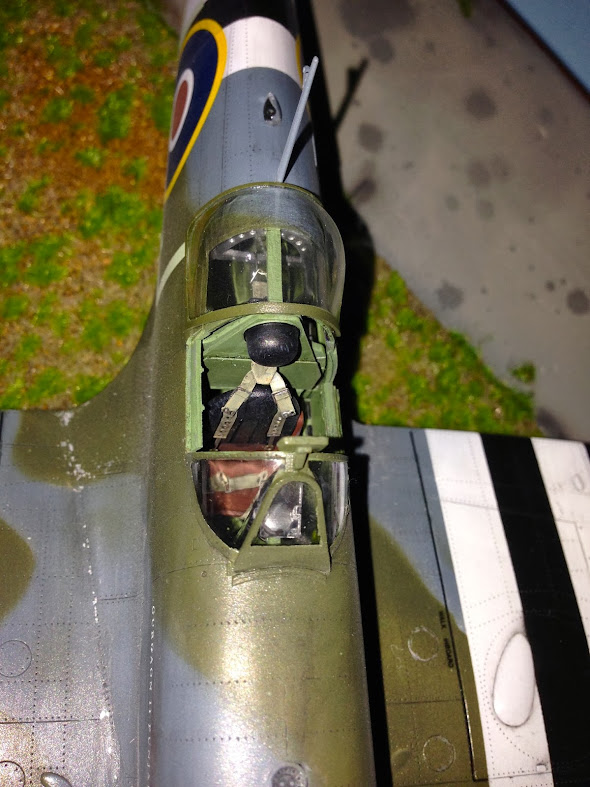
- Barracuda Cockpit Door and Cockpit Upgrade set -Awesome bit of kit!
- RB Barrels for the Hispano Cannons
- Xtradecals for the markings of BL370, Gurgaon II Punjab
I added bits and pieces of detailing, built up the backrest for the seat out of 2 part epoxy, and added hydraulic brake lines to the landing gear.
Figures are from Masterbox. I'm still learning on how to paint these guys, used oils and techniques in some online tutorials.
Base is made from spakfilla and a new grass mat I came across on an online store. Mat was washed with various tones of brown and green, and I added flowers from a weed around the house..
The real aircraft in this Diorama is actually on display at the WW2 museum in New Orleans, albeit slightly altered.
Cheers!


-
Nice work. Came up trumps!
The grass in the photos with the G6 on a base, is that a mat? If so, who makes it?
I'm looking for something similar with an upcoming WW2 project of mine.
Cheers, great work once again.
-
wow
 that's really a terrific big beast for sure!
Thanks....It certainly does take up enough room in my display cabinet.
-
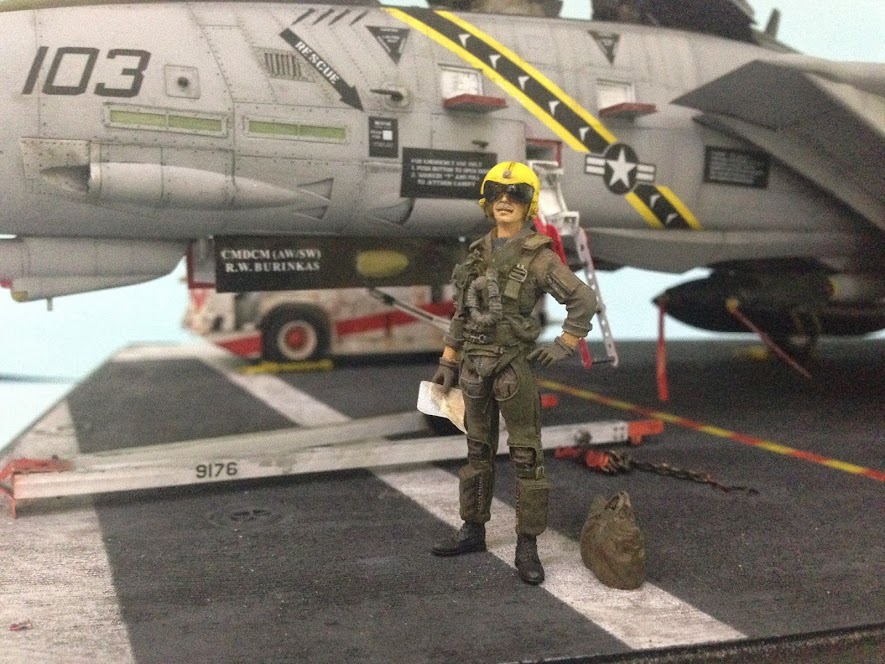
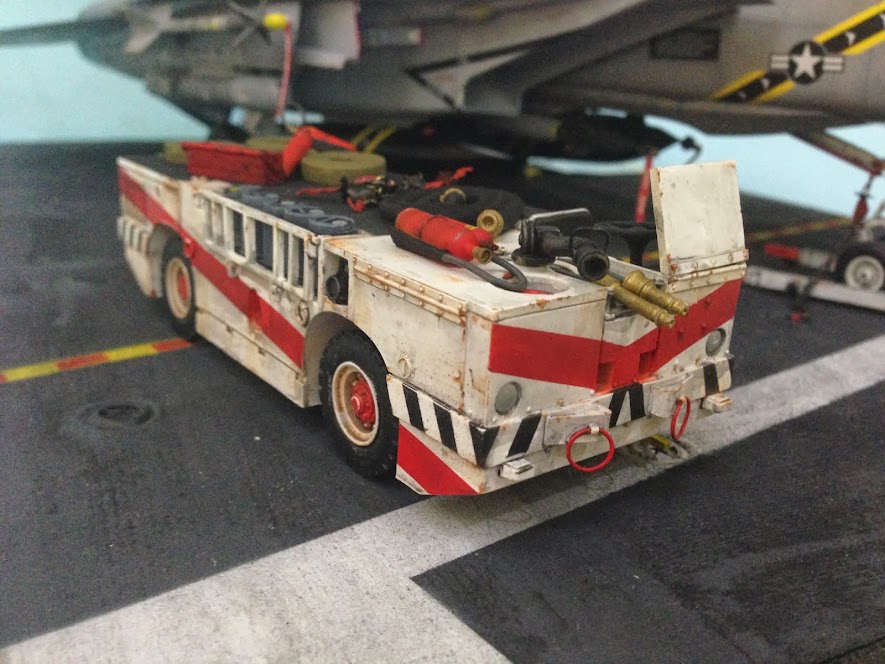
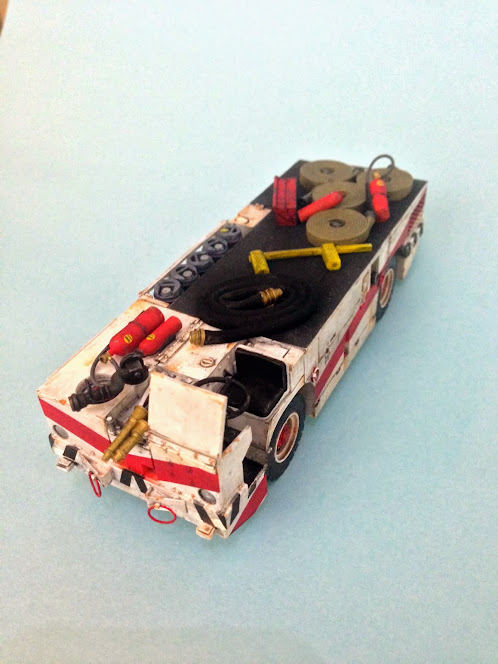
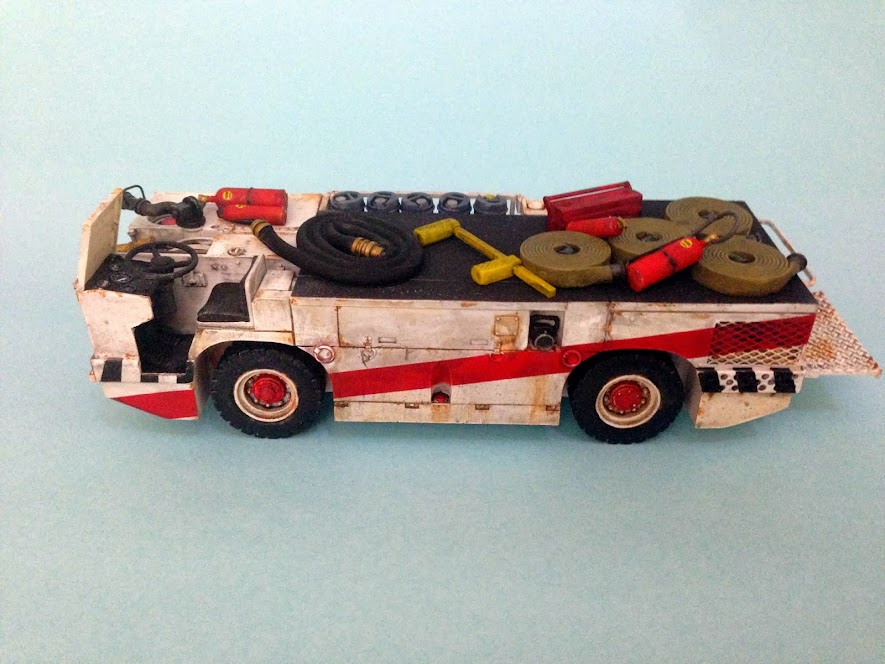
I couldn't leave this Diorama alone....
I picked up the Verlinden Fire Tractor and 1/32 Top Gun pilot.
Pilot was my first foray into Oils for tones and I was very pleased with the results.
-
Nice Superhornet mate!
Got to see these for real on the weekend as part of Riverfire in Brisbane.
They don't hold a candle to a F-111 dump and burn, but still damn awesome to see and hear up close.
Did you have to modify the kit much to make it an RAAF jet? -
Top job! I've always loved the Falcons, yours is an excellent example. Weathering is spot on in my eyes.

-
Thanks Kev, that's great.
-
Hi Rob, good looking mudhen, but could you elaborate on your painting "troubles" if possible?
Jack.
Hi Jack
When I sprayed I got dry-flight. The surface of the model was like sandpaper.
Luckily I was able to resurrect it by gently sanding the surface with some Wet and Dry sandpaper, 1400 grit and up.
I then gloss coated for decals, then Testors dull-cote over the top.
I think the reason I got dry-flight was the temperature. I seem to recall it was hot when I painted the model, which is pretty normal here in the sub-tropics of Australia.
You live and learn.
-
That looks terrific Rob! I'd like to publish this one too if I may.
Kev
Sure thing Kev. Thanks!!
-
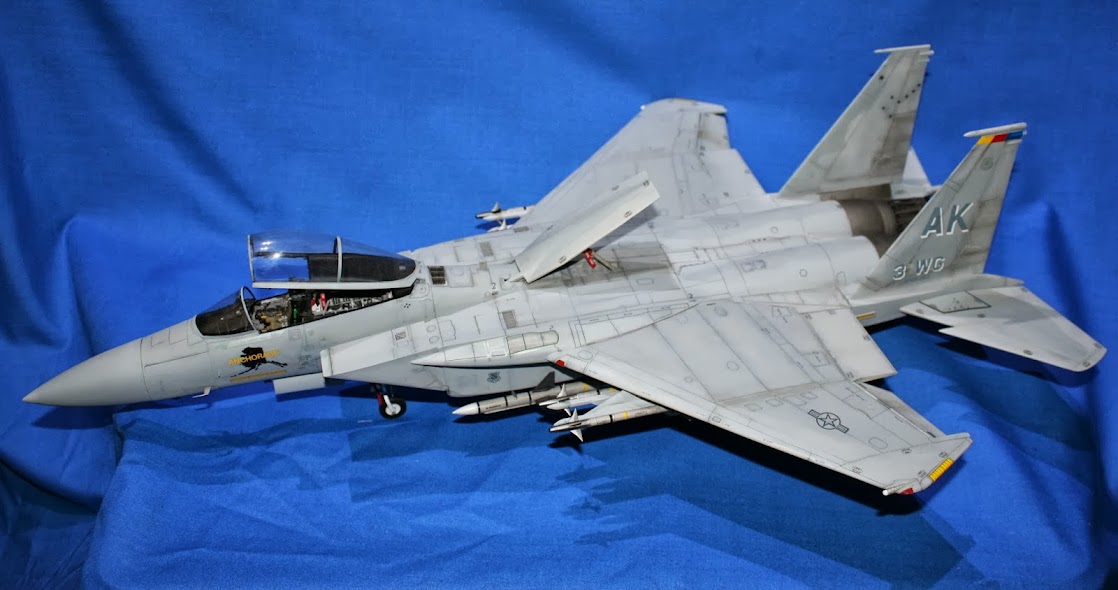
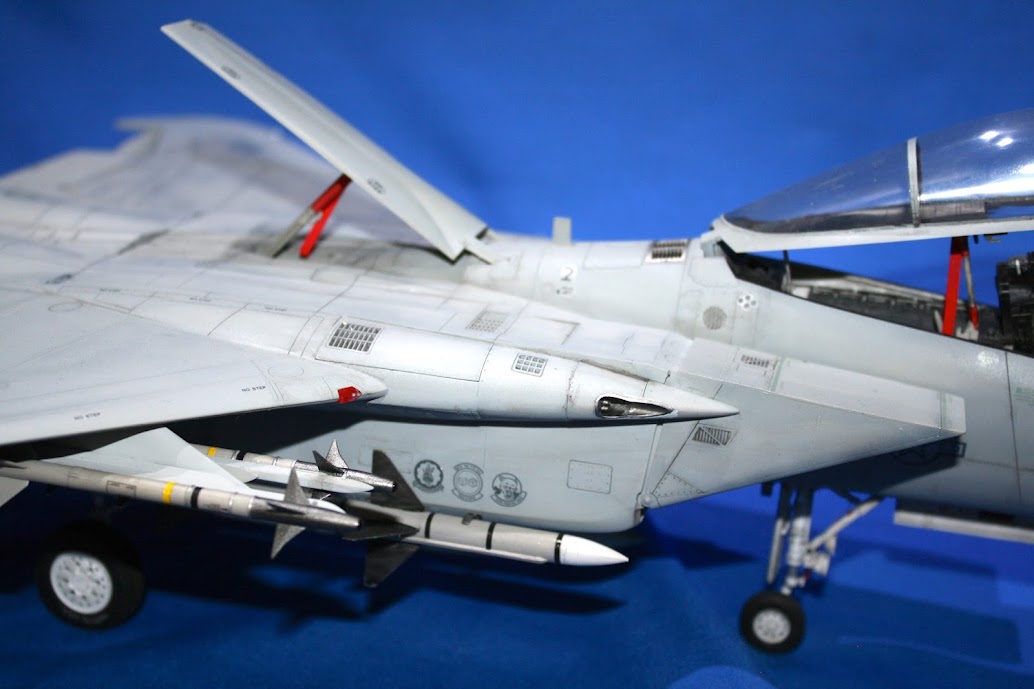
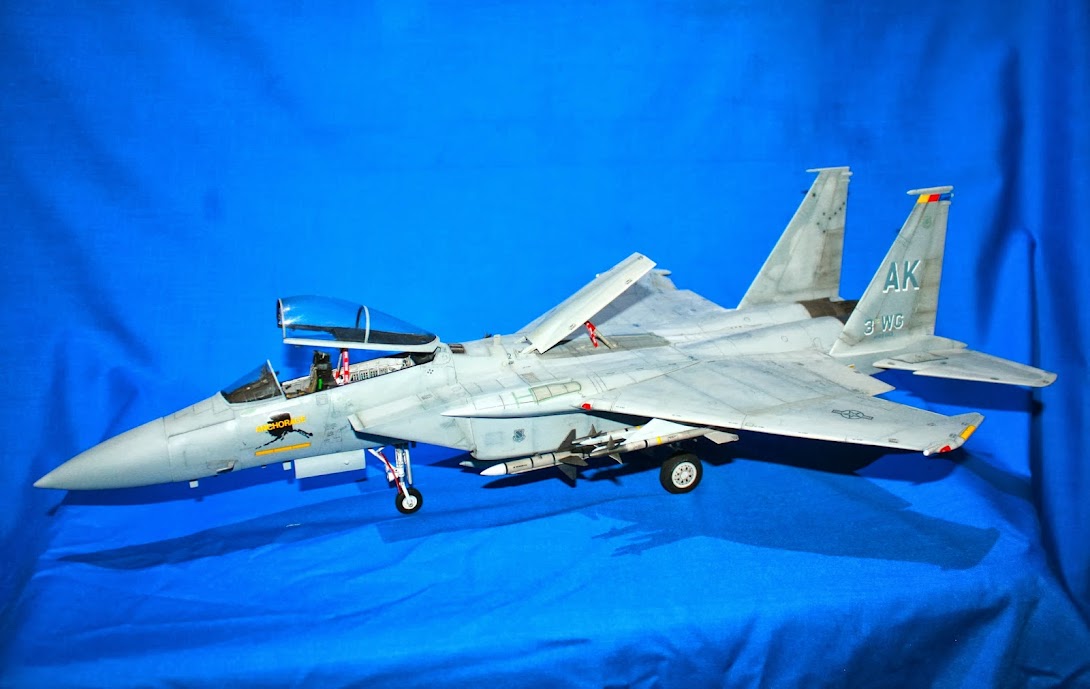
Hey Guys,
Firstly, thanks for my warm welcome. Appreciate it
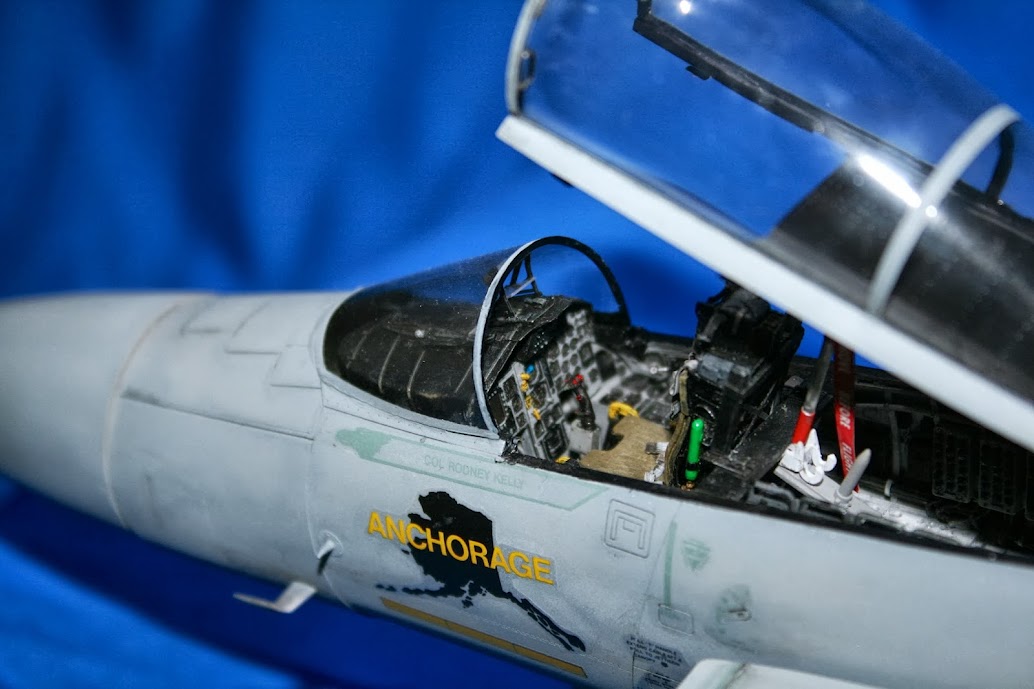
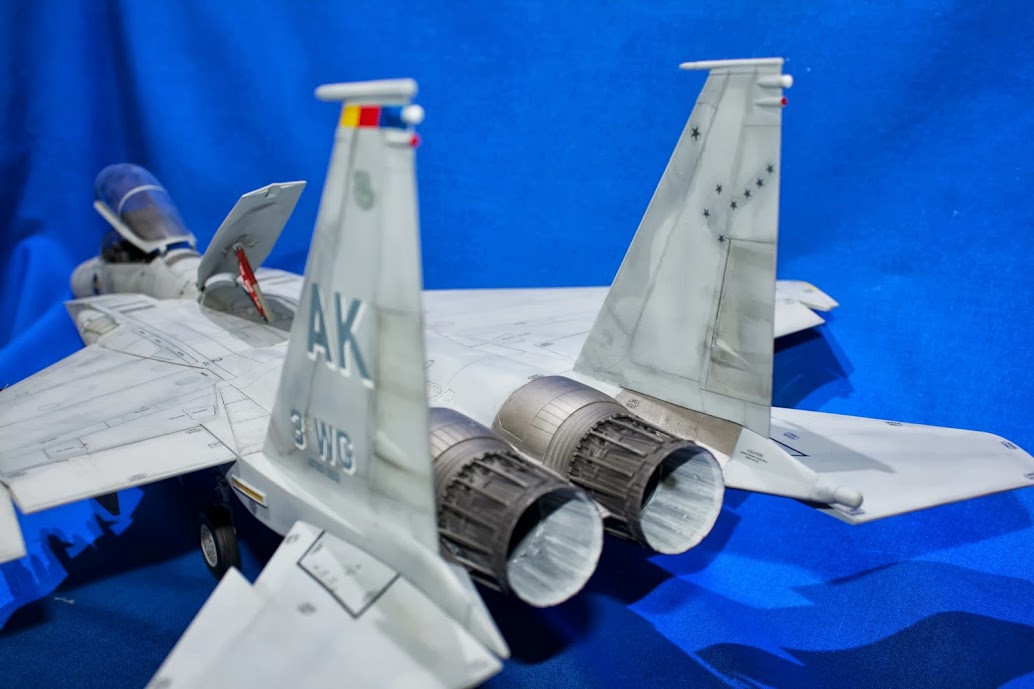
There was a request for my F-15 C..so here it is. I finished this one a while ago, so I'm a bit sketchy on the build details.
Has the Aires cockpit, which if I remember was a pain to get in. Results are worth it, and the detail is second to none.
I went for a bit of a faded look with the paint job. This was my first and last foray into the world of Model Master Enamels. I'm sure they are great once you know how to use them, and I practiced to get the application right. But for some reason, they just did not work..
Thanks for looking
Rob

-
Looks awesome.. Well done
I've got the same kit. Man those wing folds are pains!
-
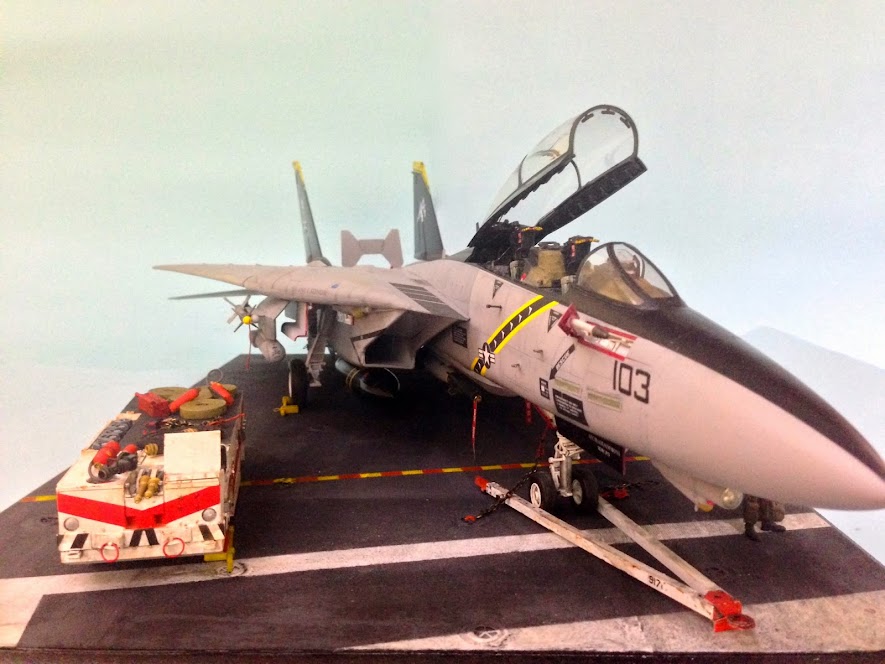
Fantastic looking Tomcat! Ooww yess !! Great build, great paintjob, very realistic weathering, Yep, top work!
I have had this Trumpeter kit so many times in my hands in the LHS, but never went to the counter with it. I'd love to do it, but it looks so complex... Maybe one day...
Anyway, welcome here! Hope to so more of your work. And hey, where are the photos of that Eagle you built?
Nic
Hi Nic,
I'll see of I can dig up some photos of the F-15. Watch this space.
You should get the kit, the build was pretty straight forward. I was annoyed with the total lack of detail in the nose landing gear, and fuel probe but that was pretty easy to remedy.
Usual Trumpeter, you have these fully detailed engines, then they are sealed up so you can't see them..
Tricky bits for me were the intake ramps, I had to reverse the left and right ramp to get a better look. There are plenty of articles on this problem and I think that there are aftermarket intakes available now.
I also had issues when mating the cockpit to the fuselage assembly, I was left with a fairly large step. Had to sand and re-scribe the detail.
The other thing...The Decals. I'd definitely go aftermarket if I was to do this again. Thick, took loads of Mr Softner to get them to adhere to any detail and cracked easily. Also, they were just wrong! One of the "Warning Jet Intake" decals is mirrored, so it's back the front and in reverse. Only discovered this when I was 3/4 of the way through decalling.

-
Thanks Kev, that is very cool!
-
Being a former U.S. Navy brat growing up on or very near U.S. Naval Air Stations, the Tomcat was my favorite a/c during those formidable years.
Your Tomcat is an awesome representation of the real deal! Very well done
 .
.Thanks.. I appreciate the great feedback. I think like every kid who grew up in the "Top Gun" era, the Tomcat holds a special place.
I love the Tomcat, and I'm sad I've never seen it fly in person, and will never get the chance.
-
Stunning build mate. It looks fantastic that's for sure.
I have the same kit in my stash.
How do you rate the wolf pack cockpit - was it worth it?
Great job, one to be very proud of.
Hi Joe,
Firstly, this is only my 2nd "big" cockpit replacement, my first being the 1/32 Aires pit for the Tamiya F-15C. so I'm not sure I'm qualified
The WP cockpit, in a word was a pain... the tub being split in 2 really adds to the complexity.
Add to this my pieces were warped, and It became a struggle. You know the drill...Dremel...sand....test fit...repeat.
Great detail, just be careful on the fit of the rear deck behind the RIO. Mine was warped, and I didn't pick it up till I'd sealed her up, even though I'd done countless test fittings.
Also, be careful on positioning. I used the Trumpeter pit as a guide, and I think I'm off. Don't ask me how, but the pilots tub is positioned too far to the aft of the aircraft.
When I was measuring, the pit fitted exactly in the same "lugs" as the Trumpeter pit.
Honestly it's made me rethink buying any WP resin in future, and why I scratch built the fuel probe internals, even though they had a kit.
I like the extra details, and it really makes the cockpit shine. Was just a lot of work is all, and it should have been easier to fit.
Eurofighter Typhoon - RAF 3rd Sqn 100th Anniversary Scheme
in Ready for Inspection
Posted
Cheers.
The decals performed flawlessly, I had a couple of spots where I got some silvering but I'm putting that down to a "me" error, and not the decals. Enjoy!