

Cees Broere
-
Posts
2,079 -
Joined
-
Last visited
-
Days Won
2
Content Type
Profiles
Forums
Events
Everything posted by Cees Broere
-
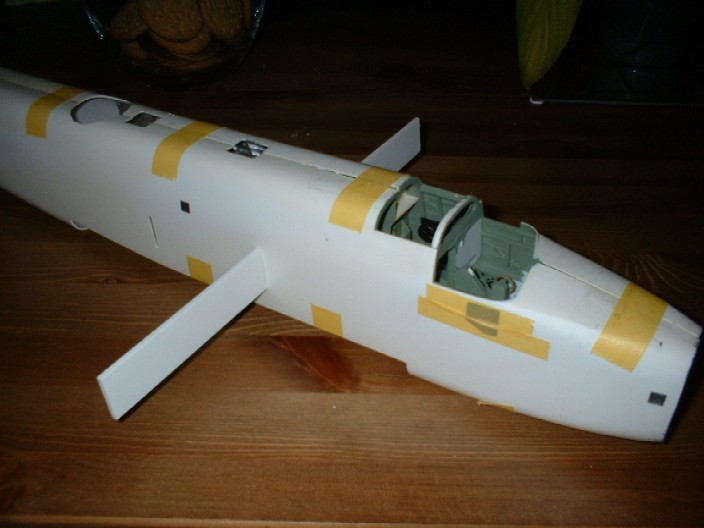
And the bombbay dryfitted. At first I was going to close the bomb bay but in this scale an open bay with bombdoors will look fantastic (I hope). Now the thing is growing, motivation is no longer a problem. I might even finish this beast within a year Cheers Cees
-
Now with centre section dry fitted and inner nacelles loosely in place. This thing is getting huge.

-
Another update, This is the front spar fitted to which the centre section will be fitted to give it much needed strenght. The thing is already quite heavy even without undercarriage and outer wings, empennage etc.
-
It is, and that in 1:48 scale. I use Phil's Halifax project as a template to see what can be left out and what not. There is a lot that just cannot be seen and otherwise I would be dabbling in the interior for many years more to come. The back of the work is broken though and if the centresection is ready I start on the interior again. The outer wings will have to wait till last and will be removable. Phil's is in one solid resin piece. In our scale that would make it very heavy and the undercart wouldn't be able to carry it. Cheers Cees
-
Fantastic work. This again goes to show that these basic vacforms can be made into something beautiful. Cheers Cees
-
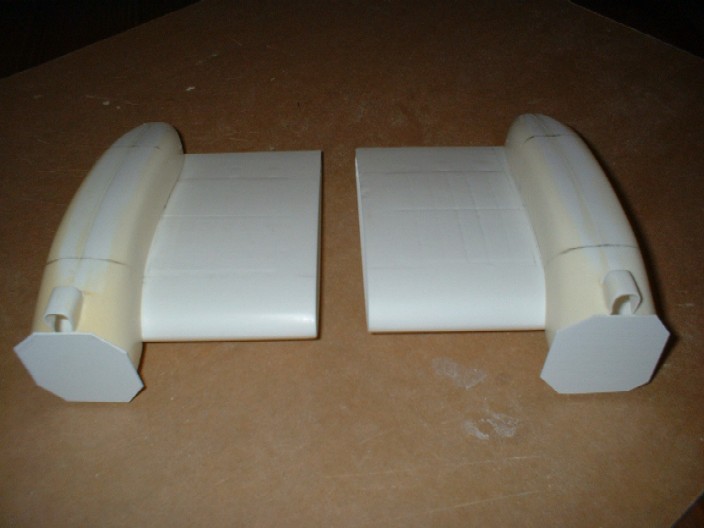
Both inner wings, still need strenghening from the inside as the full weight of the Halifax will have to be carried, I intend to fit two spars in the position of the two spars as the original Halifax had. I had alread made some slots in the fuselage so they can be slid through after the fuselage has been assembled.
-
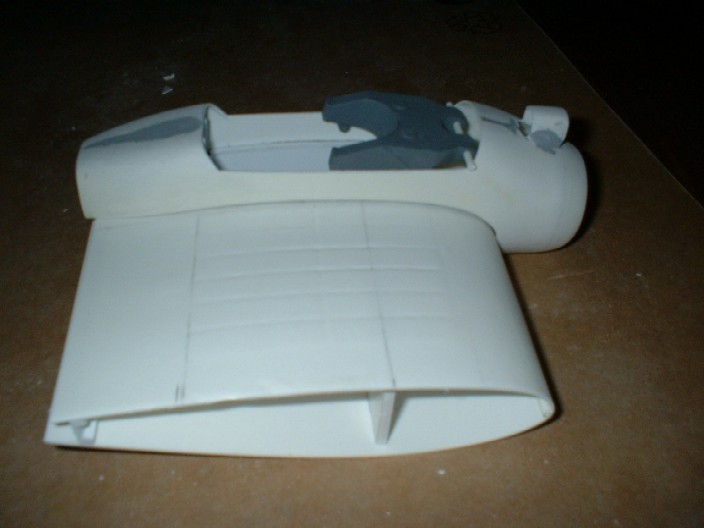
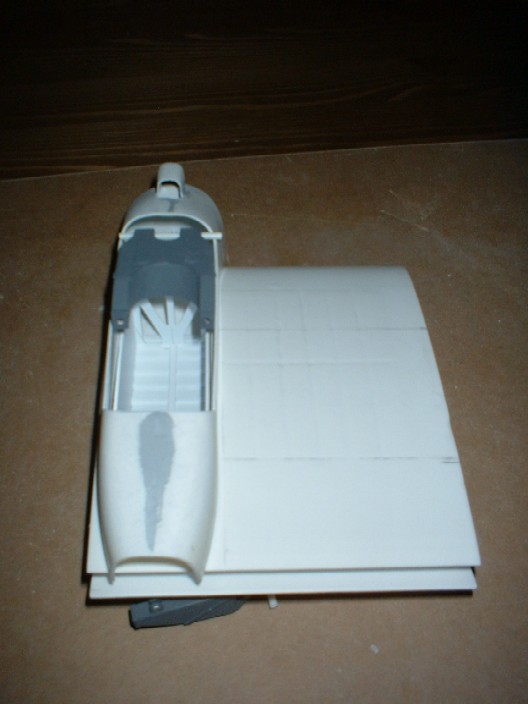
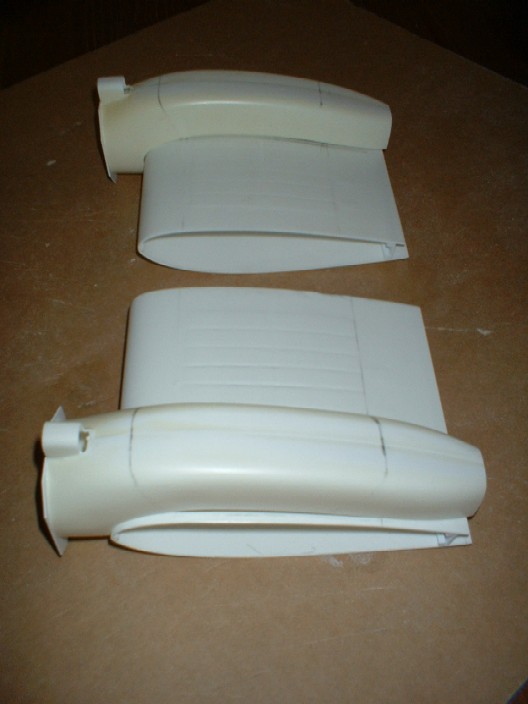
Seen from the side, nacelle fairings need to be detailed themselves before everything can be cemented together. Again, it takes a lot of dry fitting to get it right.

-
Now with nacelle dryfitted on top of that.
-
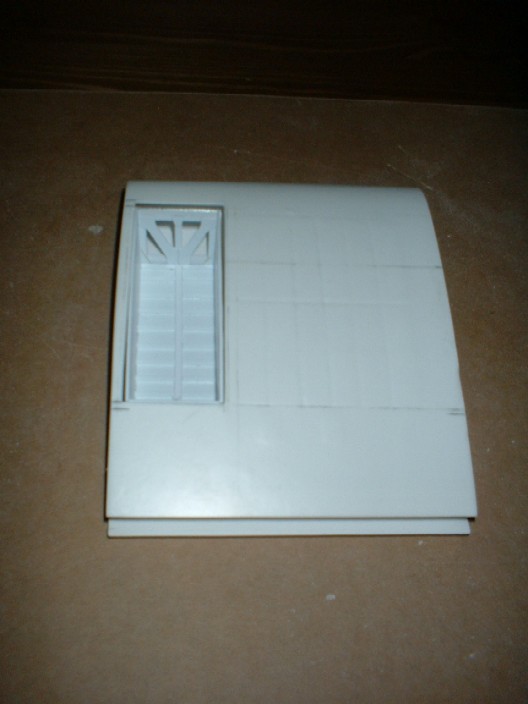
Undercarriage bay dryfitted in the centre section wing half.
-
With undercarriage legs laid in the general position to see how the structure should be made up.
-
From another angle

-
Work is concentrating on the undercarriage, the bays and inner wing nacelles. I also tried to represent some of the mainspar structure that can be seen inside the undercarriage bays. Cheers Cees

-
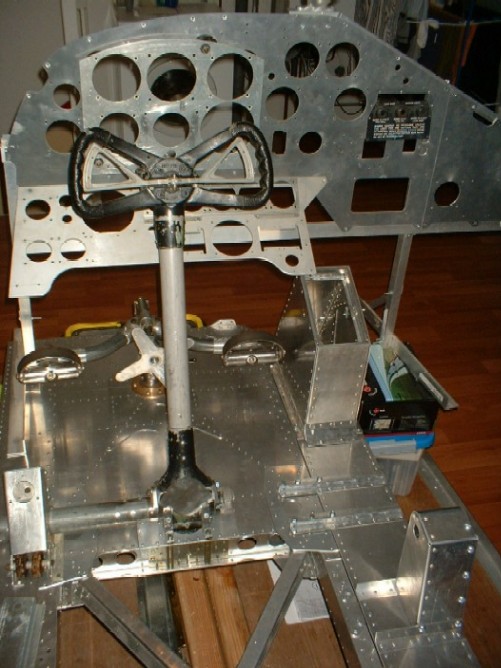
In the meantime I have been doing some work on the 1:1 Halifax cockpit as well Cheers Cees
-
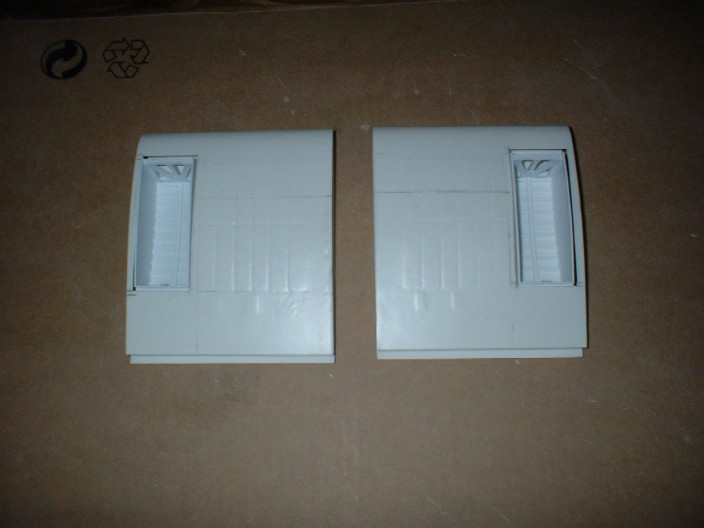
Another view showing the undercarrige door apertures. Cheers Cees
-
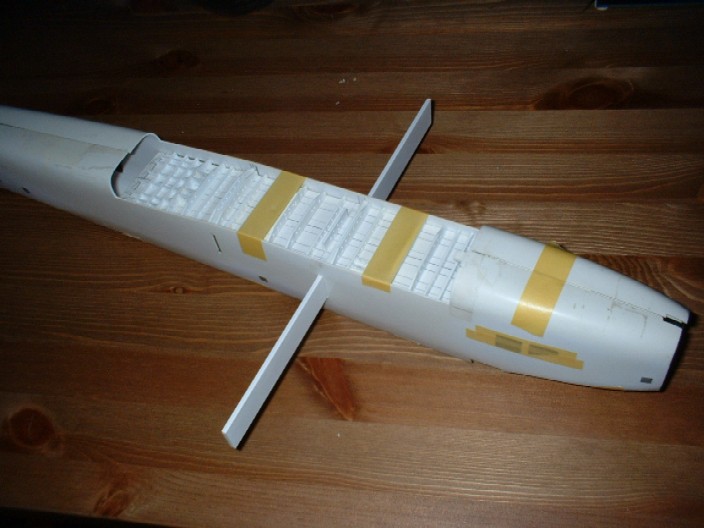
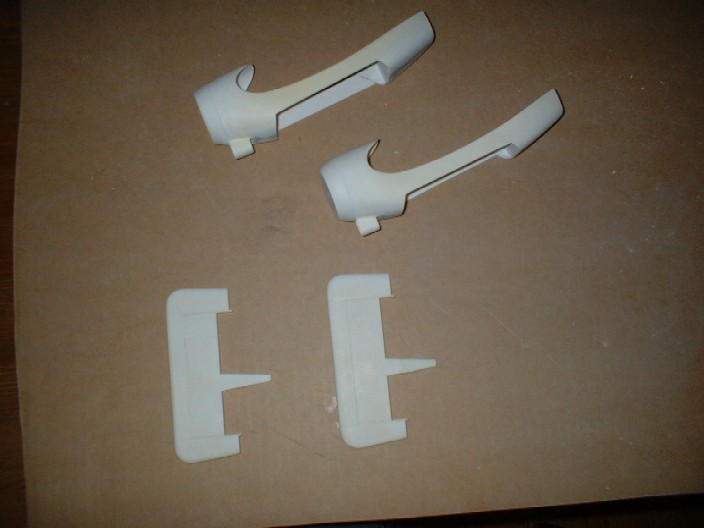
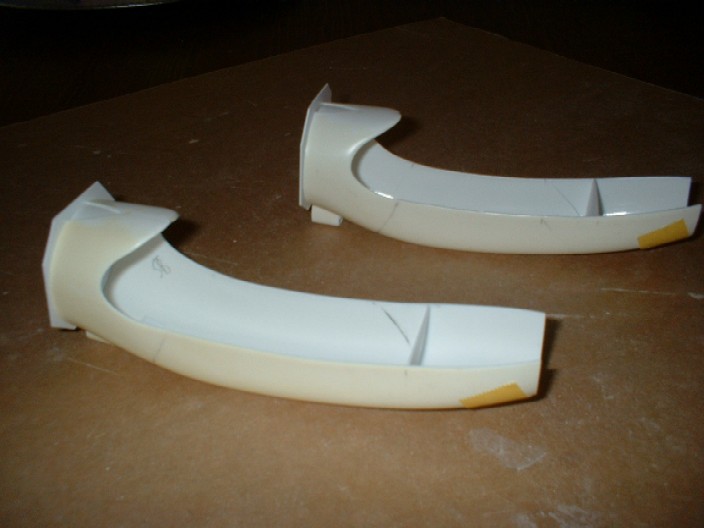
I have lenghtened the inner engine nacelles to give it the typical conical shape to mount the cowling gills on otherwise there was nothing to fit it onto. Fitting a smaller plastic card disc with some scap plastic in between which was then roughly filled with milliput.This is now sanded to shape as well as the undercarriage door aperetures cut out. Also the scratch built tailfins were given the milliput treatment. All they need now is some more sanding to shape and then they can be fitted to the horizontal taiplane. I'm having a ball at the moment. Modelling is fun Cheers Cees
-
Radu, Yes, it does. I will set myself a task at a time. Now working on the inner engine nacelles. Next stop after that, back to the cockpit. Thanks Cees
-
Radu Absolutely amazing work, I wonder how you build this cockpit so fast while I'll still stuck in the ID Models Halifax, what's the secret. Any tips? I seem to work on other parts of the model now just to avoid working on the cockpit Cheers Cees
-
Jack, Prachtig resultaat, een echte inspiratie. Cheers Cees
-
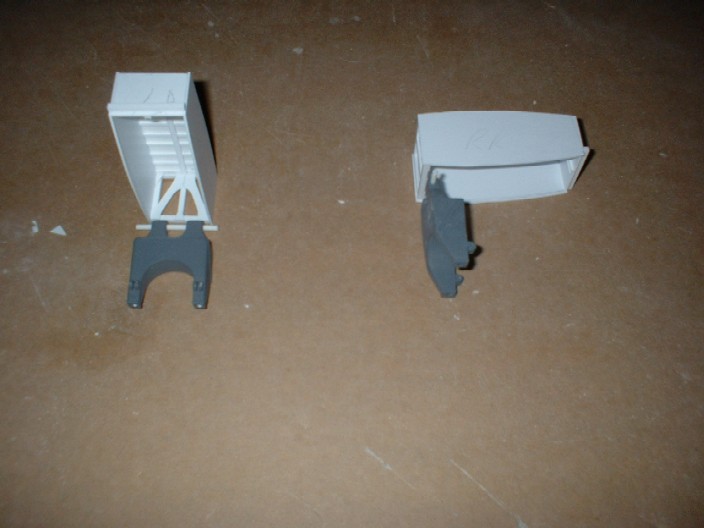
The uppersections of the undercarriage bays with structure added and the undercarriage legs layed out. Work is continuing on the undercarriage bays and the cutting out of the doors which takes a lot of trial and error (measure at least more than twice before cutting once) Cheers Cees

-
Another view
-
The centre section with nacelles dryfitted. Cheers Cees
-
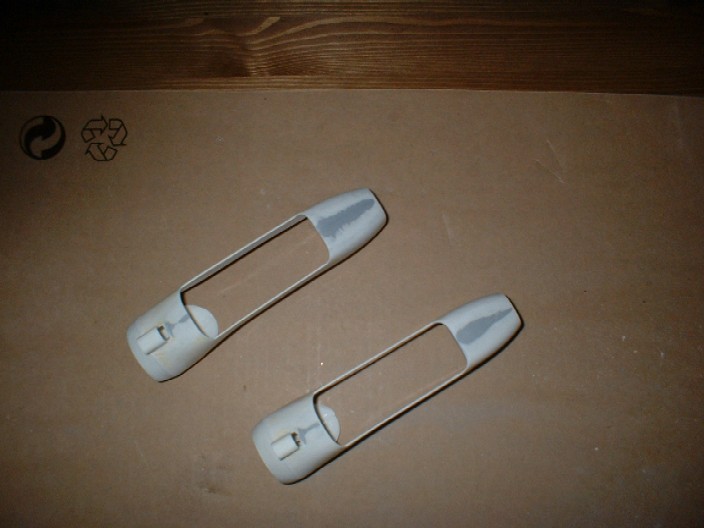
Back again, I have found some new inspiration to start on the evergoing Halifax build. I have started on the wing centresection and nacelles. As I have built a new tailplane, I was thinking about building a new centresection as well but that was not something I was looking forward to. Surprisingly the provided parts by ID Models were reasonably good and I decided to use them. Over the past week I have been cutting, sanding and fitting as it should be with vacforms but progress is good. Here's the two inner engine nacelles Cheers Cees
-
1/32 scratchbuilt Westland Whirlwind
Cees Broere replied to ironman1945's topic in Works in Progress
Dave, An amazing build, what a magnificent sight. Fantastic!!! Cheers Cees -
Hi Chris, I have seen photographs of this wreck before and the lay out of the wreck in you photo's is exactly the same. Wrecks recovered from a field do not look like this wreck, but are smashed into thousands of fragements. I know, I have seventeen years of experience (see www.arg1940-1945.nl for our work) in this field and have seen the wreck of this P-47 shortly after recovery. There are no two P-47 wrecks on display in Germany that were recovered from Holland. Any further information will be welcomed though. Cheers Cees
-
Hi all, This is Frank Gallion's Thunderbolt which was recovered from the IJsselmeer during 1995 with his remains inside. He has been given a proper burial in the US if I remember correctly. I have seen this wreck when it was on temprary display (outdoors) later in 1995. It was in very good condtion considering that it had been underwater so long and the stars and bars with red surround was clearly to be seen. This same wreck was put up for sale in Aeroplane Monthly some years later but did not seel. I made some enquiries to save it for display in Holland but the seller ( a major Dutch Museum, not the Aviodrome) refused to do as he wanted it to go back to the US. Irocally it was swapped for some German uniforms and is now on display as a heap of scrap. The wreck was intact until it broke the surface and then snapped in half. Make you cry. One of Holland's black marks in historical aviation. In the same museum must also be the wreckage of a Ju88 that was recovered in Holland as well. Cheers Cees