

Burl Burlingame
-
Posts
6 -
Joined
-
Last visited
Content Type
Profiles
Forums
Events
Posts posted by Burl Burlingame
-
-
-
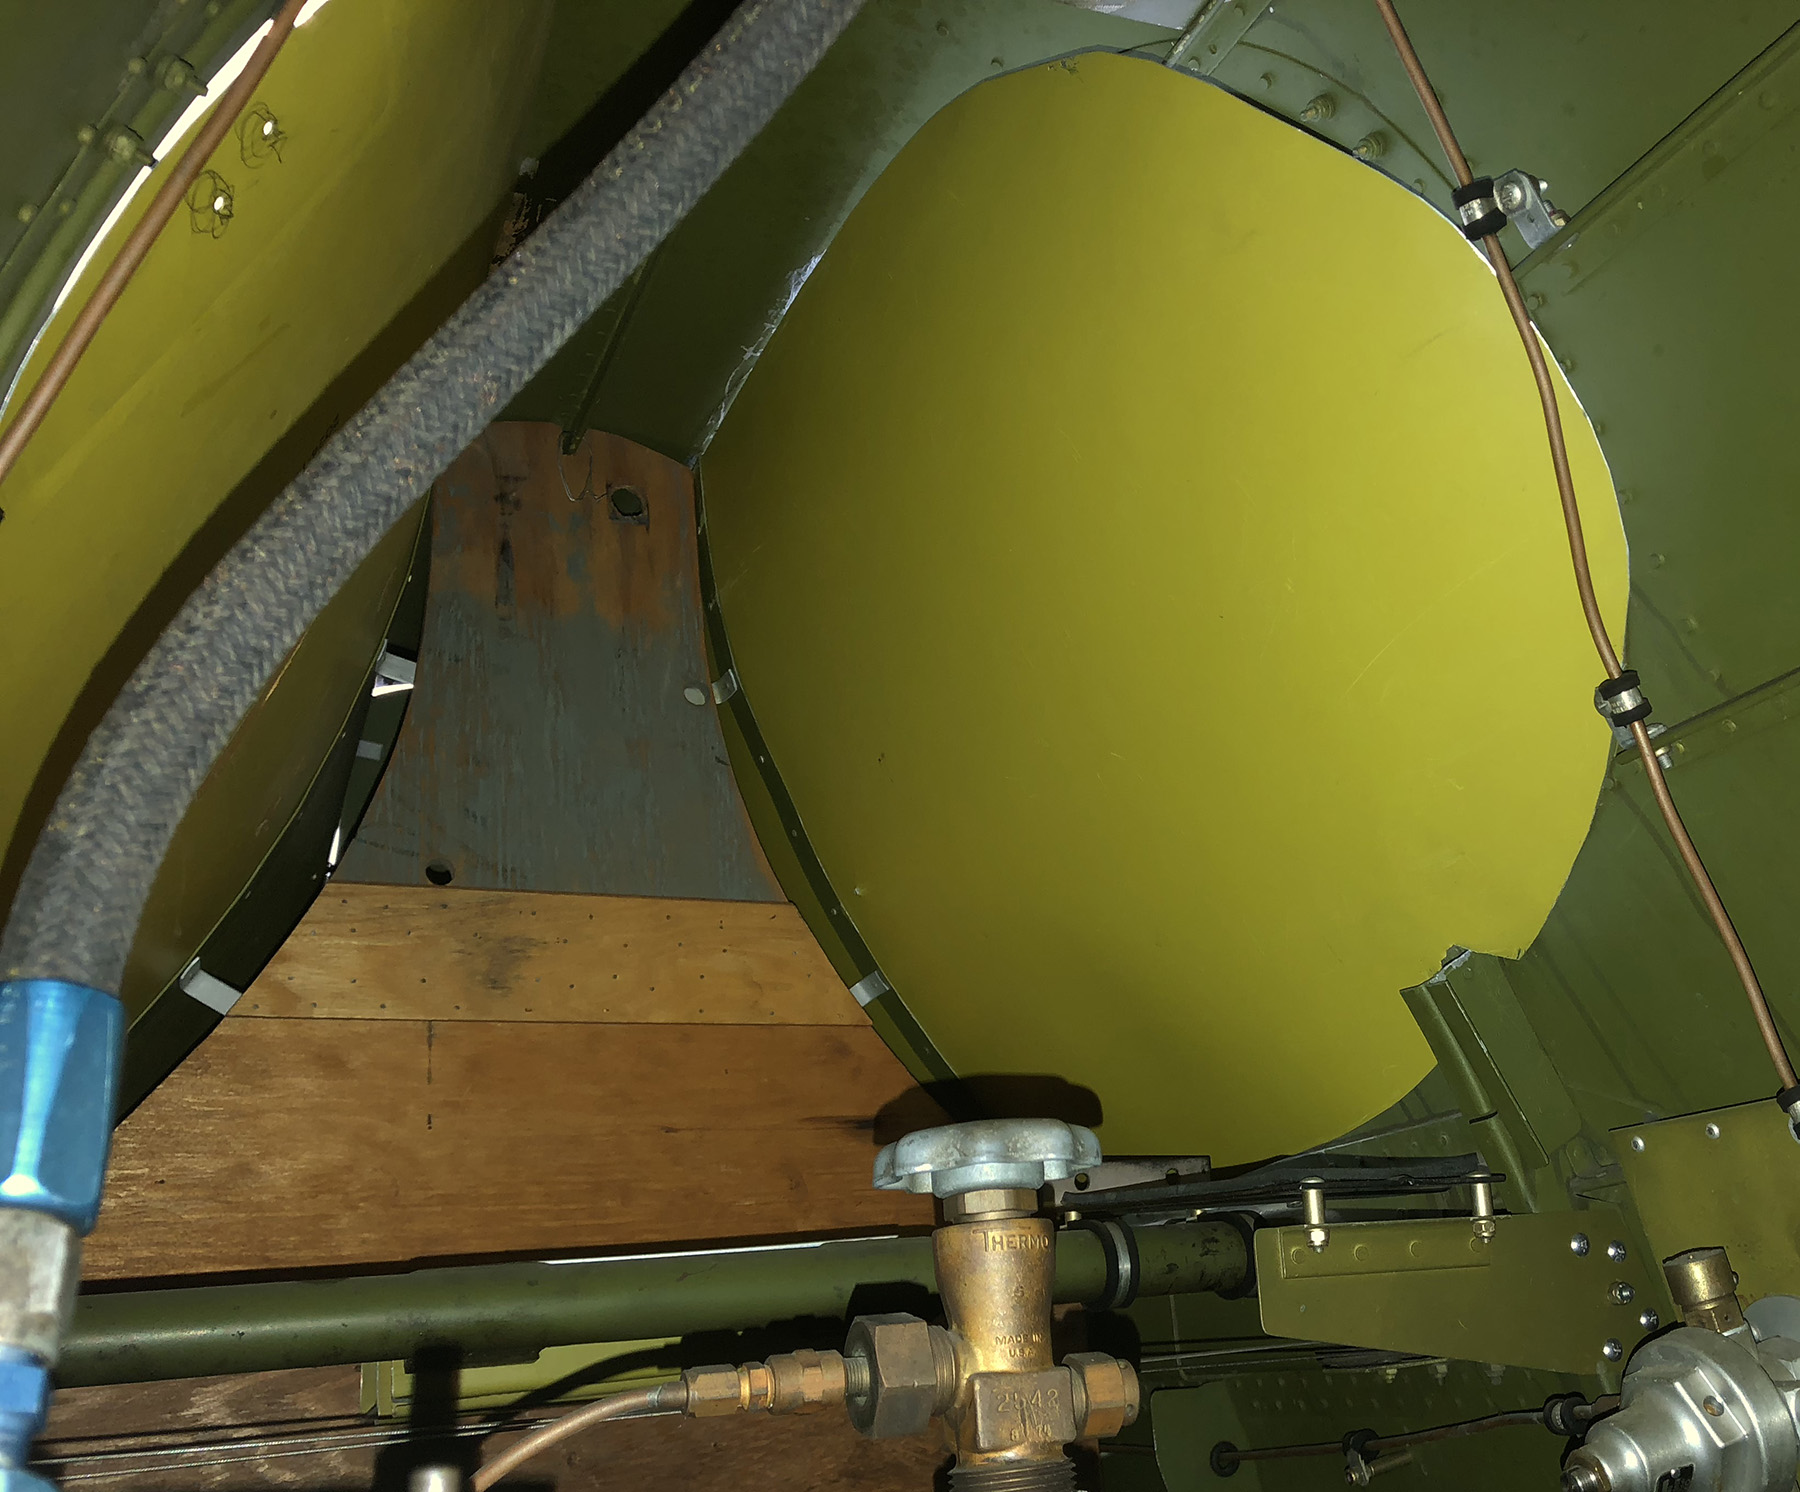
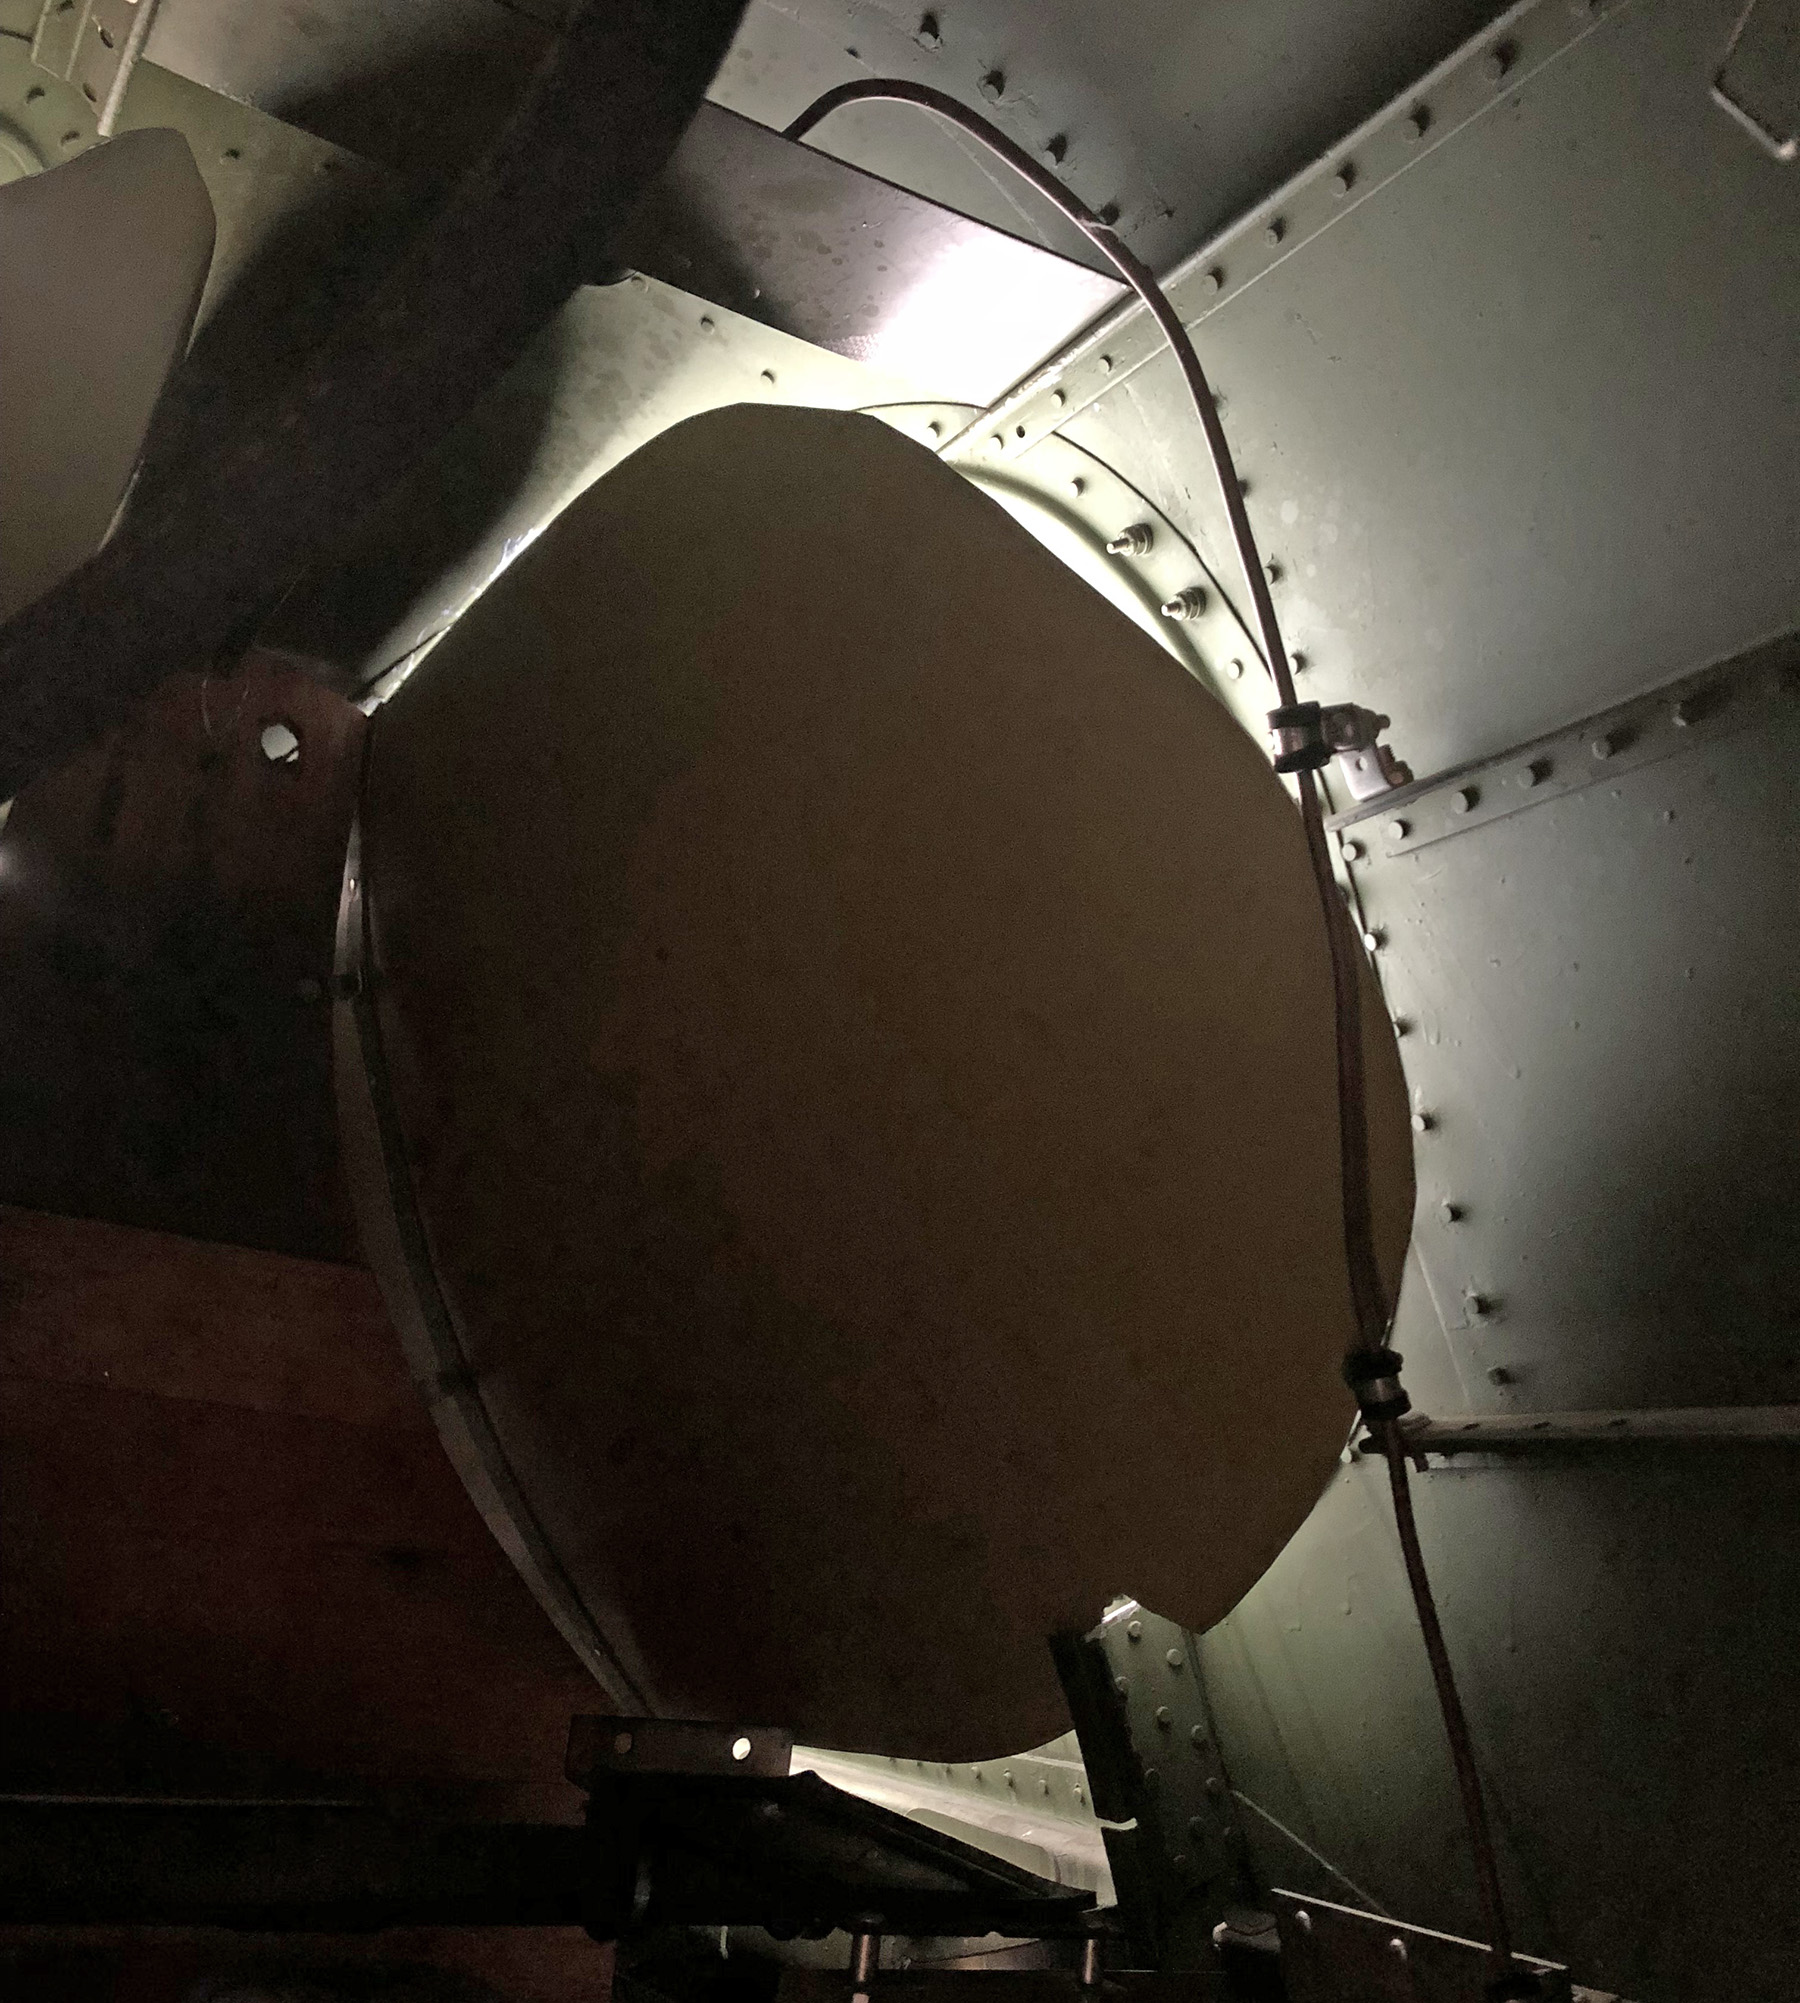
Here's some interior shots of a P-40E rear window attachments — they're not attached!
-
On 10/1/2018 at 4:44 AM, haneto said:
Good evening gentlemen.
I have some relationship with GWH so maybe I can share some more background information.
The original plan was to make the P-40N, advised by GWH boss' Taiwan ditributors (or retailer, whatever).
I suggested him to reconsider that since we already have the decent Hasegawa 1/32 P-40N and the price is quite competitive,
so my recommendation is the early P-40 especially P-40B, which still deserves a good kit and also even more important or iconic for AVG compared with P-40N.
The reference I recommend GWH to use is from a Japanese super talent air modeller Mr. Jumpei Temma's homepage, "Wings of Pegasus".
(Some pages have English version but mostly in Japanese.)
http://www.geocities.jp/yoyuso/
In his built of the 1/48 P-40B, he made very detailed and inspiring research/investigation work for the whole P-40 family, with the latest full rivet plans.
http://www.geocities.jp/yoyuso/p40b/p40b-1.html
So his plan was a great help for GWH to decide the CAD proportion and what you see in Tokyo Hobby Show 2018, is the 3D print parts based on the CAD design.
And from what I heard from GWH, their 32 scale series shall have the full rivets surface, detailed cockpit and full engine, similar like Tamiya 1/32 scale kits.
Let's wait and see...
Yufei
It would be terrific if GWH engineered the rear quarter windows properly, unlike every other P-40 kit on the market. The quarter windows are not a butt fit around the edge. They exist within a frame. Include the frame!
-
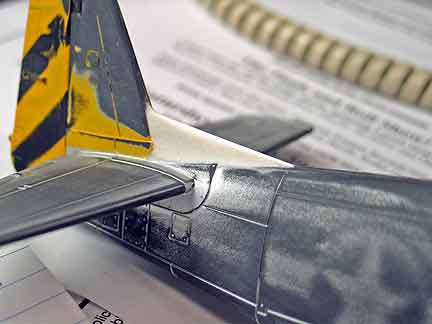
The wing and decal arrived from Germany in fine shape, and within half an hour the wing was epoxied in place.
Yeah, I know the epoxy is sloppy. The excess is fairing the wing root.
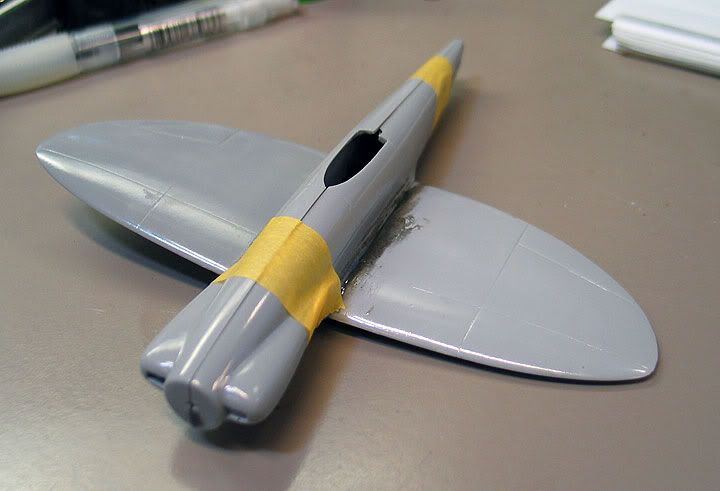
Note the air bubble in the resin at the rear of the canopy opening. It's the only air bubble of major proportions in the kit, and easily fixed.
-
This gives you an idea how rubbery the port wing is.
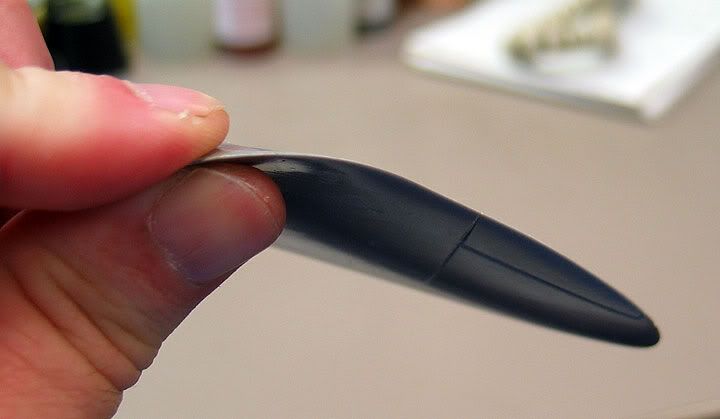
After test fitting the wings to the fuselage, it's apparent that the kit must be built with the wings attached first, and a fair amount of fairing needs to be done for a smooth fit. This model will either make it or break it on the wing installation.
-
Both XS and Red Pegasus emailed back rather quickly, and on Christmas Eve too. Solution will be in hand shortly.
-
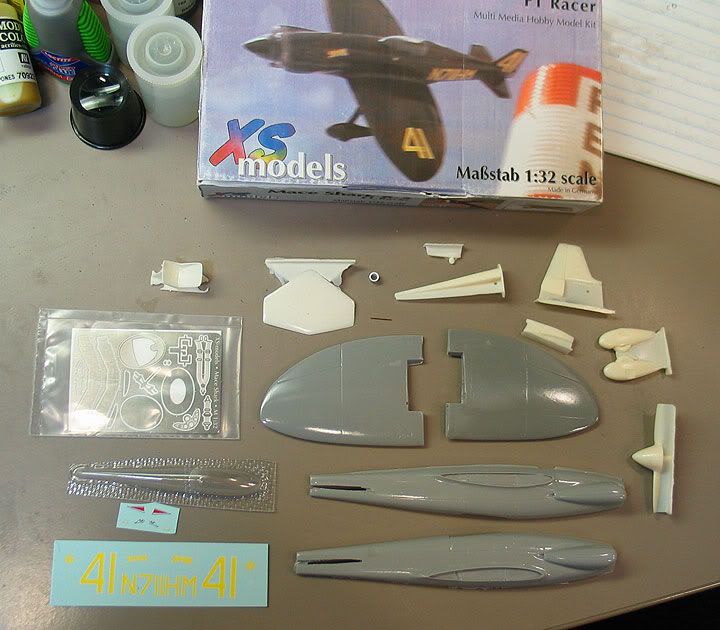
Ah, that simple build. Something right out of the box that pretty much clicks together and doesn't cause too many headaches and gets built fairly quickly. I've had a jones lately to build a Formula racer, and the Mace Shark from XS Models looks the trick — it's small, it's simple and it's one color.
One was ordered from and promptly received from Red Pegasus Decals. As you can see below, the parts count isn't great. It consists of four primary bits in grey resin, nine smaller bits in tan resin, a rather nice etched-metal sheet, a slice of plastic tube, a snip of brass wire, decals, vac-formed canopies and an acetate instrument panel. There are some casting bubbles, but nothing major.
Clean-up is commencing.
But nothing's that easy. One of the decal sheets was missing from the kit (the yellow number sheet is supposed to come in a set of two) and the port wing is cast oddly. It's as if the resin was improperly mixed and didn't kick. The wing is soft and rubbery and folds over on its own weight. I don't know if that is fixable.
I've written both Red Pegasus and XS Models for a solution. In the meantime, I can start work on the fuselage.
-
Watch your Brisfits postwar. Many were the Mk.IV version with some different fits than the WWI editions.
-
You can just press them against the family steam iron. Be sure to scrape off any stuck plastic afterwards, or the Missus will brain you.
-
I was comparing the Aires wells to the HC wells and the leg spread is slightly wider. You can either open up the gear door opening slightly or cut off the Aires wells just short of the gear plug hole.
-
Got mine from Sprue Brothers -- lightning fast -- and the Torch kit has the Malcolm bits twisted off. All the decals there.
-
Good timing, as the kit has just been re-released.
-
I built this bird using the Mauve 1/48 kit. Forgot the source of decals.
-
There was quite a similar scheme, but applied to a P-40N, which is a more likely bird for NMF. Hase's engineering makes it clear an N is coming....
-
Funny, the other P-51B prebuilt I've got in the stash is BALD EAGLE. Always liked that bird.
But not on this build. Hmmm, maybe I'll make it a surprise. But filling in the guns should give it away....
-
The pictures above might give the impression that the surface is rough, but actually it illustrates how well 21st Century's paint "bites" into the plastic.
-
That dark panel directly ahead of the front windcreen is actually clear plastic, a neat way to attach it to the fuselage.
Since the cockpit will be sealed up, I'm doing very little to the interior other than adding seat belts.
Same with the wheel wells. I'm building it with the main doors up. Simplifies things.
Next step is an overall spray of Mr. Surfacer 500, followed by scratch fillings, another Mr. 500 coat, then a rubdown with very fine steel wool and a coat of Mr. S 1000 to make a fairly smooth surface.
-
Thought I'd knock out a quick rebuild of the prebuild. Does that make any sense? Since the kits aren't available (yet), the only option is to buy a prebuilt, pre-painted model (about $18) take it apart as much as possible, and then put it back together. I'm going into this knowing that I'm not going to go nuts accurizing everything. Essentially, it will be like a prebuild, but with a little more finesse.
First step, determine the final version. The one I chose has a fin fillet, so that will have to be added. Also, the gun ports will be faired over.
Taking it apart ain't easy. The seams simply won't give way. The plastic is also kind of black and rubbery. The main fixes are to grind down the blunt wingtips and tail surfaces. The rudder really takes a beating at this point. Then the major seam lines are reglued and filled, very carefully around the canopy, and uneven mating seams leveled out.
Then an overall wet sanding to remove most of the prepainted detail. Here are some pix of that stage, plus the addition of the fin fillet.
Let's see if I can figure out how to upload images....

-
Dunno if it's the same kit, but the Combat Whirlwind is one of their best!
-
Don't forget the fuselage exhaust cutout under the cowl. Biggest omission on the kit.
-
-
I actually like this model a lot, even with the PE control connections. I'd build a passel of them if I could get some refs. Let's see, the users include
Albania
Algeria
Bangladesh
Bulgaria
Cambodia
China
Czechoslovakia
East Germany
Egypt
Guinea
Hungary
Iraq
Laos
Mali
Mongolia
North Korea
Poland
Romania
Somalia
Soviet Union
Syria
Turkmenistan
Vietnam
Yemen
Zambia
-
The engine is great on this model. The overall fit is good and the clear canopy shows everything in the cockpit. You'll need to add hydraulic lines to the gear.
The biggest problem is lack of references. Since dozens of countries used this thing, you'd think there'd be some small-air-forces alternative schemes, but nada ....
-
After eyeballing the DML P-51D and F-6D kits up close, some good news and bad news.
First, the bad: All of the identical sprues actually are identical, down to the trenchy panel lines, dimpled rivets, detail errors and missing items such as the pitot tube. Yes, the props are still flat slabs on the front.
Sort of bad: DML chose the dullest schemes imaginable for the F-6D markings. How about a French or Israeli bird?
Now the good: There is an additional, very nice clear sprue for the F-6D glassware, plus a slight modification to the etched-brass fret. The sprue with the fuselage halves is identical EXCEPT for the fuselage bits, which not only have the necessary changes for the camera ports, the rivets and panel lines are noticeably crisper. They're still overdone, mind you, but the presentation is toned down, particularly the dzus fasteners.
I can't tell if the rubber wheels are still ill-fitting.
The instructions show the diagonal seat supports to be web canvas, like the seat belts. I dunno if that's the case.
Shows that DML CAN tweak this model. Since the company is noted for doing just that with their armor kits, there's hope this can become the ultimate 1/32 Mustang. There are many nice things about this kit and a revamp can only improve it.


PACIFIC MONOGRAPH — 1/32 DH.82 Tiger Moth decals
in Vendors Board
Posted
Some alternate schemes for that Matchbox/Revell kit you've got stashed away!
http://pacificmonograph.com/pmavi-007-1-32-tigre-exotique-decals/