P-40
-
Posts
475 -
Joined
-
Last visited
Content Type
Profiles
Forums
Events
Everything posted by P-40
-
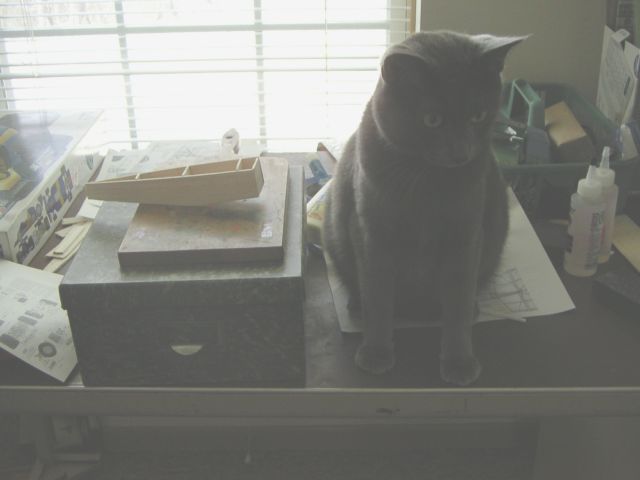
Is he guarding my work or waiting for me to leave and then pounce??
-
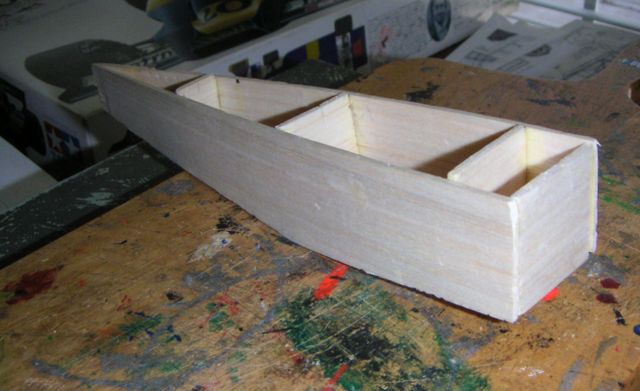
I started a complete scratch build project out of balsa, I got the plans from Cleveland Models. For those wondering what this plane is, here is a link to the flight report on one of the home builts. http://www.airbum.com/pireps/PirepMiniplane.html I started building the fuselage structure out of plastic rod but I wasn’t sure if it would be strong enough so I went back to my radio control days and built the basic structure of sheet. I’m working out what will be easier, building up the fuselage out of sheet or cutting out stringers and then covering it with silk span. Today I got a 1/16 Guillows Stearman with a 28in. wingspan off of ebay, just might start building that structure since it is straightforward while going through the monotonous part of cutting out and sanding all of the parts for the Miniplane.
-
Sometimes?? :angry:

-
Looking good so far! Did you know there are different "types" of balsa, soft, medium, and hard, each has it's own use. After you finish these, you'll be ready for pure scratchbuilding, nothing much differentbthan what you're doing now except you cut the parts out.
-
I’m just getting back into balsa after fifteen years working on a scratch built 1/12 Smith Miniplane. Two things to try when cutting wood like that, use a fine razor saw and go slowly, sometimes if needed I would also take a sponge and wet the wood, I wouldn’t get it sopping wet, but sometimes it would help. Sometimes wetting the wood before putting it over a curved surface helps, you would want to pin it into place and let it dry before gluing it, that might help take some of the stresses out of the wood.
-
The Airshow Models Pitts S2B & Bulldog are great kits also. I have both but unfortunatly need to sell them both as I have a bad reaction to resin and really can't work with it. If you want to buy either or both, email me. Here's both my reviews of them. https://www.largescaleplanes.com/reviews/review.php?rid=248 https://www.largescaleplanes.com/reviews/review.php?rid=246
-
Great Lookin bird!!
-
The tweak list is really great and very extensive. We’re looking at two different places to put it on the site, once we have decided it will go up and it should go shortly. Stay tuned.
-
Lookin really nice!!
-
I really need to remember to change that! My email is wolf427@comcast.net
-
Looking good so far. It’s been many years since I built this kit, if I remember right I don’t believe the ribs were in the scale locations anyway. Are you going to use thin paper or plastic to simulate the ribs and leading edge?
-
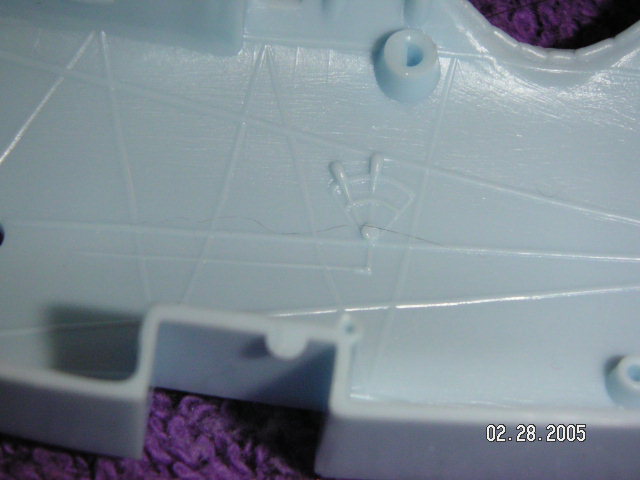
Here’s the other side. Is there something else wrong with the cockpit?
-
Thanks for the information, I’ll have to give them a try. I am working on mine for a review and I am putting it together to check for fit, consequently I am doing mine pretty much out of the box, the only differences will be I will use the aftermarket propeller and if I can make the aftermarket guns look good I will see if I can just set the kit ones in place until I can build them. I am looking for information on the Triplane, I know of some of the inaccuracies of the kit, what are the differences between the prototype versions and the production versions? My version is from 1965 and I was really surprised to see the copyright on the inside of the fuselage as 1957, that makes the molds 48 years old! There are a few things that could be better with the kit, but overall for a 48 year old kit they actually did pretty good on some areas as far as I’m concerned, the fabric detail is actually pretty good and equals or beats a lot of stuff today, the stabilizer has some pretty thin edges. Here are photos of both sides of my cockpit, they are a little bit different with the details although if you want to make a halfway decent cockpit, you almost need to sand it smooth and scratch build it.
-
That’s a great looking machine gun! How hard was it to build? I have never tried one of those ended thinking of getting some of the parts for my Triplane. Did you buy the wooden propeller? If you did, how is it?
-
Here is a really good site on the Triplane, his photo section is a gold mine if you’re into this airplane. http://www.fokkerdr1.com/
-
I have had a couple of these for a number of years and always got nervous, but for the most part they are pretty nice kits. This one is going together a lot nicer than I thought it would, I would like to do one of Roscoe’s later versions and will detail it. The cockpits are pretty basic and if you either cut the canopy open or pull a new one just for the front it will let you be able to see some detail. I want to review the Bulldog and I have heard some fit problems with the gull wing so I started putting the basic parts together and then realized there was more work than I thought on that one but I’ll continue enough to see whether there are problems or not for the review. The Wedell-Williams is a nice though and offers a number of different paint jobs if you know the history of all three. If you choose to do one of the racers, let me know and I can send you photos from different years. Williams Brothers have closed down but the kits are still available on message boards and ebay as they were produced for years. For the Wedell-Williams, here is a nice build article http://www.largescaleplanes.com/articles/C...ms_92/WW_92.htm And here is my review http://www.largescaleplanes.com/reviews/Wi...lliamsracer.htm If you ever get a chance to pick one up as a lot of times they can be had for around $10.00, this one can be a fun build.
-
I’m really not sure when the picture was taken as it didn’t say that I believe it’s around 44. Actually the conversion is a lot easier than I thought it would be, I had started a F conversion quite a while ago and screwed it up as I tried to over engineer it. This time I just didn’t think about it much and started cutting plastic and it went along pretty easily, doing the work you normally have to do on a Revell kit we’ll actually be more work. This photo is clearer than the photo above, I am slowly getting a little better with my camera that it is definitely hit or miss!
-
....

-
This is yet another model I have in progress. I always wanted to do a diorama of the startup of the 1932 Thompson Trophy race. To do that I will need three Wedell-Williams, two Gee Bees, one Bulldog, and at least one or two others that I will have to scratch build, plans are available from Cleveland Models, for the 1/32 racers there something like $5.00. This is similar to the curbside models that the guys build, the detail will be as simple as I can make it and there won’t be any cockpits, the inside of the canopy will be painted. I chose to do that for two reasons, one is the sheer number of models needed for the diorama and my slow building pace, the other is I didn’t want people picking them up to look inside and possibly break something. I would just put my effort into a nice polished paint job. I’ve heard some horror stories on the Williams Brothers models because they are limited run, this is the first one I have worked on and I was pleasantly surprised. I have tried drive fitting it a number of times and it looked like it would be a tough build with a lot of filler. This time I just grabbed the glue and tape and started building, the fuselage went together great with no need for filler, the wing halves glued together so well they looked like a solid piece, the tail pieces fit very well, in the wings glued into place at the right angle and there is no need for filler on the top with just a tiny bit of sanding on the bottom with just a tiny bit of filler needed. I hope the rest of the kit fits this will. So far it’s been really quick and also the most fun I’ve had on a model.
-
I’ve gotten a little farther on my N. I have the engine glued in but I am not going to detail it at all, it is mostly there to hold the exhaust and propeller and to plug up the open area of the cowl, I will only painter the areas that will be visible. I extended the tail, I put a cap where the fin was cut off and I glued two strips of plastic in the tail the length of the extension plus a tiny bit more to glue onto the extended fin. I glued the fin on the cap and glued the plastic strips to the inside of the tail, now I will start filling it in with plastic and then sand it to shape. The photo was pretty fuzzy and I cleaned it up a little bit with Fireworks, when I can get a better shot I will post that.
-
....

-
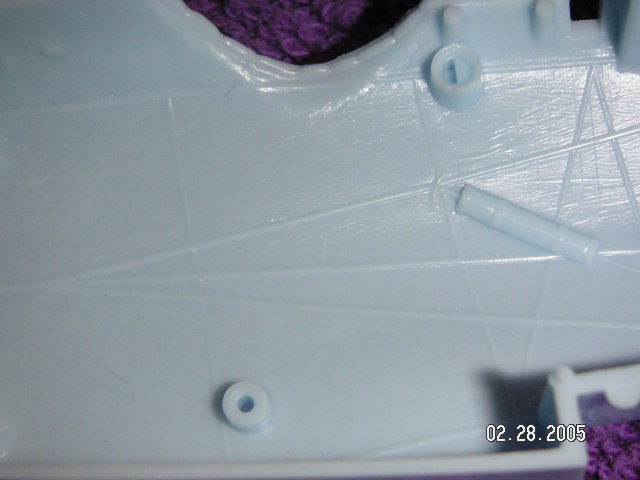
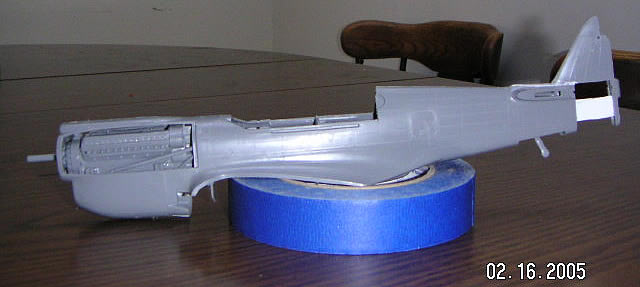
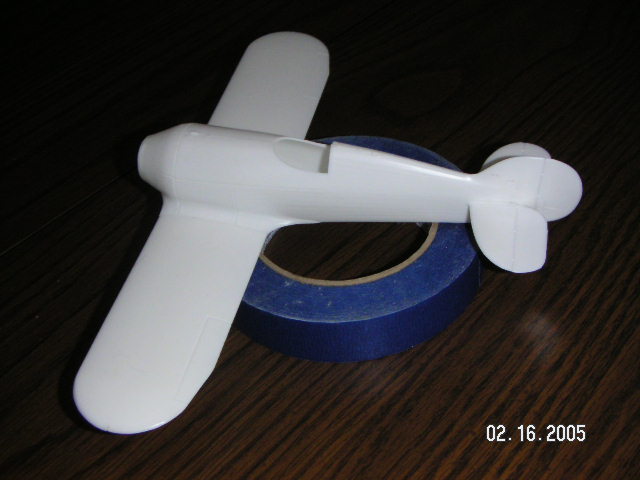
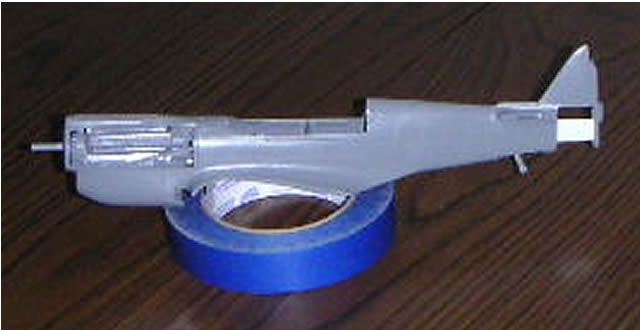
Here’s where I am on Beguine. The fuselage is taped together to check for fit on the wings and also to see how much and where it needs to be filled on the bottom. I’m going to build this one in flight so I also need to see where to attach the mount so it doesn’t interfere with the cockpit. The wings are clipped and glued and I started sanding them smooth. The plastic is kind of wavy so it’s taking a bit of work, when I get it close I will lay on a coat of primer and sand that off to fill in any low areas.

-
That is really excellent looking, I really liked the way that paint looks like it is brushed on. Did you do any modifications to it besides the wheels or is it just out of the box?
-
I have a feeling you would like this one! http://cgi.ebay.com/ws/eBayISAPI.dll?ViewI...5953875688&rd=1 These are the same drawings is offered on WAP although I’m not sure how much they cost on that site. I’m going to have to break down and pick some up just in case that site would go the same way as Pylon1 went, I do know Marks wife was in a pretty bad accident and that probably had a lot to do with the demise of the site. Too bad as it was the best one out there.
-
Great to see another racer being done! If you need any help with photos for paint jobs just ask, I have a bunch. Are you going to keep it fairly stock or modify it? From the cockpit photos I have seen they quite often use a lighter shade of gray, I'm sure it makes it a little bit easier to see quickly in a darker cockpit.