

mrintense
-
Posts
51 -
Joined
-
Last visited
Recent Profile Visitors
457 profile views
-
Wow Dave, Great Work. My P-38 has languished all year because of the work needed to restore the surface detail after eliminating the rivets. I finally got back to it a week ago and hope to start painting soon. But you'rs looks magnificent and really inspires me to get mine done. Superb job with the Rub N Buff. I am really looking forward to seeing this one completed. Carl
-
Might I add a suggestion for your hose. I've used the technique you mentioned also but added a coating of liquid mask agent afterwards. This helps to hold the wire together and gives the hose a rubber look Carl Smoot
-
I'm building mine in flight just after take off so the weight will be on the support stand rather than the struts. Putting a model this big in an inflight dio presents challenges and it's probably the only one I'll ever do this way. I enjoy seeing models in flight so I had to try it out on this aircraft (one of my favorites). The only thing I'm not doing is simulating the spinning props because I just think the P-38 props look so cool and I wanted them to be seen. Carl
-
Hey Dave, It's amazing looking at your photos. It's like looking at my own model. I have similar pictures. It's rather hard to fit it all in the picture frame isn't it? I see the same white styrene filling the same gaps I had on my kit. Like you, I have a real desire to build this aircraft. Many many, manny years ago I helped a friend build the Revell kit while I was building the Revell P-47. We both entered in a local model contest and his won first place. I wanted to build one for myself and tried back in the 80's but life got in the way. So this has been a labor of love, and I'm determined to finish it. I've started the rescribing and polishing now and maybe by the end of the next month I'll be ready to start painting. Good luck with your project as well. Looking forward to seeing more in progress shots. I'll try to get some of my own as soon as I can get a chance. Cheers Carl
-
Holy Cow Brian, This is the first time I've seen this thread. This work is fantastic. Really great work. It's late in the morning and I need to get going with getting ready for work, but I am going to come back to this thread and examine it more closely. Again, really really beautiful work. Thanks for sharing . Carl
-
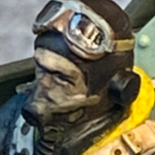
Hi Brian, thanks for the kind words. Coming from a master such as yourself, I really appreciate it. I've watched in awe as some of your work has unfolded in the past. I especially like the P-40 and the Corsair. You might have missed in one of my postings, that I'm building this aircraft in an inflight setting with the struts in partial retraction. This was my solution to the excessive nose weight required to keep this from being a tail setter. I had doubts about the kit's struts to take the weight over the long hall. I knew about the aftermarket metal struts available and I've seen the metal struts that Dave made for his P-38, but I prefer to build my kits in flight generally. The wheel wells were detailed before I made the decision to build in flight. So for that reason, the pilot has to stay in. I do have to get better at painting figures, however. This pilot is particularly ugly. He probaly enjoys going out on missions because he certainly isn't having any after hours fun with a face like that! Cheers Carl
-
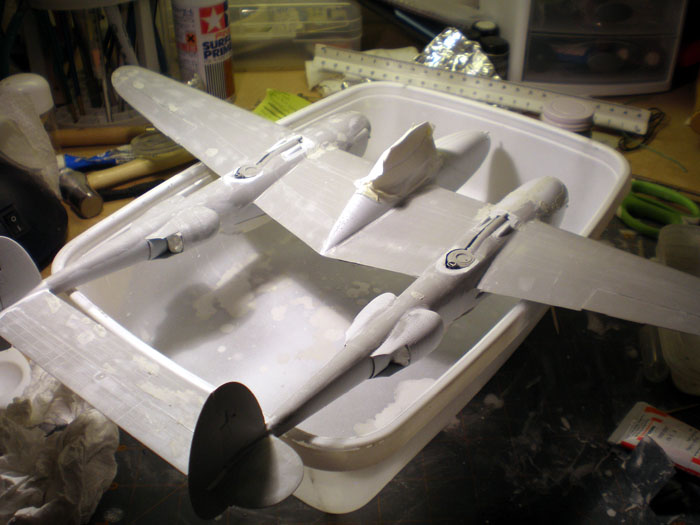
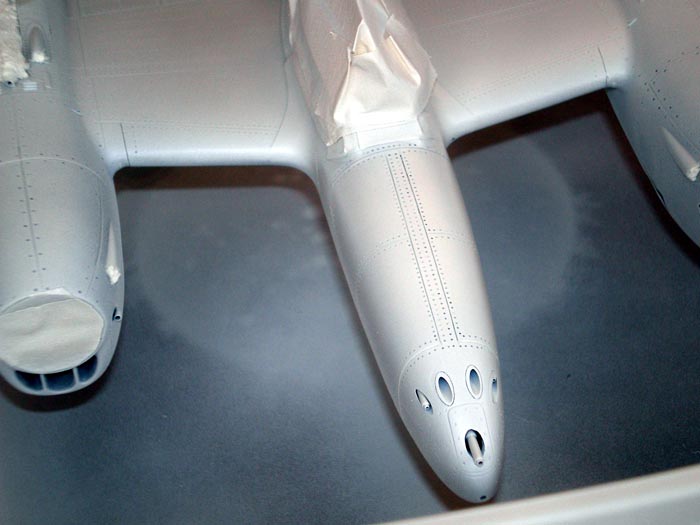
Thought I would provide an update since it's been about six months since the last one. It's been a period of ups and downs. It started of quite well when I finished the filling and sanding in March of this year. I was finially completed with all the surface restoration after all the filling and sanding which seemed to take forever. The first coat of primer went on in early April. Oh glorious days I'm finally getting to the point where I can paint! But it seems the modeling gods had other ideas, as I quickly realized that my rivet restoration efforts looked like crap and even the original rivetwork by Trumpeter look way too pronounced to me. After hemming and hawing for a week I took the plunge and strted filling in all those dang rivets. Now two months later, I'm 99% finished with filling and sanding the aircraft. But now I facing a long period of panel rescribing. Thankfully, much of it will entail simply removing putty that has filled in the original seams. But it will still be a tedious process. Some of the other ups: well the best was the completion of the decal artwork and the subsequent printing of said decals. Here's a sample of the artwork. I bought some decal paper from Bare Metal Foil for laser printing and printed them on a Dell color laser. The printing was absolutely outstanding, looking every bit as good as the pyn up decals that used to be available from Meteor Productions. The 8th Airforce logo looks ragged at this size but it's actual size is 3/8ths of an inch in diameter and at that size it looks great. I had a bit of trouble with the nose art when it was reduced to it's final size. The fine yellow lines disappeared!. But a little fattening up of the lines in the artwork caused them to look right when the artwork was subsequently reduced to correct size again. I recently tried one of them out on a test model and it worked like a champion. So I have five good sets of these decals waiting whenver I finally get past the assembly stage. The other up point, I successfully drilled the mounting hole for the stand and fashioned the stand from acrylic rod. That is ready as well. Still have to make the base, I'll do that when the kit gets a bit further on. I'll try to get some more pictures posted soon, but frankly there hasn't been anything interesting to show for quite some time. Carl Smoot

-
Okay here is the second picture. This was actually taken about a month ago and I've since finished sanding the aircraft in it's entirety. Now for all the surface detail restoration work, minus the rivets. I won't hijack your thread anymore. Any future postings will be in my thread, where ever it might be. Dave. once, again. Nice work so far on you P-38 and I cannot wait to see you'r done. Carl Smoot
-
Hello Dave, Nice to see some more work on the P-38. Not to be mean spirited or anything, but I got a bit of a chcuckle from your pictures of the underside gaps. I went through this same process late last year and it was tedious. Sorry I don't have anything better to offer. I will say that perseverance will utlimately pay off but it will take time. I am curious however in how you are or have dealt with the riveting that is destroyed in the inevitable fill and sand process. I attempted to re-drill mine using a #80 drill bit (a quite tedious process that took months of work - all for naught - more in a moment). Here is a picture of my kit after the first coat of primer: As you can see the rivets look quite prominent. Well eventually they got the best of me and I decided I couldn't live with them. So, for the last two months I've been filling and sanding them. I just completed the first filling and sanding session of the entire aircraft and now have to do a bit of minor filling and sanding to hit some areas that didn't take the first round. Then it's going to be another long session of rescribing all the panel lines . But no rivets!!! Look at the next post for a picture of the plane in it's current status. By hook or by crook, I'm going to finish this beastie. Carl Smoot Pursuing a new career as a P-38 assembler - Two and half years running
-
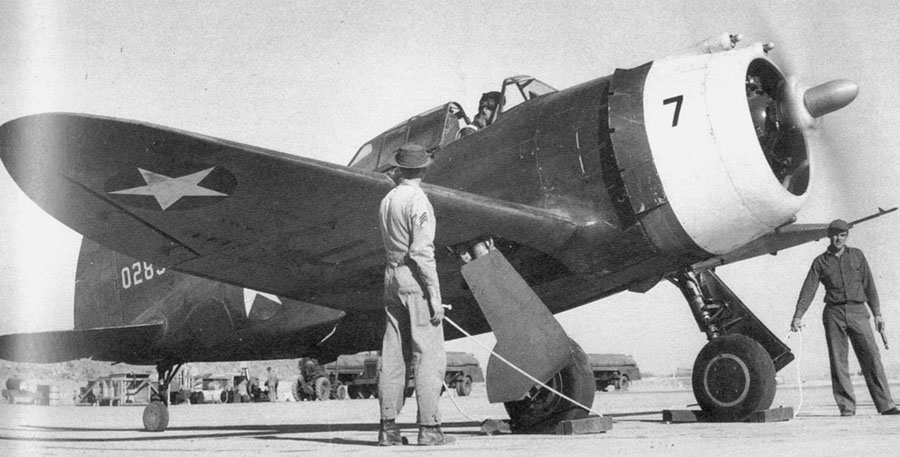
OD Painted US Army Bird
-
Here's a good shot of the underside. Sorry about the smaller pics but the 100K upload size is forcing this. I have bigger versions available via email if you need them Carl This will have to be it for now. More later. Again, feel free to email me at mrintense56@austin.rr.com for additional material too big to post here.

-
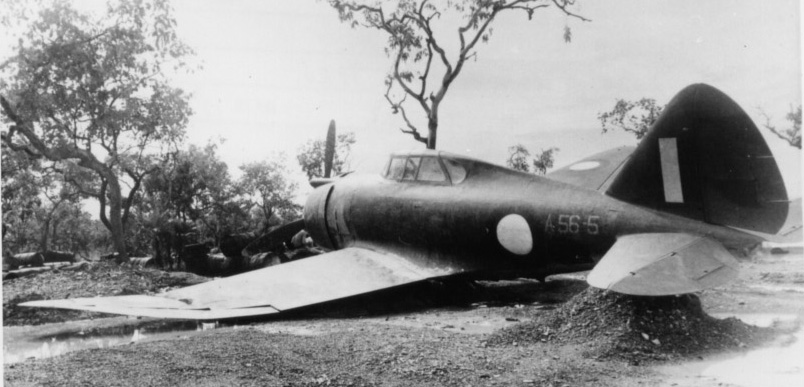
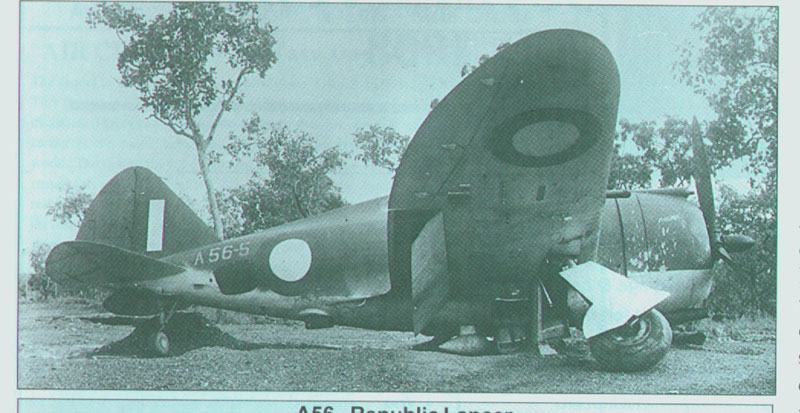
Here's another of the crashed Lancer A-56-5 Carl
-
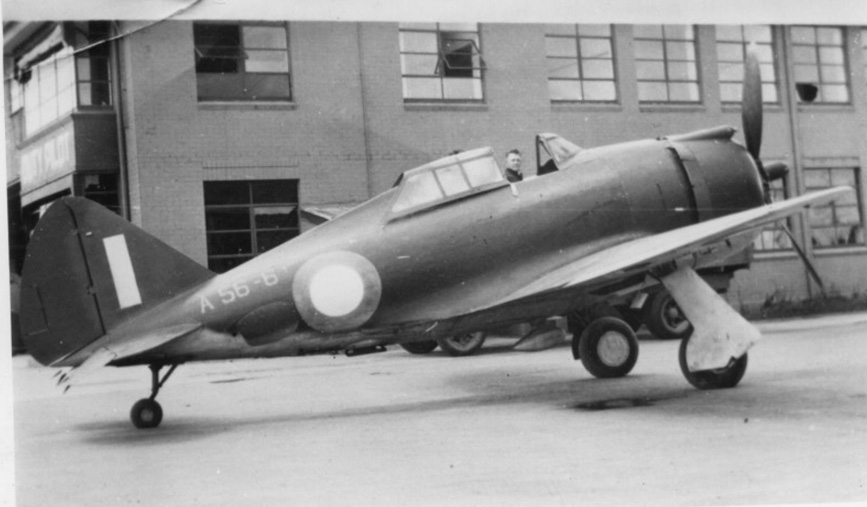
Here's a nice clear shot of the Aussie Lancer Carl
-
Okay, here's the first of some of the stuff I have to offer. More will come later as I have to get back to work in a few minutes. I have a slighly larger version available via email if you want. Carl Smoot
-
If you wouldn't mind contacting me at mrintense56@austin.rr.com, I sure would like to get a full size copy of that drawing. And I'm sorry about not posting anything last night. We had a tornado producing storm go through our neighborhood last night and I was a bit pre-occupied. Carl