Search the Community
Showing results for tags 'kotare'.
Found 11 results
-
This build has been in progress since March, but stalled for a while. It's my first large scale build since returning to the hobby and I went all in on the aftermarket. Cockpit is Quinta Studios, with a few pieces of Eduard PE, and HGW belts. Added Eduard PE flaps. I've read that RAF pilots were trained to retract flaps as soon as they left the runway so you wouldn't normally see them extended on the ground. We'll just pretend they're getting maintenance or something like that. The build was smooth overall except for the wing to fuselage fit. I think this was my fault, but not sure what I screwed up. The fillets were just a bit too narrow to seat in place on the fuselage and I had to do a good bit of sanding and scraping on the right side to make them fit. After priming I realized that the right fillet had collapsed a bit - I guess I took too much material in working on the fit. I didn't take pics of the damage, but the fillet was sitting a good 2-3 mm lower than the side of the fuselage. I used green stuff putty to fill in most the sunken area and Tamiya putty to fill in the top layer. It took about 4 rounds of sanding and priming to get the edges even and the shape reasonably correct. Finally yesterday and today I have been painting. All MRP paints - I marbled the top camo with RAF light earth and light green, then finished with dark earth & dark green. The camo was done freehand with the airbrush. I'm not unhappy with the result, but if I had it to do over I think I'd mask it. The bottom was marbled with white, and then the white side got some additional marbling with earth yellow before a top coat of white, and the black side got additional marbling with haze grey before a top coat of "black night". Going to put a gloss coat on tomorrow so the paint has some protection, then this weekend I will be trying out those 1ManArmy stencils.
-
This was one of the most involved conversions I've done: taking the Laminar Flow Design Vc conversion, adding it to the Kotare Models Va fuselage, blending that with the Tamiya IXc wings and landing gear. You might be asking why: the Kotare fuselage has the raised rivets already, and the fit to both the conversion and the Tamiya kit is almost flawless. I just needed to sand the floor of the Kotare cockpit so the wing would fit. Otherwise I painted all markings and scratchbuilt the crowbar for the pilot's door. For more see my Work In Progress here: Cheers, Tom
- 33 replies
-
- 36
-

-
- laminar flow design
- kotare
- (and 1 more)
-
I have the Kotare Spitfire Va kit and would like to buy a aftermarket seatbelt set for it. Is a "QK" version correct like this https://www.hannants.co.uk/product/HGW132508 or do I need something else please?
-
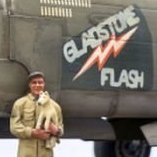
So whilst I'm waiting for bits of my Fury to set, I have had a look (for the first time!) at the Kotare Spitfire 1a that I've had for a while. I had already decided that it would be one of the Spitfires flown by my friend John Shipman's father, Ted, but this was the first time that I have looked seriously at my options. This is the clearest photo in John's collection of Ted at the controls of a Spitfire: but I would welcome the opinions and interpretations for those more knowledgeable about Spits than me! So, in no particular order: a) the roundels of the two Spits are interesting....it appears that EB-L has had two larger rings (evident on the further Spit) painted over? I've enlarged this area: b) the darker area under the nose...any thoughts....what, why? c) though EB-L is listed in John's caption in his book as N3126, in the Spitfire Production database "L" is N3123: However, it seems to me from the photo that she sports a "B" camouflage scheme which is usually associated with even-numbered serials so N3126 more likely? d) this point may be moot however because as far as I can see, there is no serial number painted on the fuselage which was not uncommon at that point and is in line with other 41 squadron Spits in John's photos. I'd like to run some further assumptions past the cognoscenti later but the above will do for now.
-
This is my rendition of a very early Spitfire, using the Kotare model of the Spitfire Mk.I, early. The only add on used was the Eduard Space set which contains 3D printed cockpit details and a set of steel seat belts. There is a WIP of this build, here. This model represents K-9795 which was the ninth production Spitfire, built by Supermarine in Southampton. The plane as depicted here was powered by a Rolls Royce Merlin II engine of 990hp driving a two blade "Watts" propeller while serving with 19 Squadron in late 1938. The markings depict the plane as it was when flown by the squadron CO, Sqdn Ldr H.I. Cozens while on display in October 1938, hence the squadron number on the tail which was temporary. Henry Ilife Cozens was born in London on 13th March 1904. He joined the RAF in 1923 and after various postings, took over command of 19 Squadron in December 1937. This squadron was the first to equip with Spitfires, and he took delivery of the first Spitfire ( K-9789) on 14th October 1938. He continued as squadron CO until the end of 1939 when he took on various administrative duties, retiring in September 1956 as an Air Commodore. He died aged 91 in June 1995. K-9795, the subject of this build was delivered to 19 Squadron's home at Duxford on 27th September 1938, later being transferred to 64 Squadron on 18th April 1940. It was shot down by friendly AA fire but both it and the pilot survived the experience being repaired by General Aircraft Ltd after which it was issued to 603 Squadron on 29th September 1940. 222Squadron took it on charge shortly after when it suffered an engine failure on 14th October that year. Again, both pilot and aircraft survived with the aircraft being classified as Cat 2 damaged. It was struck off charge while serving with 58 OTU on 12th January 1941, ending it's days as an instructional airframe from new years day 1942. Here's a couple of pictures of the actual plane in 1938. There are many differences to later Mk.I Spitfires, starting with the two blade fixed pitch prop and Merlin II, which could not drive a variable pitch prop or constant speed prop. The exhausts were different, the fuel tank had no armour covering and there was no armour glass or steel plate protection for the pilot. Very early machines were not always fitted with the outer .303 guns. The very early planes had a flat sliding canopy but complaints about hitting heads on this lead to the fitment of a blown canopy from the fiftieth production machine. Notice also a different antenna mast and two probe pitot on this plane. Here's the photo's of my model. The cockpit being assembled. This has been a very enjoyable build, and Kotare's model is one of the finest depictions of a Spitfire in 1/32 scale yet produced. I do have a few gripes, but not many overall. I've detailed my thoughts more fully in the WIP, so I won't reproduce them here. Cheers, Michael
- 15 replies
-
- 23
-
-
So while I wait for the last part to arrive for my Vampire, I thought I'd start the next project which will be the Kotare Model's early Spitfire Mk.I. And when I say early, I do mean Early. And this is the only aftermarket I'm using. So I had to glue something together as soon as I'd opened the box, so I assembled the pilot's seat. Notice that the lightening holes on the seat support brackets are already opened. Nice one Kotare, and so-oooo nice after battling with every part of the Vampire build. These very early Spitfires had an apple green interior, so I've dabbed a bit on the seat to check the colour. I've also made a small start on the wings, which need alteration as these early planes had no gun heat exhausts in the outer wings. These were filed off and the kit supplied blanks fitted in place. The gun heat ducts have also been removed from the radiator as this plane didn't have gun heat. These will need some small amount of filler. The wing spar has also bee added. Once I'd figured out which parts needed paint, I immediately sprayed all the relevant cockpit bits in AS12, then applied the green to as much of the cockpit as I could. Then construction began in ernest with the instrument panel. This benefited from the Eduard Space 3D decal set, and the picture below shows it almost finished. Still to go are some paint for the fuel selectors (Mk.I's had two; one for each of the upper and lower tanks - later marks had only one for the lower tank and the upper tank fed fuel into that via gravity) and also the landing light selector. The rudder pedals were built up next then the IP could be glued to the floor, quickly followed by the rudder pedals and the forward firewall, which was a rather flimsy affair on early Spitfires and provided the pilot with little protection against a burning fuel tank. That's it at the moment. Next up will be the control column and seat area. Cheers, Michael
- 85 replies
-
- 18
-
-
No,sadly I haven't got an early release of the Kotare Spitfire 1 (early), but in anticipation and as a placeholder as is my wont, I've been doing a bit of research. Two definite requirements as far as I'm concerned about which aircraft I'm doing: a) must be a two-bladed Spit and b) must have the flat canopy. This limits my choices to some very early production ones, and 19 Squadron's were in the initial batch of 310 serial range K8797 to L1096, ordered 3rd June 1936 and delivered from July 1938 to Specification F.16/36. 19 Squadron started receiving theirs in August 1938, the first service squadron to be equipped. A few pictures of probable candidates: Sadly a few days into the war K9795 was damaged in a crash and relegated to ground instruction work! What’s interesting about the Section picture below is just how varied the camouflage pattern is on each aeroplane: And a couple of extracts from the ORBs during the "Phoney War": Glamorous duties for the Spits.....fishing fleet patrols!! You can imagine the frustration of the eager young men in Blue Section when this happened: Example above of how ORBs, despite being written “on the spot” are still subject to human error, can be wrong and therefore not trusted 100%! The date is wrong, this event took place on 21st October not 22nd. More research for sure before the kit arrives. A distinctly possible contender:
-
Hi, everyone. I guess it's time to get my membership card to the Kotare Klub as there seem to be about a million of these in the WIP forum right now. Since finishing my Corsair diorama, which took months, I wanted a quick, straight forward build as something of a palate cleanser. My son said he thought it'd be neat if I did a Spitfire, I had the Kotare Mk Ia (mid) kit in the stash, I've never build a British aircraft before, and so, fate was decided. I departed from my usual MO of recreating an historical photograph and decided to just do a fictional, but feasible scene. I've wanted to depict battle damage on an aircraft since I was kid, but never really had the skills or practice till now. So, being that this kit has a low parts count and went together really nicely, I decided it would be a good platform to try my hand at damage. I thinned the interior plastic walls with a low rpm rotary tool, carefully punched and pried holes in the weakened area, then painted and streaked the area to look the part. Aside from the rigging wire (EZ-line), figures (Black Dog Resin, out of the box), and the base (el cheapo panel board), the kit is presented out of the box. I even used the decals in lieu of my usual gig of cutting masks and painting. This experience reminded me that I'm way out of practice working with large decals, but after a few minor scares, they turned out okay. This is a Spitfire Mk Ia of 610 Squadron sometime in the summer of 1940 before it was damaged beyond repair that August. "Bit of a rough go today, eh, chap?"
-
Greetings fellow modelers: This was one of the most enjoyable projects I've done. The Kotare Spitfire Mk.Ia "Brian Lane" kit is fantastic. The Kotare team certainly put a lot of effort into creating a wonderful build experience for the modeler. And they pulled it off. In this brief, ready-for-inspection summary I'll share my build overview, my thoughts on the kit and some recommendations for future kit builders as I go through the photos. Here's a link to the build: Ok, here's my rendition of QV-K P9386 from September 1940. The quality of the molding, engineering, decals, and thoroughness and thoughtfulness of the 24-page instruction book really made this project a pleasure. I built the kit completely out of the box with the exception of Eduard masks for the canopy. Kotare's design philosophy made for a superb assembly process. Each main engine panel was molded as an individual part -- no seam lines or glue clean up. The fuselage aft section parts all intersect at panel line joins. The wing fairings are each single molded parts that fit perfectly. It's designed so that one can assemble the entire plane almost without a single seam line that intersects a rivet line or panel line. What a pleasure. The only area where this occurs is underneath the aft section of the fuselage -- conveniently away from normal viewing. I can't think of a single situation where the fit was not PERFECT. For example, there is only one way to install the landing gear struts. Full stop. There's no play, no wiggle, no uncertainty. One of the best designs I've seen. The horizontal stabilizers are one piece and there's only one way to install it for a nice, tight fit in perfect alignment. The prop assembly installs by literally fitting a square peg in a round hole for a perfect fit. Another nice treat is that the rudder and elevators are positioned off-center and match the positions of the control stick and rudder pedals in the cockpit. I haven't seen that before. That's just one of the many nice details and surprises discovered as one works through the build. Even the trim tabs are offset slightly. As for painting, the instructions provide extremely helpful guides for painting the cockpit as well as the exterior. For the cockpit, painting call outs are provided during the build steps and there are also summary diagrams with multiple views in full color. For the exterior, four full color views are provided for the aircraft with color call outs and key points. I used Mr. Color lacquers for the main camo colors (C361 for Dark Green and C369 for Dark Earth) and MRP Marking Yellow for the spinner. I mixed by own version of Sky Blue for the underside using Mr Color White, RLM 76 and Sky Blue. Since I wanted to emphasize color variation across the different subassemblies as the instructions pointed out, I painted some of the panels a little darker or lighter or a slightly different shade of green or brown. For example the fabric covered sections are a little more faded than the metal sections. I used the kit decals by Cartograf, which were fabulous -- perfect color, perfect register, nice and thin, no excess carrier film. All good. The main challenge with the decals was getting them to settle over the raised rivet areas on the aft part of the fuselage. It took several days of bubble popping and decal solution application to get them to finally behave around the rivets but they got there. I planned out the weathering process at the start of the project. My goal was to reflect what I saw in the reference photos -- and there are multiple clear photos of P9386 as well as several other Spitfires that are very helpful. One of the photos of a real spitfire elevator section has a humorous caption highlighting that there's no evidence of preshading on the fabric area. After priming with Mr Finishing Surfacer 1500, I painted the wing roots MC201 Super Fine Silver, then applied AK worn effects fluid over the silver areas. I pre-shaded the panel lines in black and then applied heavy marbling using spatter templates and random airbrush patterns to break up the solid panel colors. After the main camo painting, I dabbed the wing root areas with a wet brush to get the chipping effect I was after. Next was a gloss coat to seal in the chipping and prep for decals. After the decals and flat coat, I augmented the chipped wing roots with a sharp silver Prismacolor pencil to add some scratches and make some of the chipped areas "less round" and more random looking. The exhausts each are molded in top and bottom halves. There's a nice close up photo in the instructions showing the weld seams that can be replicated when you glue the exhausts together and let some glue squeeze out of the seams. I needed to add a little material to the tips of the exhausts to get the proper shape and I used my motor tool to drill out the exhaust interiors. I used reference photos for guidance on painting the exhausts. I started with gloss black and then applied a 1:1 mix of Mr Color Metallic Black and Super Stainless. After the decals were applied on the lower side of the manifolds, I used Tamiya acrylics to achieve the exhaust gas/heat color pattern. Black, purple, brown, orange, and deck tan were used. The cockpit detail that comes with the kit is astounding in my view. The instrument panel dials all have individual decals and there are placards all over the place - sidewalls, compass, gunsight, etc. Also, in the photo above, the molded seatbelt harness is visible, which I think looks pretty good. The figure of Brian Lane was a nice bonus and here's my attempt at painting him. There's a nice painting guide in the instructions. Overall Summary of the kit: Highlights Clear, detailed, comprehensive instructions. I may keep the book as a reference for other builds. Excellent. Design and fit for easy assembly and minimal clean up. Decals by Cartograf - cockpit decals and placards as well as the main markings and stencils Brian Lane figure - Colorful RAF pilot uniforms are great subjects. Aircraft interior and exterior color profiles in the instructions Surface detail - stressed skin effect around some fasteners, rivets, panel fasteners, hinges -- all good. Fine and consistent panel lines Landing gear design - "weighted" wheels with flat spots and slight bulges. Things to look out for (for future builders) My copy had some very slight molding sink marks on the tops of the wings above the wheel wells. Easy clean up. The exhaust manifold tips needed some extra filler material (CA glue). Again, easy clean up. The molded seatbelt harness is fairly thick in the section between the seat top and the armor plate slot. I thinned the seatbelt quite a bit by scraping underneath and cleaning up. Another option is an aftermarket seatbelt as the kit provides a seat without the molded seatbelt. Some of the molded detail needed a little sprucing up. Nothing major. Thanks for looking. Needless to say, I highly recommend this kit. Comments and critiques are more than welcome. - Jim Jenson
- 23 replies
-
- 29
-
-

-

*** 1/32 Kotare Spitfire Mk.Ia "Brian Lane" COMPLETE ***
Hoss FL posted a topic in Works in Progress
Well, I'm back to 1/32 after a few armor projects and several 1/48 kits. I picked this kit up this summer and am really looking forward to the build. The plan is to build it completely out of the box with no aftermarket and I think the kit has all the detail needed for an excellent rendition of this bird. This is the one marking option, but the subject is very well researched. The instructions are very detailed with photos and historical tidbits. A fun build experience so far. I just got started on the cockpit and will post updates along the way.- 87 replies
-
- 16
-
-
- wwii
- brian lane
- (and 4 more)
-
Hello guys, this is my recently finished Kotare Spitfire. While I have no special interest in Spitfires and I have very limited knowledge of the subject I have to say that this is the best kit I have ever build so far! Especially from buildability point of view, with logical build steps, great fit, almost no cleaning required, extensive decals and best in class instructions with detailed color callouts and great profiles, the kit has the highest probability to get finished once started. I did not used any other references except the instructions. Truly OOB build except HGW seatbelts and Artscale double sided masks, which btw fit perfectly. I hope that Kotare will raise enough cash to become major player on 1/32 market. I have no doubts that I will buy anything they will release (and I don't mind that it will be small collection of Spitfires ) Jan