

Sav
-
Posts
75 -
Joined
-
Last visited
-
 geedubelyer reacted to a post in a topic:
Su-27 Flanker
geedubelyer reacted to a post in a topic:
Su-27 Flanker
-
geedubelyer reacted to a post in a topic:
Su-27 Flanker
-
Hi Manelaos, Quick tip before you get as far as joining fuselage halves together. The Polly caps that will in time hold in the tailplanes. Make sure that you glue these to the lower half before joining the top half. If you dont (i did'nt) you will find that the tailplanes will swivel backwards into a really 'stupid' angle on the finished model. Very annoying! Also be sure to use the correct 'steel pins' for the faps as this will cause similar problems. It is not obvious in the instuctions which are the correct ones to use, so it's worth double checking. I cannot think of anymore problem areas with the kit if i do i will let you know. Have fun Sav.
-
Hi Manelaos, Looking good so far. I have already built this model and it will be interesting to see your approach to the same subject. Sav
-
Hi Chris, Have a look at this www.fineartmodels.com follow the links to thier aircraft page, here you will find a F4U Corsair. also there is a good page showing it's engine (as a model, not that you could tell) should be good for some detail reference for your build. Sav.
-
Hi Chris, Stunning mate, i think it's better than your 190 but then i am Spit fan. I have some picture's showing the crow bar that is attatched to the cockpit door painted red, how accurate this is i do not know, just thought i'd mention it. Yes, yes and yes, a five bladed MKXIV is a must and i think that you should make a start right away, go on , off you go Looking forwards to seeing your next Spit, sorry build. Sav.
-
Hi Chris You should have the photo's this morning. Sav
-
Hi Chris, I am a big, BIG fan of weathered aircraft. Yes it's true, a lot of MKII Spits look decidedly clean in period photo's. I do have some pic's of MKII's that are showing heavy wear and tear particularly at the wing roots, both sides, but more so on the Port side. This is mostly scratches to the paintwork and bootprints etc. I also have some very good colour picture's of AR213, a MKII that was restored for the film Battle of Britain in 1967. This machine is very well looked after but still shows a very light exhaust stain in a very light grey colour. One thing that is common with most early Spit's is thier tendancy to spew oil all over the underside of the fuselage, from a hatch near the wing root almost to the tailwheel. I also have good colour photo's of this but do not have a scanner, if you think they would be of use i could try to photograph them with my digi camera and post them to you. (Shh... don't tell though, copyrights and all that) let me know your e- mail address if you are interested. Sav. PS Looks spot on to me, your Spit that is!
-
Hi Chris, Don't post much these day's as i have not built a model for a while, but i have been following your builds. Great stuff mate. I think your little disaster with the paint has created a very realistic weathered effect. Those scratches are almost to a perfect scale, billiant. Can't wait to see the Spit finished and hats off to you for giving your 'airforce' a bit of Allied opposition. :-) All the best, Sav.
-
Hey Jim, I've been studying the photo you posted for some time now, must be at least an hour! Guess what? There's a lady with massive breasts in it, you have look. Chris, i have a question. Do you ever stop modelling? Is't just one after another and getting better all the time. Great work mate keep it up. Sav.
-
Hi geedub, The build is progressing well, love your work so far. I have a question. You mentioned in the past , when i was building me F-16, that you do not own an air- brush. So how have you painted the bit's we've seen so far and why paint them so early on in the build? OH! that's two question's, hope ya don't mind Guy? Look forward to seeing more pic's, Oh, off to Yeovilton Air Day this weekend so finger's crossed the weather hold's out. Sav.
-
Hello Guy, It's great to see you over here at LSP land. I've been following your build on ARC, most impressive. The work on those U/C leg's and bay's is awsome. Hope to see more of your work here, soon, the wait kill's me!! :-) Sav.
-
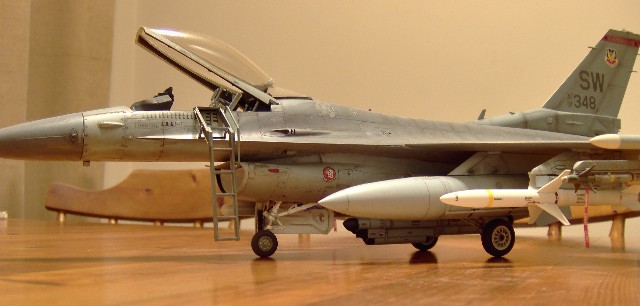
Hi all Very nearly there. The panel lines need finishing on the underside and there's a few odd's 'n' sod's left to go on, a coat of clear matt varnish and we'll call it done. I will try to to take a few detail pic's when it's finished but as you have all probably seen my photography skills are, well, crap really so don't hold ya breath. Sav
-
Excellent!! Cheer's Chris, It's good to see that some people know what they are doing when it comes to digital pc photo thingies. Sav
-
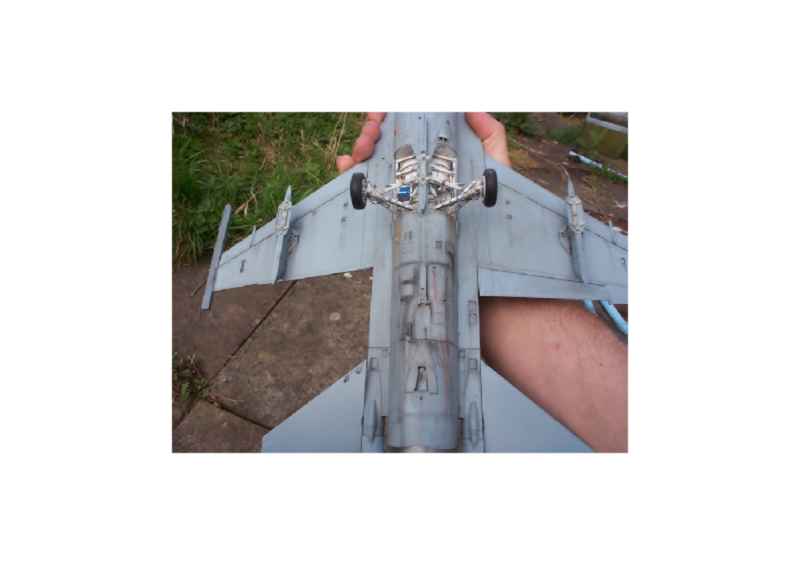
Here is another pic of the underside, hopefully it will be in proportion as i resisted the temptation to try and do stuff to it.
-
Hmmm Bugger look's like somebody trod on it, but you get the idea. Note to self 'do not bugger about with setting's Corel photo shop!' Sav
-
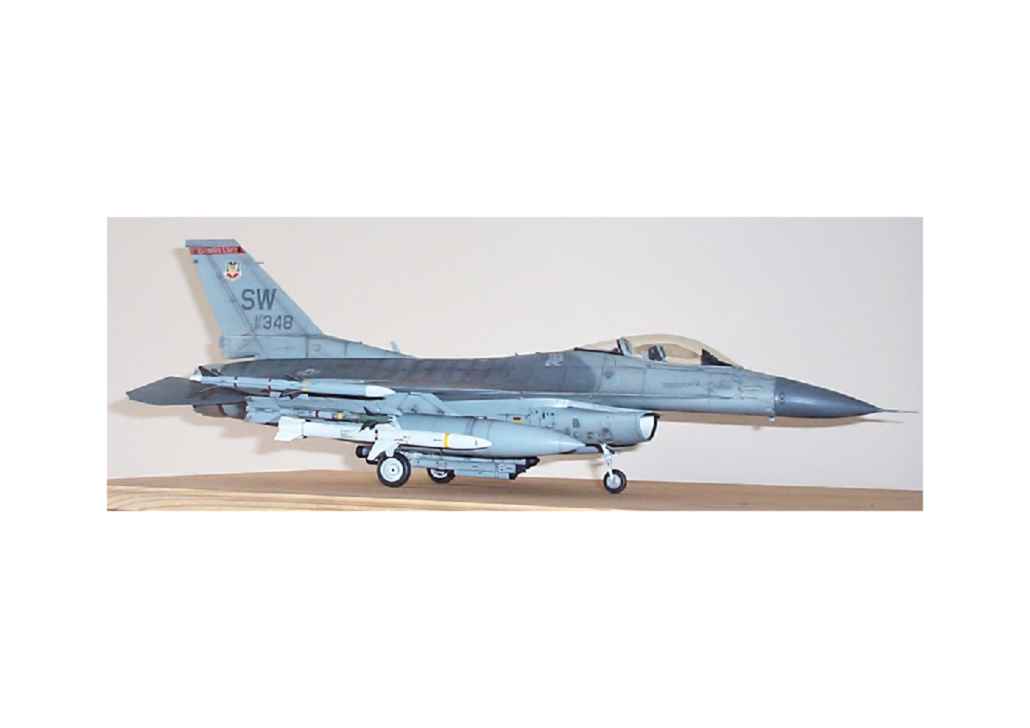
Hi all Started the weathering, the top side is done complete with decals, the underside has a little way to go yet to get it looking right. Sav
