
BloorwestSiR
-
Posts
6,248 -
Joined
-
Last visited
-
Days Won
37
Content Type
Profiles
Forums
Events
Posts posted by BloorwestSiR
-
-
Just ordered the Trumpy P-38 so that's my first purchase of the year.
Next up are the GMF F/G/H conversion, props and tires for the kit to go with the Zotz decals.
Carl
-
Happy New Year!
That's some great progress you've made. The finish looks good to me. But I guess we're always our worst critic.
BTW, the undercarriage parts will be in the post to GMF for casting tomorrow.
Derek
Does that mean there's going to be a set specifically for the Revell kit?!!! And if so, will you or GMF be the ones to order it from?
Carl
-
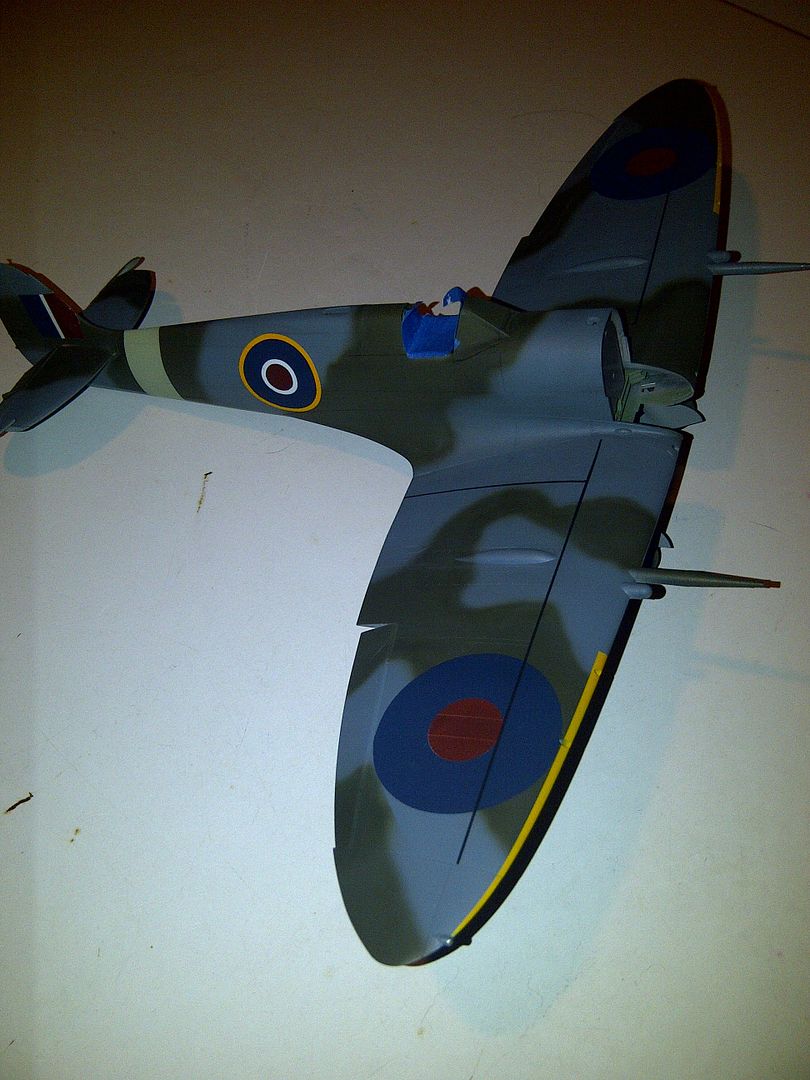
Wow! What a difference with the decals stickers on!
Looks great Kev..............im not looking forward to building this one after your trials, but hopefully with my Seafire conv, and a new nose.......and a cockpit kit............Ill have as little of the original kit left as possible

Look great!
Well, against my better judgement (since I have too many other projects on the go) I've started my Seafire conversion. But I have no idea how long it'll take me. I'll see about starting a WiP on it shortly.
As for your build Kevin, it looks great with all the stickies on it
 . Can't wait to see it all done.
Carl
-
Looks good to me. I've never tried using Future so can't offer any advice on that one.
I finally picked up one of these kits. My LHS even had the original Matchbox version but the Revell re-issue was much cheaper. Since I have a set of SAC gear for the Tamiya kit, I'll see how that works and let you know. Mine will be turned into a Seafire 47 using the Freightdog conversion set.
Derek B has certainly helped get me hooked on Spitfires.
Carl
-
Kevin, for the yellow leading edge stripes, I've been using 95% Flat Yellow (XF-3) and 5% Flat Red (XF-7). This seems to give that bit of orange that you're looking for. Iain from Ad Astra suggested the mix to me.
As for the landing gear, I think I read that someone here used SAC gear for a MkIX (didn'st say if it was the Tamiya or PCM kit) but mounted them reversed to get the links facing the right way.
Carl
-
Nice progress. Is the original release of the kit or the recent re-issue with the animae markings?
Watching your build is making it very hard to resist starting the Shinden re-issue I just picked up. But I have way too many started projects so shouldn't...
Carl
-
Great Models was bought out by Sprue Bros. earlier this year and I don't think Sprue Bros is carrying the line any more.
The Great Models website has been left up as a sort of reference for people but you can't buy anything on it and I'm not sure if anyone will get back to you.
Just in case that's where you made your inquiry.
Carl
-
This one's got the right tail and everything, but it's an expensive kit that needs some work, IIRC.
Kyrre
You can get it from Lucky Model for quite a bit less.
But if it's not in stock, they make you pay up front and then it can sometimes be a wait before you get it. I got mine from them but since I wasn't in a rush, I didn't mind the wait.
Carl
-
Just saw this and thought there might be some interest in it:
http://store.spruebrothers.com/category_s/2381.htm
Cant decide what to pick up...
Carl
-
I double checked the Datafile's colour chart to see if there was a difference between the 22 and the 24 but there doesnt seem to be. It says that only Seafires used Dark Sea Grey.
I can try To scan it for you if you like.
Carl
-
Saw the Kingfisher listed. I'm sure there is going to be lots of happy people on that news.
I found the news that another company is looking to do an IM P-6E so they're going to hold off for now very interesting.
Carl
-
Hello!
My stencil decals arrived in the post today, thanks entirely to the generosity of Carl (bloorwestSiR).
Thanks a million Carl, you saved the day!

Looking forward to getting them on and then back to the build so I can post some more photos.
Hi Frank, glad they got to you. Can't wait to see more progress.
Looks like I'll have my workshop back sooner than I expected and will join you in Spitfire nirvana.
Carl
-
Thanks Carl... you camo'd the cowl separately from the fuse? was it hard matching things up? Mitch

What I did was leave the engine off the fuselage and just taped the cowls together and then to the fuselage itself. Tamiya designed the kit so that the entire engine assembly plugs into the front of the cockpit firewall. So I stuck small strips of blue painters tape to that firewall and then attached the individual cowl panels to it and themselves with more tape from behind. So basically the cowl is hollow.
Hope that makes sense. I'll may have a pic somewhere I'll try to dig up.
Edit: I found a pic of the main fuselage together that shows the firewall I mentioned:
Carl
-
I just checked my copy of Modellers Datafile and they show Ocean Grey and Dark Green over Medium Sea Grey.
Carl
-
You guys are making it very hard to not get a WNW kit! I keep saying the rigging is too hard, they're too fussy and then watch you throw this one together and make it look so easy.
Great job on that too.
Carl
-
Sierra Hotels makes a better conversion set for the Revell kit. The CAM one is not as accurate IMO- the nose is still the wrong shape.
Hope that helps,
Carl
-
I'll try to take some pics when I restart my FRIX build. Just have to finish unpacking the workshop first.
Carl
-
One thing you have to consider when looking at the prices of non-Japanese manufactured kits on Hobby Search's and HLJ's websites is the duties that Japan imposes on those kits. They are pretty protectionist and it shows. Of course, most of Tamiya's kits are made in the Phillipines but who's checking.
Take a look at what they're asking on the Revell He-219 and you'll get a better idea. It's their equivalent of what Japanese kits cost when they hit North America or Europe.
Lucky Model in Hong Kong I would say is a bit more realistic since they don't have import duties there. Now if only their ordering process wasn't so hit and miss.
-
I've got both the CE and CMK sets and neither is full depth. The CMK set is the same as the stock bits while the CE one is maybe only slightly deeper. The only one I found that seems to be the right depth is the one made by Part. It's completely PE, you make the ribs and floor from multiple parts so is quite fiddly to build. I botched it so ended up using bits from both the CE and CMK sets to just git'er done.
Carl
-
Both HLJ and Hobby Search have Dec now listed as the expected arrival date so maybe we're getting closer?
Nigel, as for lack of interest, I've definitely found your comparison of all the AM bits interesting and invaluable. I certainly wasn't aware of the extra pushrods on the engines so that alone made it worthwhile tuning in.
Personally, I think there are enough interesting marking variations out there for both the glass nosed versions ( I have one which I plan to do as the Red Bulls version) as well as the strafers.
Carl
-
Interesting......................
"Parts formerly molded in light gray are white in this special version."
Mine is on its way so I'll let you know what's white and what's not.
This hobby is getting expensive.

Carl
-
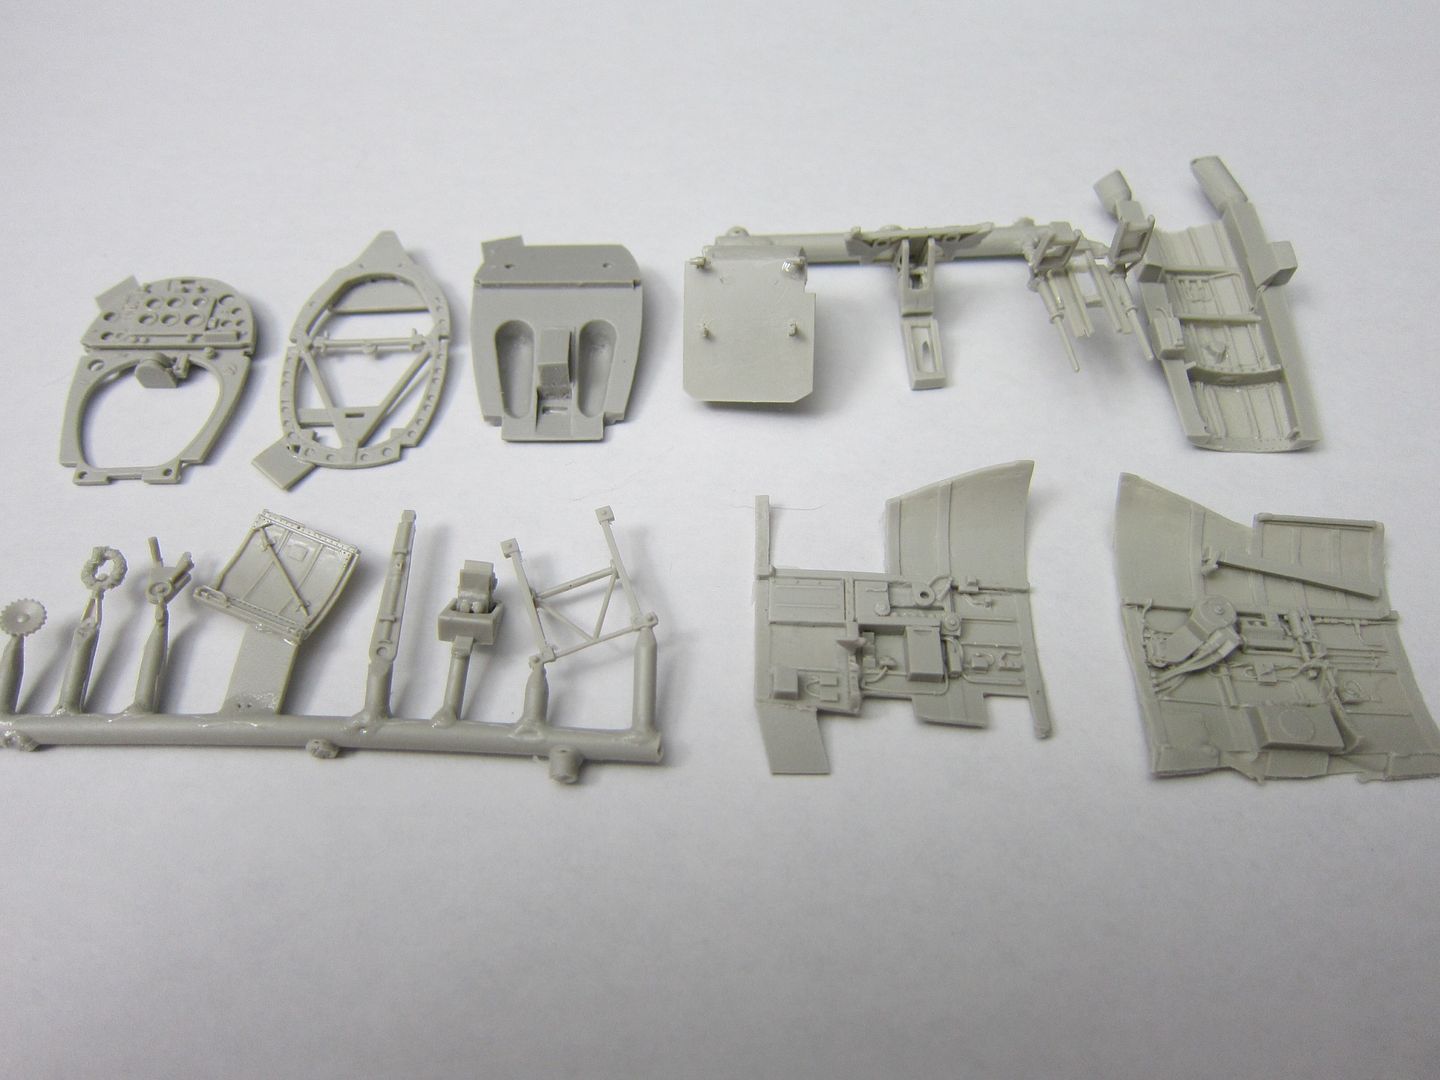
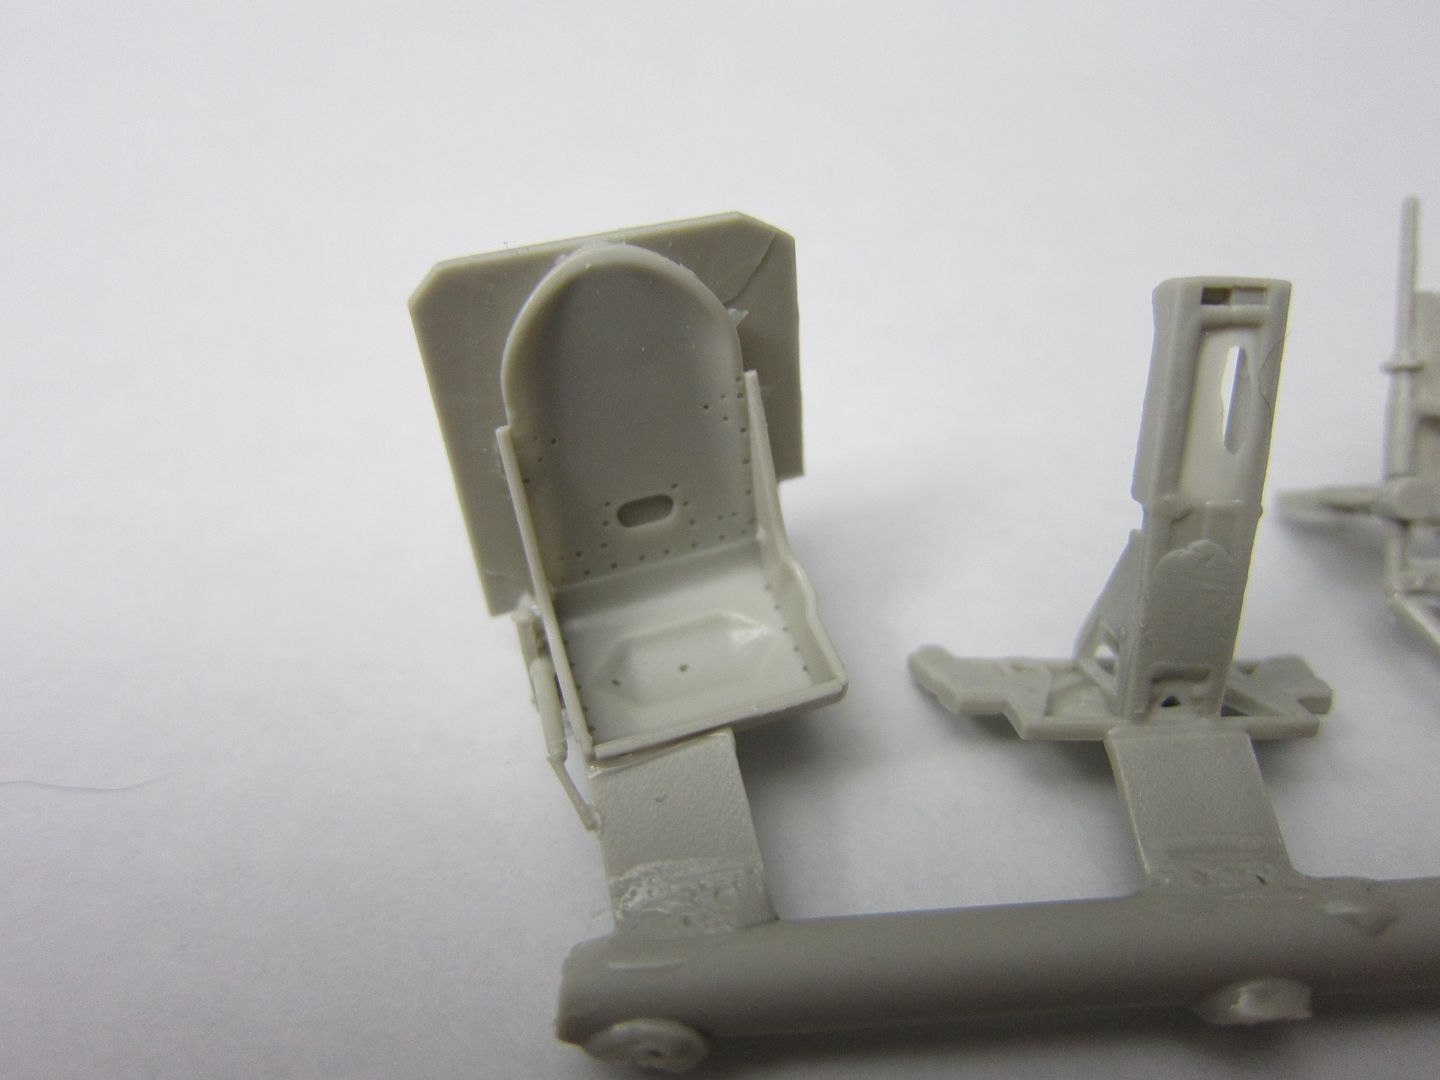
Hi Kev,
Here you go:
The instructions mention that if you are building the kit with the door closed, to use the kit part. They say it's a better fit.
Here are the instrument panel and rear bulkhead:

Carl
-
The instructions are in colour on a single A4 sized page, and are photos of the parts being assembled. No instrument decals so we're on our own there. Likewise for painting suggestions.
Carl
-
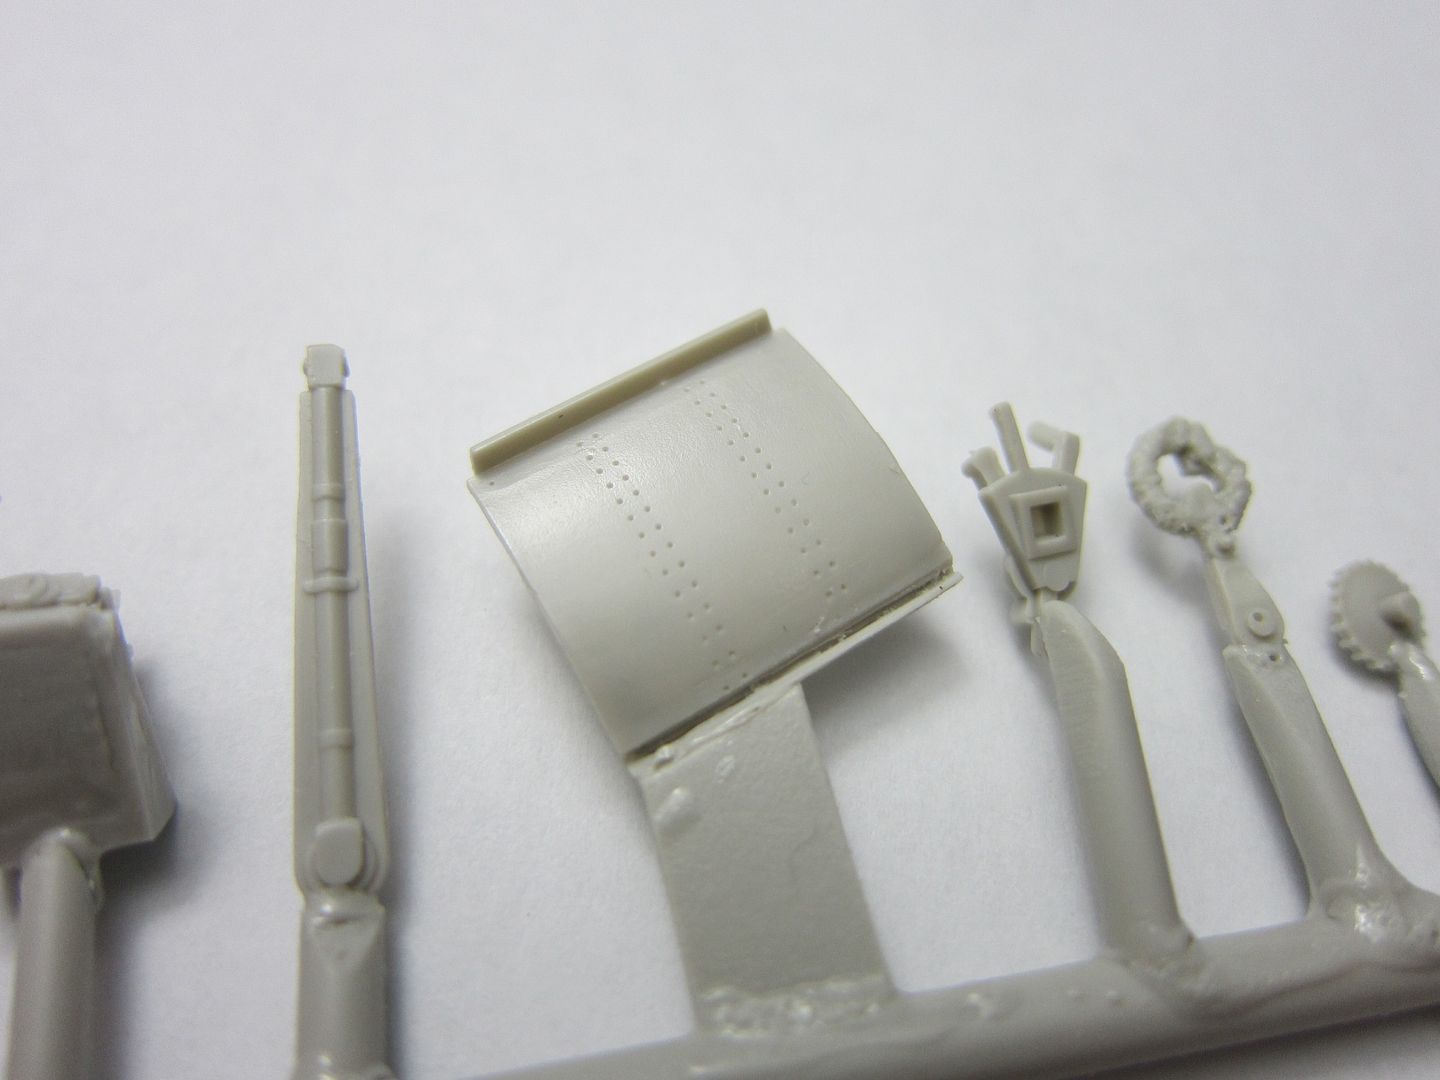
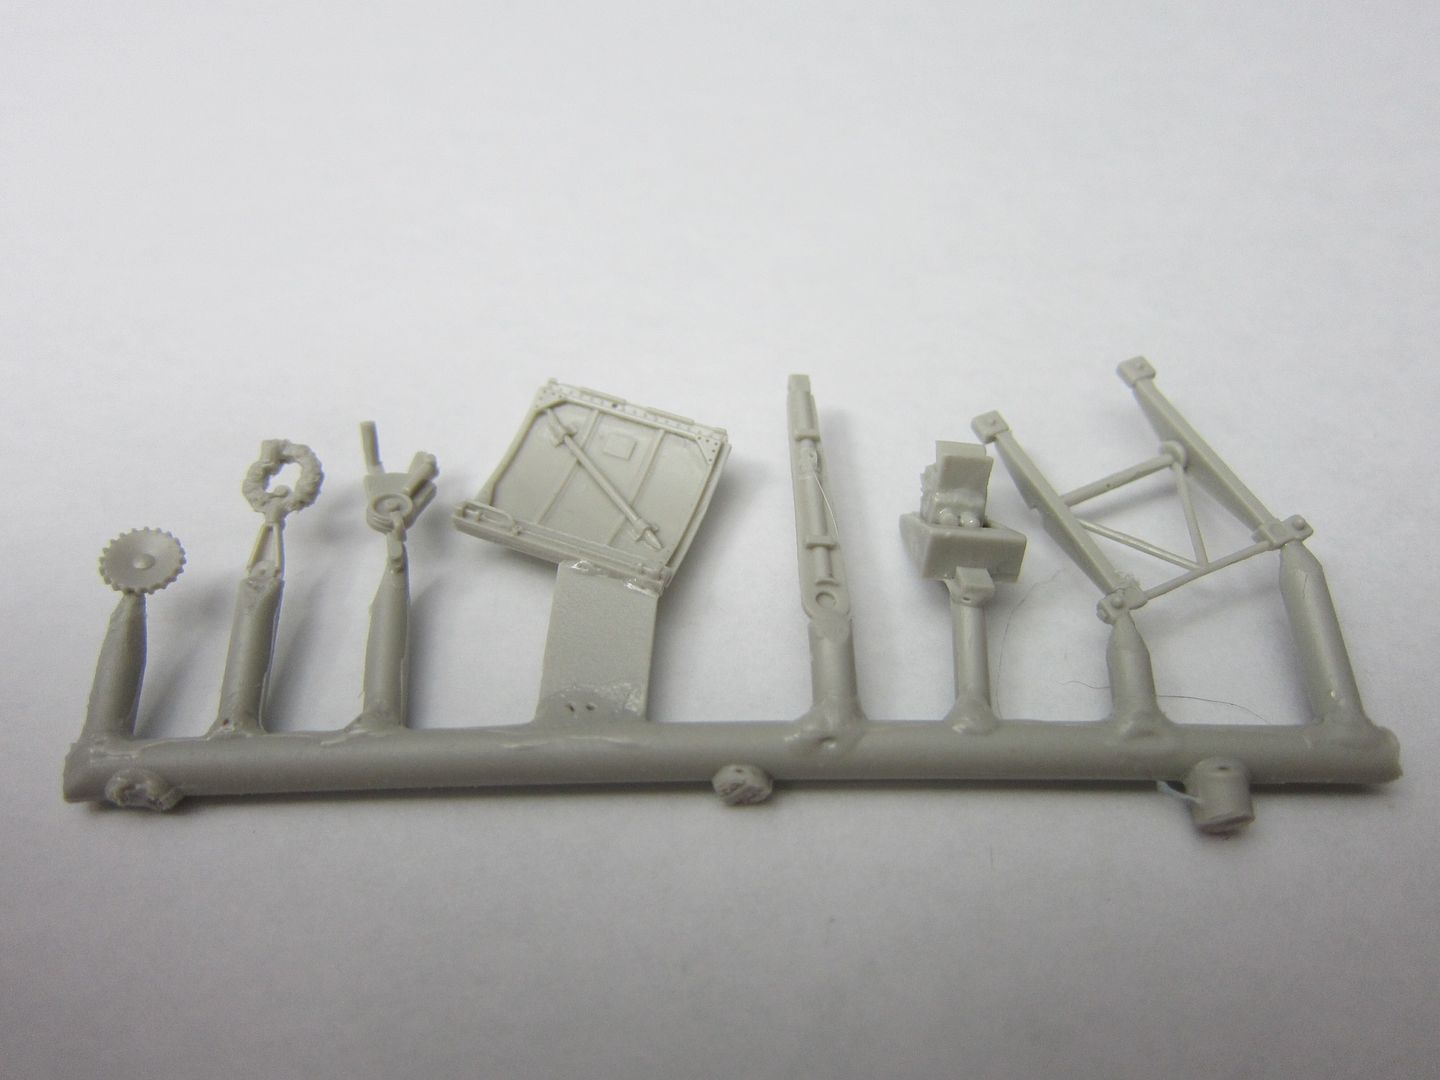
Ok, here are a couple quick shots:
The complete set:
The seat:
The starboard cockpit wall:
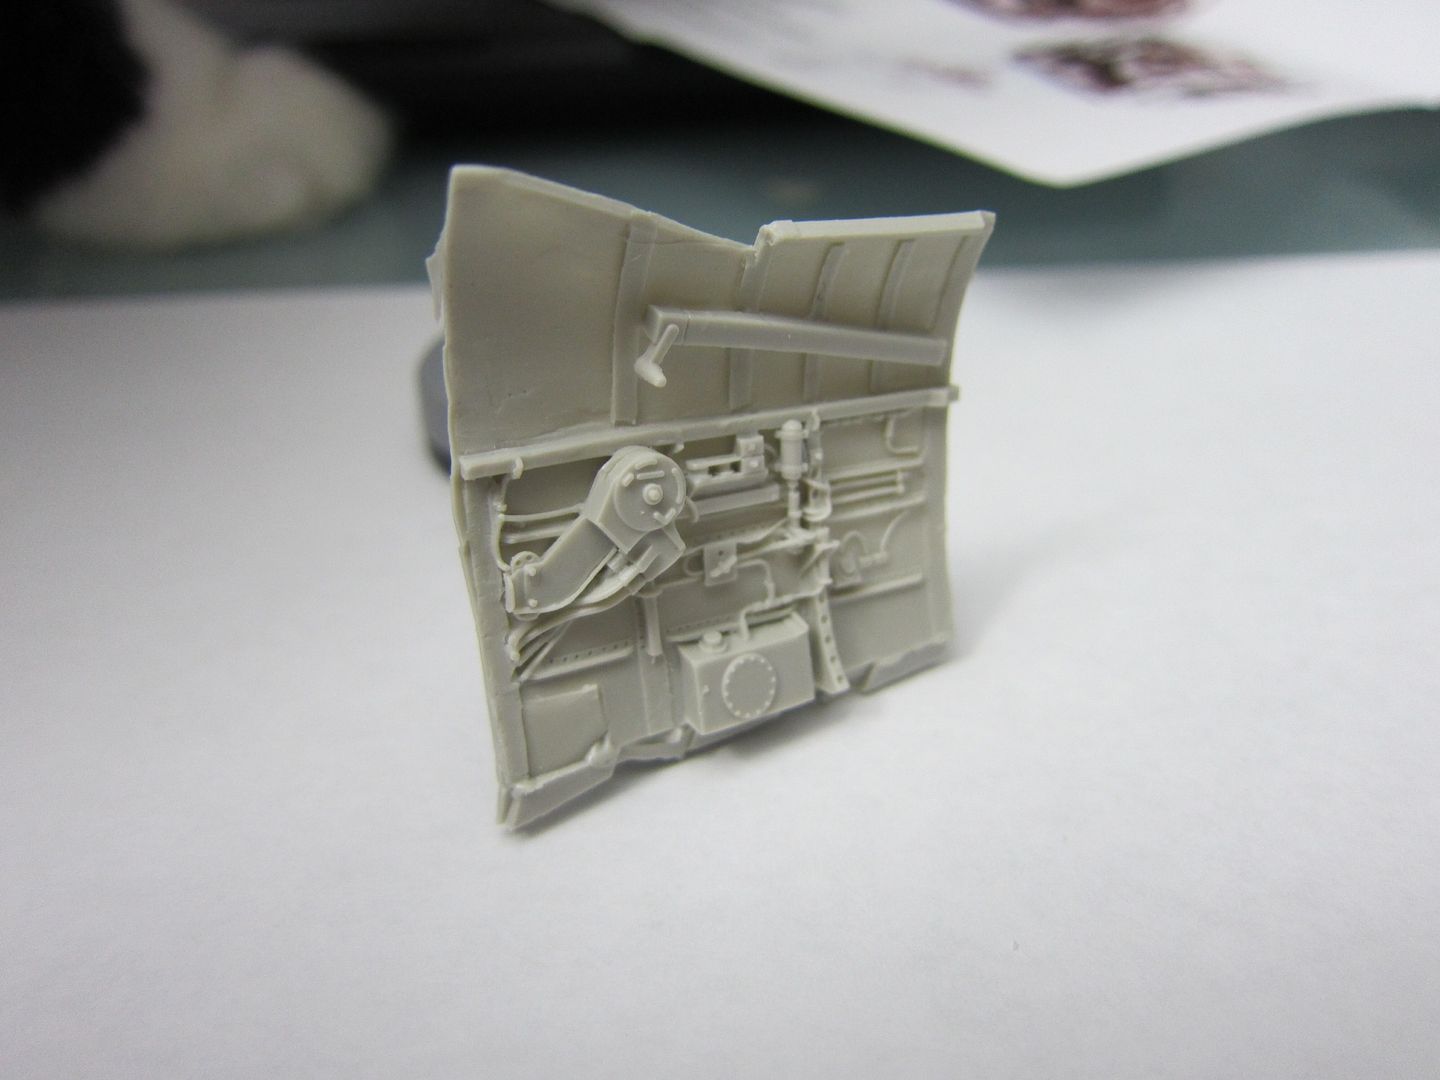
There's a nice under cut on the upper lever.
The port cockpit wall:
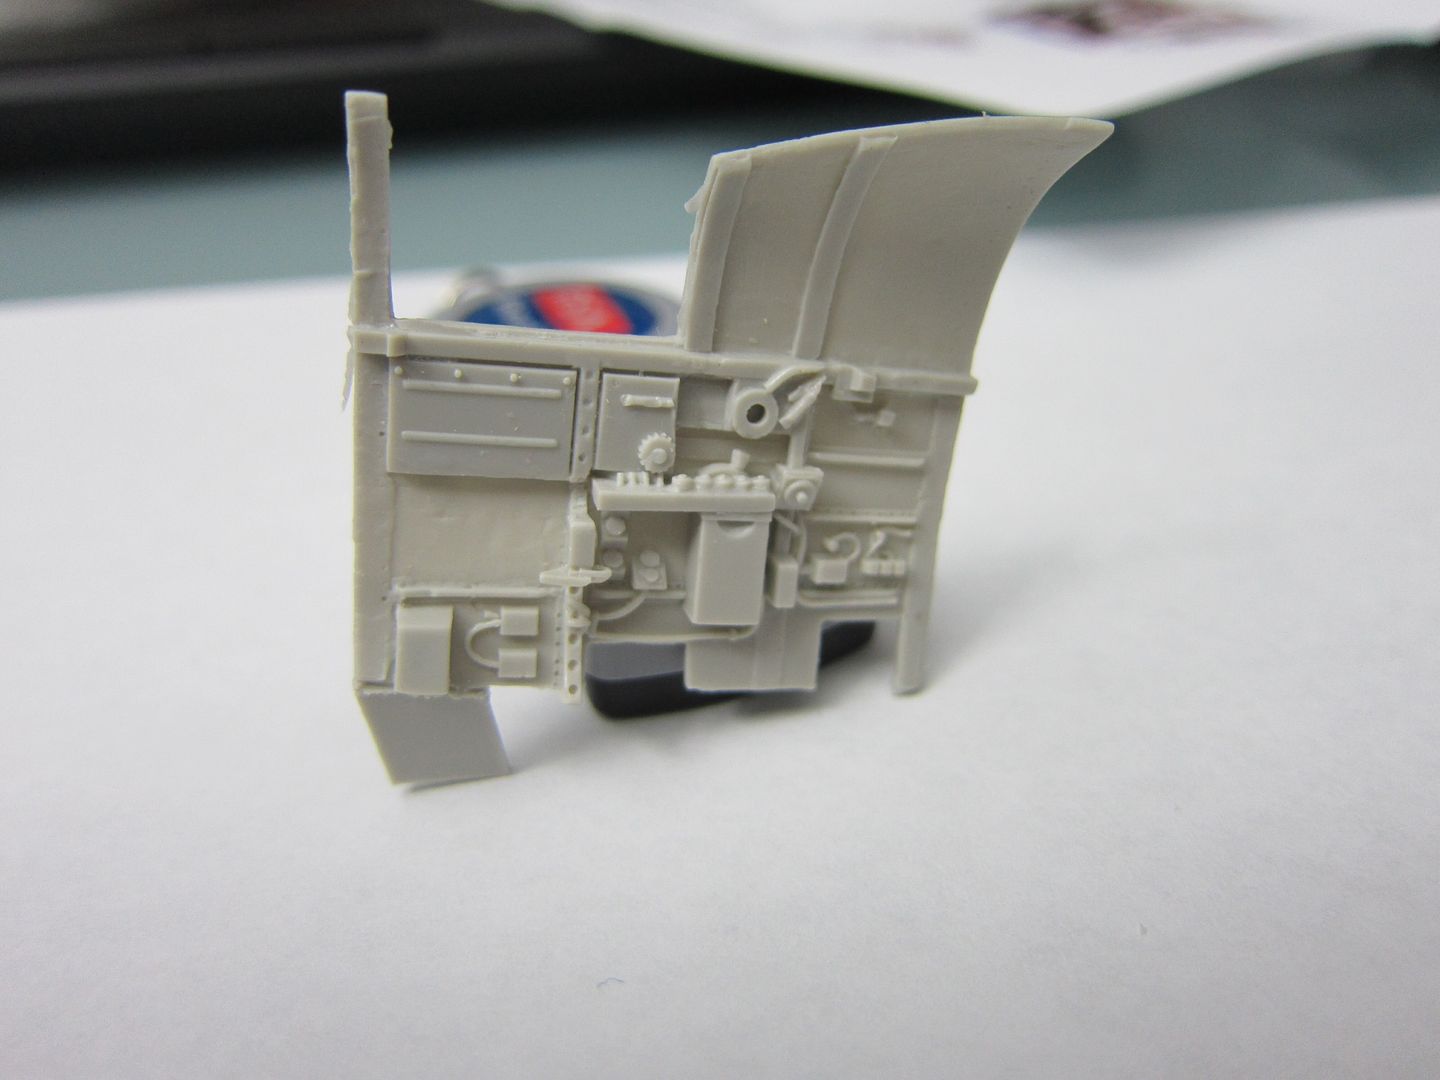
The small bits:

First Purchase of 2013!
in LSP Discussion
Posted
Thanks Harv!
Although I don't know how quickly I'll get to starting it, I'll be using your work for inspiration and advice. So hurry up and finish
Carl