Search the Community
Showing results for tags 'Flogger'.
Found 4 results
-
This is the the Thunderbirds version of the well-regarded Tamiya kit as it is the closest to the 'Flogger' version of the 64AGRS Aggressor Squadron F-16C that I wanted to emulate. The kit itself is excellent with good fit, detail and design, makes a really nice change from some of the other efforts out there. My aim this time was to generate a more realistic paint and weathering combo as these birds are relatively well kept, and to add some lighting of course! Anyway, on with the photos.. Some close-up detail. The ECM pods are fixed by small magnets and removable. The intake took a while to get right but looks ok now. The wingtip pylons are from Kopecky (lovely detail) and the ALQ-188 is Aires (weirdly a noticeably different size to the Wolfpack version). The weathering was kept fairly subdued using colours that closely matched the originals but provided enough difference for scale effect. The paints are MRP (love these) and the decals by Afterburner. This jet didn't seem to have a black nose but it looks so much cooler with one so artistic license prevailed! The exhaust and Winders are from ResKit and are a really nice substitute for the Tamiya parts. The static dischargers are by Master and the lovely ACMI pods by Bandit Resin. The visor cover is actually a photocopied picture then reduced to size. And yes, the lights still worked - always a nervy moment when you finally connect it all up! I'm still perfecting the afterburner effect but I think this is my best effort yet. Cockpit lighting also came out ok though as its a closed cockpit it only really works from certain angles. Many thanks to everyone who stayed the course and commented on the build - always welcome. Link below if interested. Til next time!
-
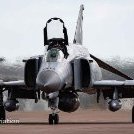
Well here we go again, this time I'm indulging in a Tamiya kit. Much as I like the challenge of upgrading the delights of Revell's offerings, sometimes you just want something a little less demanding. Such as the Tamiya F-16C which judging by all the accounts I've read, is a superb kit. Squirrelled away in my stash is the Thunderbirds offering which allows an earlier Blk32 aircraft which differs from the mainstream Blk50 kit by having the P&W engine, normal (small) shock inlet, lightweight gear with the original wheels and flat MLG doors. However, as it is the Thunderbirds kit it also does not come with weapons and some of the pylon details which I will need for my chosen subject. I've always liked aggressor schemes (who doesn't!), in fact anything that gets away from monotone (grey) colour schemes and there is no doubting that the 64AGRS based out of Nellis has some of the most interesting schemes around. I'm pretty much a fan of all the schemes but for this one I've plumbed for the 'Flogger' scheme as pictured on the lead aircraft below. Crucially, the Thunderbirds kit comes with early sidewinder rails which is right for the era I'm looking at i.e. pre-AMRAAM. (USAF) Now I don't want to make it too easy so this will be an in-flight display and I will be adding lights to this one as well but most of the kit will be out of the box. Except for the engine exhaust which comes courtesy of ResKit (love their stuff). Oh and some ResKit winders, will probably need an ALQ-188 and ACMI pod as well. Maybe some cockpit enhancements from Quinta and might treat myself to some goodies from Kopecky who does loads of goodies for the F-16. Yeah, pretty much out of the box. Right, so where do we start. With the intake of course. That's the thing with adding lights, you can't build it in the order Tamiya would like you to. Because you need to add things like wires and batteries you also need to plan the layout of how you will connect it altogether noting that once you close a section up, that's it - no more access. The F-16 has some nav lights on each side of the intake. These can be added by drilling out a small hole and adding a very small LED. To avoid light overspill (a real problem with bright LEDs) a silver foil backing is used. The outside will be first painted black to kill light overspill. Luckily the actual intake has a small enough gap for the wires to go past and feed back into the fuselage. Another tight spot for lighting is the tail where the F-16 has a large anti-col beacon at the top and a smaller light at the base. Again, a small white LED was used with silver foil to limit overspill. The clear part sits on top of the LED and the wires run down the back of the rudder. I had to do this as this was a second hand kit and the tail had already been glued together. In addition, the started kit had also had the base of the fin cut off in anticipation of reworking to an F-16A by the previous owner. I therefore needed to reinstate the original base using a thick piece of card as a strut to provide some strength. In addition to the wire, a thin fibre optic wire was run from the LED light down the base of the rudder and out of the base of the tail. Interestingly, I'm pretty sure Tamiya had plans to add their own lighting kit to this model. The wing tip photo below shows a groove carved into the inside of the wing which leads to the point where the wing nav lights are and the design of that clear part is definitely with lighting in mind. I know because I was going to do the same to fit the lighting I had in mind. Thank you Tamiya for making that part of the kit construction slightly easier! Well its a start. I should point out that progress is inversely proportional to the many demands of family and life in general so please be patient. We will get there in the end.
- 61 replies
-
- 32
-

-
Hello, here I am with my last project, a MiG-23BN attack-fighter of the Czech Air Force during the early 1990s. The following is what I need on kit and accessories in 1/32 to start: MiG-23MF Trumpeter kit HpH MiG-23BN resin conversion set Two Mikes resin cockpit set for MiG-23MF Eduard Colored PE interior set for MiG-23MF Eduard PE exterior ser for MiG-23MF Quickboost resin airscoops for MiG-23MF Quickboost resin ventral fin for MiG-23BN Quickboost resin FOD covers for MiG-23 Aires resin undercarriage bays for MiG-23 Master metal pitot tube for MiG-23 PM metal static electricity dischargers for MiG-23 It's a lot of stuff... and other parts I will have to build from scratch. Starting from the cockpit, as usual: the Two Mikes resin set is a direct replacement of the kit parts, so the only effort is to remove the casting resin parts to have a good fit with the fuselage parts and the resin front undercarriage bay. Another matter is for the front Instrument Panel: starting from the Eduard PE part I have to make a sandwich using bezels and switchs from various Reheat PE sheet. Here the result. For the Russian cockpit torquise color I'm using the AK Real Colors RC206 reference. It's perfect to match the Eduard pre-painted parts. It's my first time with the AK Real Colors and they are very good to be used with brush and also airbrush thinned with Tamiya acrylic thinner. All the details are brush panted with Vallejo and AK Colors. Spare instrument decals complete the job. Fitting the cockpit and the front undercarriage bay inside the front fuselage parts of the HpH set is not a problem, but I have to to a lot of dry-fitting of the HpH resin parts to match and align them. CA glue is a must here together with Tamiya epoxy putty. Some recessed panels has to be rescribed. ...
-
Hi, Few days ago I finished my sixth model in 1:32 and as it was A-10 it also was a fourth plane is US markings that's why I decided to go to the east and choose one of the former USSR planes. I have Su-27 but I'm not ready to it yet, also Su-25 was not a good choose as I just finish CAS plane. So the choice was simple: MiG-23MLD. In quite a big box half of sprues is for armament - various missiles, bombs, gun pods, fuel tanks etc but MLD was an ultimate fighter so mostly air to air missiles were carried. Plane have 7 mounting points but only 4 are available as the central one and left and right ones are reserved for fuel tanks. I decide to mount 2 R-24R (1 per pylon) missiles and 4 R-60 (2 per pylon) in configuration as below: After gluing I had to sand it a little bit, rescribe some lines, paint with primer and sand a little more: In the meantime I ordered a Aires detail set (2196) http://www.aires.cz/get/image.php?object=product-photo&id=2287 And also a Pitot tube from Master, Air Scoops and Chute brake from Quickboost. Still I'm not sure about painting as Trumpeter is offering two quite interesting schemes, but in the meantime I found on the wiki interesting photo: Camo like Su-27 and idea for a base. Waiting for resin parts I'm trying to glue and prepare as many parts as I can: