Radub
-
Posts
4,720 -
Joined
-
Last visited
-
Days Won
15
Content Type
Profiles
Forums
Events
Everything posted by Radub
-
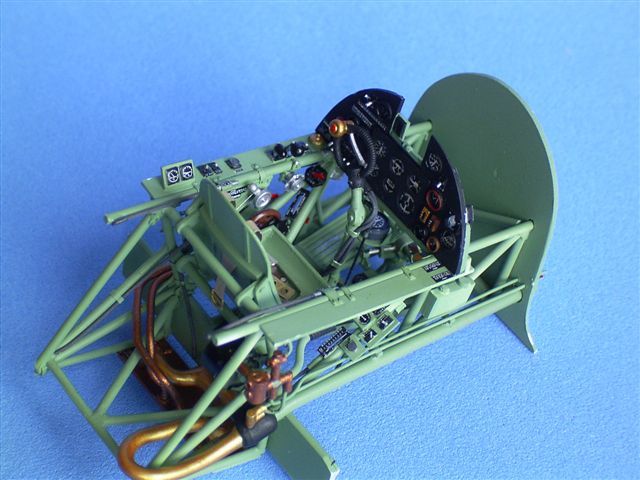
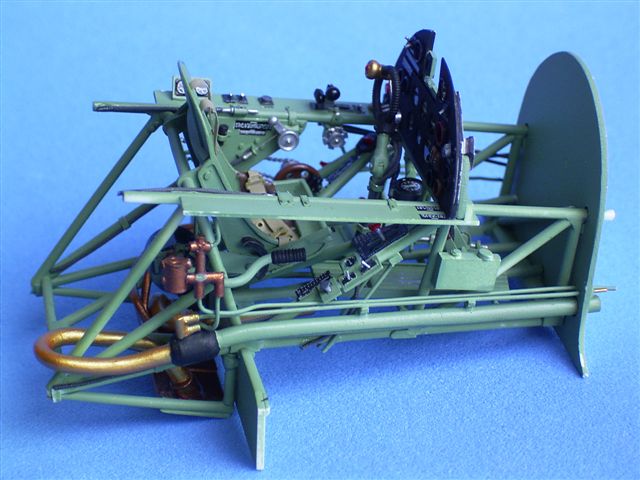
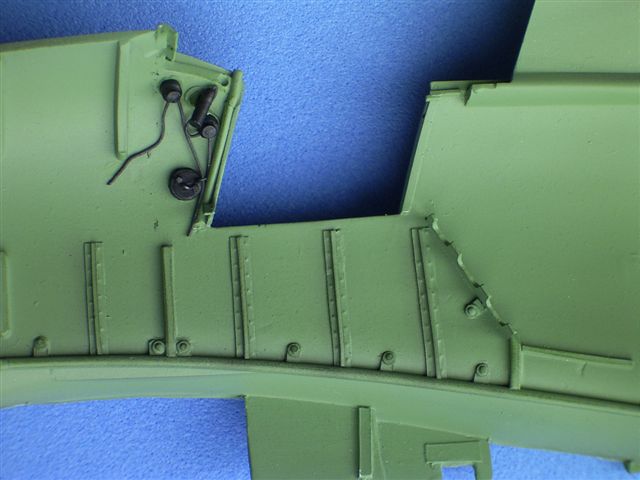
Right sidewall. This is the last picture for today. Radu Brinzan
-
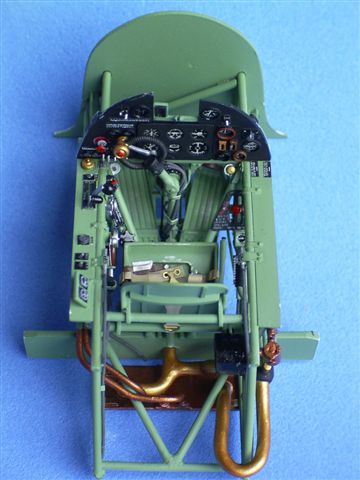
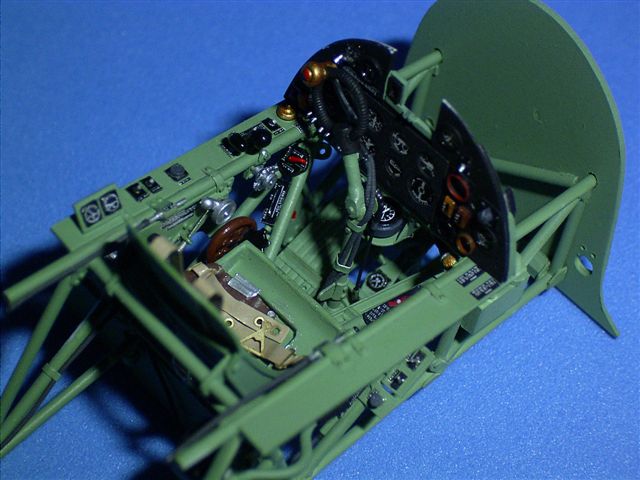
Thank you all again for the kind words. This is the complete cockpit with all wiring and pipes in place (well, not actually, some piping was left out because it would not be visible on the finished model anyway). The colours look much better in daylight. The fuselage will be joined later today. Radu Brinzan

-
Hi Slartibartfast, Although I am sure you meant it as a compliment, I would honestly hate that. I like a fair competition and I always had nothing but utmost respect for any of the model builders I ever competed against. I have been competing since 1997 and I was awarded all kinds of medals and trophies. I am not a "trophy hunter" but I find contentment in my fellow modellers' appreciation. This is just a hobby for me yet I had the chance to come across people that took this pastime too seriously (recently, one of my competition entries was interfered with by another competitor to the point that I had to ask the officials to move my model.) This model will probably be entered in competitions and I will accept whatever award with a smile on my face, I will have no grumblings about judges or judging standards and most importantly, I will not look down on the runners-up. I know I did my best. Thanks again everyone for your kind words, I greatly appreciate them. Radu Brinzan
-
Hi Jay, we'll definitely meet for a jar or two. Rick, the tubular framework was made from evergreen 1.2mm round rod stock straight from the pack. The ends were drilled and a pin was inserted as a "peg". A corresponding hole was drilled in the connection point, and the peg went in there. The whole thing becomes quite sturdy when everything is connected without any glue. The cockpit is now glued together. Please ask as many questions as you wish. I will answer all. I use a Ricoh Caplio RR30 which I bought especially for the macro facility. The pictures are actually quite poor because I used the flash which affected the colours a bit and caused some glare in places. I usually take my pictures in daylight but the weather has been atrocious lately. I will post some more photos soon which will hopefully be better. Radu Brinzan
-
Hi Alan, I am based in Ireland. Thanks for the invitation, but unfortunately I will not be able to come to Friedrichshaffen. In November I am going to the IPMS UK Modelworld (so I would rather save my money). Radu
-
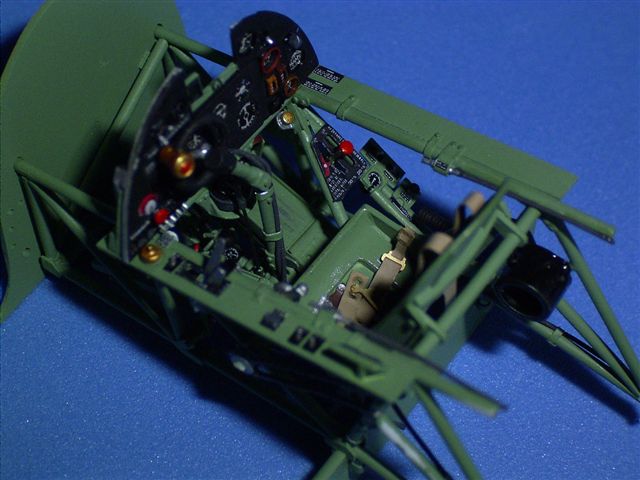
Last picture for the moment. I will post more after the week-end. Radu Brinzan
-
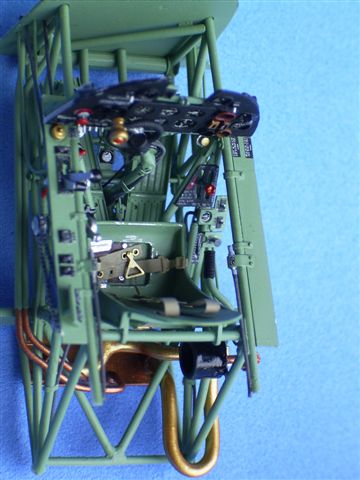
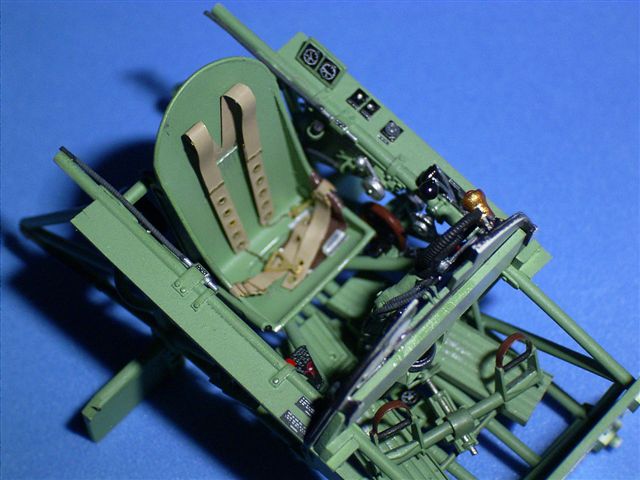
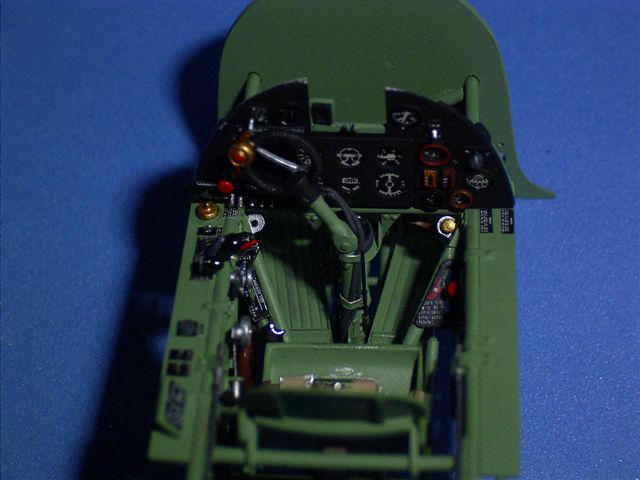
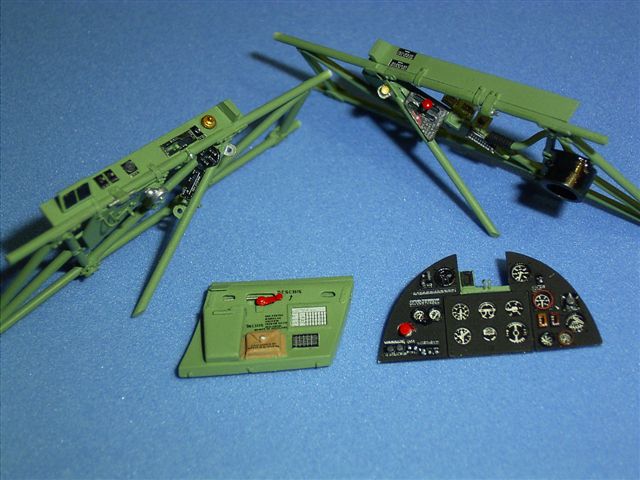
As promised, here are some photos of the painted cockpit. There is still some work to be done - the complex cooling and hydraulic piping are painted and waiting to dry. The harness is the "MDC Sutton" Pe set. The placards wer eprinted as described above with my OKI/ALPS printer. The instrument faces on the main instrument panel are from the Eduard set for the Hurricane. All other gauges were printed by myself. The cockpit was mostly painted with the Lifecolor paints, details painted with Tamyia or Aeromaster. Radu

-
Hi Piet, For the artwork, I use Deneba Canvas 7. This is an old piece of software that can draw both vectorial and bitmap. It is very easy to use and I prefer it over Corel Draw or Illustrator. The artwork was created in a vector format that allows for splitting an image into separate layers, one for each colour. I draw my artwork with a "pen and pad" drawing tablet. I used an OKI DP5000 (ALPS clone) for printing these decals. The placards were printed at 600dpi. That sounds low, but somehow it delivers readable text in 0.5mm letters. As a matter of fact, the OKI DP5000 prints at 600dpi no matter what - it can use some kind of jiggery pokey they call "variable dot size " to get a quality level that they say is 2400dpi. I split the image into separate layers, one for each colour and print them in the respective "spot colour" using "overlay" mode (never forget to ckeck "overlay" when spot printing). The printer setting is, "Image type - automatic", "cardboard". Printing decals is a very steep learning curve - one needs to just go ahead and waste paper and ink in an effort to find what works best. The method above works for me - I have been doing this for 5 years and I am still learning. Hope this helps, Radu
-
This is just a teaser (sorry, work in progress). I plan to post more pictures tomorrow, which will be clearer. The instrument faces are from the Eudard PE set for the Hurricane. The placards were printed with my ALPS printer (they are in Romanian - this is a Romanian Hurricane). I used mostly Lifecolor paints with some Tamyia here and there. Radu Brinzan
-
The French deserved their win. It was a good match. Radu
-
he he he, you wish! Zidane could not hit a ball tied to his shoe. (joke) Eire 1, France 0. Radu
-
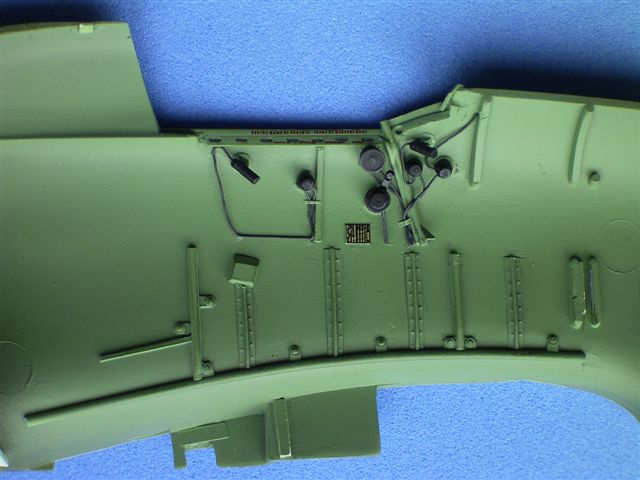
Hi Chris and Alan, That link is from the MDC website - there is a link to all of their instruction sheets. The air connection on the starboard underside is for the oxygen of the breathing apparatus (pure oxygen, hence the warning about fat and oil). In some cases, the access hatch could be oblong rather than round as suggested by Hasegawa. The connection for refilling the bottles of compressed air used to **** the MG is on the port upperside. The access hatch is the hatch that was used on previous models for loading the MG ammo, near the wingroot. HTH Radu
-
Hi Alan, This should give you a fair idea. http://ds.dial.pipex.com/town/place/gfb78/icv3231b.jpg HTH Radu