

Anthony in NZ
-
Posts
4,868 -
Joined
-
Last visited
-
Days Won
29
Content Type
Profiles
Forums
Events
Posts posted by Anthony in NZ
-
-
WOW!!!!! what more can I say. That is some beautiful detail work. What did you use for the silver? It looks very fine without any grainy effect-spot on.
Keep us posted PLEASE!!!
Cheers Anthony
-
Stunning work, what more can I say!!! You just seem to have hit the nail on the head with the detail and finish. Now I cant wait to see that 190 finished (no pressure of course!)
Thanks for sharing your work.
Cheers Anthony
-
Thanks Saso, LSP guys will be the first to know when it is ready.
Cheers Anthony
-
excellent work, I admire people who can make these big birds look realistic and not like a model, well done!
Cheers Anthony
-
Hi Saso
Yes this is the Hasegawa 32nd TA-4. Also there is quite a lot more surface detail to add like re-doing the rudder hinges etc...
Yes there is a Cutting edge Skyhawk bulged intakes & tailcone set. The intakes have only been bulged from the outside and the inside still has the original intake curves. You only need to grind out the excess exterior and simply slide them into the plastic ones. I did this because I can scribe more evenly and cleanly on plastic than resin.
As for the detail set it will be compatable with the Black Box ones as the patternmaker will be one and the same person. We are working to be able to add on the nosewheel bay if so desired to the BB pit. Incl will also be a new tailpipe with accurate detail as well as many more bits.
We are not rushing this set as it needs to be done properly. Perhaps when a few items start coming out early next year then they could be released individually. The mainwheels are done by myself already and look stunning (if I do say so myself)and it includes all new hub detail, brake discs, and new tyres with scribed tread detail.
Sorry for the long winded post.
I hope you eventually like it Saso as your work is VERY inspiring and well executed. Goodness knows how many hours have already been spent photographing and measuring!!!!
Cheers Anthony
-
Thanks, no not really a biggie to open up those hatches. The ones on the other side are open too as well as the LOX compt in the rear fuse. After opening the panels I edged them with very thin plasti card and mek'd them just below the surface opening as per the actual plane rubbed them down th the correct(well to the eye) width and presto!
Just take your time, and I find that if I gaze at lots of pics for long enough then you get a mental picture of how it should look, then for me one day at work a week later (when I am not thinking about it) it comes to me how to make it, strange but true!
Cheers Anthony
-
Thanks guys for the comments,
As regards the cockpit upgrade this will be compatable with Black Boxes one which will incl the HUD & mods etc for the front and rear cockpits. The pre KAHU ones were pretty much like an E/F already, so if you get the seperate 'K' conversion the idea is to have the new cockpit bits that will go straight onto BB's ones. I think I will have the rest of the detail bits as a seperate set like wheel wells, LOX compt etc as a generic set so anyone doing an E/F or TA-4J could also use it.
Cheers Anthony
-
-
-
I have paused on the project at the moment as I am doing the masters with a well knowen patternmaker whose work is first class on a Skyhawk superdetail set and 'K' conversion. It wont be out for a little while yet but I am sure it will be worth the wait, there has been an amazing amount of research, photos and hours of measuring stuff.

-
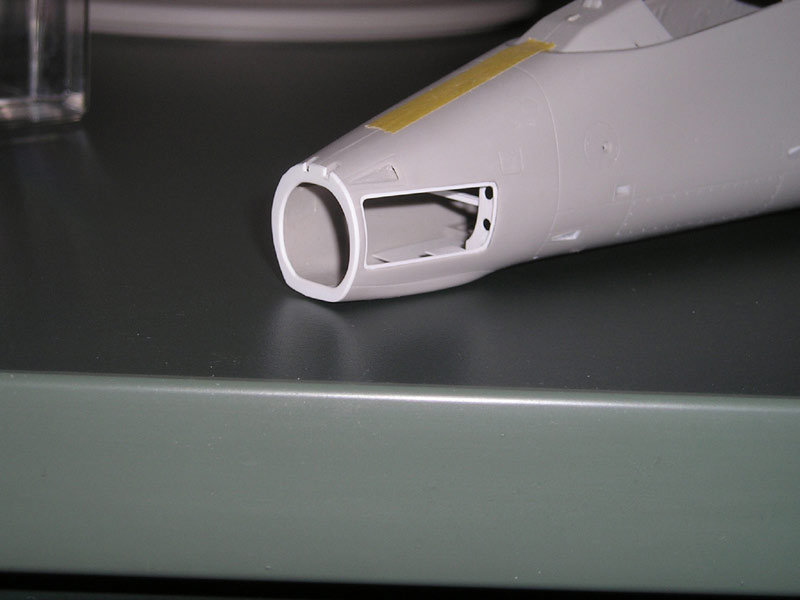
Hi Guys, well this is the first time I have ever posted anything of mine "in the works", but someone was asking about the Beading Tool on Discussion forum. I had a look around my pics on file and found these of my Skyhawk I had photographed several months ago with it in.
This TA-4K has been completely rescribed with the slat areas filled to a smooth upper contour, new front/rear fuse attach bolt points, redesigned NACA intakes, new positions for slat rails and rollers installed etc etc...
Everythng so far has been rebuilt or modified, I have started installing the CE intakes by grinding off the outsides and slotting them in the kit ones then filling & sanding them smooth, along with a box full of scratchbuilt items.
I hope you like progress so far.


Fw190D-9 - Hasegawa 1/32
in Works in Progress
Posted
Thanks for that.
I have been using the Tamiya spray can Laquer (AS12? or 11 I cant recall off hand which) run through the airbrush as it too has virtually no grain effect. I even thin mine even more.
I might try the one you have used also if you dont get any reaction with other paints, something which I am always aware of.
Thanks for the reply
Anthony