ruzlkampf
-
Posts
3,126 -
Joined
-
Last visited
-
Days Won
4
Content Type
Profiles
Forums
Events
Everything posted by ruzlkampf
-
All glued together with a few more laminated skins of styrene to fill things out, which will minimize the amount of putty I'll need.

-
Skinning the bottom with yet more scrap styrene. I'm refusing to spend another dime acquiring parts for this, so it's recycling time.
-
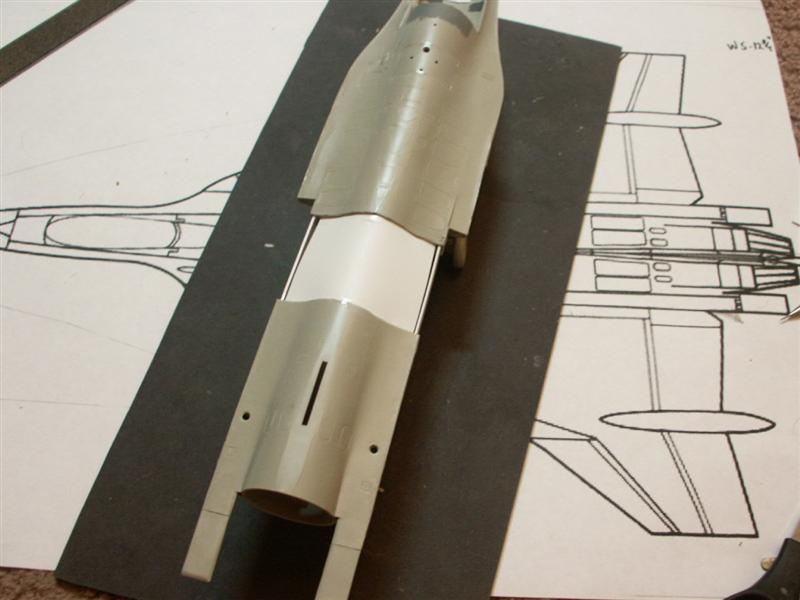
Whoohoo! Upsweep on the burner looks OK, and the length is right on.
-
Last test-fit before gluing;
-
While that dried a bit, I went ahead and 'feathered' the cockpit piece.

-
Going for light weight here, as this is all behind the main gear. More stringers for strength and something to glue the bottom skin to.
-
Whoop-dee-dooo! Thanks for following along everybody. Yep, I've got the 'Texas Battle-cry' of "Just get er done" going on right now Tex. Put about 2-1/2hrs. into this tonight before I had to call a pizza-break and stop. I'm liking this new design. Only got time for some short snippets for explanations as I go along, so I won't be doing too much jabbering. Started with some longerons applied to the sides and bottom before adding a sheet of styrene to the top for some sheer strength and lining things up. Here's the bottom; And the top;

-

Vietnam aera F-4E Phantom, Revell
ruzlkampf replied to blackbetty's topic in Clear the Bench! Group Build
Niiiice Karl! I've never seen those high-drag bombs in a kit before, did they come with this Phantom? Looks like a hefty load-out ya got going on there! Like it! -
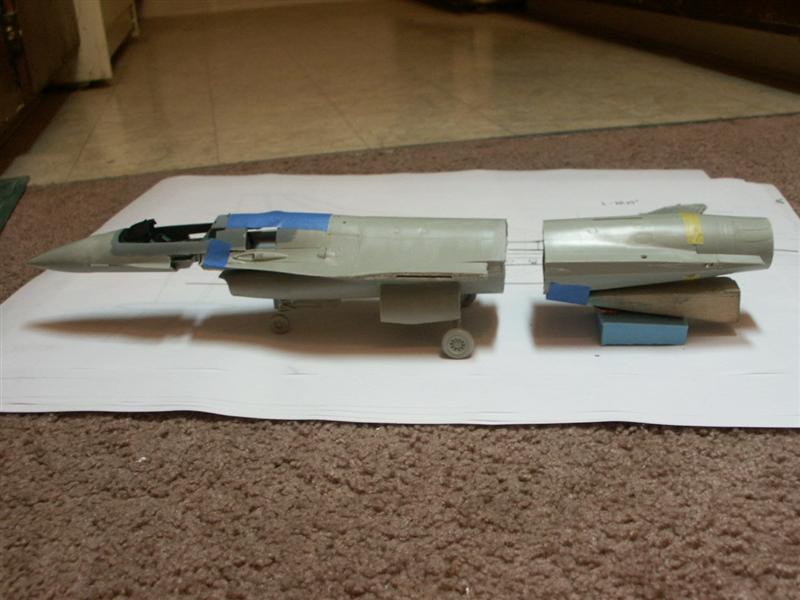
Last view of the night from the top. Goggle-eye of the camera makes the rear gap look huge, but it's only about 1 inch(25mm). Tomorrow I should have these sections joined back together and ready for putty. Wing design number 1 should follow soon. More pics as things progress! Later, Russ

-
Little bit better view of the rear up-sweep I'm trying to get.
-

-

-
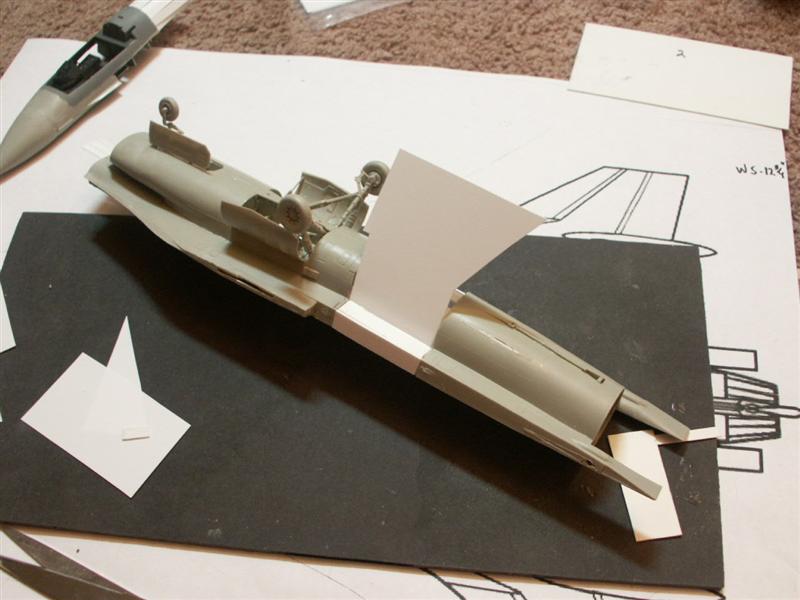
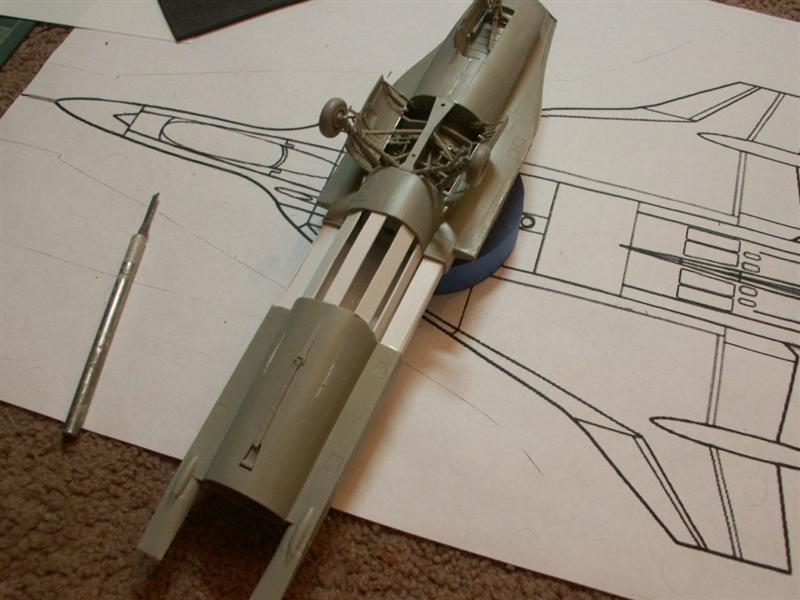
Taped and propped up to see how everything lines up. I cut the nose like that, cuz i wanted the gun/engine intake/ and refueling receptacle to line up with my plans....but the cockpit has to be about 2 feet (3/4's inch scale) more forward. Ventral fins are now gone, and I made the rear cut to get the 3 degrees of 'up-sweep' that the engine will have to clear the ground at high AOA. (this can be seen in the previous pics of the plans) I now have a scale 30 inch gap (almost an inch) in the rear which coincides with the plans really well.

-
Whoooeee! Thanks for the interest fellas! WOW, what a gorgeous build Roy! I was nodding knowingly about a lot of the points you brought up. Not much out there for plans, wondering if the kit landing gear will hold the weight, and which direction to go with the wings.....etc. I too discovered the NASA site for some good close-up pics. Very nice. Also saw the 'Wild Hare' conversion Harv! Looked like the cat's meow for doing this conversion,....but I hear it's OOP? Meh, don't think I could justify it for this 'putty-queen' build anyway. No telling what this will eventually morph into before it's all over. I keep having visions of variable geometry intakes for a higher top-end, vectored exhaust with thrust reversers, a 'mission adaptable swing-wing' that changes camber in flight but folds back into the double-cranked delta kinda like an F-111, conformal fuel tanks,....blah blah blah. But as the object of the GB is to actually FINISH something off,.....maybe I'd better keep it down to a dull roar? heh heh. I hear that the mighty Kangnam had an XL version for it's F-16 also Derek! Just a set of wings on an un-modified fuse though. Still be cool though. Won't have any eye-bleeding detail on this build,...just a 'what if' design exercise to keep things fun. Been playing around with an arctic snow camo, or a variation of some kinda 'Ferris scheme' for a final paint job....but dunno yet. ANOTHER Kangnam F-16 Peter?! Hmmmm, could actually use the main gear for the future Norwegian X-29 I'm going to morph the F-5E into. As far as I can tell, the center body of the fuse remained the same as a regular F-16.(landing gear, gun position, refueling receptacle,etc.) A 30 inch plug in the rear, and a 24 inch plug forward of this central body made the fuse 54 inches longer than a standard F-16. The cuts I made to stretch the fuse out scaled out to those measurements exactly....which amazed the heck outta me! My plans aren't the greatest, but they're all I have to go on for now. I agree Shawn, this is a MOST interesting design....and looks to be a hoot to emulate! Made this build a lot more interesting with a snap of the fingers. But I digress; Here's where I was last night after Humpty-Dumpty fell off the wall and cracked into a few major components.(OK, actually I Dremeled the crap outta it...but let's pretend eh?) Uh oh, my nose fell off! Major pieces ready for re-assembly;


-
Not much different dimensionally with a slightly larger wingspan and fuse....,but ooooooh what a difference in the appearance. Probably still make it Norwegian, and not Australian....but I can already envision a cool 'what-if' camo scheme. Should have some pics tomorrow of the buzz-sawed fuse, and how I'm going to put Humpty-Dumpty back together again. More pics as things 'progress'? later, Russ

-
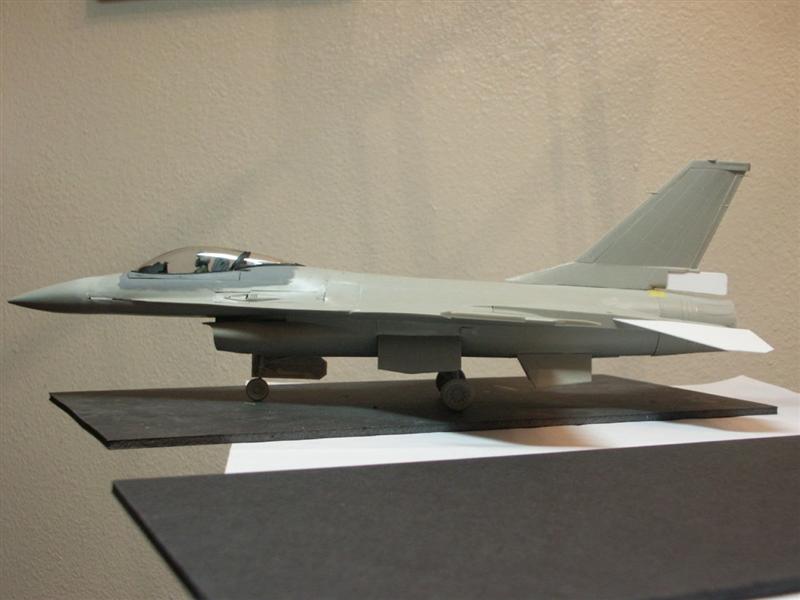
I'm happy where this is going now. I can get into this;

-
It's not an 'A' model anymore Shawn! I no sooner got putty all over this, and had a grand mess going on......when I for some reason just stopped, and paused. Blast it, if I'm gonna putty something it's got to be done in style! Just can't get into an 'A' for some reason, and I was fooling myself into jousting and tilting at windmills thinking otherwise. When a build becomes a job, and is no longer a hoot it's time to stop the train and get off at Russville. Heh heh, this thread has now changed gears 'r0todr1ver'. Time to leave the 'control group' and head into the unknown 'experimental' side of things. I feel better already! A little research for some measurements, and a preliminary looksy over a set of scaled plans has set this build off into another direction. My model is now cut up into 5 pieces in anticipation of lengthening the fuse about 1-1/2inches, and the wings/tail are back into the ME-109 box where they belong. Whoohooo! Here's an overview of where I'm heading now;

-
Et tu Brutus? Et tu? Bwhahahaha, I fully deserved that one Derek! Hmmmm, wonder if that IS where it's at? Meh, probably find those burner cans in the fridge behind the applesauce, or hidden in the fireplace to keep them from unscrupulous eyes. I hear they're really hot on the black market these days?
-
Now THAT'S a beautiful paint-job Peter! Whooooeee, I can see why you weren't looking forward to starting on something as tricky as that! What a cool paint-scheme. Really looking sharp dude! It's all down hill now,eh? Can't wait to see what that monster engine looks like fixed to the front! Go Peter Go!
-
Hmmmm, I seem to have miss-placed my other set of after-burners that were in the closed position,....so I think I might hack up the open ones I have and detail out the inner burner petals to get them closed. Dunno though, as I like to bounce around on whatever interests me at the moment on this build. More pics as I get assemblies done. Later, Russ

-

-
Gaaaahhh! I had to walk away from the F-16 build for a night after applying a trowel full of putty on it,...and decided to warm up on this for a change. Already had my RTV moulds made up and the wheels cast earlier so I decided to clean those suckers up and put them on the axles to see what I got. Still have to put all the brake stuff on the outside of the mains, and the spindle and bolts that go around the rim on the nose wheels.....but it felt good to dust everything off and start whomping on this again. Here's some sneak previews of the gear roughed out;

-
Whoah! That is too cool Derek! Love those markings. Man, I ALMOST made this into a Belgian or Dutch F-16,.....but decided to keep my triumverate all Norwegian. Thanks Shawn, I'm bombing on this critter pretty bad, eh? I had to walk away from it yet again after applying a cubic ton of putty tonight. If it doesn't sand down 1/2-way correctly, it's going to morph into an Aussie F-16XL just to keep it exciting. If I'm gonna have to hack on this anymore it might at least be fun! Hmmmmm, instead of making the F-5E into an 'A',.....I could really have the shavings fly by making THAT into an forward swept wing X-29 while I'm at it?
-
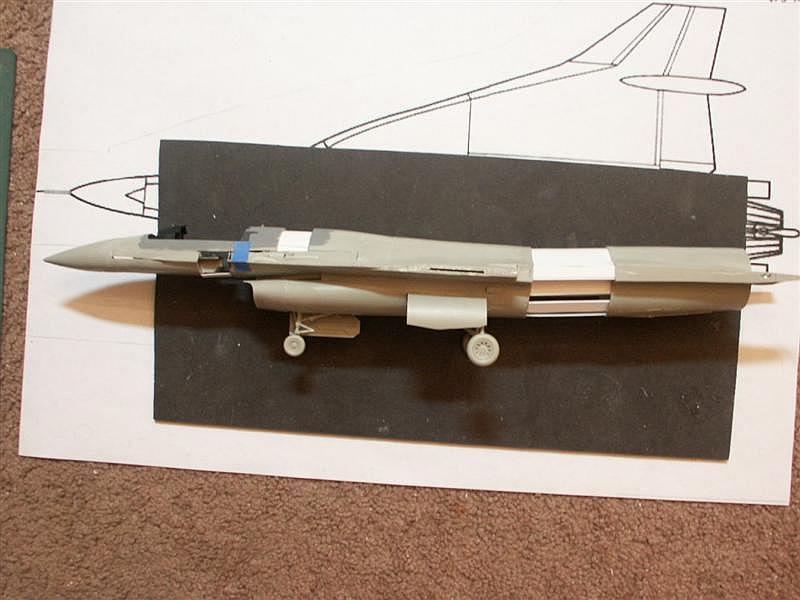
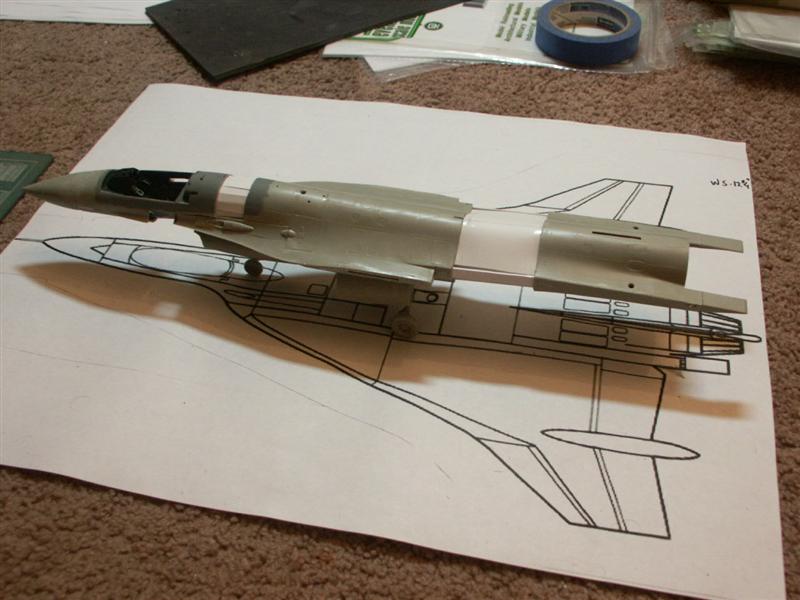
Some side shots. After I finish off the cockpit and add the canopy,....it's time to start laying on the putty. I'll take some pics before I paint the model, so ya'll can see where I had to smooth the contours in. Lumpy or smooth, this will be completed by the end of next weekend. I want to get started on the F-104. More pics as things progress! Later, Russ

-
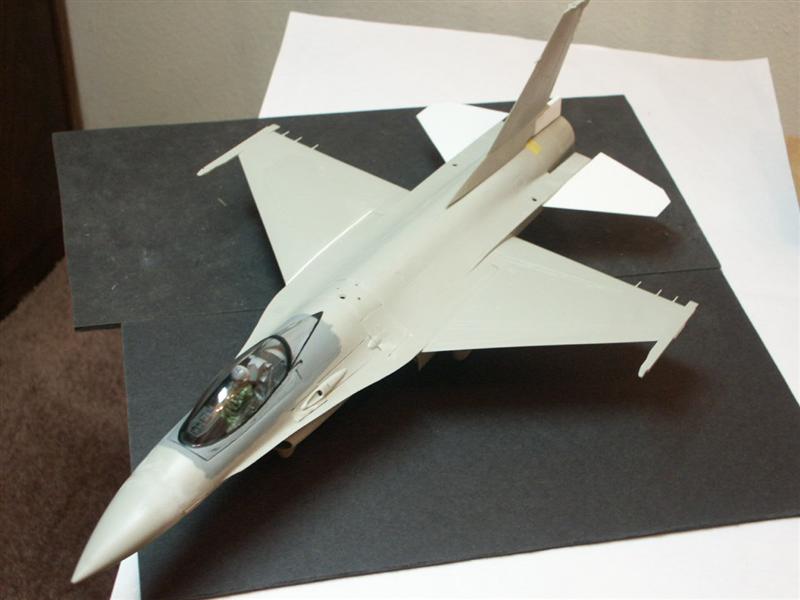
Views from the top. Canopy doesn't fit so hot, so I'll be installing it and puttying around the edges.