

miamiangler
-
Posts
484 -
Joined
-
Last visited
-
Days Won
5
Content Type
Profiles
Forums
Events
Posts posted by miamiangler
-
-
Thanks Maru5,
I finally started the process of closing up the fuselage
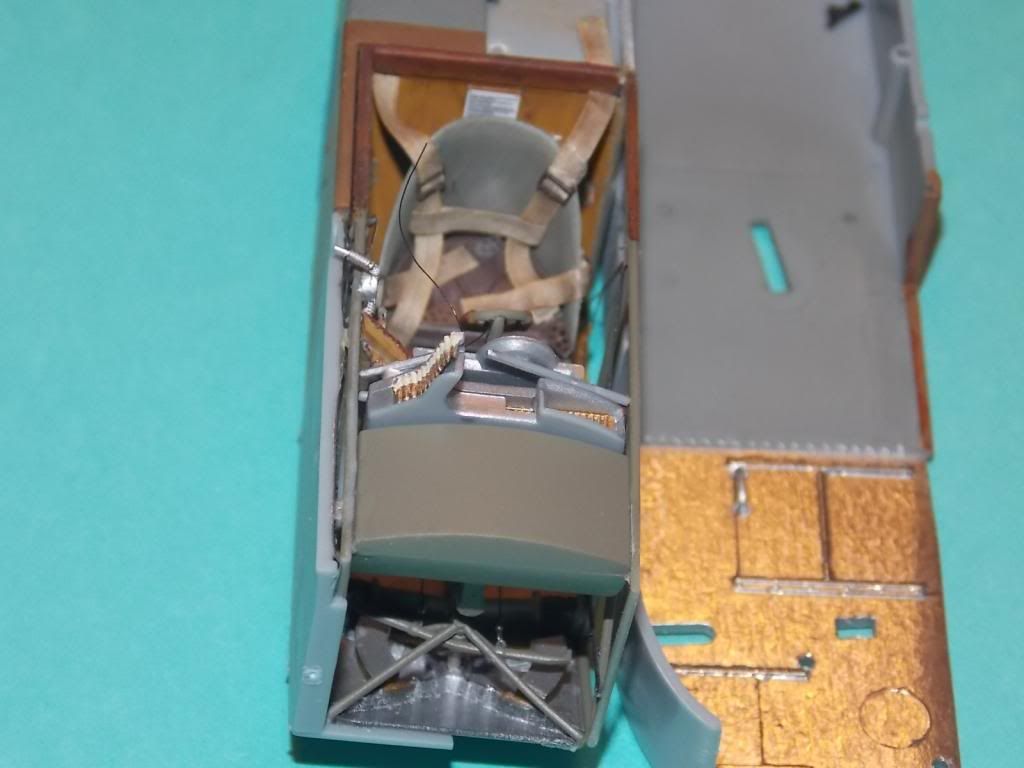
 . I added the HGW seat belts .
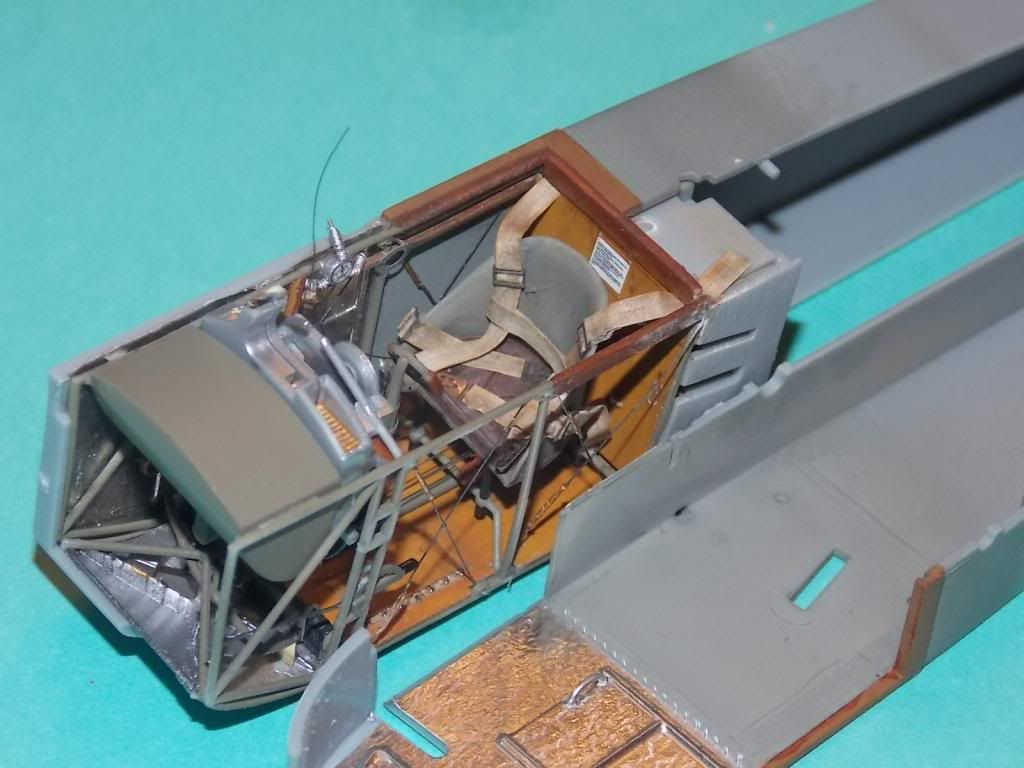
More to come soon .
Willi
-
Thanks Peter for your kind words. I bet the WNW Tripe is easier to build !Willi
Absolutely incredible work. After your magical touch, the The rotary is a gem all by itself. Super work on teh cockpit interior; the floor boards are simply outstanding.
Keep 'em coming
 :popcorn:
Willi
-
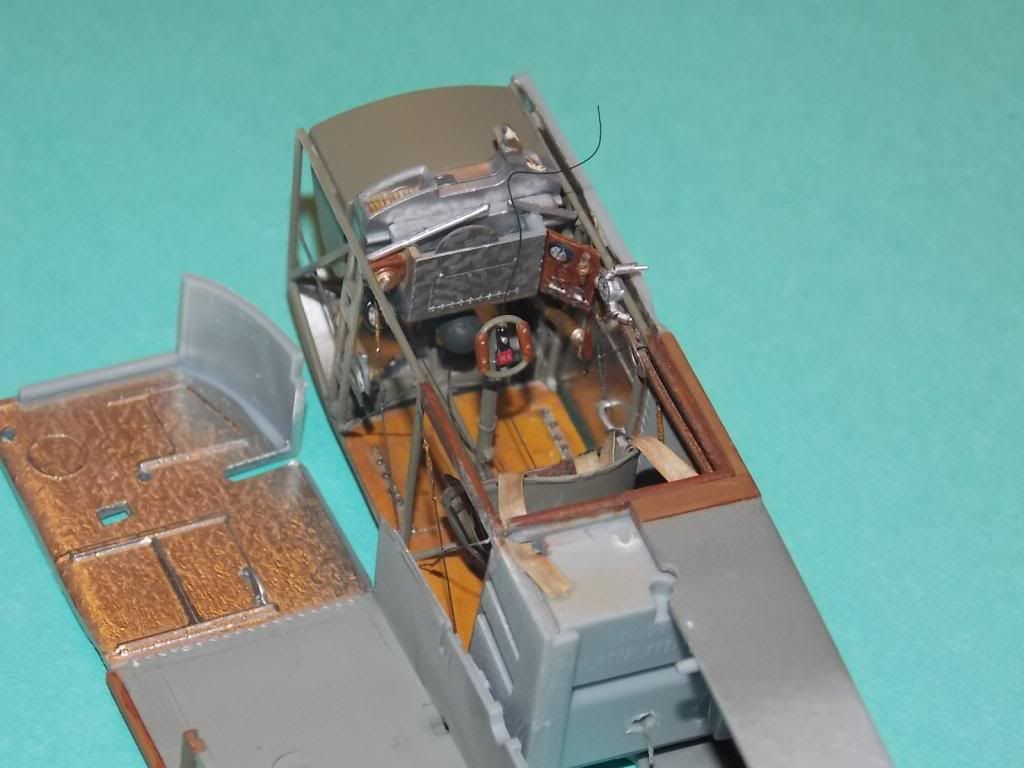
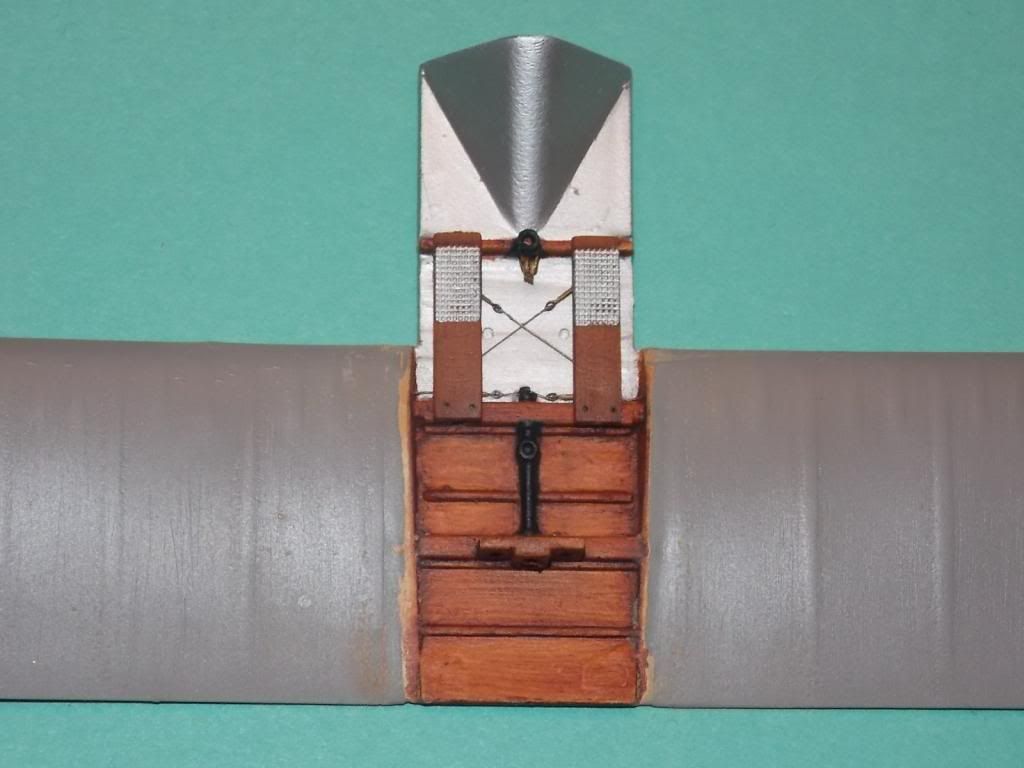
I added the cables to the floor boards ,Not too happy with the results
 . I used wire which probably was not the best choice. Next time I`ll use mono ! Most wont be seen with the small cockpit ,
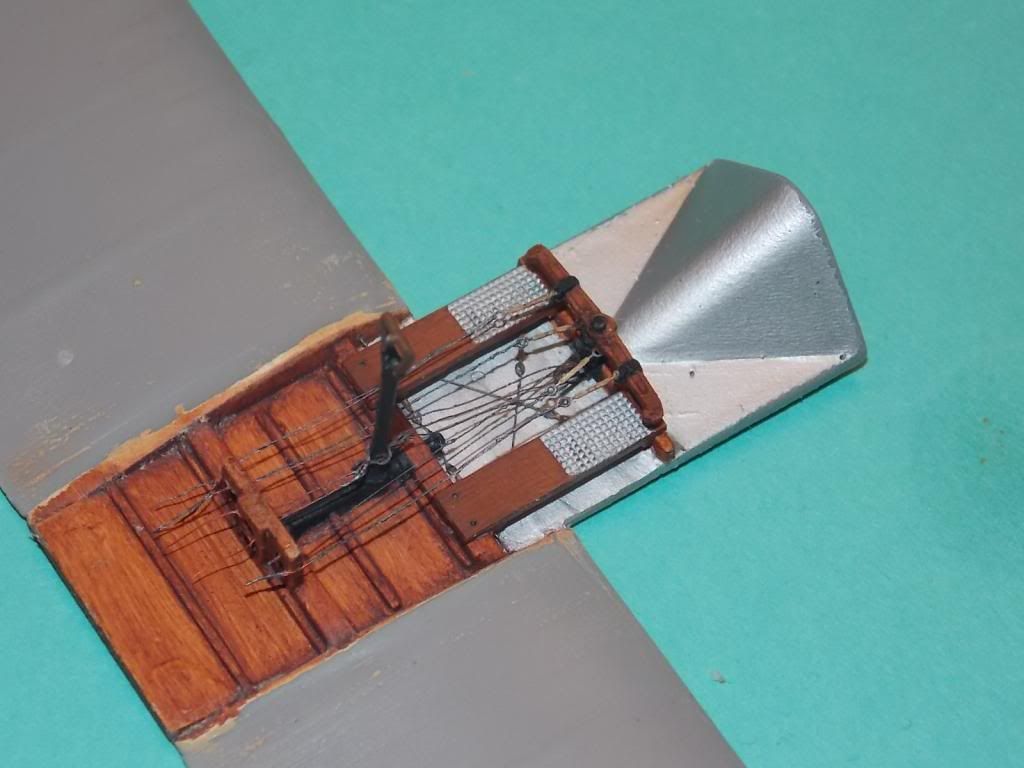

Thanks ,Willi
-
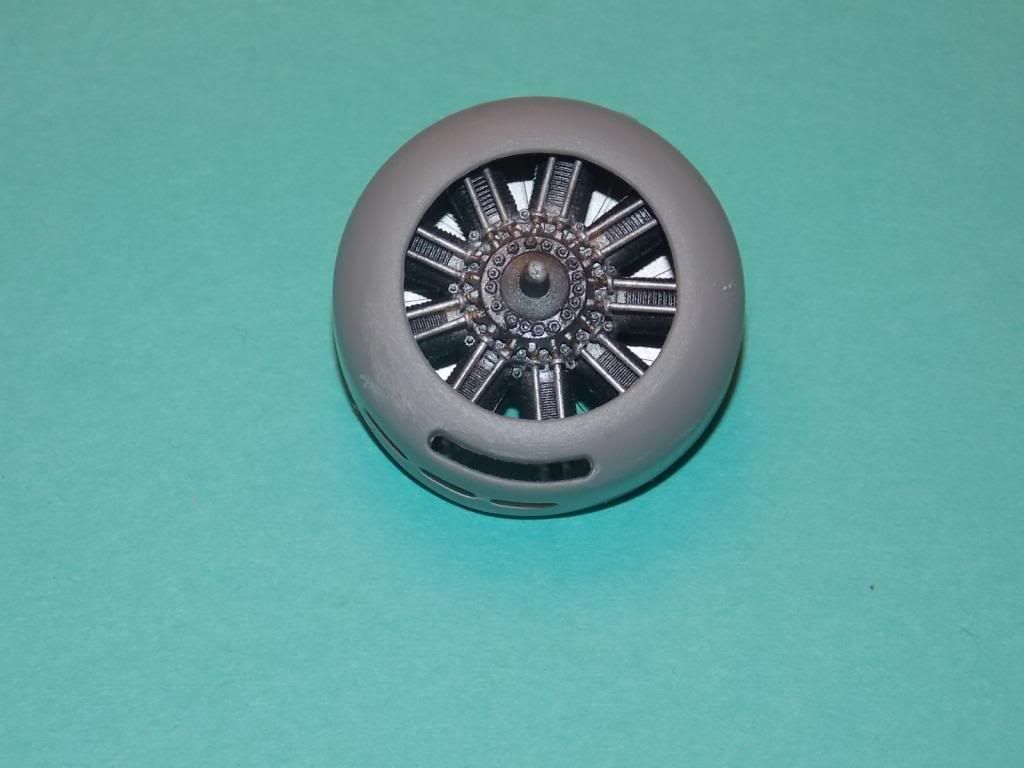
Fit the Taurus engine into a thinned down cowling .It`s only dry fit till I get the fuselage done .
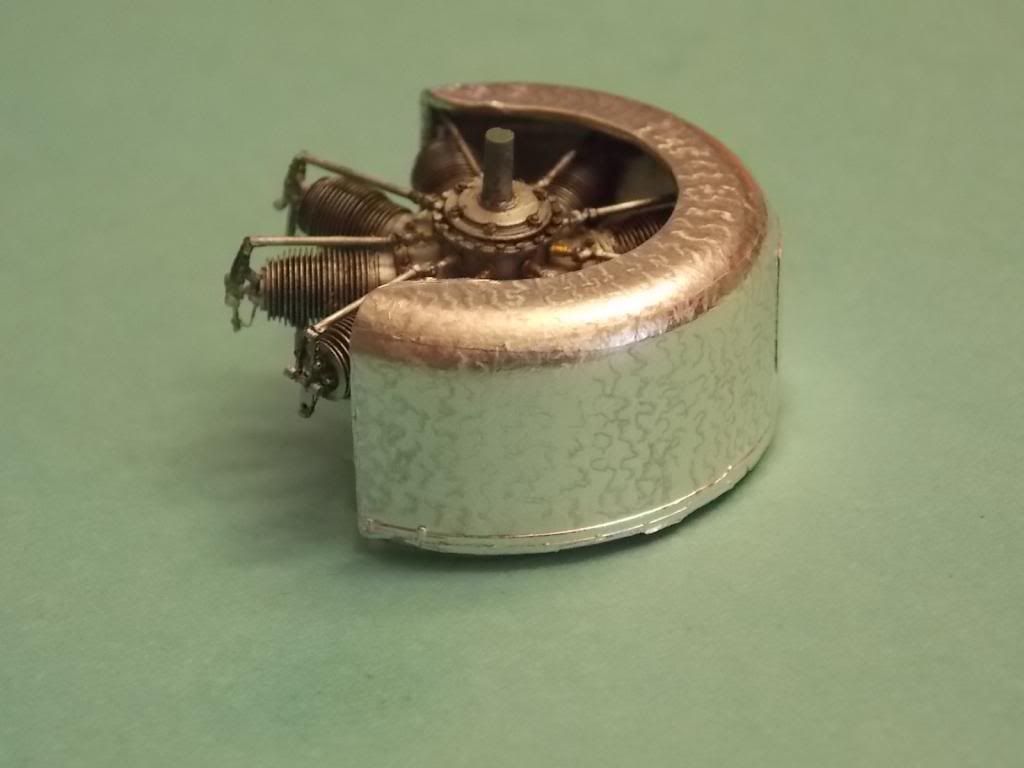
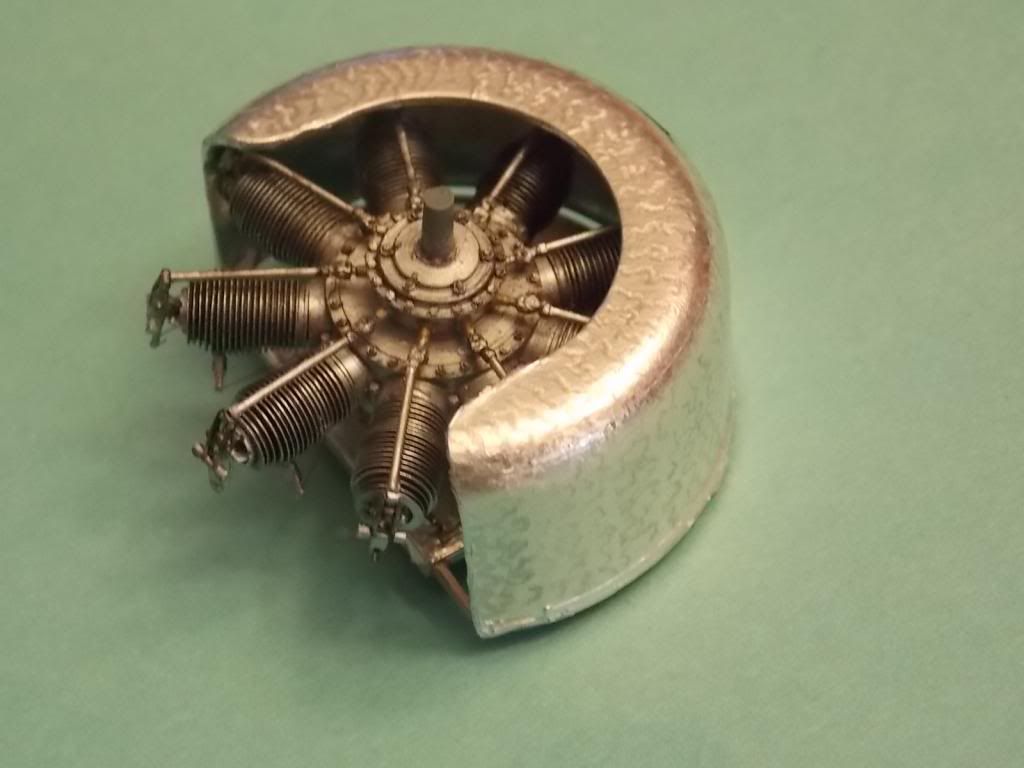
Willi
-
Hi Dave ,Hi Willi,
Thanks for the tip these look great and appear easy to manufacture. One of the few shortcomings of the WNW kits is the mysterious lack of spark plugs and I don't like the idea of having to buy a set from Taurus Models every time I build up an engine.
Cheers
Dave
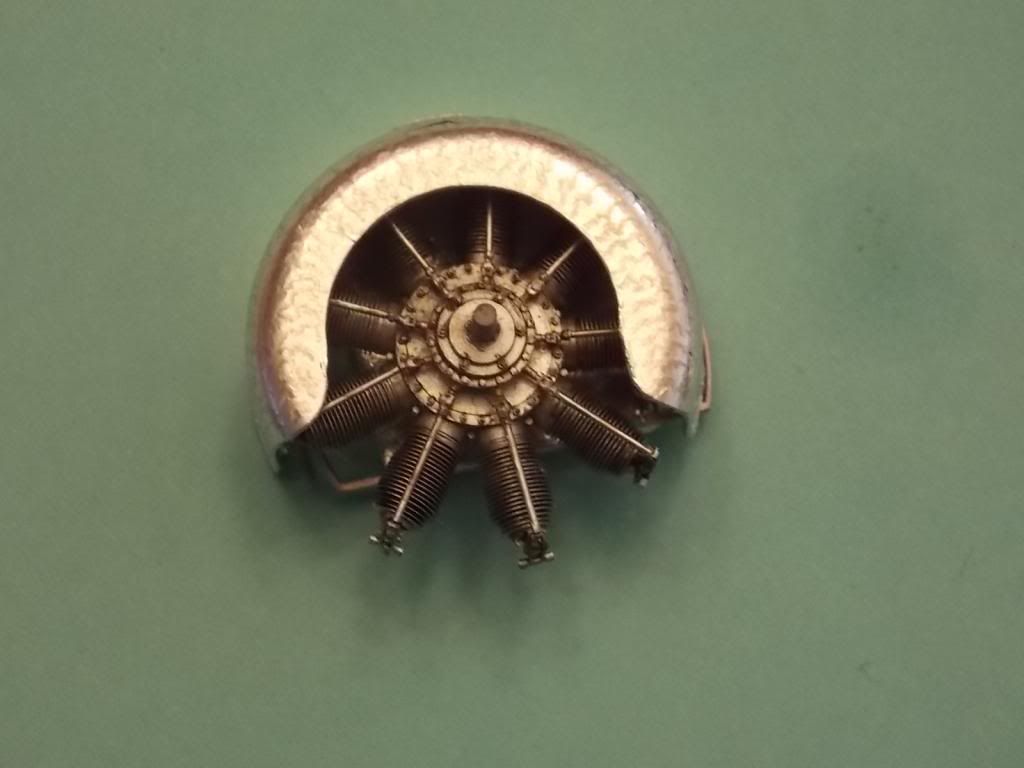
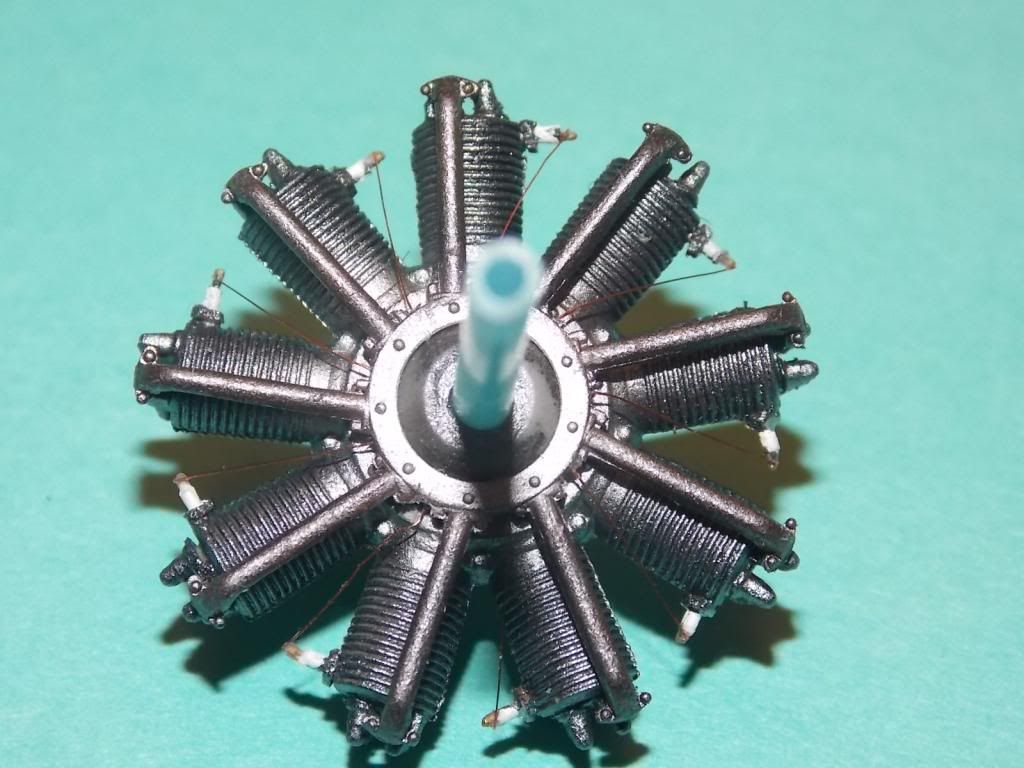
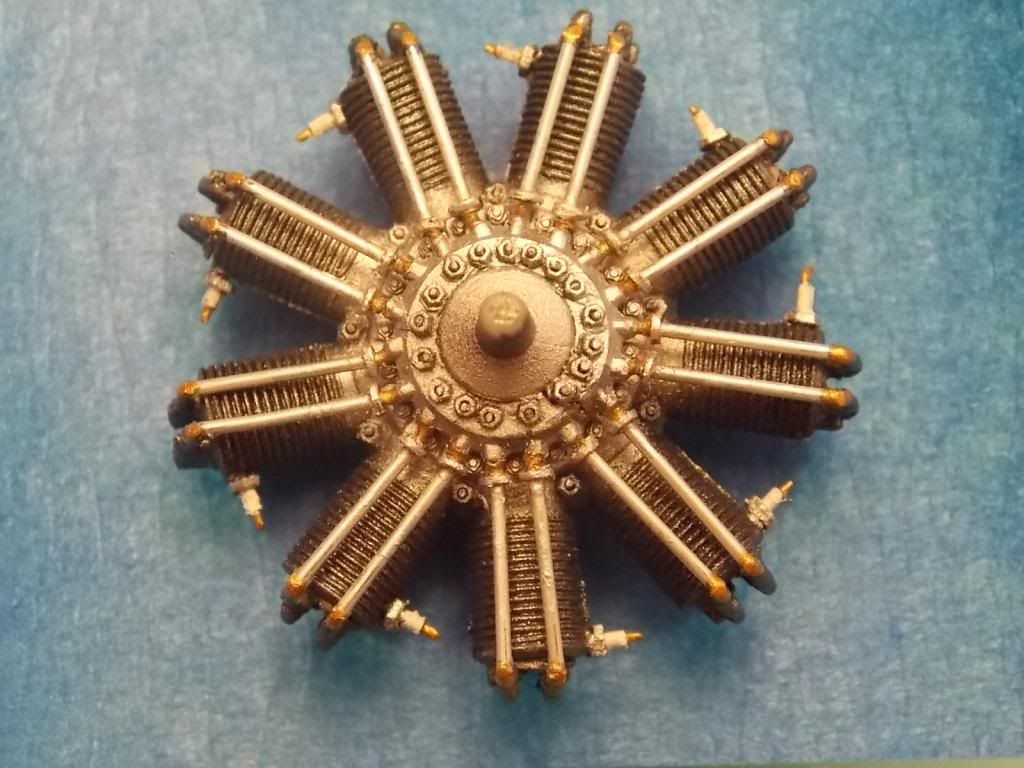
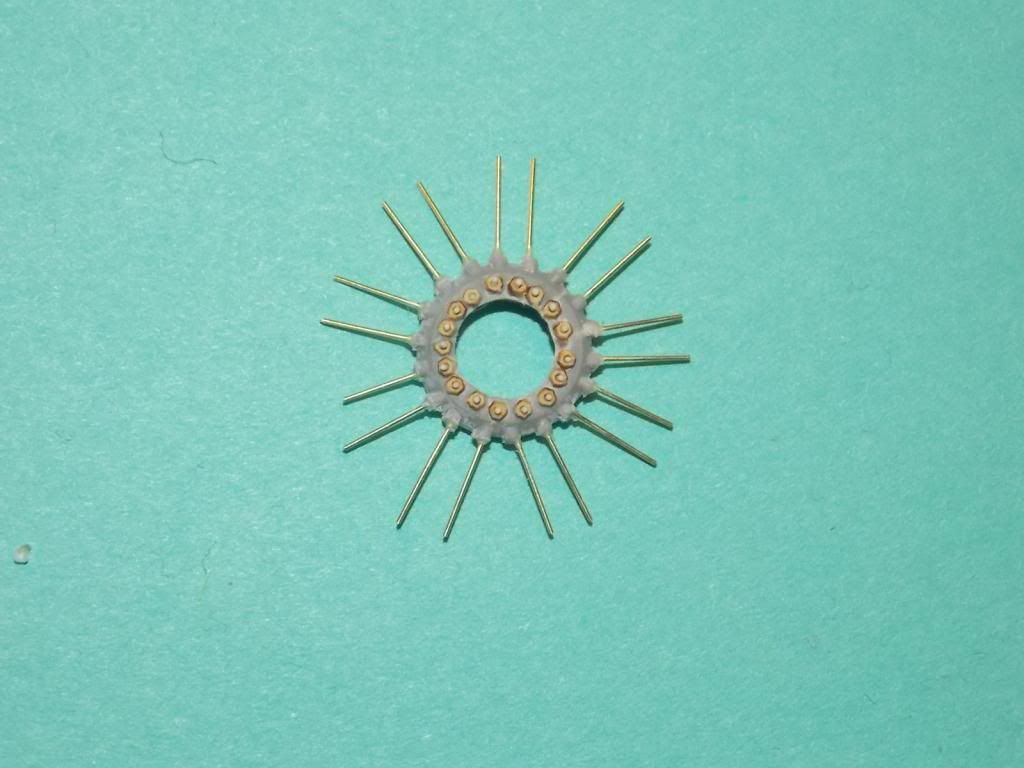
Yes the spark plugs are easy to make with the tubing and the VectorCut nuts you can make lots of spark plugs in an evening . I still like the Taurus Models spark plugs ,but if they are hidden then you are better off making your own . As you can see I put the cowling together and not too much of the engine can be seen .
I started work on the interior of the Sopwith by adding bracing wire and adding the pulley for the elevator control .
The only addition to the IP is decals and clear rod to the pulsameter (lower left ) .

The decals are from the 1/48th Airscale WW1 set . I always thought they where to big for 1/48th !
Thanks ,
Willi
-
WoW very nice start ! I,m watching this one ! ,
Willi
-
Hi Willi,
Engine looks great, love the spark plugs.
Dave
Thanks Dave ,
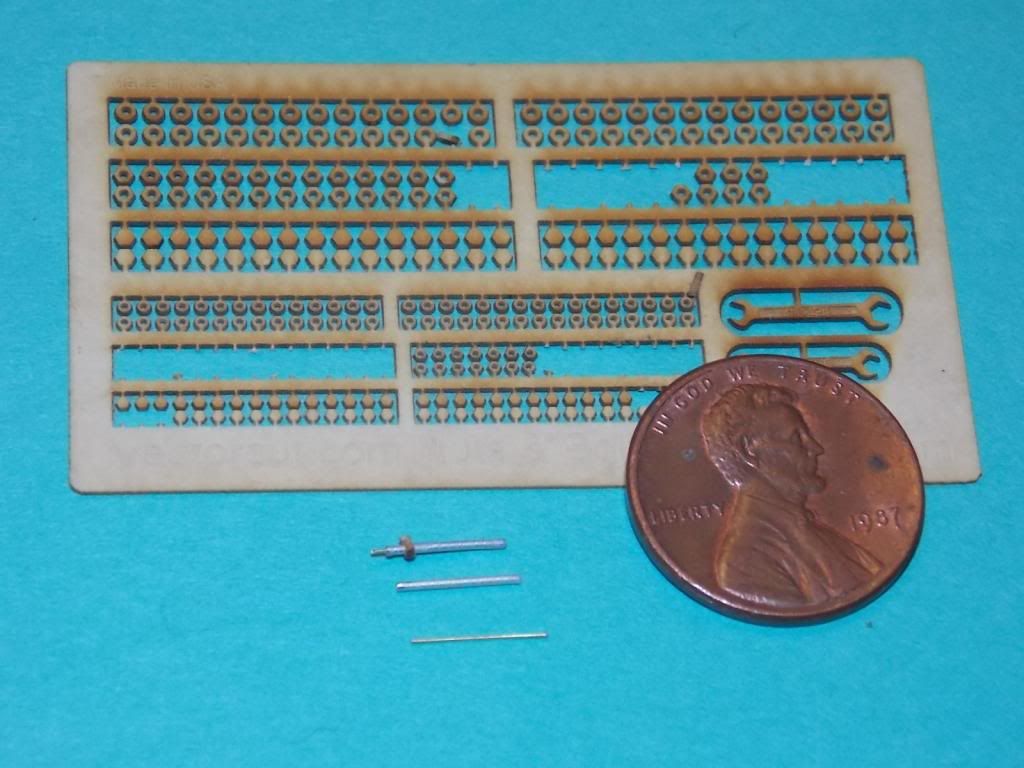
They are not to hard to make . I used the nuts and bolts from Vector Cut ,tubing was .6mm ,the rod was .25mm.
I finished the back end of the engine . I added the copper wire and exhaust .
Thanks ,
Willi
-
Thanks Maru5,Willi ...the engine looks SPECTACULAR ... So very effulgence in appearance ...

I have a thing for engines..LOVE IT...
Seeing how good..no, hang fire, BRILLIANT you are at wood effects I am just hanging around to see the triplanes wings...
The kit looks pretty good except for the soft plastic ! I am starting on the interior .I love doing the wood effects on WW1 aircraft I have been checking the WNW`s site and using that as a guide . I am going to get the resin Fuselage since it is a lot easier then lengthening the fuselage by 6mm.
More later ,
Willi
-
Thanks guys,
Well after two days and 150 pieces later. I got the front end of the engine done . All I have to add is the exhaust and spark plug wires . Then the engine will get a wash .
Thanks ,
Willi
-
Many thanks RonApparently the kit fuselage is correct for one of the prototypes but not for the production version Triplane. Contact Pheon Decals at pheon@pheondecals.com to see if the correction set is still available.
Edit - or just go here: http://www.fawcettmodelsandpatterns.co.uk/1-32-scale-resin-detail-correction-parts
-
Thanks Ron,
It does look 100% better .I just can`t find a web site from where I can purchase the set .
Willi
-
I didn't know there was a problem with the fuselageJust curious...are you going to use the kit's short fuselage or are you going with the Pheon/Brian Fawcett corrected fuselage?
-
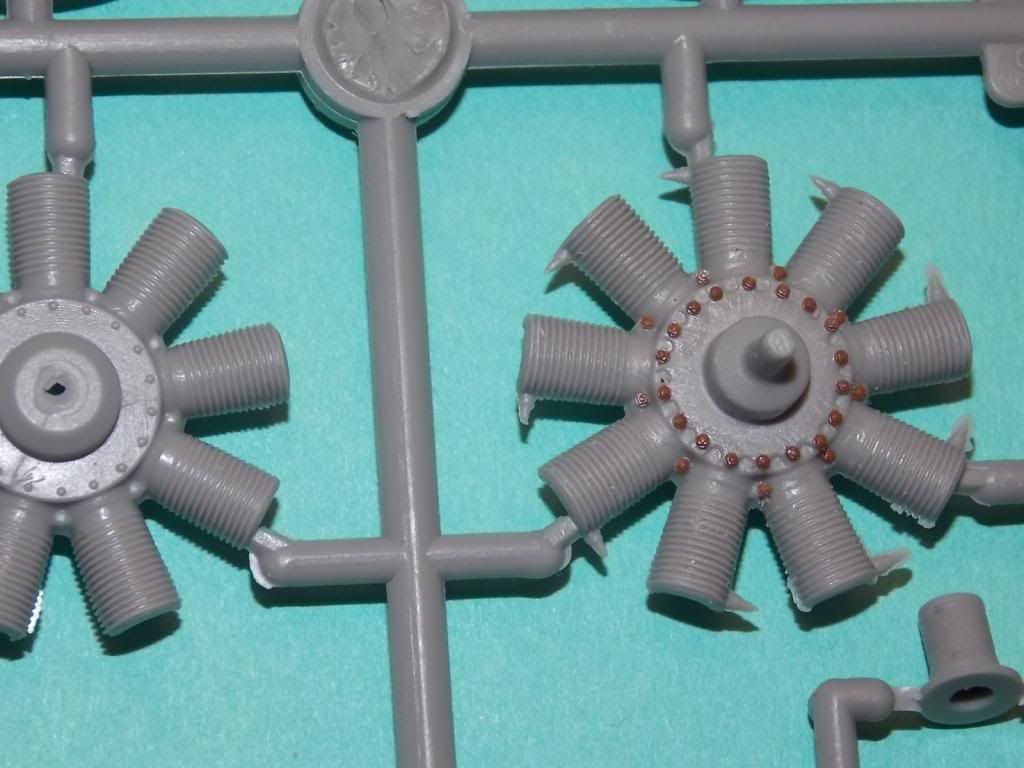
This is the kit I won on Swanny`s WW1 contest . This kit will be a little more of a challenge then the WNW`s kits. I`ll be detailing the engine and interior . There`s no decals for the instrument s on the dash board so some work will be done there . I`m going to start with the engine first . I will replace all of the round bumps on the engine block with Vector Cut nuts . the spark plugs will be made from rods and tubing . the push rods will get the same work done by replacing the oversized plastic with metal tubing .

Before:

After:
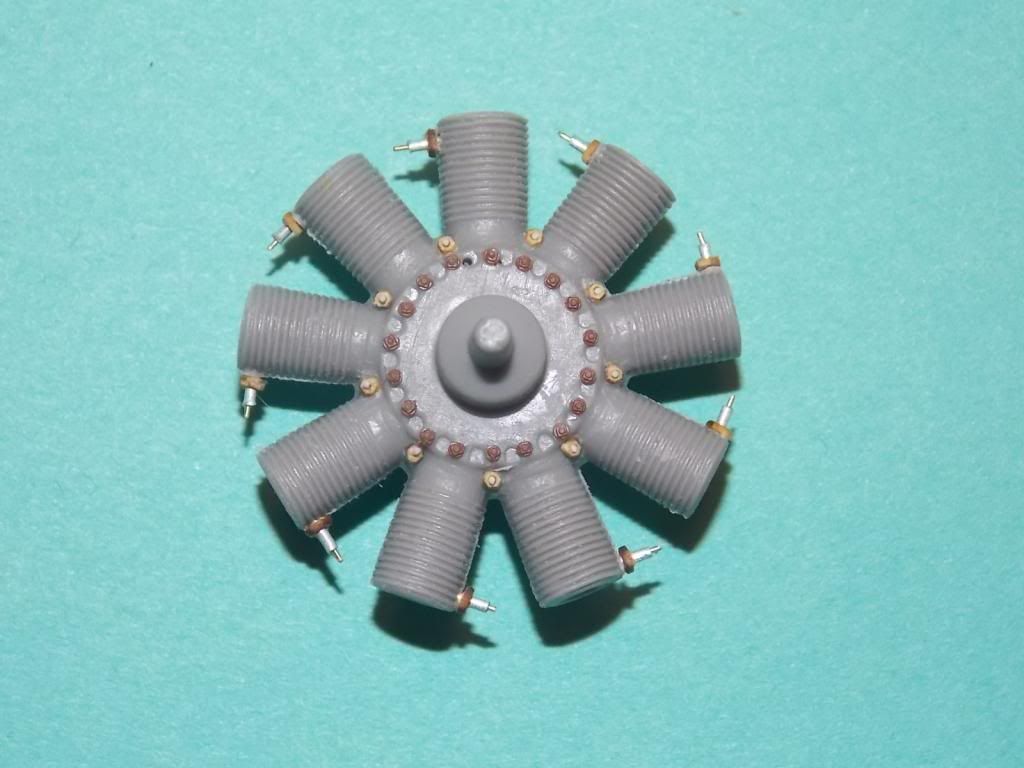
Added the nuts and using .25mm rod as a guide for the push rods .
More to come later .
Thanks ,
Willi
-
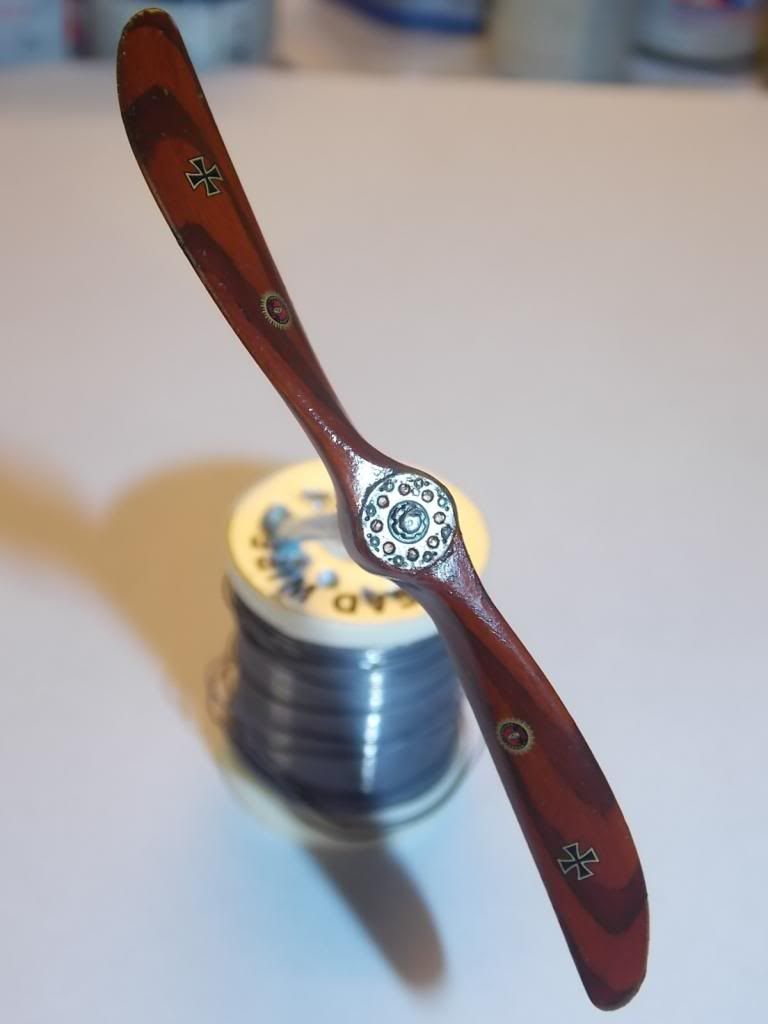
What I did is before painting the base color .I sanded the prop with some course sand paper . That way you get some grain effect . I made the masks out of blue tape .Whoa!! Willi,that propellor belies the fact that its been painted and looks SO real...the wood effect is amazing.......

-
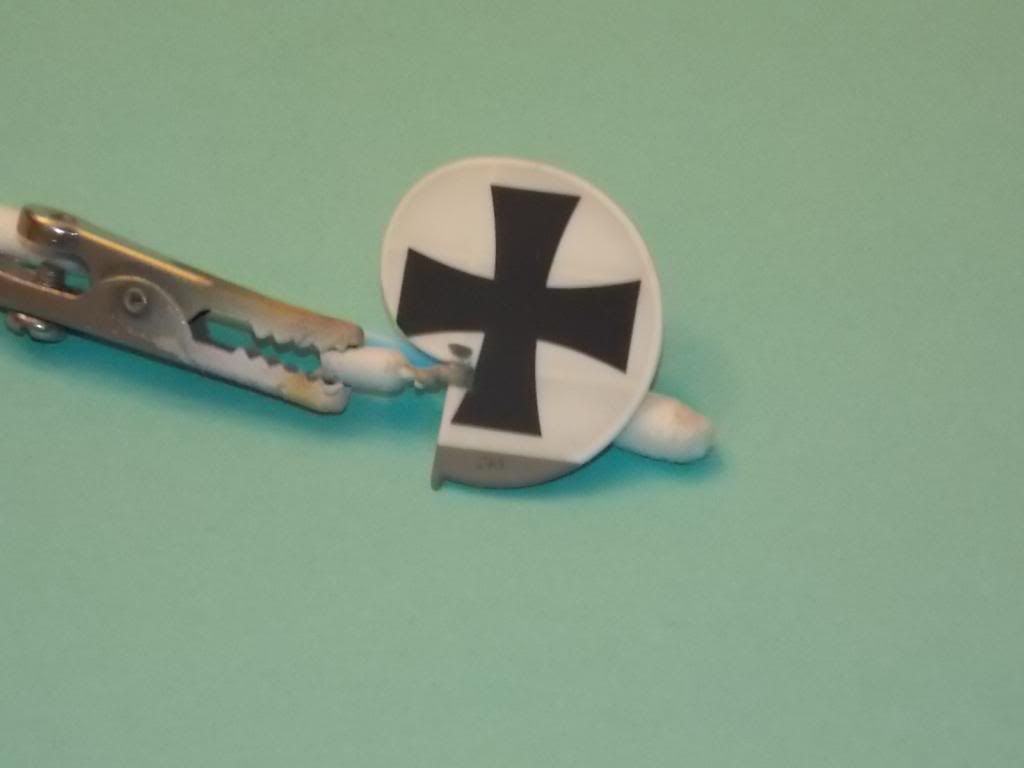
The emblems are in the Fokker E.III (late ) WNW kit.Where did you get the emblems? Are they supplied in the kits? Great job!
-
Very Nice ,I love the color scheme !
Willi
-
Thanks Dave I`ll check out the turnbuckles and your A/C .Hi Will,
I cannot comment on the Gaspatch turnbuckles, but I have been using those from RB Productions. They are easy to use, look good (IMHO) and are very cost effective. You can see them in action if you take a look at the Roland that I just completed as part of this group build
Dave
Willi
-
Well I decided to do Manfred Von Richthofen`s A/C I`m still waiting on Parts to arrive in the mail so All that I have done is paint and decal the tail . I still am not sure which turn buckles I want to use . The R&B productions or the GasPatch Models ? I would like some feed back on which turn buckles look the best .
Thanks ,
Willi
-
Hi all,
Not saying that this is THE way to paint a prop,but It's how I do it.
First paint the prop any shade of brown you like the most.
After drying a day,I will add a coat of brown varnish that is used for painting woodwork in houses.
But that's a picture for later.
Feel free to comment.

Hi Erwin
That`s a good base color , but instead of using brown house paint .Use artist oils . I like raw umber and burnt seianna for my props . I like some props in dark colors ,but you can lighten up some of the wood also .
Willi
-
Very Nice . Awesome job !
-
Thanks Peter ,
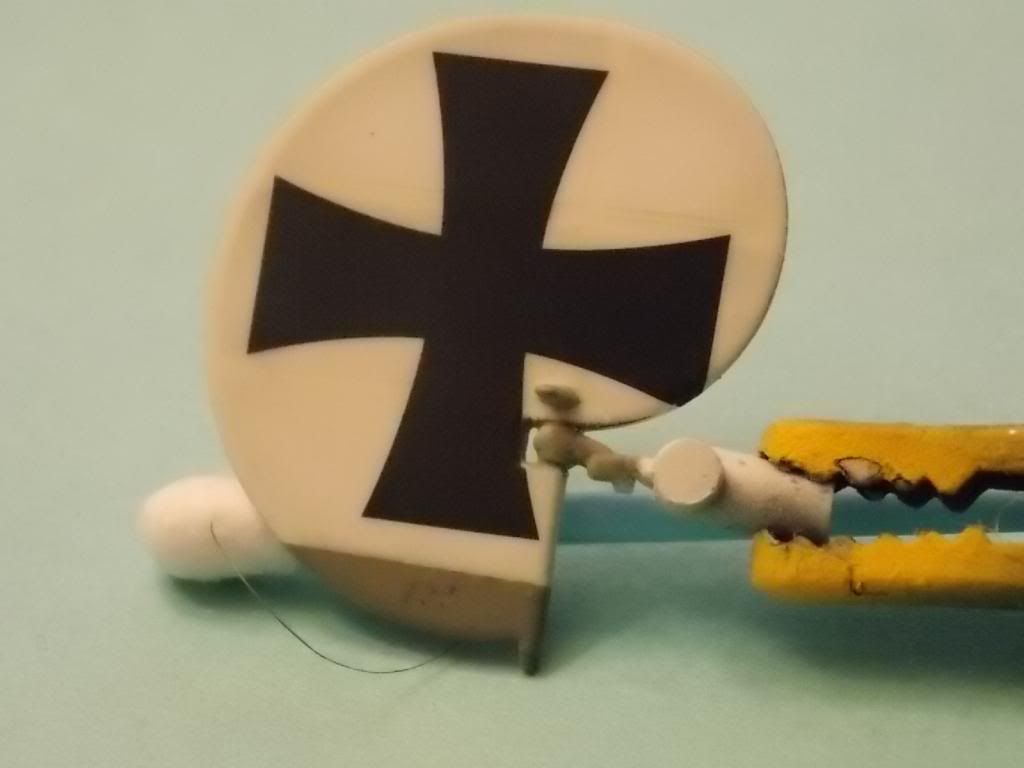
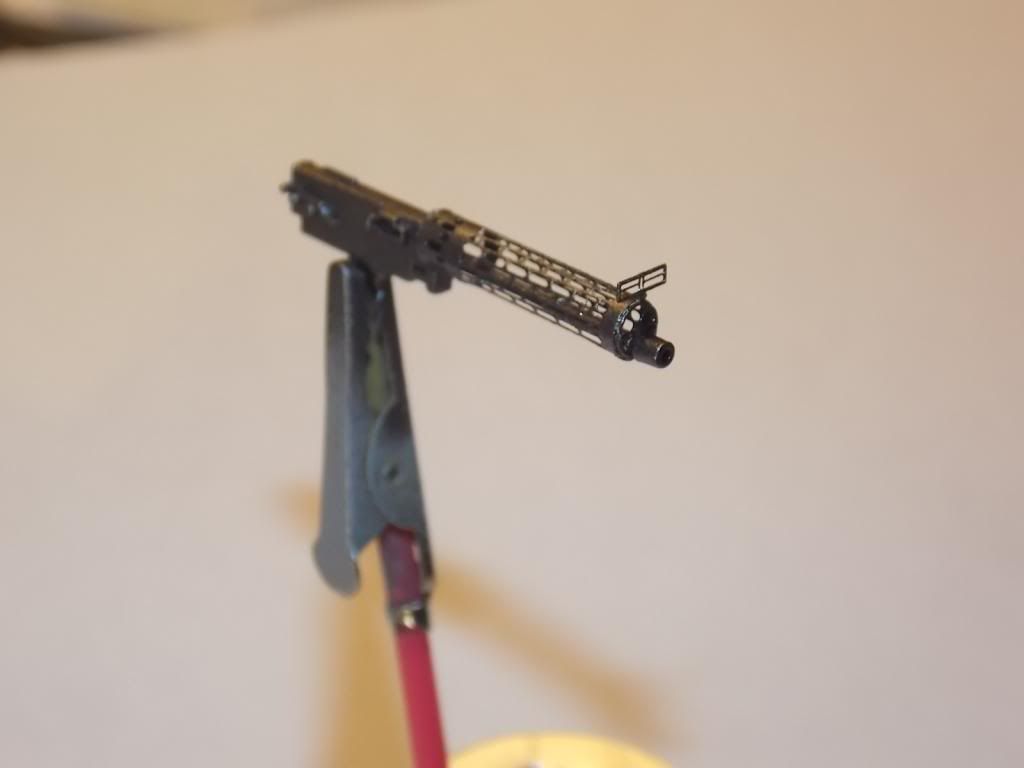
It took a lot of trial and error ,but I think I got the hang of doing the metal work . The build is stalled till I get the PE set and HGW seatbelts from RollModels . I did finish the Germania prop and IMG 08 Spandau machine gun .
Thanks ,Willi
-
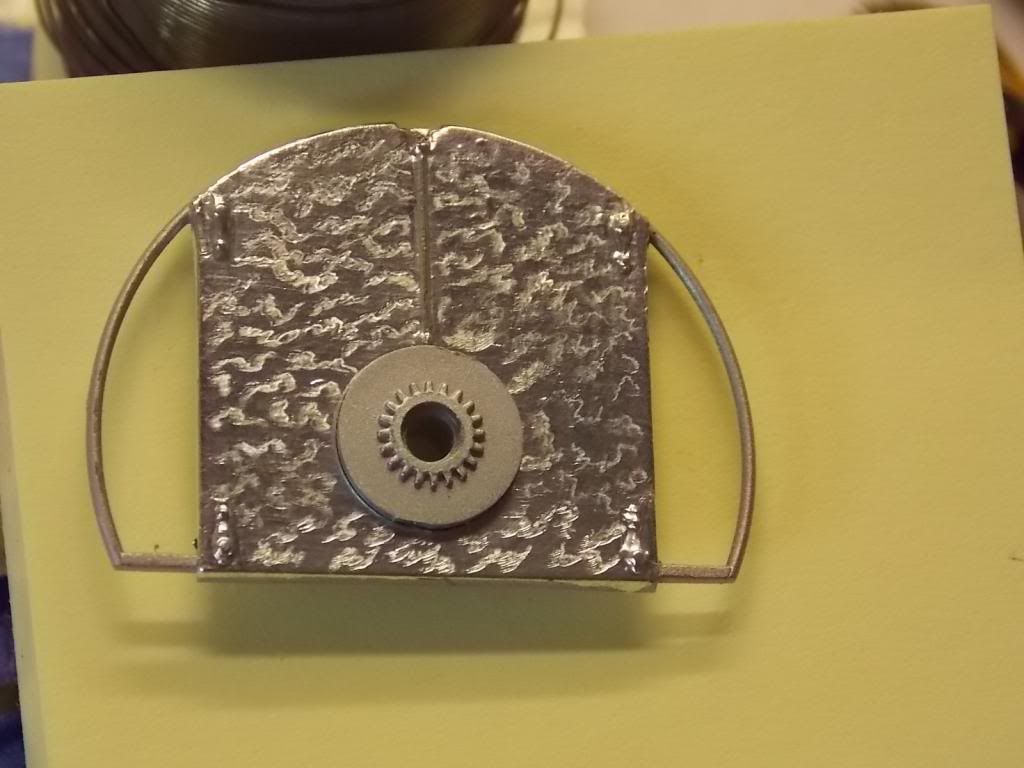
Here`s the test of the matte bare metal foil .Photo was taken under natural light .
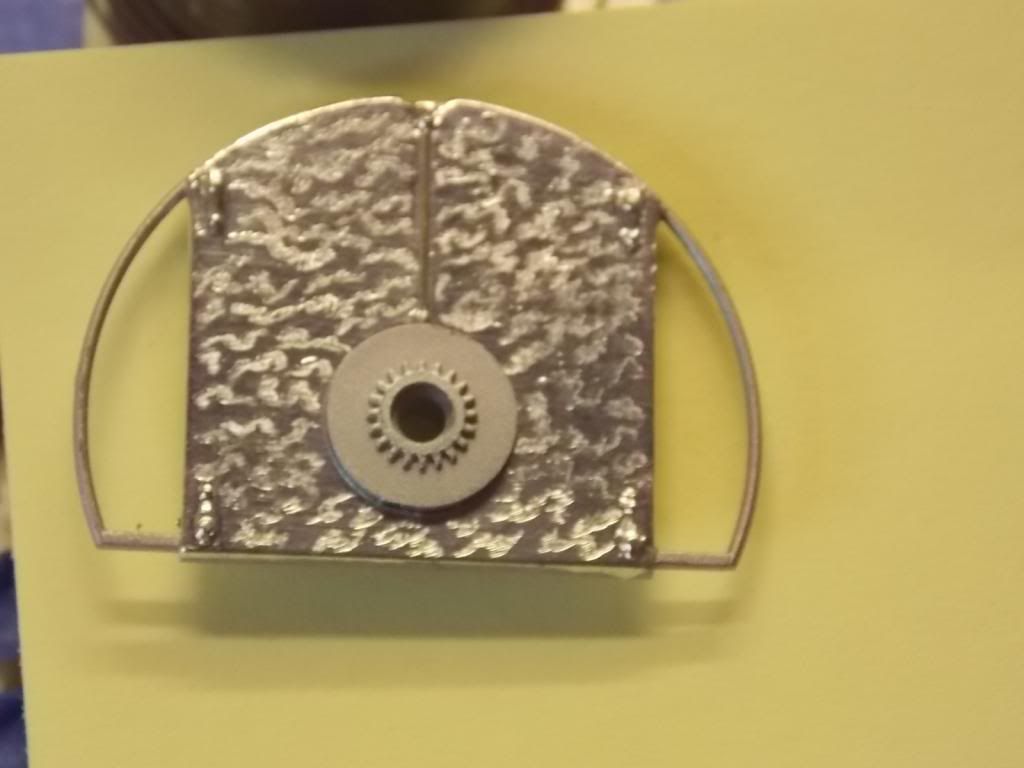
Thanks,
Willi
-
Thanks for the great comment s,
I did not get much done this week . Still waiting on the HGW PE set and seat belts. I started to paint the prop and worked on the landing gear .
To Ernie , I used some left over 1/48th HGW wood decals for the floor boards.

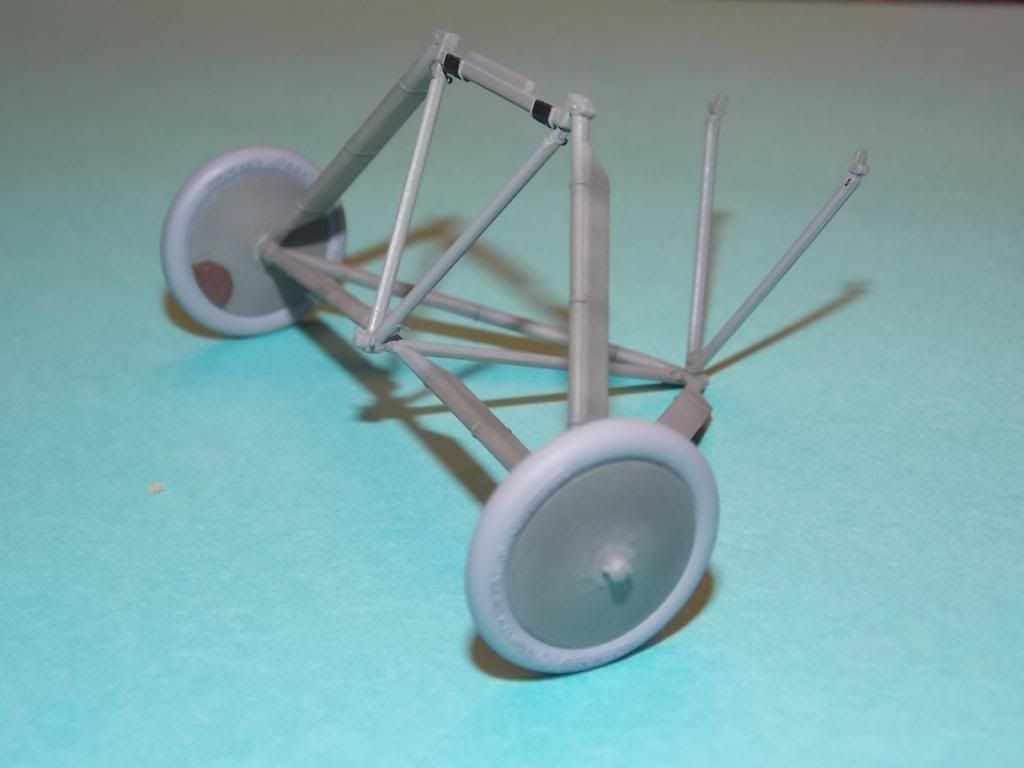
Thanks ,
Willi
-


RODEN , Sopwith Triplane
in Wings of the Great War
Posted
Thanks Tim ,
I did some work on the wood graining of the struts .I just have to add black paint to the brackets .
The fuselage I ordered are a big improvement from the original . It`s 6mm longer . I added the bracing wire .
Today I glued the fuselage together and glued the bottom wings to the fuselage . I still have to add the seat cushion and seat belts .
Well that`s all for now!.
Willi