Search the Community
Showing results for tags 'aerocraft models'.
Found 2 results
-
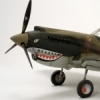
 Greetings all - and all the best for coming year. Airfix 1/24th Hellcat II NF (F6F-5N), KD127, 892 NAS, Drem, Scotland, mid-1945. Here's my first completion of 2024 which nearly made 2023 but the cold, wet weather was against me for the final varnish coat! The Airfix 1/24th Hellcat is well known and documented so I'll save the background information but suffice to say it's one of the most enjoyable builds I've ever done - it's an absolute beauty of a kit and I loved building it. Whist there are some nice marking options in the box, I decided to go off-piste a little and do something different, hence buying the excellent Aerocraft set (reviewed here) to make this into a Royal Navy night-fighter variant: The level of detail is sublime out of the box, and it went together beautifully with virtually no fit issues whatsoever. What I will say though, is tolerances are very tight indeed and the parts benefit from having their mating surfaces sanded slightly to cater for the thickness of the paint. The gun bays, for example, have a lot of the wing structure to add and thus very careful test-fitting was required to get that satisfying 'click' as it all goes together. The engine is a small model in itself - it took a total of three weeks to get it together and painted. Airfix give you a very detailed construction guide and this enables the builder to add the mass of wiring associated with the ignition harness - I used some aftermarket braided wiring and the effort was well worth it. The surface detailing is some of the best I've ever seen and gives a wonderful 3D effect - when you catch the right light it looks so realistic: Considering this was built OOB with the only additions being the seatbelts (I felt the kit examples were a little over-scaled), the ignition wiring and conversion set, it's exceptional value and quite a presence on the modelling desk. Paints were all Xtracolor enamels and I kept weathering effects to virtually none - these were, in reality, high gloss Dark Sea Blue and pretty clean. The stressed skin effect does most of the work for you to be fair, and other than some light exhaust staining I kept this in line with period photos of late-war Royal Navy Hellcats. To anyone considering building this, a few observations of the build process which may come in useful: As mentioned above, tolerances are very tight - gentle sanding of gluing surfaces and test-fits are a must and it will be very easy for things to become misaligned, especially in the gun bays; If you can, build the engine and main airframe as separate parts and bring them together after painting. I installed the engine as a completed unit prior to the main airframe being painted and this resulted in some very complex masking around the exhausts! The main canopy was quite a bit wider/flared at the base than the runners it is supposed to sit on. I had to coat the inside of the canopy with some Future (to avoid 'fogging') and then attach it with CA glue; The wing tip light lenses are slightly too large for the apertures they sit in - in hindsight I should have test-fitted these earlier in the build and not after painting! Be really careful when following the instructions as to whether you are doing wings folded or extended - the build sequence is very different between the two! Anyway, that's enough waffle from me! All the best, Tom
 -
With the advent of 3D decals from Quinta et al I find myself having difficulties on choosing which path to go. 1. Quinta IPs + resin seats + resin canopies with inner frames etc https://aerocraftmodels.bigcartel.com/product/mcdonnell-douglas-phantom-replacement-canopy-set-for-tamiya-kits 2. All resin+PE cockpit set (like Aires) which caters for all areas but probably with more assembly and trial fitting involved. And yes, I dislike doing cockpits but still really like the look of a well-finished office. Any thoughts?
- 6 replies
-
- 1
-

-
- aires
- quinta studio
- (and 1 more)