

Saso Knez
-
Posts
206 -
Joined
-
Last visited
Content Type
Profiles
Forums
Events
Everything posted by Saso Knez
-
And it goes -three wheelbays and one intake trunking
-
Last glance and in it goes
-
Here we go:
-
CMR Tornado F.3 conversion set parts rundown...
Saso Knez replied to Cleveland Model Resins's topic in LSP Discussion
This is what happens when I am second in line for something. Murphy's law I guess. (when I met this Murphy guy I am gonna kill'im). I bet the CED Phantom will be about 120 USD. Not in my ballpark. Have fun and good luck with your endevours. Saso -
Very nice scratchbuilding Chris! Yeah I might take you up on that offer for the round sprue rod. I will e-mail you soon (I am in a hurry now) Thanks Saso
-
A few models more and I will get the hang of these ''metalic wheelbays''. More and better images will follow in a few days. I will leave these parts for a few days since I have some shelves to install, after that I will go at it with some washes and drybrushes where they need them. I find applying metalic paints over scratchbuild parts can be very frustrating. These parts, while not perfect - as detail images will reveal - I feel they are a giant improvment over the Hawker Hunter wheelbays. Here is the last one to get everything in persepective. Cheers Saso

-
a bit closer:

-
Another angle:

-
Well, here they are:

-
Actually the Chuck-it-out brigade went into the theatre under the official neme of GumVal. But sources close to the action can tell you even today, that all was not pink with the Gum sight. Basically the problem was with the microscopic bubbles in the gum sight. When the aeroplane climbed the bubbles expanded and thus rendering the pilot unfit for flying let alone for action. A problem like this was previously encountered with condoms in the pilot survival kit. The chuck it out brigade also tested the most important aeronautical scientific discovery of the fifties. Namely if you put a trycicle gear on the airplane anyone who had ever riden a bycicle, or even attempted to do so unsucsefully can taxi such an airplane without any problems. This fact and the lack of torque on the jet eliminated the need for rudder pedals and brake mechanism. The feet of the pilot were therefore suspended in rubber bands (Yes, Dent - they were attached to the instrument panel). This also meant that the Pilot operating handbook had to be changed a bit. For example after landing sequence was changed from: ''after touchdown maintain the nose elevated by graudually increasing stick back-pressure untill the nose gear touches. Retract the flaps and apply pulsive braking untill aircraft reaches taxi speed.'' to: ''after touchdown maintain the nose elevated by graudually increasing stick back-pressure untill the nose gear touches. Then unstrap yourself with the quick release harness, actutate the canopy release handle, stand up in the rubber straps and yell Whoa on the top of your lungs repeatedly untill the aircraft reaches taxi speed.'' The performance section also had to revised. Namely the landing distance required was changed from 2600ft to about 92 000ft on PSP planking. This later fact motivated some conspiracy theory that the whole project was induced by US steel. There are contemporary reports from South Korea that the 95 000ft PSP runway is now owned by a chain of world wide German food restourants. The whole thing was electrified and is used as a giant BBQ for sauerkraut und knackworst. The MiG Alley 200 miles sign was replaced by the Wait here to be seated sign. Usually there is not a long waiting cue.
-
Hiya Chris, Again this will be an excellent build! Can hardly wait. I have a question for you. On the Dora you employed some sprue rod ala Evergreen. Where do you get those in Germany? Have fun Saso
-
Ya kill me Peit. But the engine hot side is actually a fake - and since it was originally out of styrofoam you should paint it so. Remember that anything can fly when dropped from a B-29 at 30 000ft - it doesn't need any friggin motor. Gunmetal styrofoam - I say! Great job on the rest by the way. I see a lot of Piet and only traces of Revell there. Keep at it! Saso
-
And this joint also smoothed in. Anyway....boooooring (I actually know), but just to show what a difference can be made in just an hour or so spent extra on such details.

-
The line on the nose strut has also been covered in.

-
Anyhoo, here is the step forward for the part depicted above.
-
Hey Peit and Jay, Many thanks for the compliments. The ''step back'' is already taken on the pubic hair part. Sanded away the dirt and redid the detail. The difference is worthwhile the effort I think.

-
So there you have it! More work to follow! Kindest regards Saso
-
And some things just cannot be seen, until revealed by some paint.
-
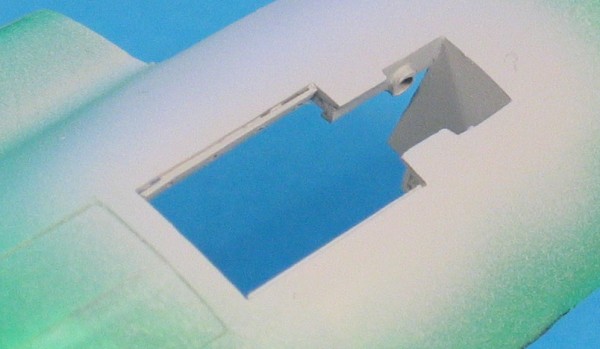
Here the little edge needs to be faired in. The part is nose gear strut.

-
But the reason for priming is to search for errors. These parts seem to grow pubic hair. Compare with the image above.

-
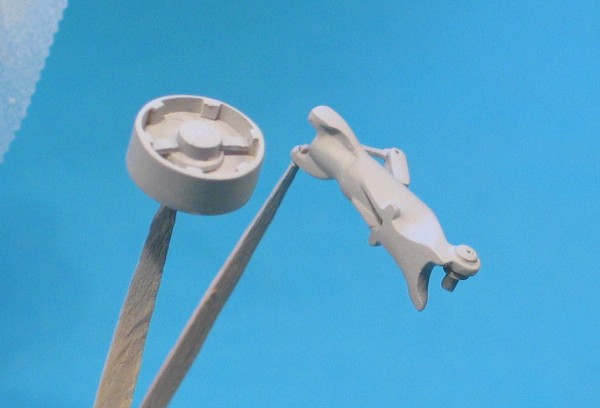
This part goes to the backside of the wheelhub.

-
I am especially pleased by the main gear strut. Left is the backside of the wheel hub.
-
I had some very complex shapes to form and most of them (if I may say so) came out quite well!

-
Here are all the part for the right wheelbay and undercarriage:

-
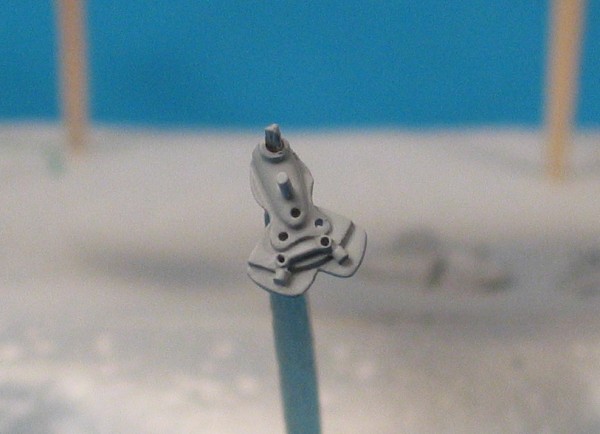
Yup, 15cm of snow here sportfans, so we are back at our favourite winter sport: Priming! Actually I have done quite some work on the undercarriage in the last two weeks or so, but today I got all the parts primed. I mounted each on a toothpick and stuck the toothpicks in styrofoam. Did this the first time and I found it was a very elegant way of painting small parts. All of the parts you can see on the image are just the subassemblies for the undercarriage. (main left and right and front)
