

miamiangler
-
Posts
484 -
Joined
-
Last visited
-
Days Won
5
Content Type
Profiles
Forums
Events
Posts posted by miamiangler
-
-
This aircraft was flown by Obslt.Fritz Auffhammer the Kommodore of JG301. Flown on 22 March 1945. He felt uncomforable flying a new type of aircraft because of the trigger happy flak crews shooting at unfamillar aircraft. He ordered it to be painted orange -red before his flight back to the Luftwaffe proving ground at Rechlin . He was escorted by Hptm.Roderich Cesctti flying an FW190D-9 "Green 1"
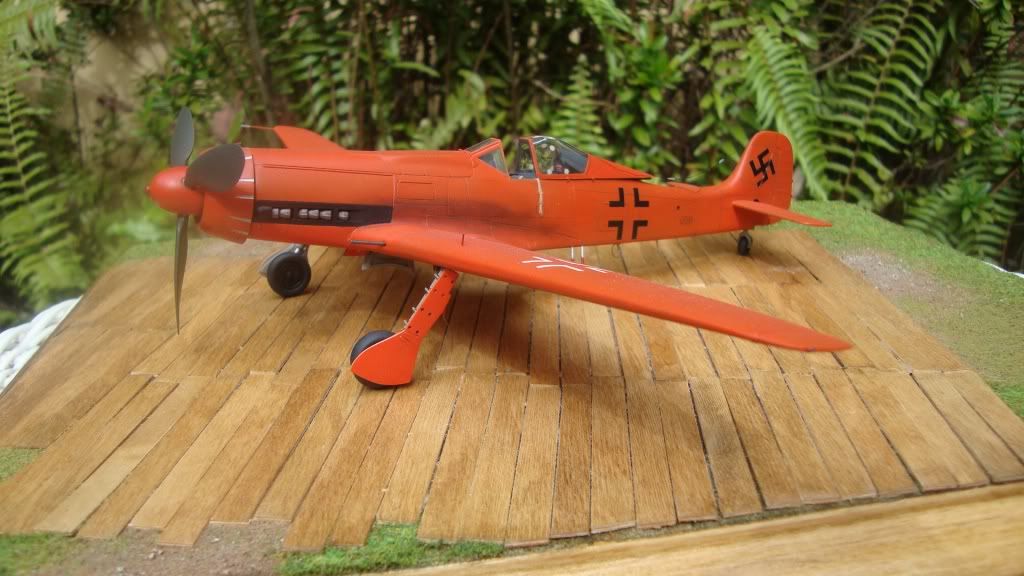
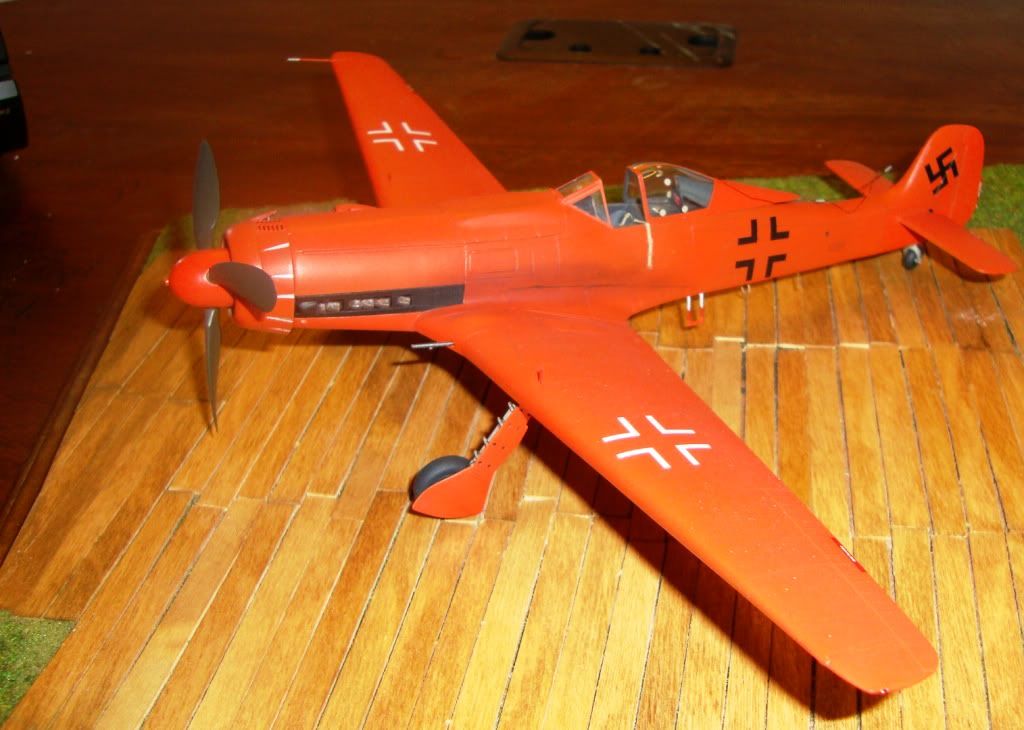
Built in 1992 refurbished in Feb.2011
Willi
-
WoW great stuff . an all time favorate. wonderful job !

Willi
-
Thanks Matt,
I mix a light and dark shade of each color.So I go back and forward with 4 different bottles of color . Since RLM 72&73 are very close it is hard to see in the pic`s but looks better in true light . I Hope to mount the fuse. to the floats this weekend .It all depends how nice it is in the morning .Might go fishing or diving first!
Willi
-
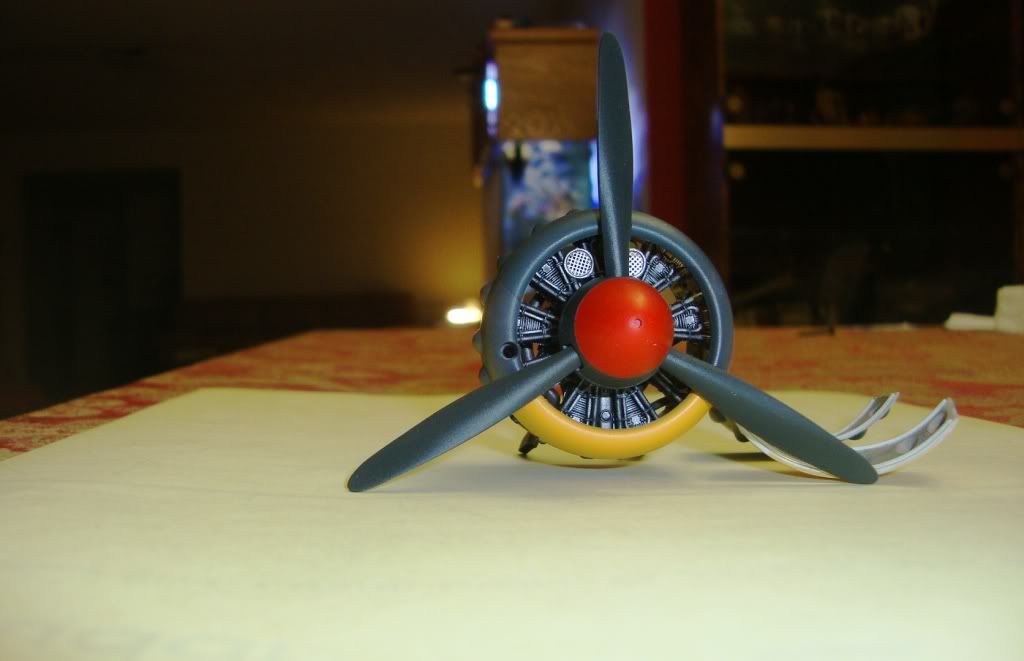
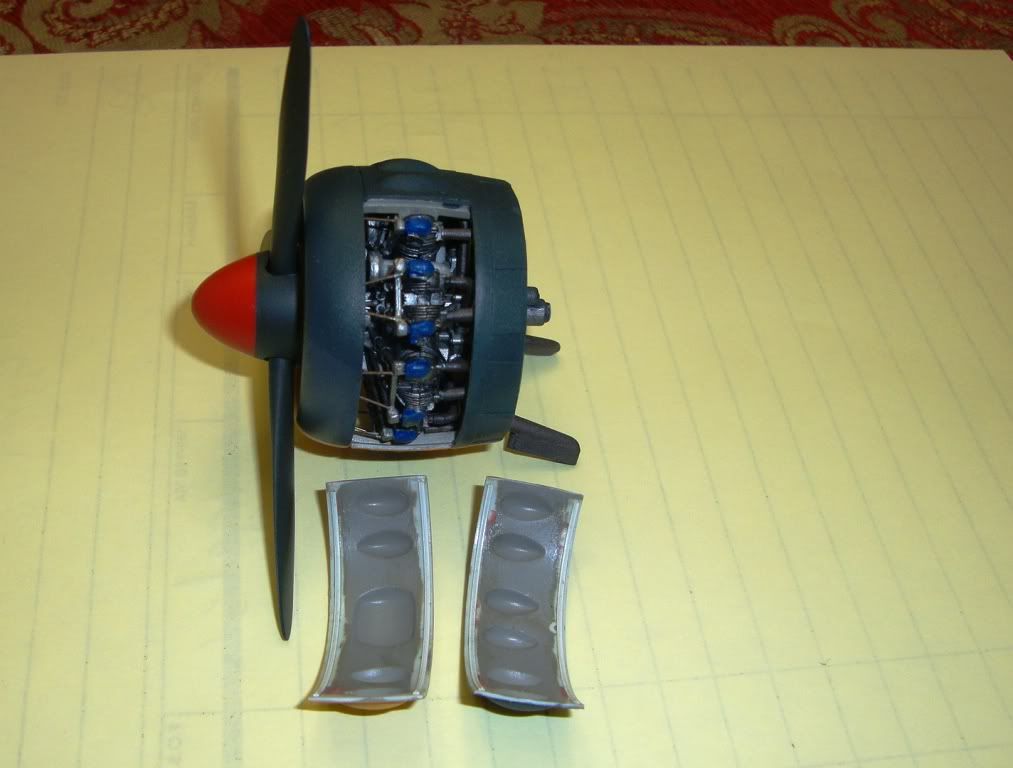
I have the cowling together and have started with airbrushing .The paints being used are Polly Scale . Hard to find ,but one Hobbyshop 30 miles from home stocks most colors . These paints are fairly close to the RLM colors .
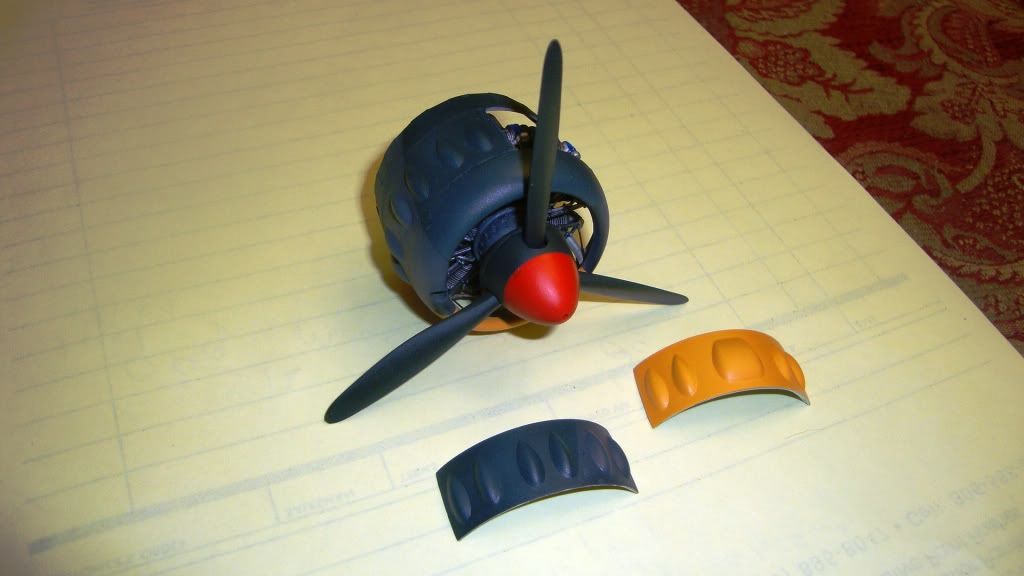
Started to add some detail to the inside of the covers
Thanks for looking
Willi
-
Small Update:
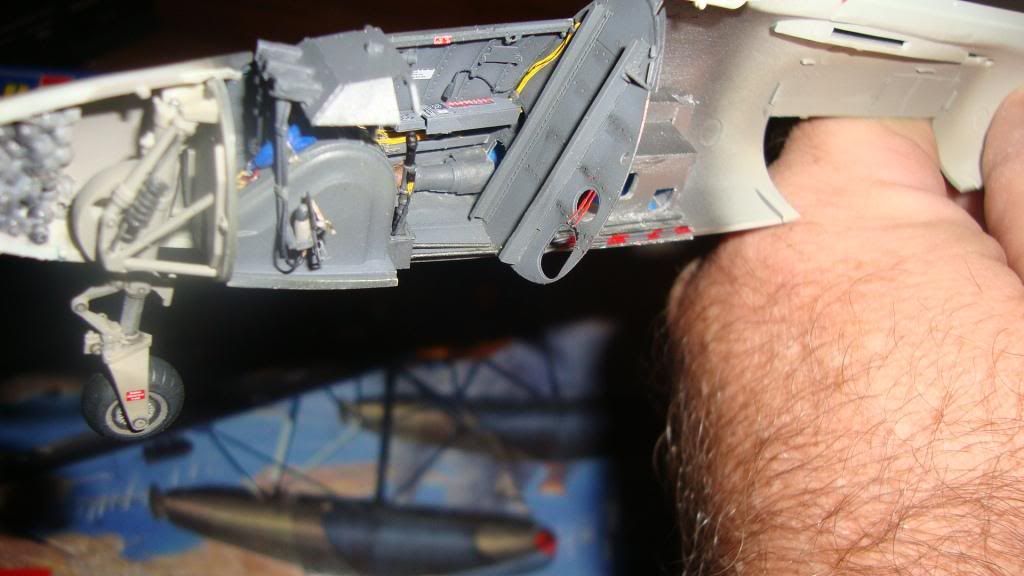
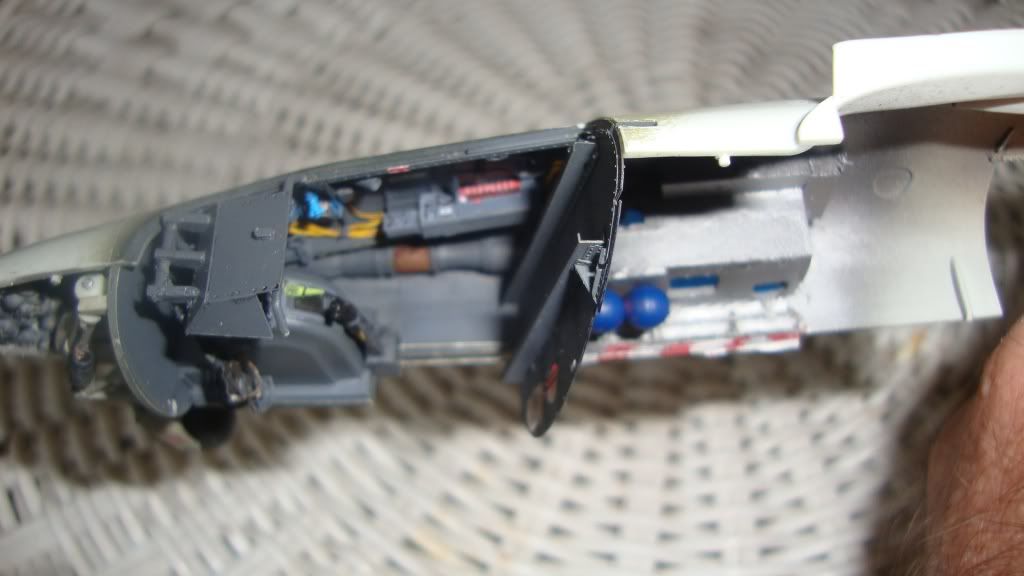
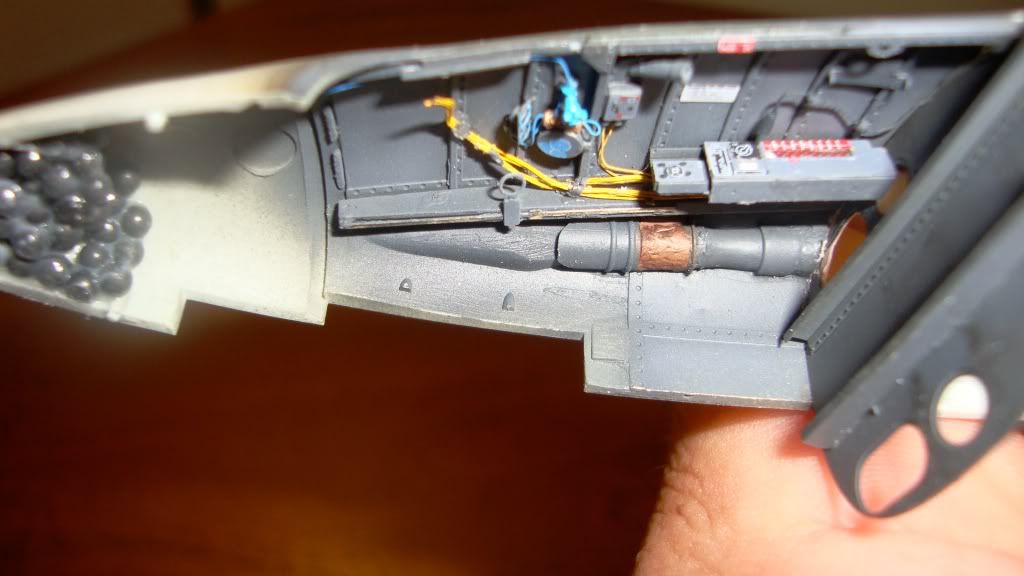
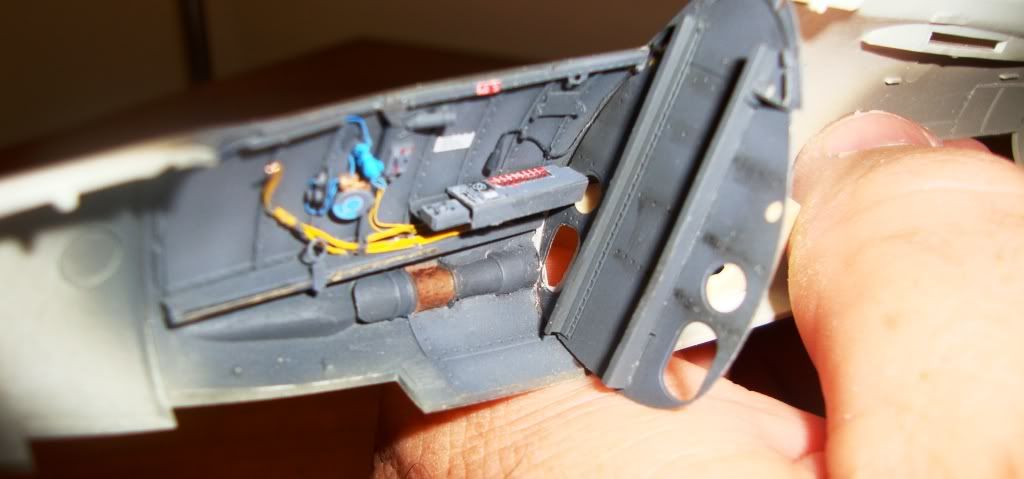
I started work on the gunbays . Originally it was going to be the left gun bay open since Eduard only gives that side .I decided to open up the right side so I had to reproduce the parts out of plastic .I did not like the CMK parts at all .
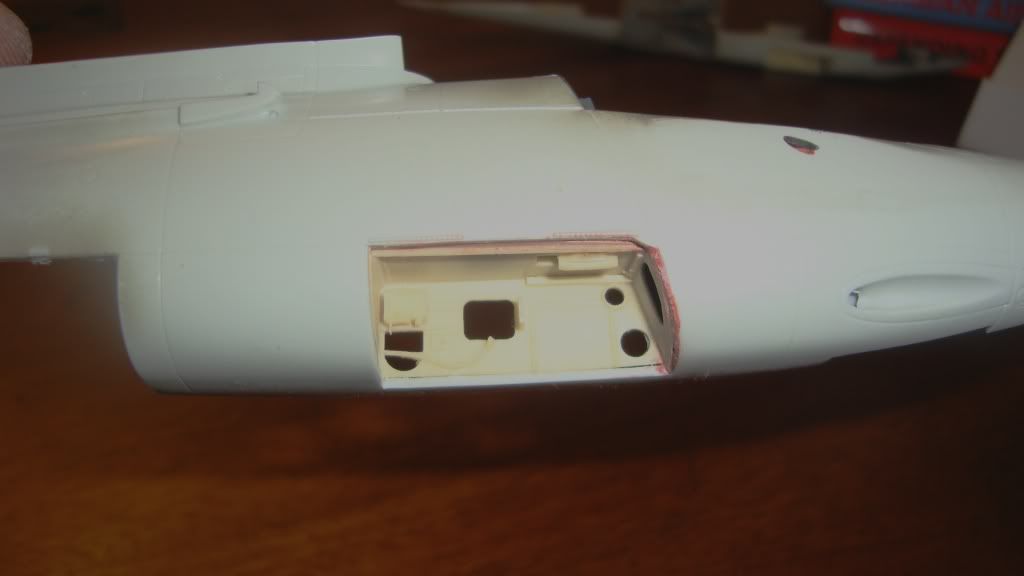
Getting ready to spray the duraluminum

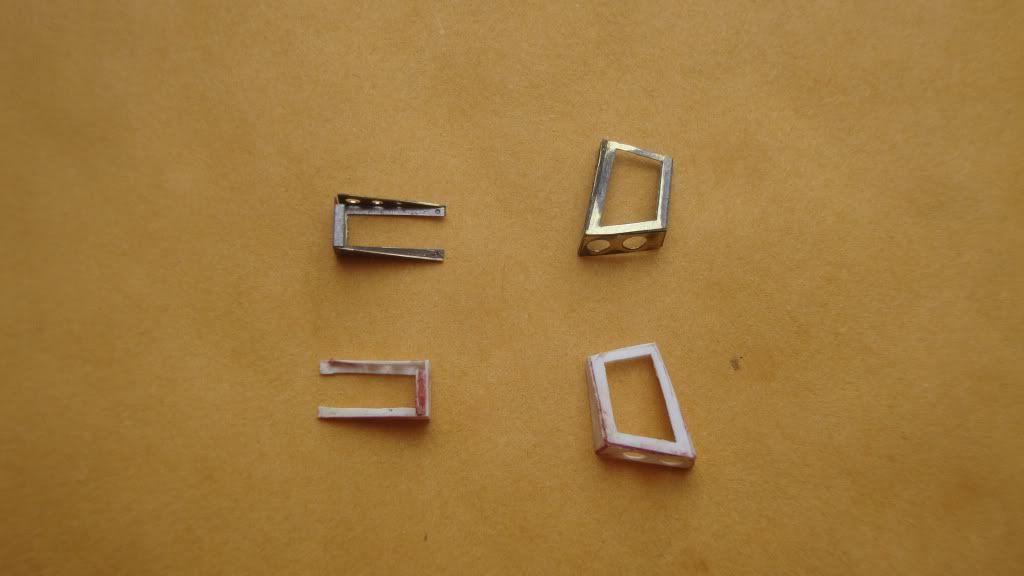
The parts I had to reproduce in plastic
Added some detail to the guns
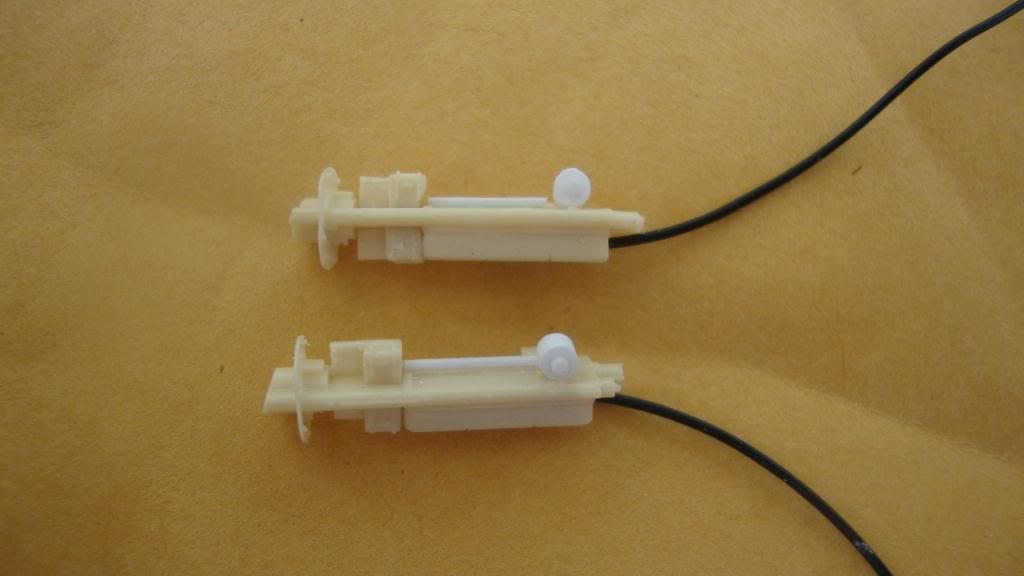
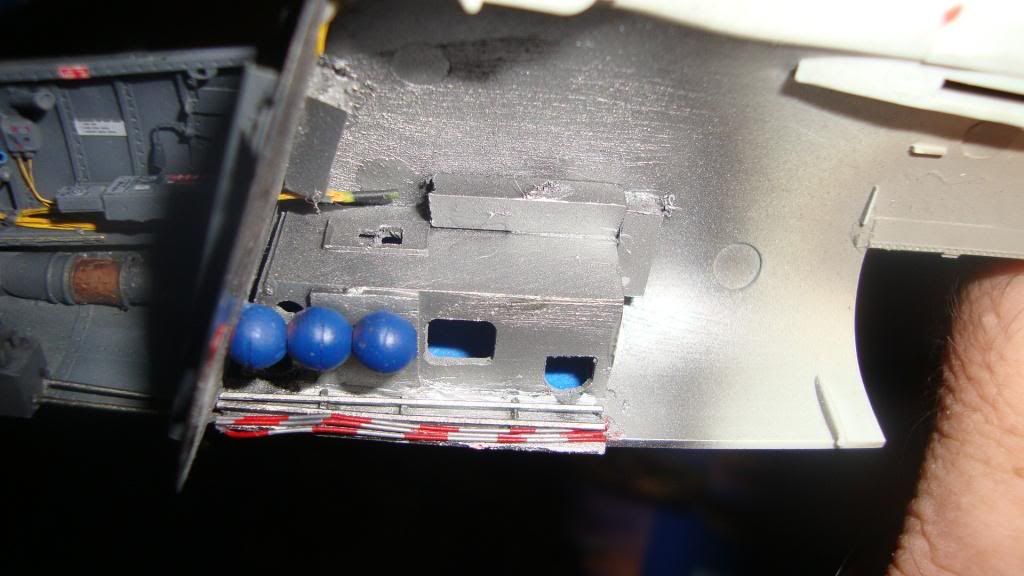
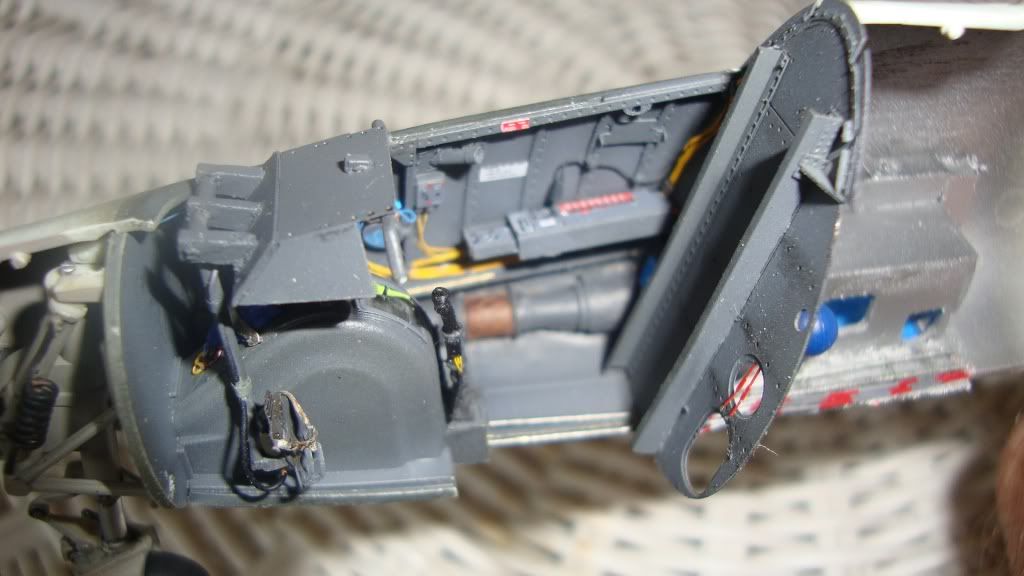
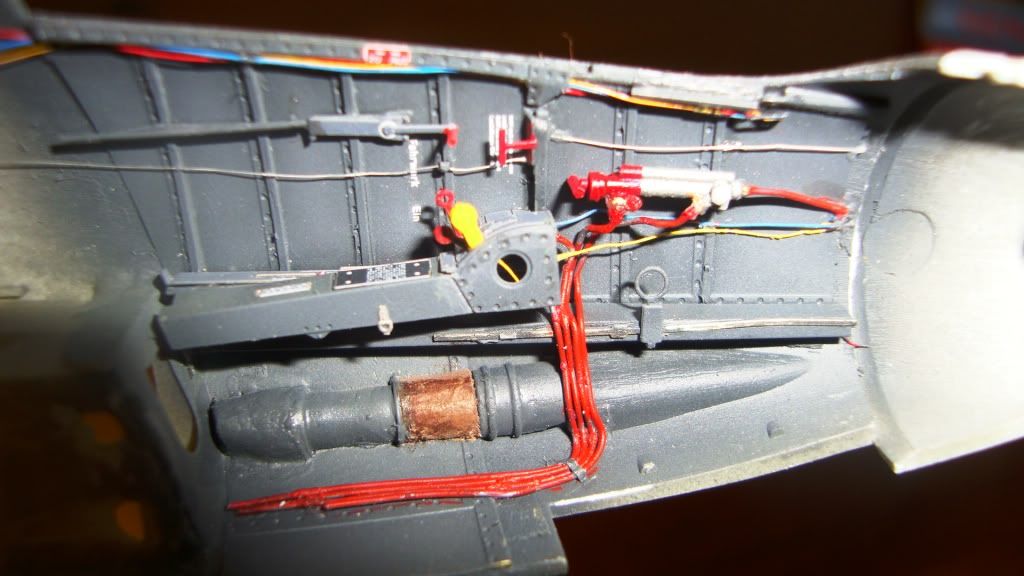
This is probably not going to be seen ,but with the hole drilled out some of it might . Added the Oxygen bottles ,hydralic lines red -silver and the elevator and rudder controls.
-
Hi Jeroen,
Another project ! I build one of those 1/32 ME 163 20 years ago .It`s still a good kit. Back then there was no CMK
 Keep up the good work ! What happened to the He 162 ?
Willi
-
Hi Matt ,
It`s looking awesome ,it moving along fast ! starting to really like this build. how do you get it so perfect from paper to plastic? An Me 410 would be cool
Willi
-
Hi Kevin ,
Your build is look very nice , interior looks great !
Willi
-
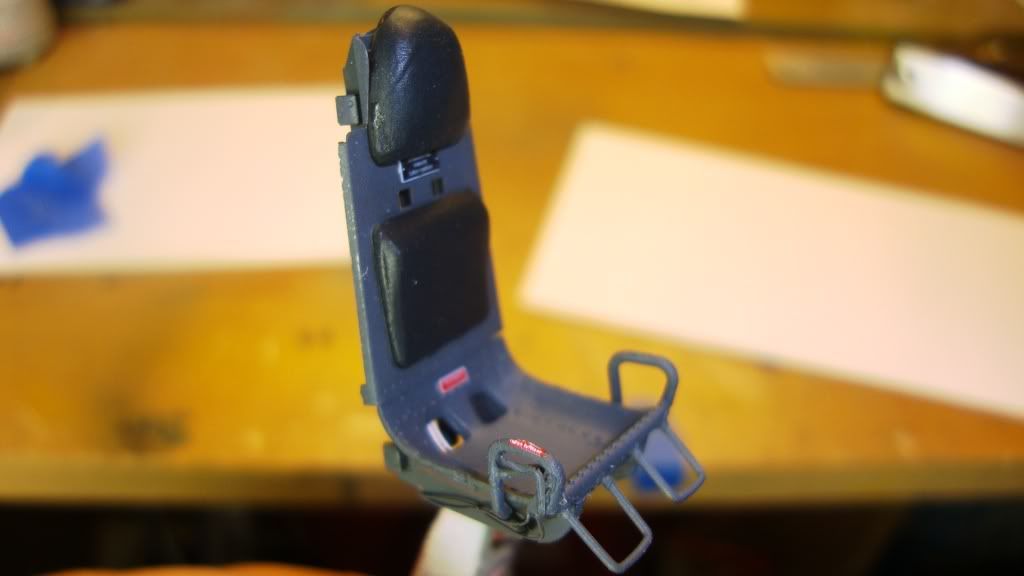
I thought about going with the quick boost seat but yours looks really good. Seems a good way to go.
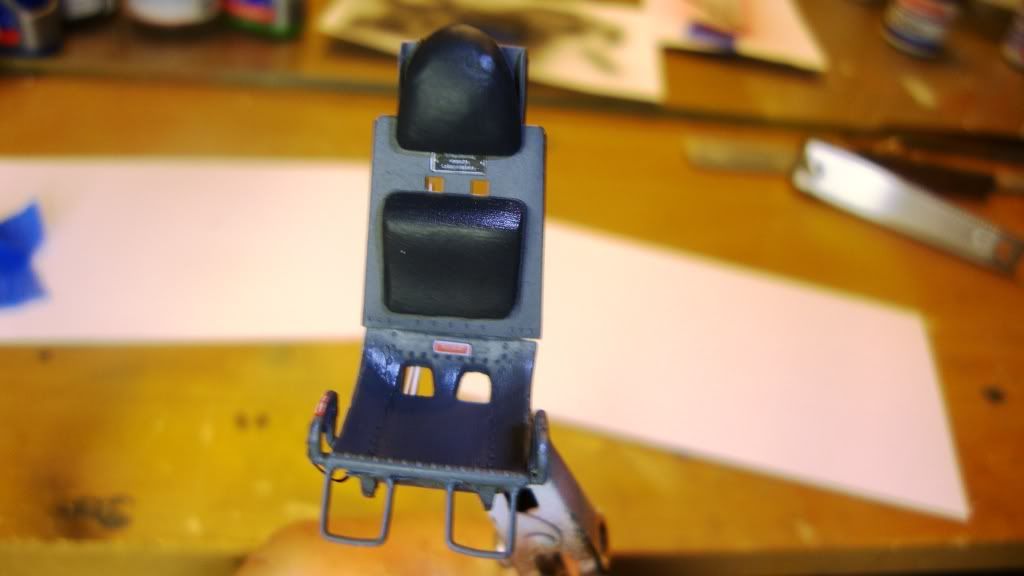
Hi Matt , I was going to get a Quick boost seat at first ,but when I put this seat together ,it didnt look too bad .Plus it fits into the rails .
I might get more work done on both projects this weekend ! Looks like the Hurricane is going to miss Miami and be a problem for the folks up North!
Willi
-
Hey guys and gals
I need some help. I am working on Tamiya's F-15j in 1/32 scale and I am having a problem painting the instrument panel. I am bulding it out of the boxas according to the imps rules. So I would not like to add anything to it. So how is done to the perfect instrument panel?
Hi Nick,
I would paint the whole panel then pick out all the gauges in black then added some after market decals which would still be in Imps rules . Airscale makes some nice sets .
-
That is one Awesome aircraft
Willi
-
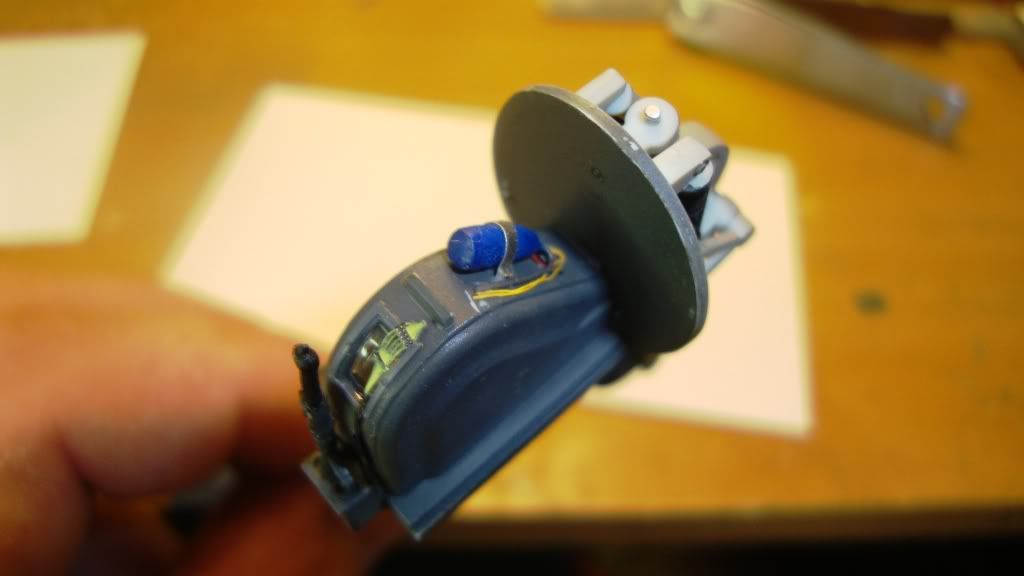
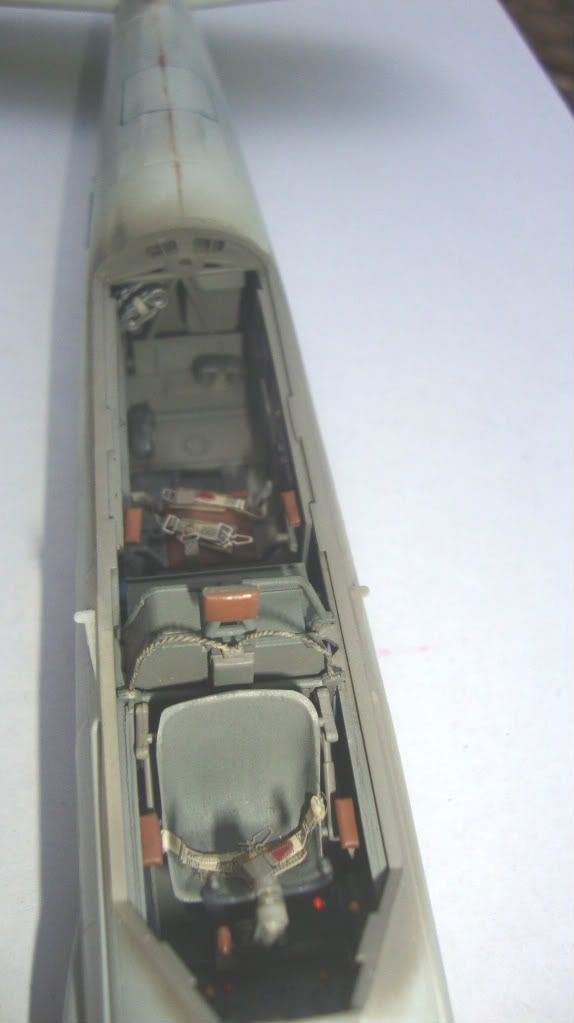
Hello everyone here`s another update:
The seat from the He 162 without the seat belts at this time . I used the eduard set which is not that bad and added some detail to the back of the seat. Even if it can`t be seen it`s there.
Thanks for looking hope to start on the gun bays soon .
Willi
-
Thanks for all the interest ,
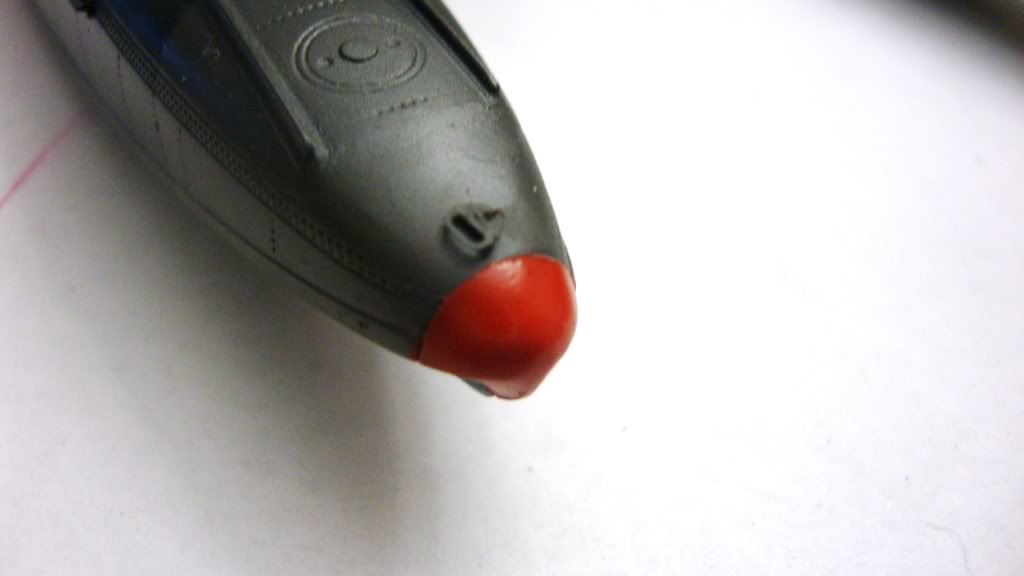
Jeroen, I dropped the flaps doing it old school ,just cut the parts off and use sheet plastic for filler so far it looks pretty good. I also loaded the nose cone with #9 lead shot .
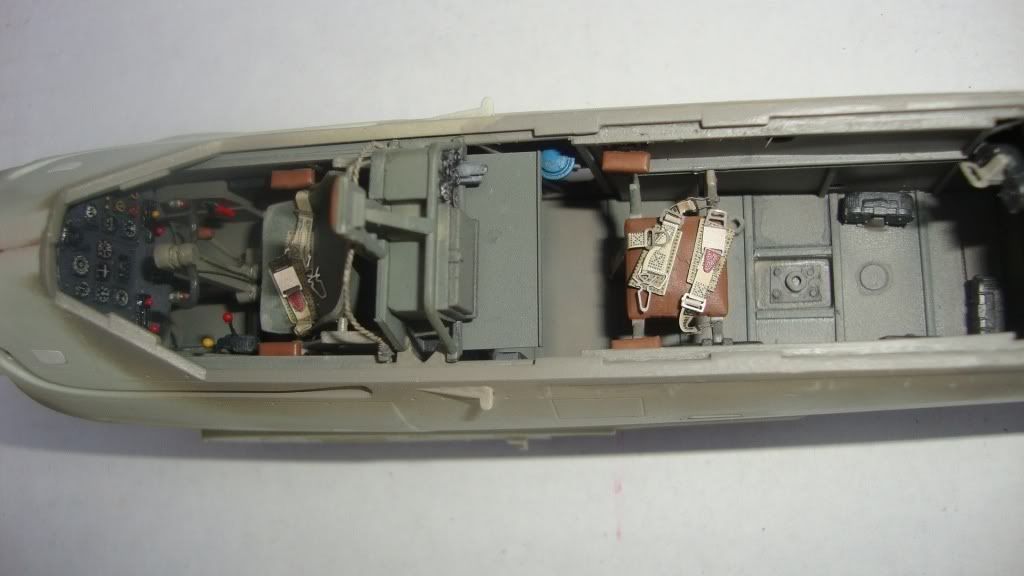
Hans , That`s one reason I liked this aircraft , in the Closeup 11 from Momogram it stated dark green with dark olive topsides 76 lower and 65 on the gear doors . the dark olive is close to the US color used on the AR234 not the field applyed RLM81 .as for the dark green I am leaning more to 71 but might be RLM 82 dark green .
dodgem37 ,I used masking tape in layers and painted it with different shades of brown. BTW the interior colors aren`t that bright color it`s the flash from the camera!
More interior photo`s:
That`s all for now ,Thank`s for looking .
Willi
-
Thanks for focusing on these little details. I am saving your pics in a 196 file for when I tackle this kit.
Great work!!!
Thank`s Matt,
The small detail`s are what I am focusing on .In 1/48 I would not go this crazy:). I figured out If I would get all the detail sets plus the kit it would Cost the same as the HpH kit give a few dollars here and there ! .Next one if I build an Arado it again I`m getting the resin kit ! It`s just that you can`t fold the wings on the HpH kit, but the detail is Awesome. I just wish someone would make the trolly for this plane .
Willi
-
Here`s another update:
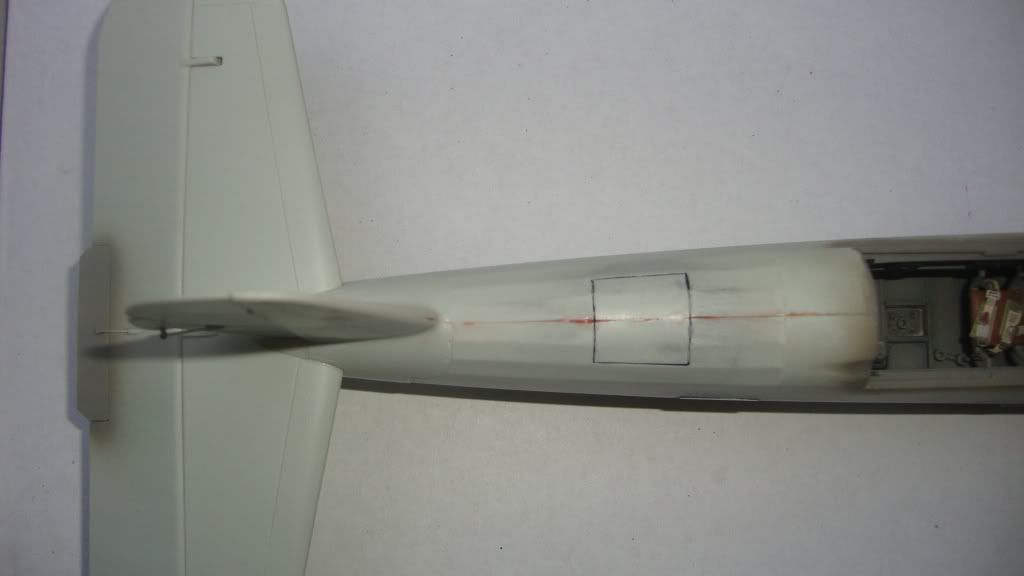
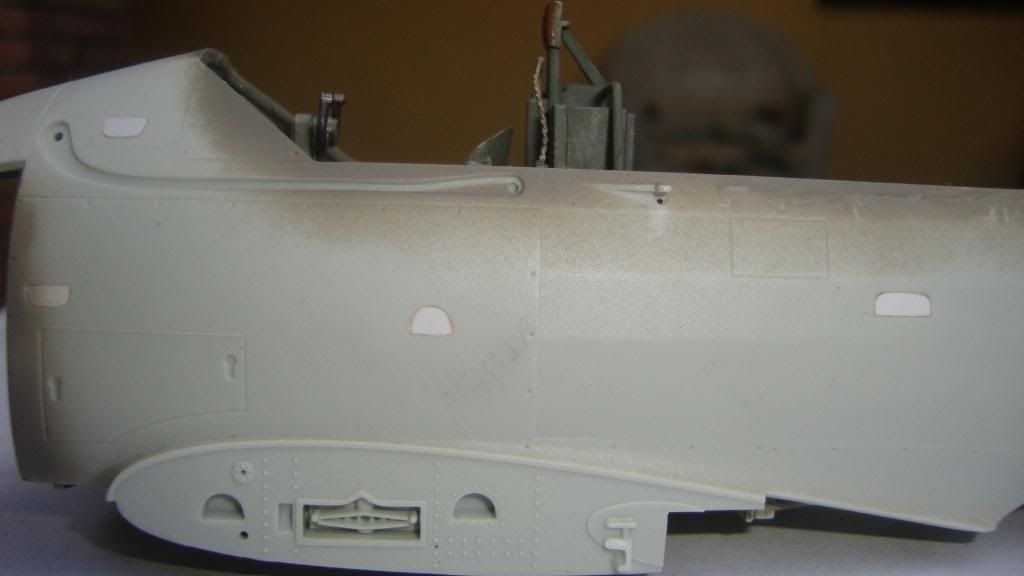
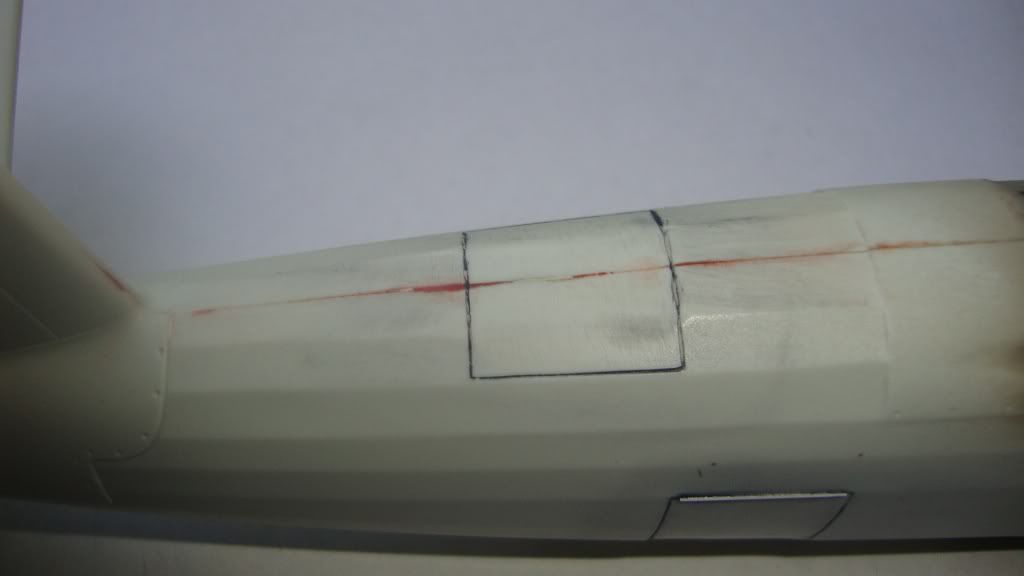
I have the main body put together . Did most of the exterior detail ,dropped elevators ,trim tabs moved ,added foothold covers ,and sanded the hatchs .

-
Hello everyone ,
I will be using the aircrafts original codes before the British changed out the tail (120230)
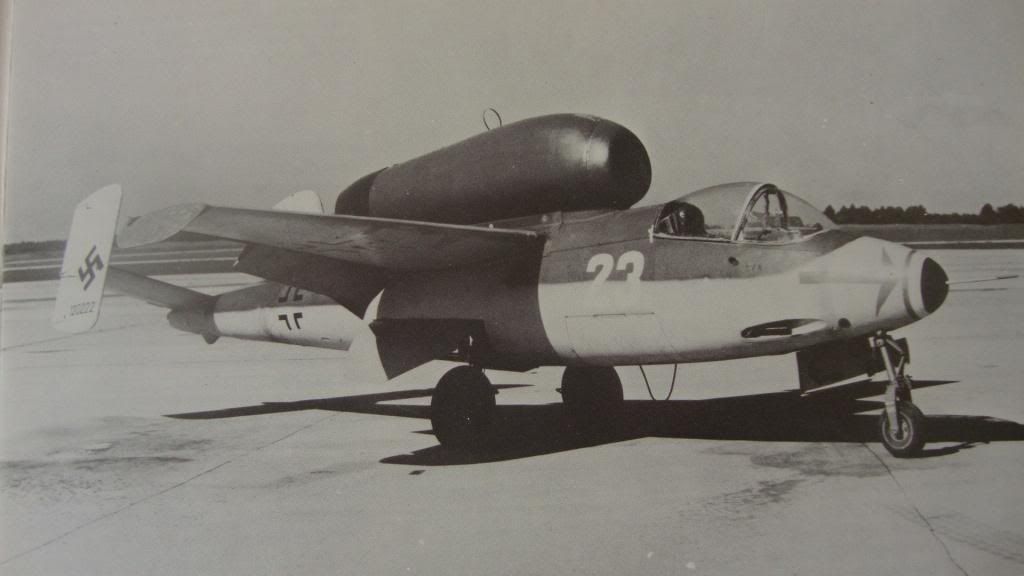
This is a Revell 1/32nd jet I started years ago but didn`t get to far .In the last few months the project has been moving along at a good pace until I started the Arado 196. I always wanted to do white 23. Thanks to Ian from Ad Astra Masks who did a great job with the masks. It is now possible for me to complete the project!
The Aftermarket goodies are from Eduard and CMK . I am using the interior and exterior sets from Eduard . From CMK I have the Engine which is the long project with all the detail that goes with it . Also the CMK gun bays which needs alittle improving .A web site that helped my build along is Memorial Flight Association Http://memorial.flight.free.fr/indexuk.html There`s a cool vid you have to see of the working landing gear from a restored 162 .
Here`s all of my references :

First I corrected the opening for the flare pistol.
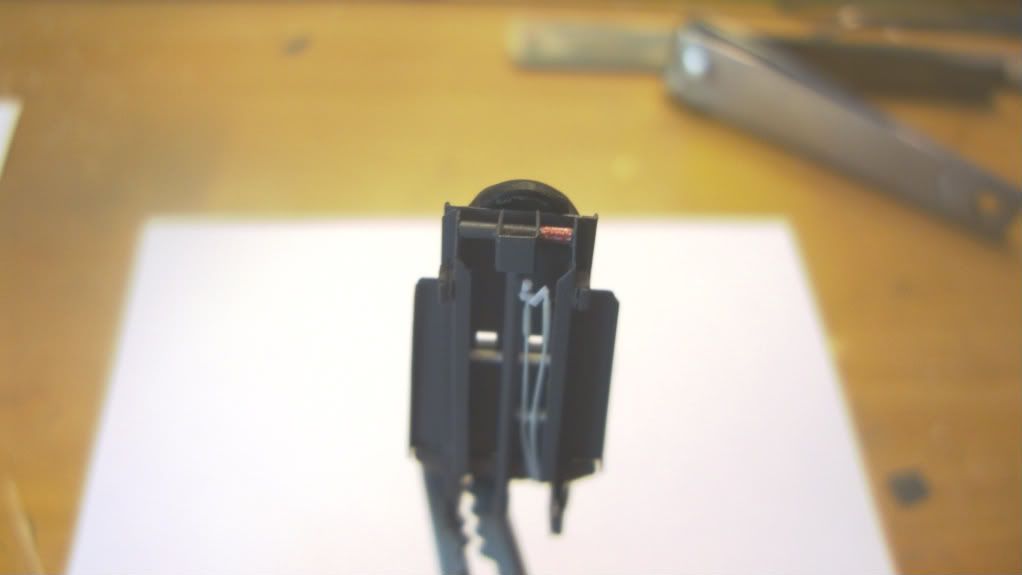
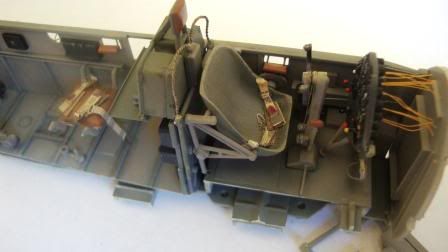
Now the next pic`s will be the cockpit , it is all Eduard interior set , fine wires ,lead wire .
Thanks for looking ,
Willi
-
Revell. The price is hard to beat.
Anyone know what the knob colors are on the instrument panel and the port side? Red I presume?
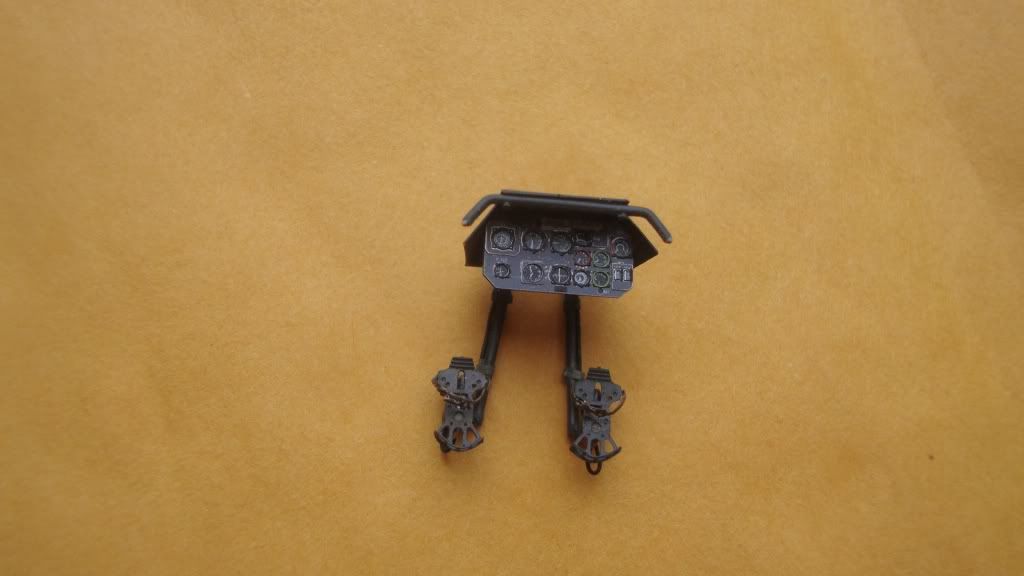
Hi Bill, Here`s what I found there`s a color drawing and a instrument panel on one of the forums but here`s what I copied for them .
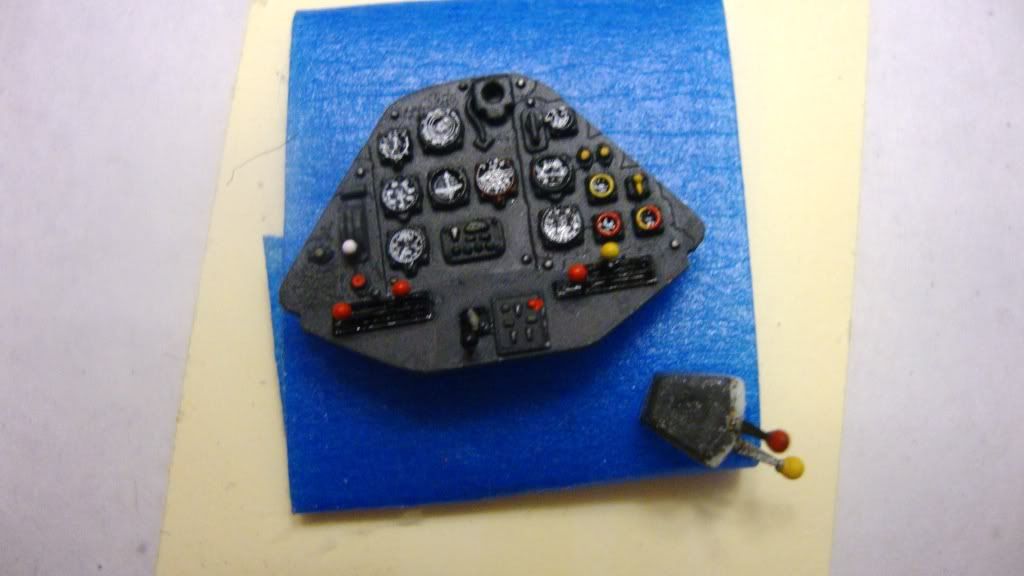
This is what I copied from what I found I used my Monogram German interior book to find the gauges . Yellow for fuel ,red for oil pressure ,the two yellow dots on the right are warning lights for the right and left fuel tanks . the gauge with all yellow is the fuel contents,all red is oil temp. and the duel fuel and oil pressure gauge ,the knobs on the left have to do with the flaps I think I did them in red , the right side has to do with radiator for what I could read in Deutch
 .There is also a knob on the center bottom I did it in black but it is hard to see .
Willi
-
Wow ,nice work .I`m starting to like these wing nut planes . I`m waiting for a Fokker D.VII
Willi
-
Thanks, Willi, that's VERY helpful.
It's a superb kit so far, and the Eduard PE sets make it even better. The cockpit instrument facings are about the best I've seen so far from Eduard.
Hi Bill , which kit do you have ? Revell or HpH
Willi
-
UPDATE:
I just ran across this announcement from Eduard about PE seat belts for the Arado, and it would seem that Radu's lap belts will handle this nicely, except for the "belly band" restraint and floor belt shown in the assembly instructions.
I wonder if I can't scratch those. PE seat belts are OK in comparison with Radu's.
Hi Bill,
Yes you can make it .It is just like a shoulder harness,it goes in the front of the seat in the middle of the floor in front of the radio .If you look at the Eduards PE set the belt is the one above the gunners sling.
Hope this helps
Willi
-
Thanks Tomek,
I look at every piece as a small model and try to make it better if I can. I am used to building 1/48th scale which is 99% of my models . Finding this forum has opened up a new world of modeling to me .
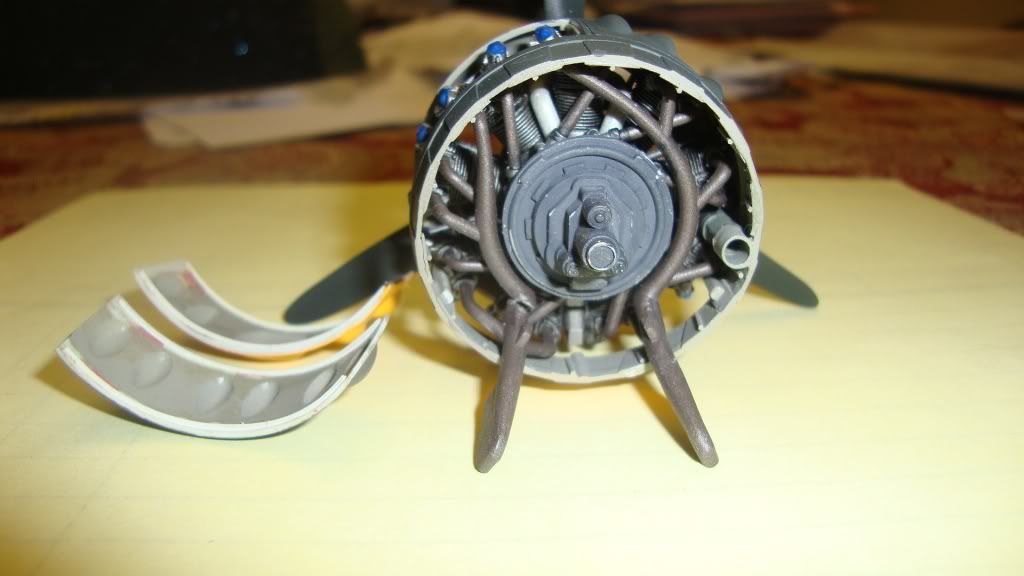
I hit one block and can`t seem to find much information on the wiring for the back of the engine .I want to keep both doors open .So if anyone has any idea`s ,I`m open to them!
This is the site I used for my exterior detail .There`s a vid on U-tube but the walkaround photo`s you can pick up more detail
Here`s another update ,I worked on the radiator by opening up the back end .Adding wire mesh and plastic .
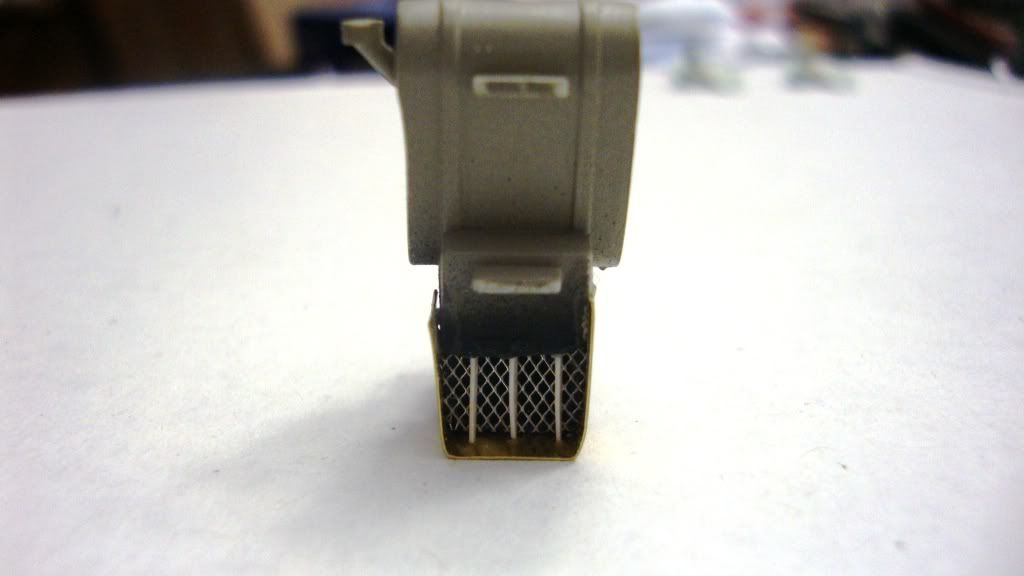
I wrapped the radiator with 4mm wide scrap PE ,plastic did not work as well . Hint .save all the pieces of PE scrap it can be used for many things .
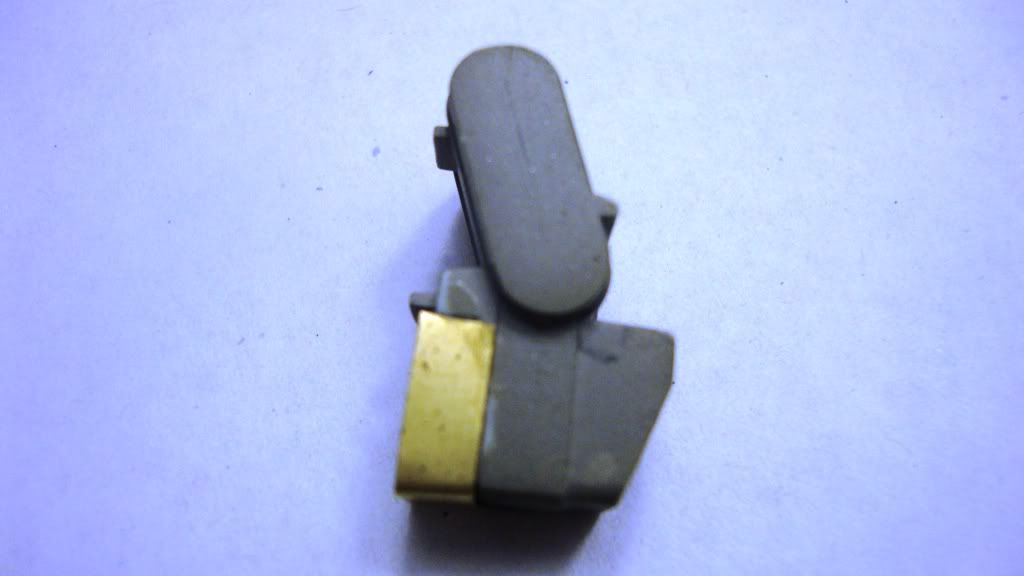
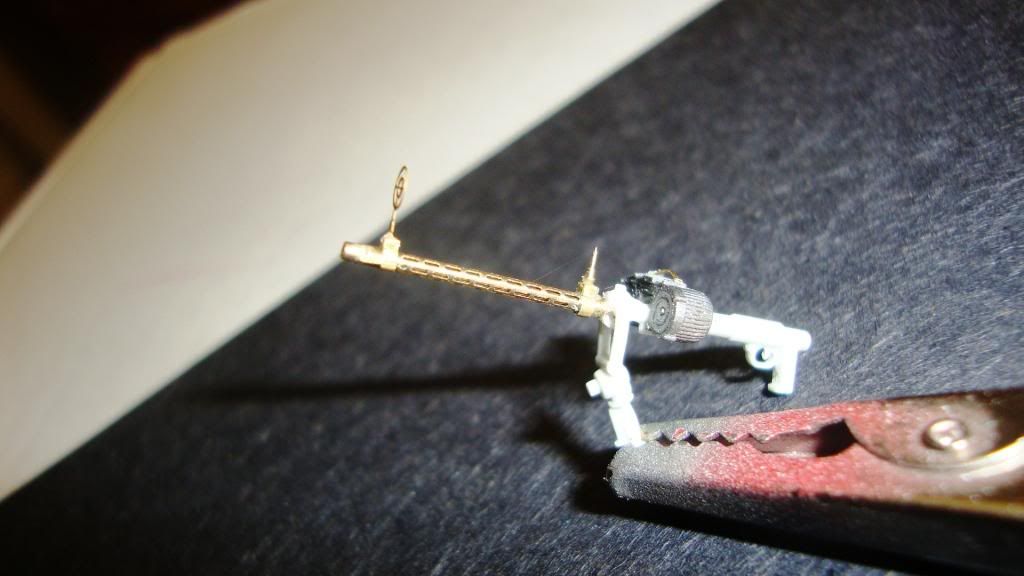
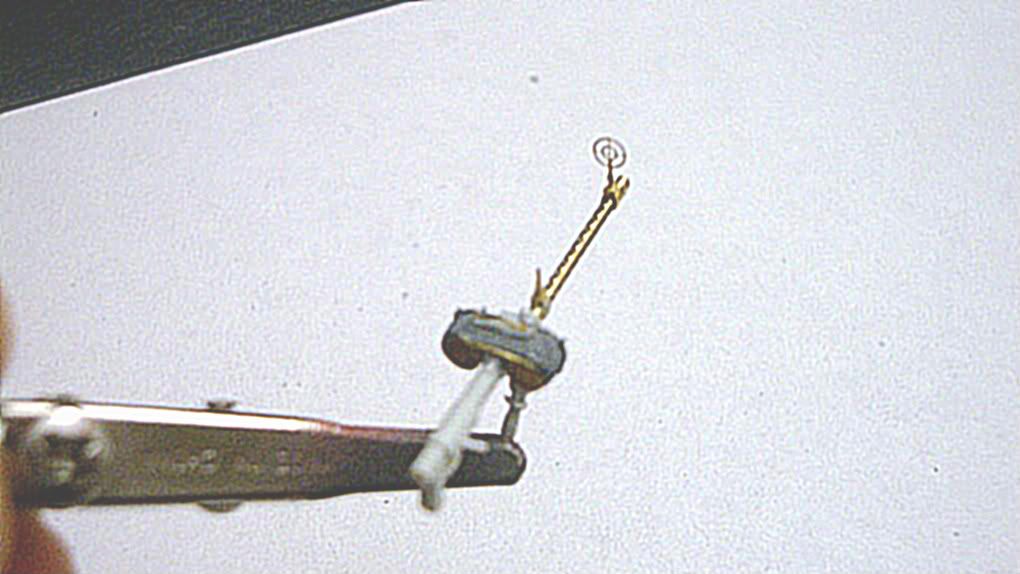
I also worked on the rear gun and added a little detail to it.
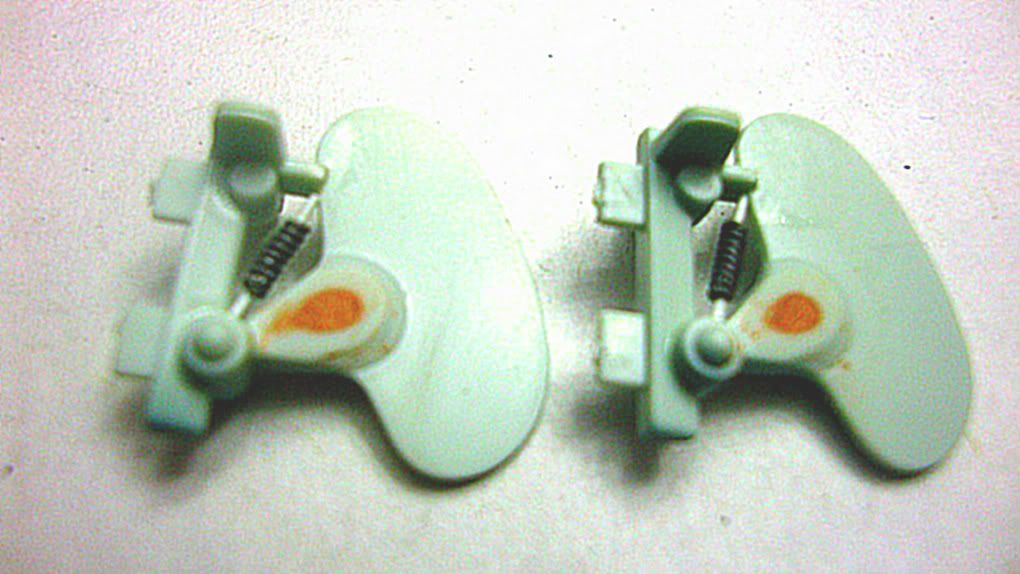
Here`s some improve ment I have done to the rudders . First was to fill the sink marks .Then added the springs made from lead wire on a plastic rod .I am still thinking of improving the rudder control .I just dont like their shape.
-
Thanks to everyone who recently replied to my post.
Shawn I hope some of what I have done on my kit will help you along with your build . I am totally addicted to this plane , It`s been great weather here in Florida and instead of going fishing in my boat I`m staying indoors building plastic.

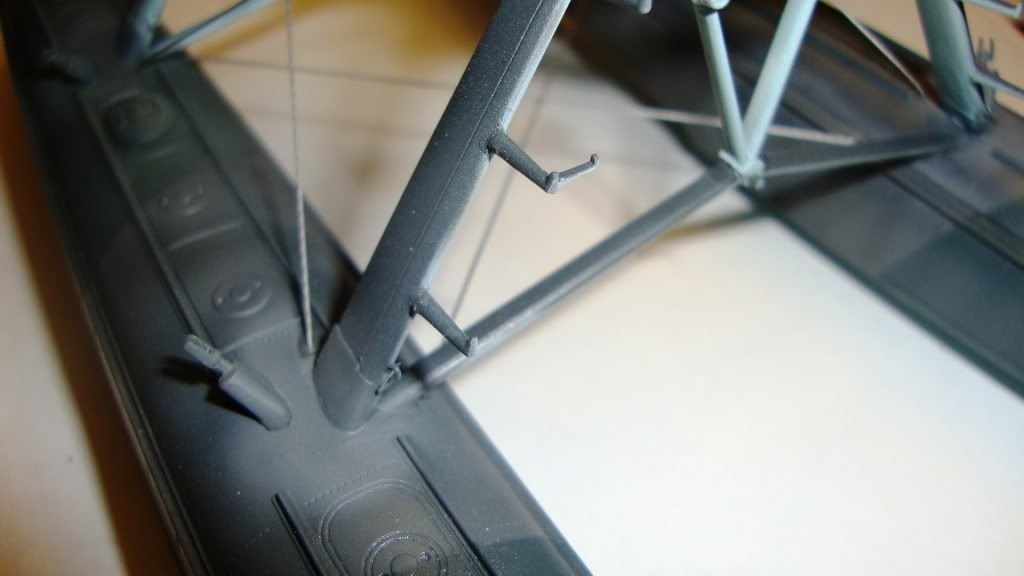
Well here`s lots more photo`s of what I have done this week, I have started putting the floats together . But before you put the bottom half together it is best to do all the rigging . I used cable for my rigging . It is called TyGer leader .The smallest dia is .006.
I added #9 shot to the lower half for weight .
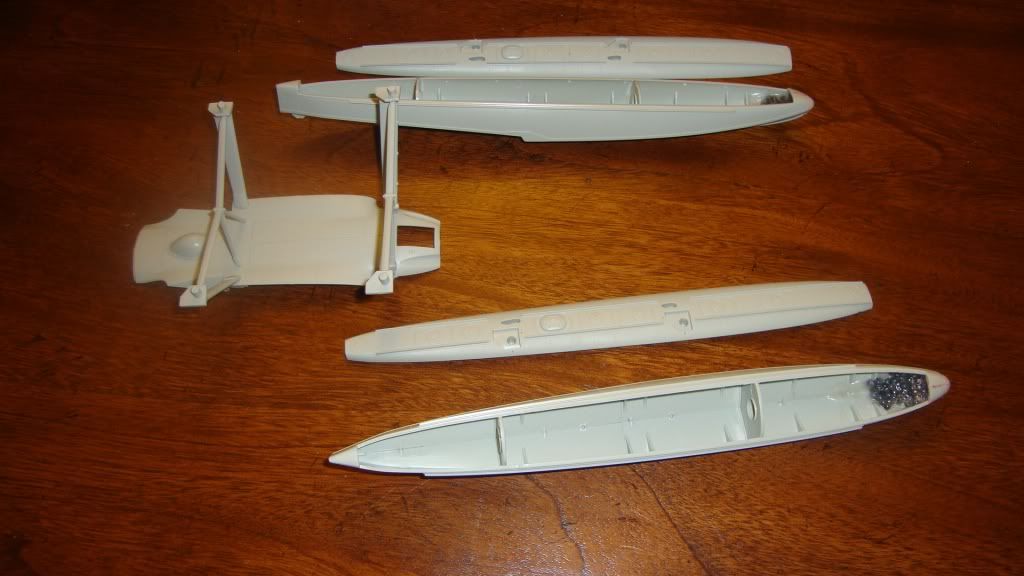
In back ground you can see the top half together just before the rigging. BTW there are two 1LBS weights on top .I wanted to see if it would hold up .


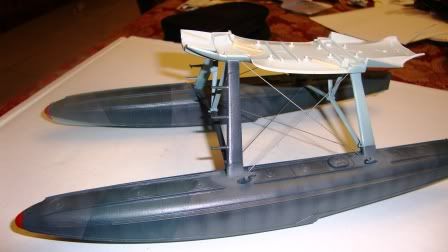
Here it is with color , the centers of the rigging were tied together with small dia. wire.
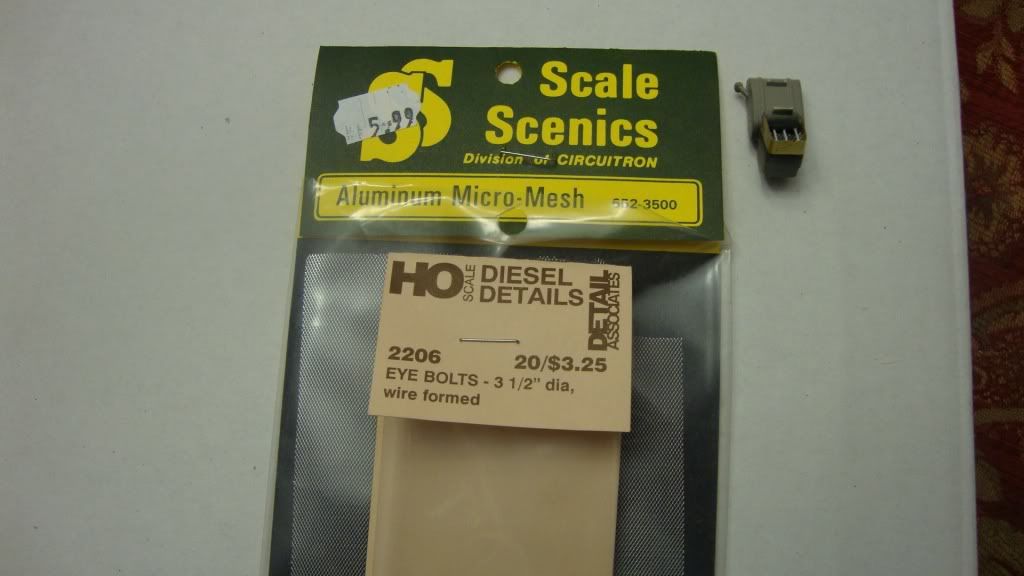
Here is a close up of the rings that go on all 4 posts. I had an old Fotocut O ring set and used eye bolts from HO scale (model rail road)
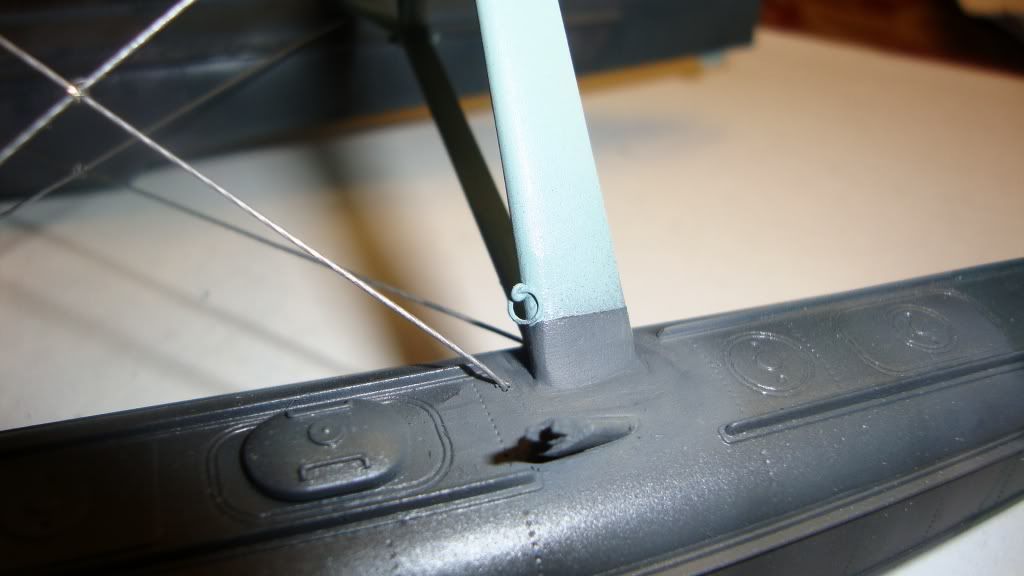
Here`s the ring that goes on the back side of each float .
The front tie downs I made from scrap PE.
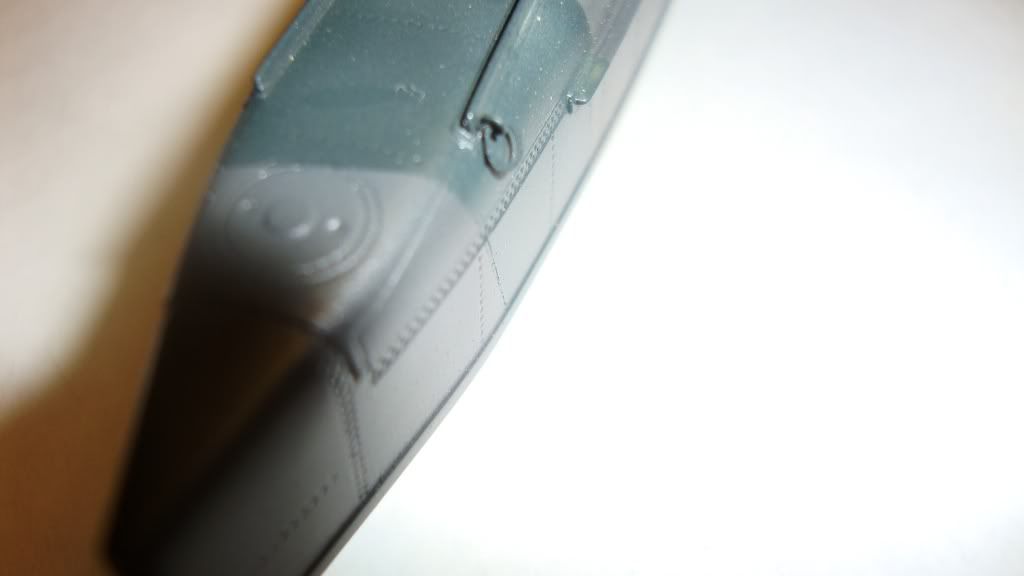
The foot hold on the second step was made from flat brass rod . The photo`s I have seen have it on the right side . Eduard shows it on the left . Have`nt found photo`s showing the foot hold there .
Well thanks for looking there`s more to come soon .
Willi
-
Hi Matt ,
Wish you lots of luck . does not look as it will be a fast build .I`ll be watching .
Willi
-
Hi Bill,
I am working on my Arado ,I am totally addicted to it for the past few weeks . I have a post on the WIP ,under Reconstructive surgery , my daugther`s Idea . I have researched every thing I could find .There are no shoulder straps for the pilot ,I used the eduard PE .hope this will help you !
Willi

MiG-21PF(ish)
in Works in Progress
Posted
Looks great , good start !
Willi