

Kyle
-
Posts
66 -
Joined
-
Last visited
Content Type
Profiles
Forums
Events
Posts posted by Kyle
-
-
I drilled out the center of the F-104 nozzle so the rod on the stand could pass through.

-
Couldn't resist the flashy scheme on this one. By the time I got everything to fit the raised detail was gone at the seam lines, so I decided to re-scribe it. Thats what a big snow storm is good for
 . Was planning on using the gear but I cam across the left over stand on the Tamiya F-16 Thunderbird I did. The engine part from Tamiya fits perfectly into the F-104 tail cone. The Tamiya part is white and has the yellow bracket line above it.
-
I started mine and love it. Yes it could have been better but after rescribing older kits, not any P-51's, this kit is just fun. I too was suprised by the 'deep' detail but at least I can finally prime and prep a plane for a NMF with minimal rescribing, if any.

Kyle
-
Looks good.
I've been away from posting for awhile but I built the P-38 and it did need weight stuffed everywhere ahead of the main wheels. I even drilled a hole in the engines and filled them with lead shot and glue, and it will still will sit on its tail if pushed down at the elevator. I built mine in 30 days for a contest and it nearly killed me

I thought it was a good kit overall. Ended up glueing all of the movable control surfaces in place though.
Kyle G
-
Like those WEM paints. I'll have to try them.
Kyle
-
Brian,
I've always used the Tamiya colors.
Kyle
-
Koala,
That is one VERY nice Fw-190!
Kyle
-
Looks GREAT Chris. You've motivated me to pull out my 109 and finish painting it. Put it away a couple of years ago when I had to move my work area.
Kyle
-
Brian,
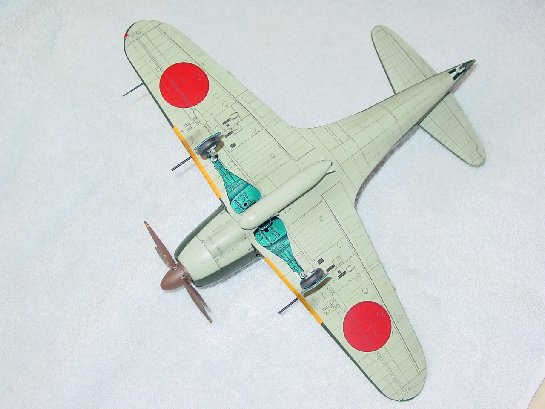
I used Tamiya paints, except for the knobs and such I used PolyScale. The wheel well and gun bay was painted with a mixture of Tamiya paints from thier Zero kit instructions. Its X-13: 3 parts + X-25 : 1 part. (X-13 is Metallic Blue and X-25 is Clear Green). I used and old PolyScale jar I cleaned out to store the mixture. I painted the area with silver paint then applied my mixed paint over that. I now have the Gunze Sanyo Hobby Color H63 Metallic Blue Green that I want to try, It looks close to the mixture called out by Tamiya.
Kyle
-
Thanks for the comments!!! It was a slow build, I'm not fast anyway. It was slow because of all the additional items I included.
I'm now working on the Hasagawa Ki-84 and it is going very fast, even for me. Next up is the 1/32 Revell N1K1, these kits are just to nice to sit in a box. I'm trying to stick only to 1/32 WW II Japanese, otherwise I'd be buying everything, but its not working out too good!! Oh! Well!

Kyle
-
Finally

-
Again..
-
Another...

-
Next
-
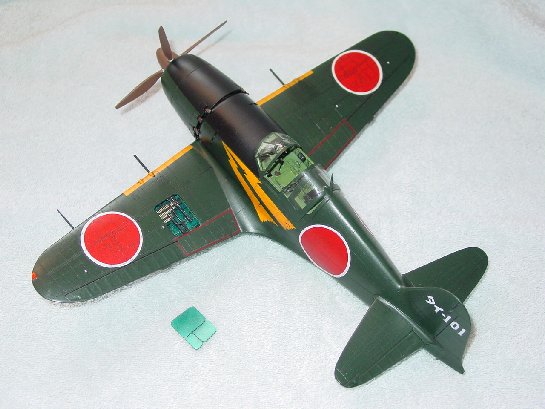
Here is my 1/32 Revell Raiden. I used the Eduard set for the Hasagawa Zero and Waldron instruments to help out in the cockpit. I also used the Cutting Edge Revi Gun sight. The actual decals from the kit where used, after letting them set in a window for a couple of weeks to remove the yellow. They did crack a little but where still manageable.I did have trouble with the lighting bolts, this is why they are not angled more in relationship to the fuselage. Overall the fit was very good except for the rear bottom of the wing to the fuselage, but nothing a little super glue and sanding cannot fix.

Revell Olympos
in Works in Progress
Posted
Here are a few more pics.
Kyle