ruzlkampf
-
Posts
3,126 -
Joined
-
Last visited
-
Days Won
4
Content Type
Profiles
Forums
Events
Everything posted by ruzlkampf
-

-

-
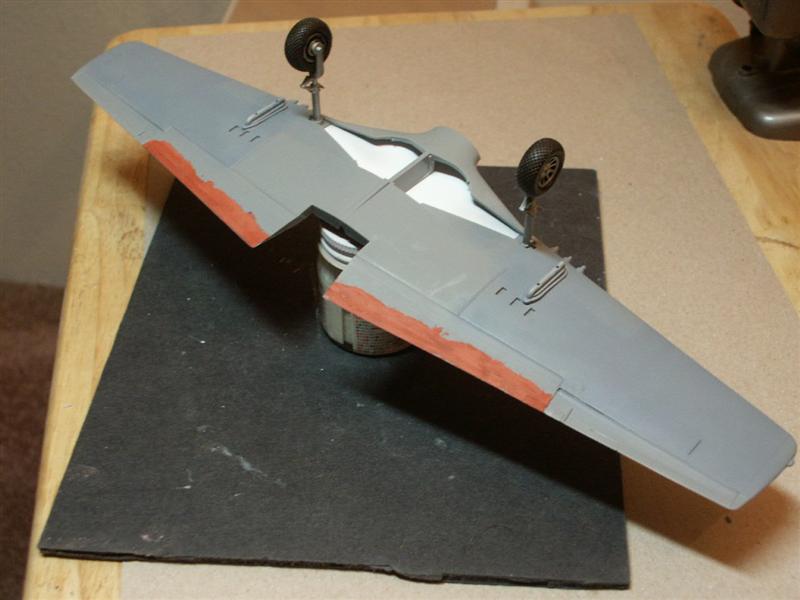
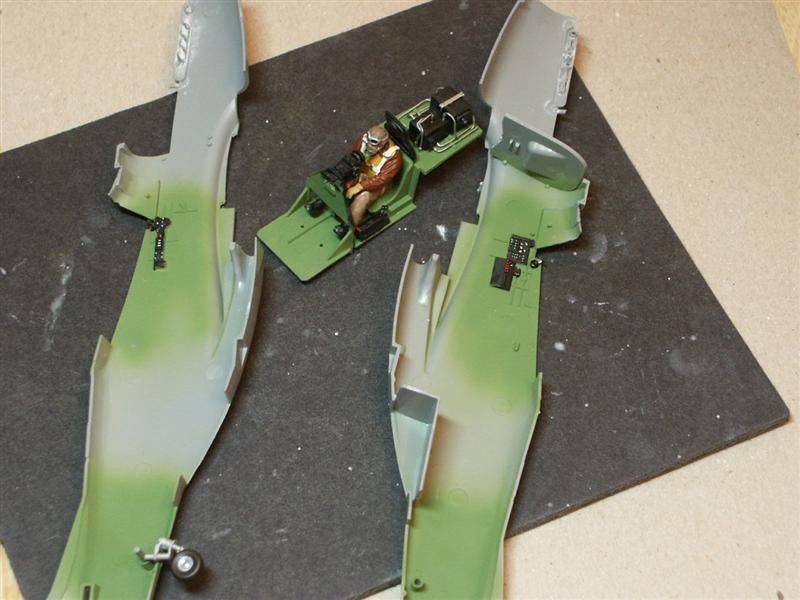
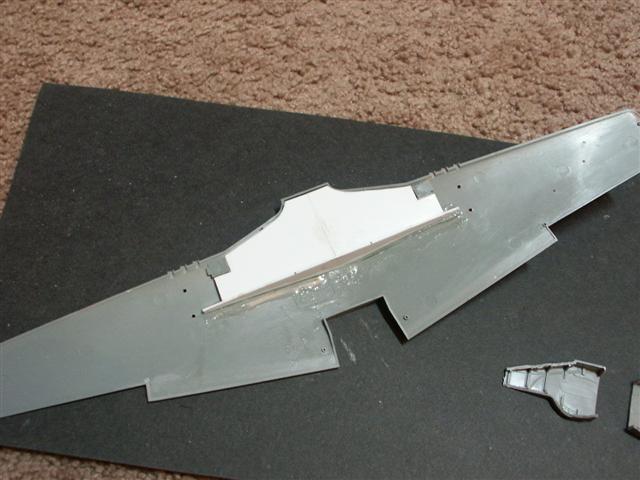
Worked on getting the ribs in the wheel well, well....the outer wells cuz my inner doors will be closed,....and just about have the wing final sanded. Here's how it turned out.

-
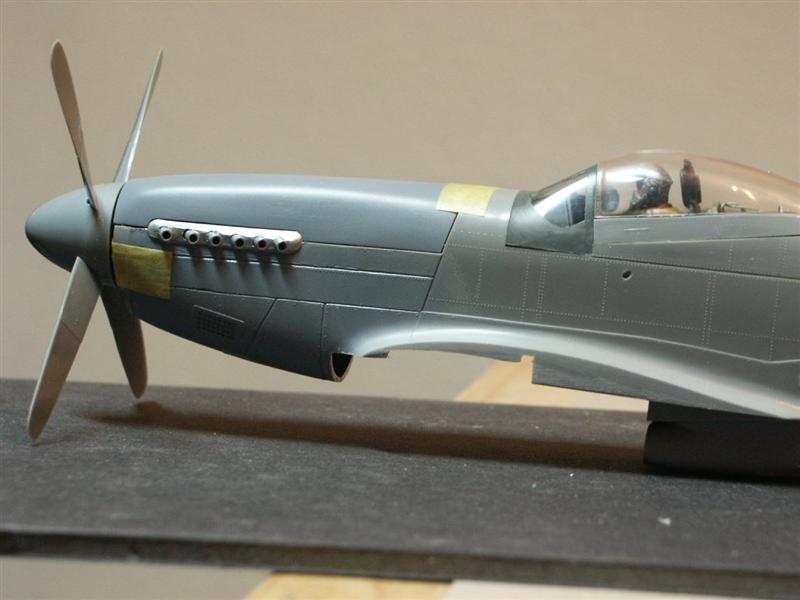
Here's some different angles of the cowling comparing it to the stock kit piece. Wasn't able to get it final shaped until after I attached it to the fuse, but this gives an idea of where I added putty to give it it's new shape.


-
Bahahahaha! Not guilty of that crime Matt! heh heh. The only reason I have resin wheels in these kit boxes is because I snagged the originals for chopping up for masters on the XF5-U Pancake awhile back. Wish I had 'Elvis-The-Wunder-dog' around right now, as I want to 'call out the hounds' on these dadburned elves. They're chained/shackled in the dungeon right now, and I'm torturing them by making them watch me eat apple pie 'ala-mode'. Yummy! Yeah 'wingman', I've tried cajoling and threats of violence.....but they're insensitive to such things. I wasn't expecting much from these slackers and rejects from the North Pole, but Santa must've been quite the taskmaster.....they are impervious to anything I can dish out.(course, they haven't met Elvis yet? ) But I digress; That reflection does make the cowling look kinda funky, huh Hubert? It's just the position of the light actually. I HAVE stripped all the primer off the cowl for some final sanding now that I have it attached to the fuse permanently. Makes it a lot easier to get honed down to a more exact shape. Speaking of the fuse,....I got it zipped up today with the help of a few styrene tabs added for strength. I also had to knock off a locator pin in front of the pilot to get the fuse 1/2's to line up a bit more precisely. Here's some more update pics;

-
Last pic of this update. Think the dihedral is looking OK now? Hope so, cuz I'm not chopping into that wing anymore! Time to take everything back apart and start gluing stuff together. The elves are on strike right now, and clamoring for some peanut-butter and crackers before resuming work so I gotta go. I'm going to have to trade those onery 'n contrary critters in for some much more placid and technically savvy blue smurfs?! More pics as things progress! Later, Russ
-
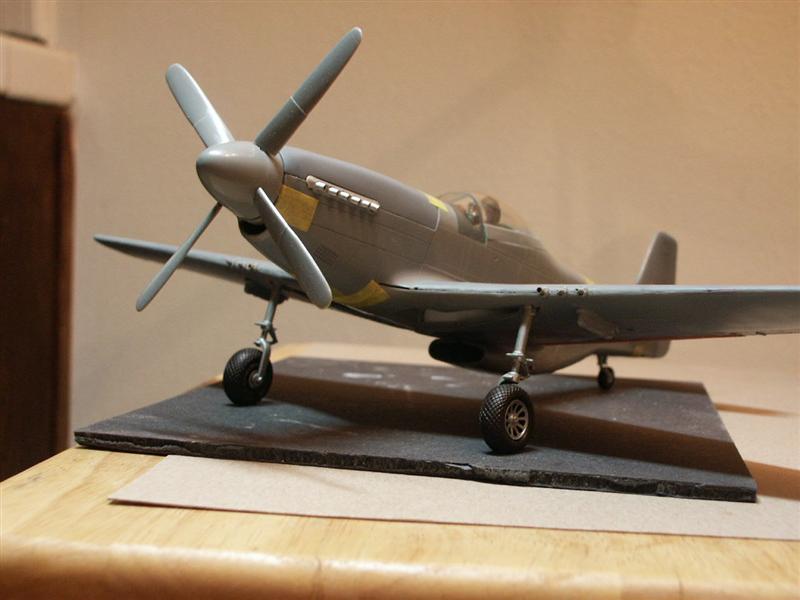
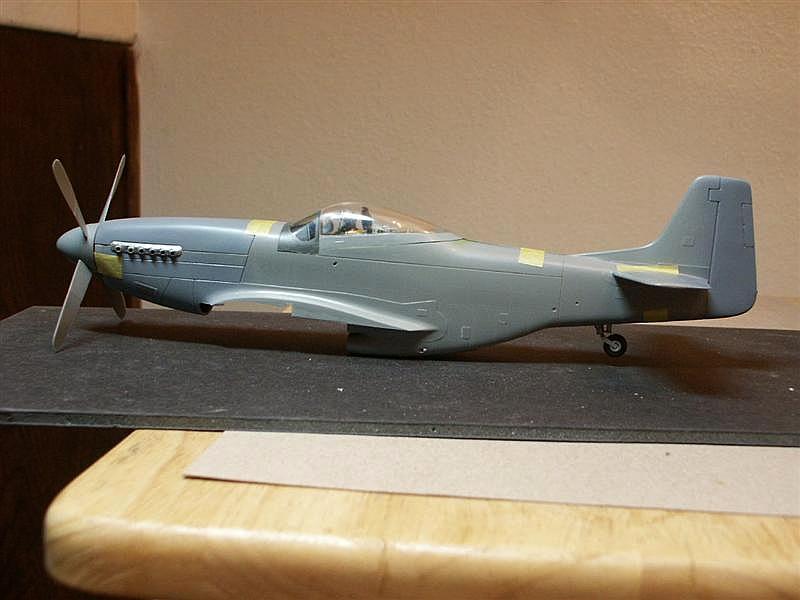
Whoopee, I think I'm on about day-5 for this build.....and it was a momentuous occasion to get it taped up and on it's gear! Looking kinda crude right now, but this kit has a lot of potential. I'm having a lot of fun with it so far.....but I'm trembling at having to deal with a NMF. Something tells me that's going to be an eye-opener for sure! This particular AC had the tail-warning radar on the vertical fin, so I'm hunting for some really fine wire or sumthin to make that up with. Finally got most of my putty job primered up, so at least it's only down to about 2-3 different colors now! heh heh.
-
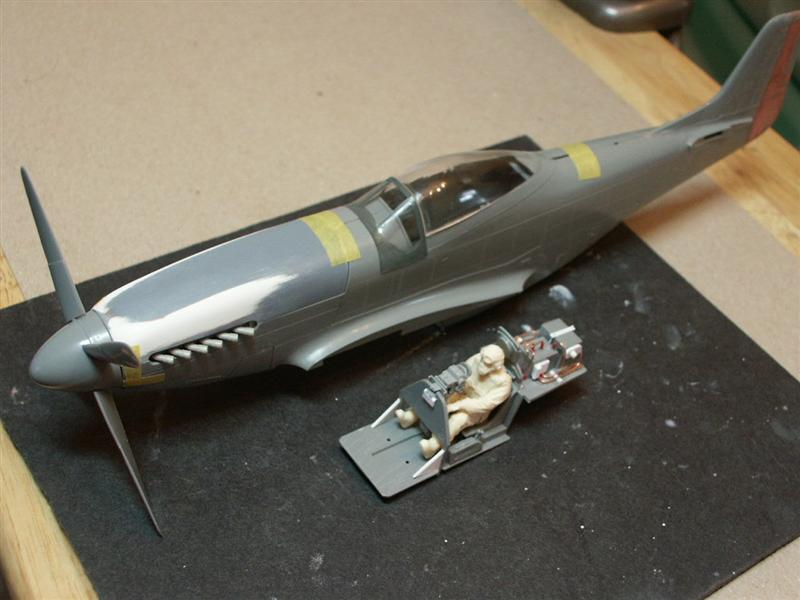
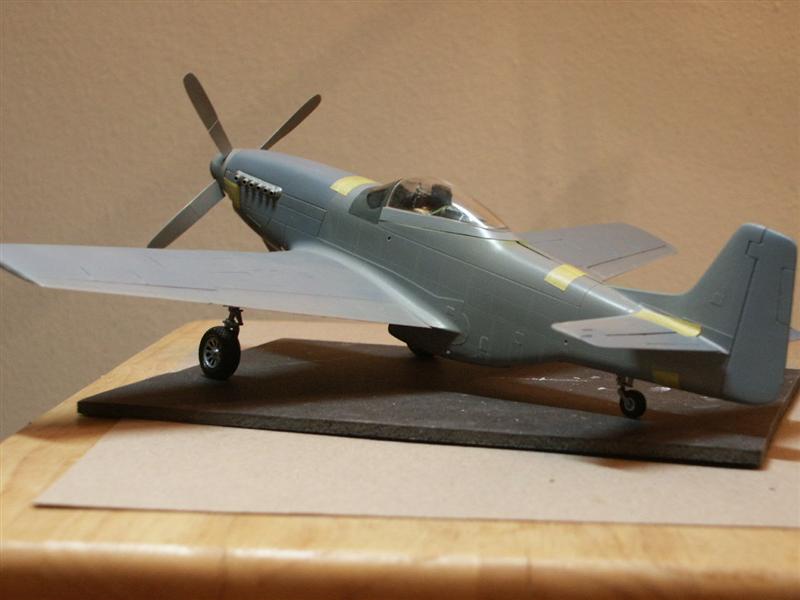
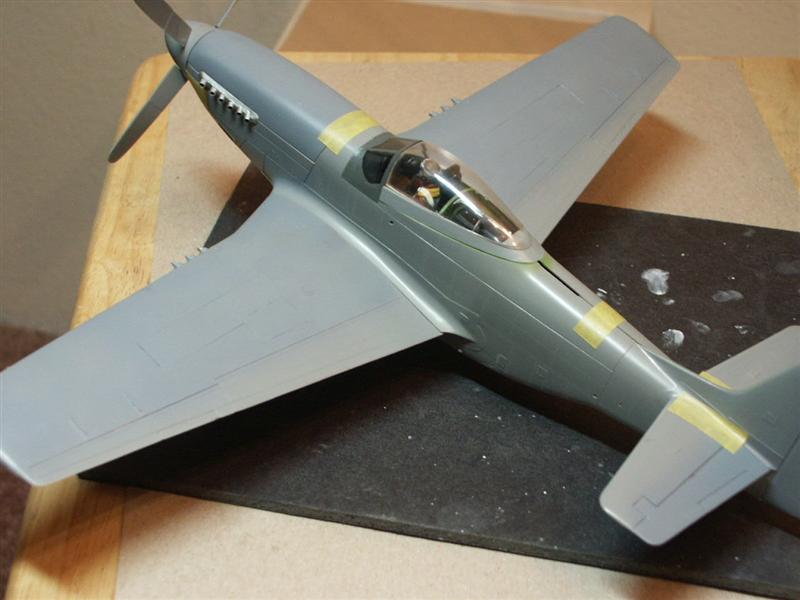
Alright, enough of the fuse pics. Because this is 'practice' Mustang for me, (almost every one I've ever built was a severely modified Reno air racer) I'm having a hard time getting my visuals down for a 'late war' stock look. I just like this angle, looks like a P-51 to these tired old eyes! Don't have too many pics of what I'm doing on the wings tonight. I'm in-process of adding ribs to the gear wells, and detailing the legs up a bit more with tow-hooks and such. Got the wheels painted and everything mocked up for a looksy. Going to be doing the final filling around the edges and flap area tonight for installation. Getting real close to putting this all together!
-
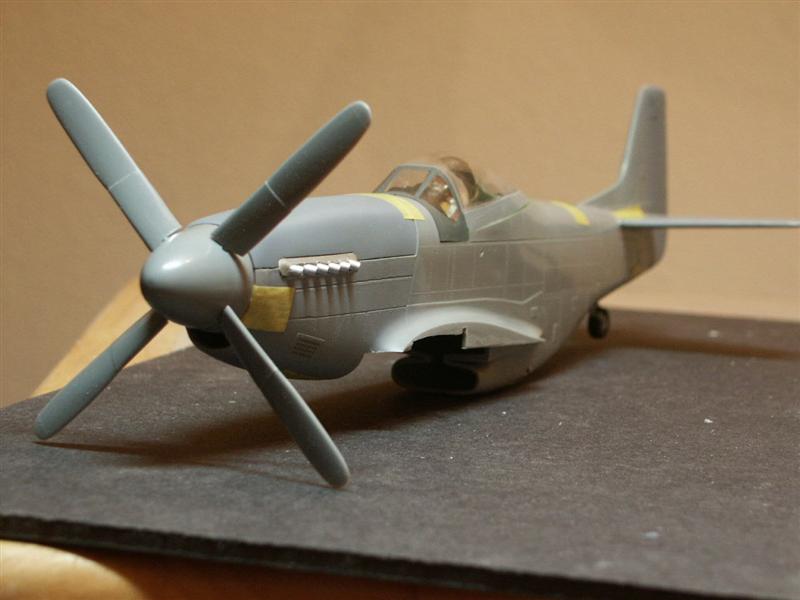
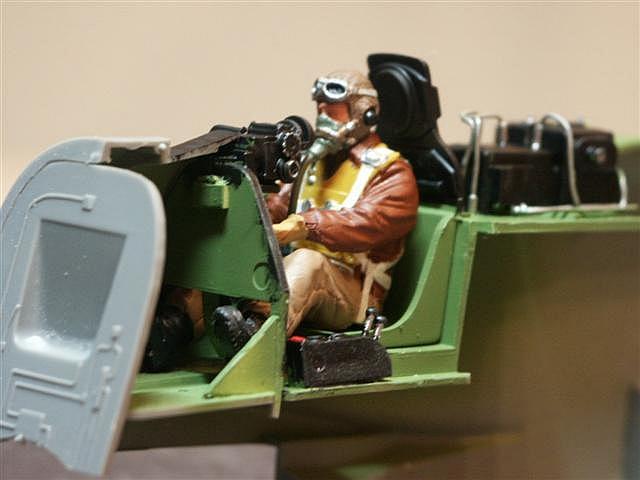
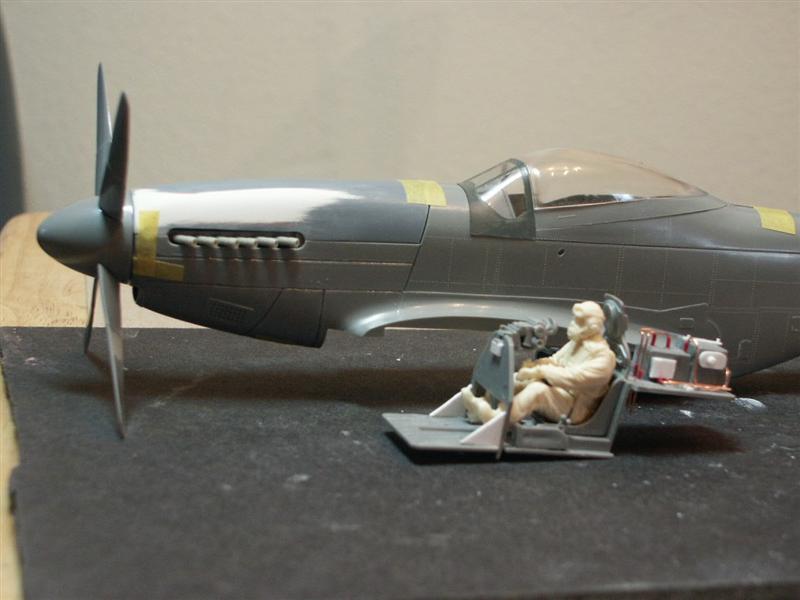
Closer look at them bazooka tubes. I really like how this pilot looks in this model, now I just need to vac a new canopy with that clear blister rear-view so I can see him better! Whoohoo! Different angle of the nose, cuz I'm STILL checking out the new cowl contours. Still not perfect, but it's close, real close.

-
Time to start mocking things up again. Oh yeah, that Dragon head-rest/armor-plate was about 1.5mm too tall. Didn't hit the canopy, but it was toooooo close. Can't see ANYthing in this cockpit from the pilots shoulders down. I drybrushed silver on all the IP dials and such, but phhhhtttt it won't be seen if a pilot is installed. Fuse taped up, and all parts trial fitted. I'm going to be knocking off the raised detail, and filling in where those longerons are. Still a lot easier than filling in what I've seen on the Dragon kit. This shouldn't take long at all with my glazing putty. Oh yeah, check out my aluminum tube exhausts. They're a mite too big in diameter,....but its the closest size I could find in my tubing stash. These are the same size as the PCM un-shrouded exhausts. I could still go either way, as the 'Nookster' here was photographed with both styles. I kinda like these for this build.
-
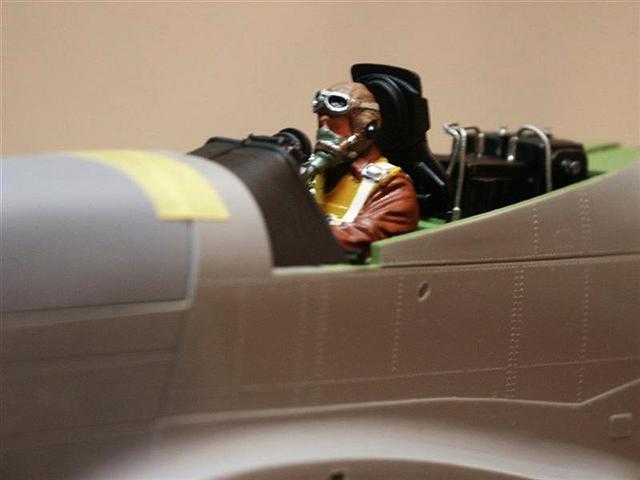
Thanks Kevin, but the hard #'s and dihedral mod is due to Raphael......I'd have never caught it. Speaking of not catching things,.....duuuuuh don't make yer spar as long as I did in the pics above! Well, that is if you're going to put the 50.cal mg bays in the wing. I wasn't going to do it cuz I ain't got nuuuthin there, but at the last second decided they would strengthen the ammo doors above and glued them in. Gaaaaaah, I spent about 2 hours trying to figure out why my wings were 2mm too thick at the wing-roots. First thought it had to do with the dihedral mod somehow, but my test-fits went sweet. Finally had to carefully pry the wings apart at the flap seam and take a looksy. Yep, that spar was a smidgion too long. BLAST! A mild bump in the road after all, but boy was I freaking for a bit! OK, got the pilot and cockpit painted up today in preparation of zipping this fuse up and adding the wing. Wanted to delve into seeing if the Dragon cockpit parts would slide over into this kit, but the spar fix sucked all the playtime I had for that experiment. Here's the pilot, pre-weathering, sitting in the fuse 1/2. And here's all the detail I'm putting into the insides. Very basic, but suits my style of build cuz the pilot hogs all the view anyway.
-
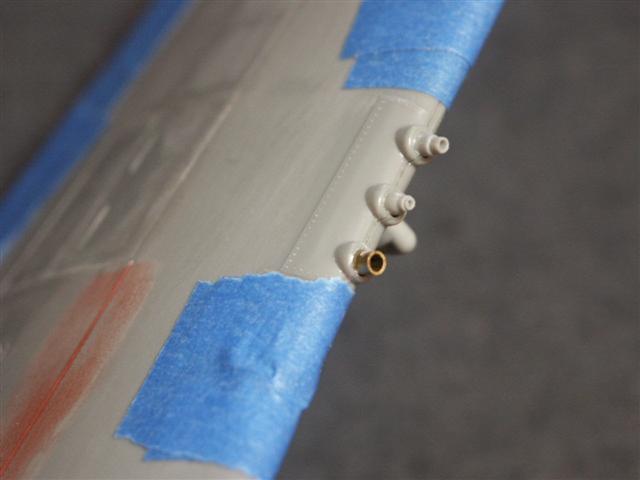
Alright, it's time to zip the wing up before I run across any more land-mines I'll have to tap-dance around. When I put the upper 1/2's on the wing it 'scrinched-down' the styrene in the forward wheel-well and left it looking more finished. (looks like there's a huge air-gap in the pic above looking forward) Oh yeah, this was a perfect time to install the mg's. These all look different on the real-deal, with the center gun looking a lot like a 'nipple' (oh my), the outer gun had a sleeeve cuz it sticks out just a wee more, and the inner gun is staggered back enough to only have a blast-tube protruding. I tried to emulate this using the Dragon parts and some brass tube. Looks good enough from my house! Gotta go look at an old VW for restoration now, so I need to scram. Working on painting the cockpit/pilot and getting the fuse zipped up tonight, so I'll be back later with more updates. Got an SR-71 waiting for me to finish so I need to slam this one out pretty soon. Later, Russ
-
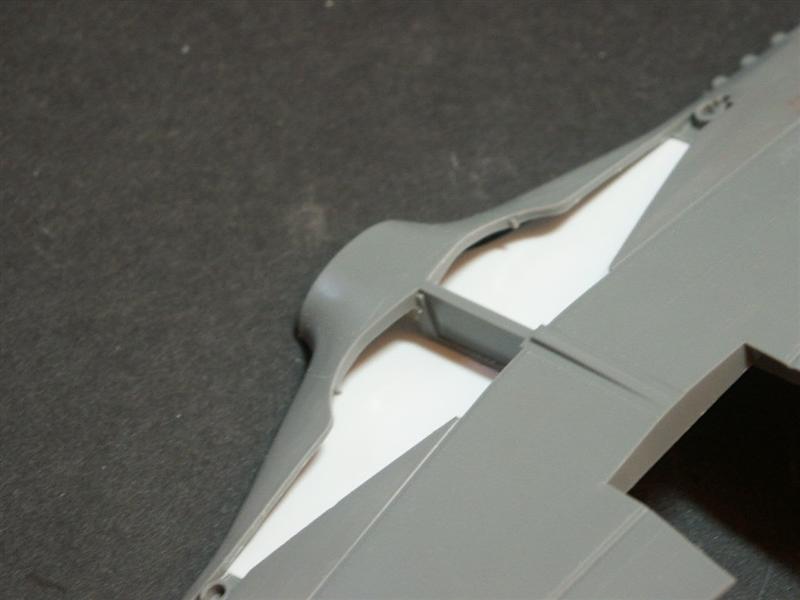
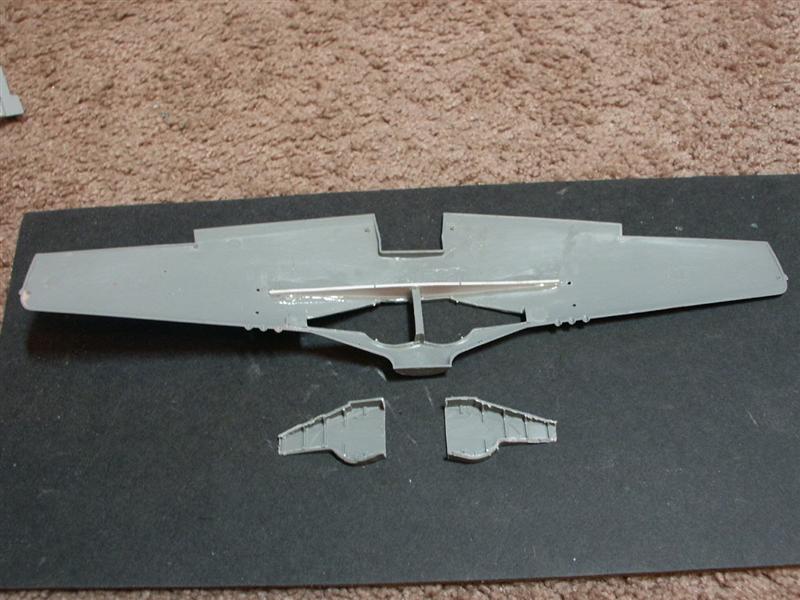
Here's a view from where it counts. Spar is now in it's correct location, and the view forward has the appropriate emptiness towad the leading edge and it's ready for some ribbing to be going on in here. My inner gear doors are going to be up so I won't be going to town in that area, but this is a blank canvas for detailing further out where it'll be seen. (yeah, like most people notice....most everybody looks at my models for exactly 20 seconds and says....."oh, how nice" and rolls their eyes. ) Let's move on, eh?!
-
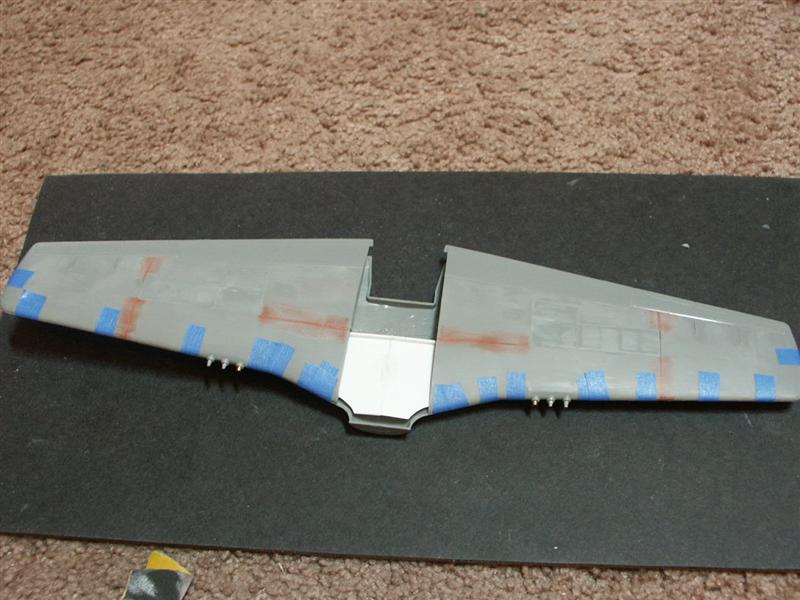
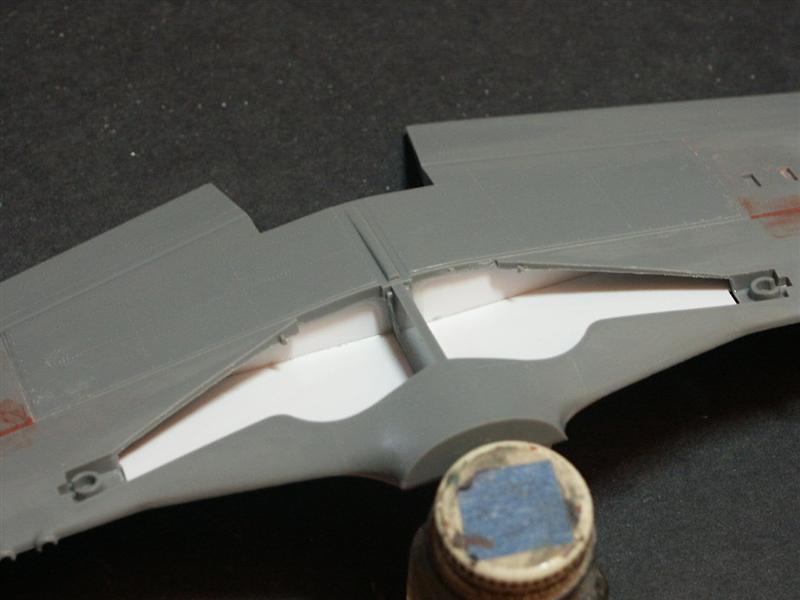
Now, just modifying the dihedral a few degrees threw off a lot of other things too like the wing root and where the front of the wing meets the fuse. But it took mercifully few swipes with a sanding stick to get everything lined back up with no huge putty chasms. Everything still fits tight, which is a beautiful thing considering this will be a NMF. OK, put some styrene back into the wheel wells to give me a 'roof' to put some ribs back into place and busy those up again. Views from the top;
-
Bahahahaha! Well Matt, I'm just crawling with elves (and I'd love to shuffle some up north for ya, they'd make great 'Elvis-snacks!), but it's a trial keeping them in the lifestyle they've become accustomed to. Darn yakkity spoiled rotten things require a ton of pudding cups and pop-tarts to keep em wound up enough to pound on models at all hours. Grrrrf, they're creepy little things too, and quite rowdy. They're starting to stink too,....I'd better hose em off. Hmmmmm. But I digress; Well Rick and Raphael, after throwing the chicken-bones up in the air and doing my spastic voodoo dance/chant for enlightenment.....,the bones said to squeak in at 172.5 degrees. This matches up with what Dragon did with their wing, so everybody can cast stones in their direction. heh heh. Just a manatee-hair less than what Raphael says at 170 degrees, and a yak-whisker more than what it came with. Whoohoo! Here's a shot of the wheel-wells chopped out and a new spar afixed into position. Can't believe what just 2-1/2 degrees did to the dihedral. I like it.
-
So yeah, even though it's only about 1-1-/2 degrees difference, look what it does to the dihedral of the wing. Elves already have their masks and hands sanitized and surgery on the Hasegawa wing has already commenced. Might take this opportunity to correct that spar location? Dunno, I'll have to see what-all gets chopped out eventually. Thanks for the timely info Raphael, if nothing else detail-wise....I want to get the basic shape right on this build. That dihedral is a big part of it. Keep an eye on me buddy, I'm no Mustang 'smexpert' and I'm just trying to bumble my way thru this thing in anticipation of doing a few more. More pics as this progress! (regress? ) Later, Russ

-
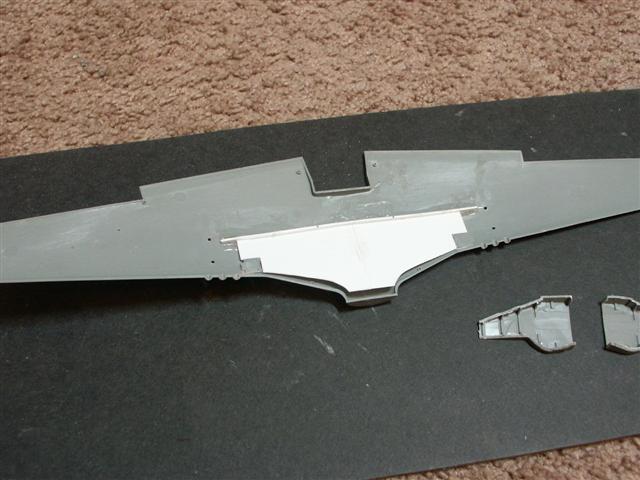
Here's the Dragon wing. First impression was it's got too much dihedral according to my jig, but not thru the centerlines of the guns. 2 red lines are now parallel even though there's a gap of 3mm (?) at the wingtip. Interesting.

-
This was definitely a lesson in 'illusions', and as usual.....know what the magician knows and it's no longer 'magic'. Here's the Hasegawa wing laid out in the jig with a line thru the center of the wing root thru the gun openings. Yeah, the wing is 5 degrees of dihedral, but not thru the plane of the guns. It IS about 1-1-1/2 degree low. The 2 red lines should be parallel.

-
OK, here's the jig set up with the Hasegawa wing on the bottom, and the Dragon wing on top. Can't believe while I was robbing parts off the Dragon kit, I never thought to take Raphaels suggestion of taking the wing out of the cellophane mocking it up and comparing the two. Doooooh! Well, without knowing the dihedral was 5 degrees THRU THE CENTERLINE of the guns I wouldn't have known whether either was correct at the time. Note the difference in the angle of the wings. BUT! Notice also that the Hasegawa wing is exactly at 5 degrees of dihedral?! This gave me pause until I remembered Raphaels concise phrase of 'THRU THE CENTERLINE' of the guns. This changes the entire equation and angle of the wing! Whoohoo! Soooo, this is what I meant about Hasegawa getting the it sorta right.

-
Whah hah! Well this update might interest a few persons thinking of building up the Hasegawa kit for sure. (Don't follow this guinea pig Big Matt, we'd BOTH be running on that funny little wheel getting nowhere quick! ) Heeey Rick, howse my buddy getting on with his new year?! Ya know, I thought the dihedral looked OK too.....and it is..... but only too a point!!!! Thanks to Raphaels hard numbers he was so kind to provide (THANKS my friend! ) I decided to do a little experiment earlier. Had the elves busy making up a jig of sorts to actually see what was going on here,....and it was quite the epiphany! Enough blatherings; let me show ya'll what I found out with a little help from Mr. Geometry. (gah, I'm on vacation and doing 'cipherings' was kinda tough) Here's the start of my jig. 5 degrees (I got 175 degrees Raphael?) from the horizontal.

-
Full-on rear view to show what the kit gives. Doesn't look off to me, but I dunno? And from the front. If it's off, it sure is real close? I'll check back later on tonight after I have my nappy-time (geting old is Sooo soothing.) and see what the vote is. If I don't hear nuthin, I'll just go on my fat,dumb, happy way and do it like this. Later all, Russ


-
Alright, time for some dihedral pics. Until I get a consensus otherwise, this is pretty much where it's going to be. Got an afternoon for my primer to dry before I start slapping this together, so I'll check back later on tonight and look for input. From the rear; Slightly different angle;


-
That's enough fuse pics; I just like this one cuz it shows off that cool Masterdetails pilot so well.

-
Oh yeah....., that cowling is looking much better now. More of a profile view. I can't hang with this kit canopy, and I want a clear rear-view mirror blister on top....so looks like this will end up a master for a new vacuformed version. Lotsa fun, whoohoo!
-
This model will have the shrouded exhausts, I'm just not thru playing around with these off the PCM Spit yet. Nuther view;