

Kahunaminor
-
Posts
938 -
Joined
-
Last visited
-
Days Won
2
Content Type
Profiles
Forums
Events
Posts posted by Kahunaminor
-
-
Rohan,
Have a look at this eBay link for the Pacific version at a good price:
Regards,
Kent
-
Steve,
You will like the kit!
Regards,
-
Gents,
The A6M2b can be had at Sealmodel (used to be ericcymodel) here:
http://www.sealmodel.com/product_details.php?category_id=78&item_id=7
for a reasonable AUD price.
Regards
-
The modelling world and the world in general are a poorer place for his passing.
Vale Dr Charles Metz
-
Fix them...you know you want to...
Noice Kev, real noice.
Regards
-
Very very noice.
Regards
-
Looks great Kev,
Nothing to be sneezed at there.
Regards
-
Great stuff!
The radio bay looks the goods too!
Thanks for sharing.
-
Cool build!
I have a couple of those upstairs. I hope they turn out as nice!
Regards
-
Hello all,
I present my latest off the bench. This build had a bit of a hiatus due to a decal problem and the 190STGB. I had a problem with the decals not adhering properly. It was the first time I had used Red Roo decals so I fired an email off to them and explained the situation. Not only did Gary Byk of Red Roo supply a replacement set, he gave me sufficient sets to conduct some experimentation to remedy the problem and even offered some salient advice. That is GREAT service in my book.
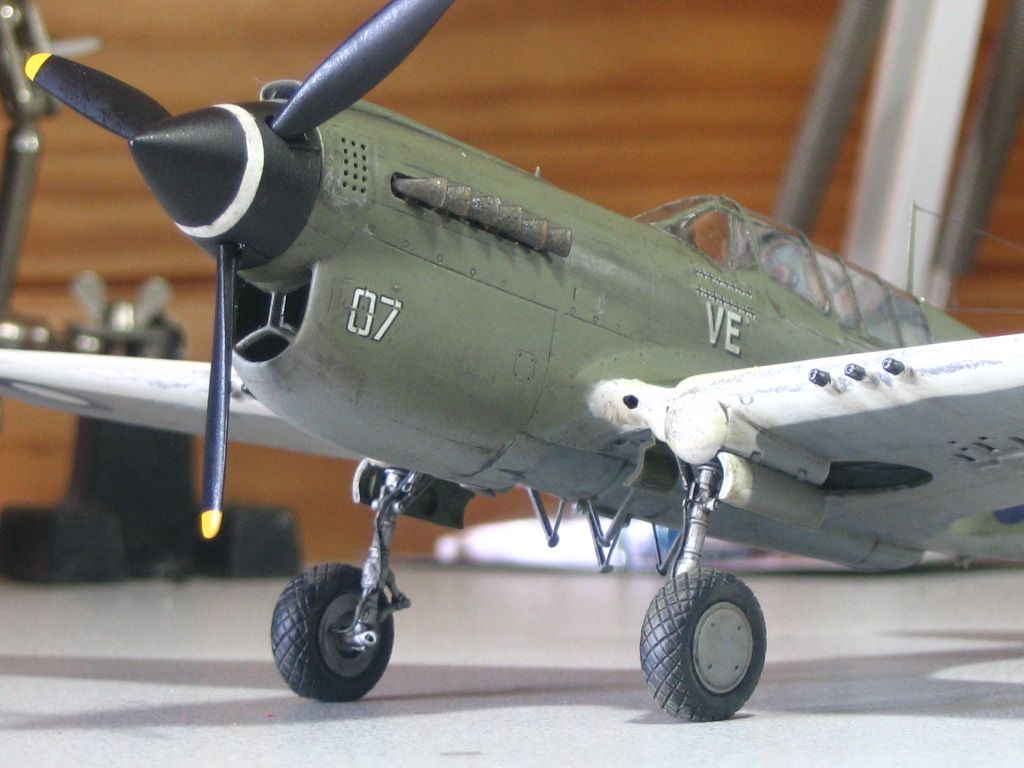
Anyway I digress. The kit is the Hasegawa P40-N kit. I used Red Roo decals, remnants of the Eduard P40-N PE set, Ultracast exhausts and wheels, MM enamels (faded OD, Neutral Grey, Insignia White) and some lead wire for the brake lines. Finished with a Future clear coat and Dullcote out of a spraycan. Tamiya weathering sets, Flory dark wash and Ezyline for the antenna.
Photos show that this a/c was particularly weathered on the white ID strips on the wings and I tried to represent that by going a little ballistic with the silver pencil on the leading edges.
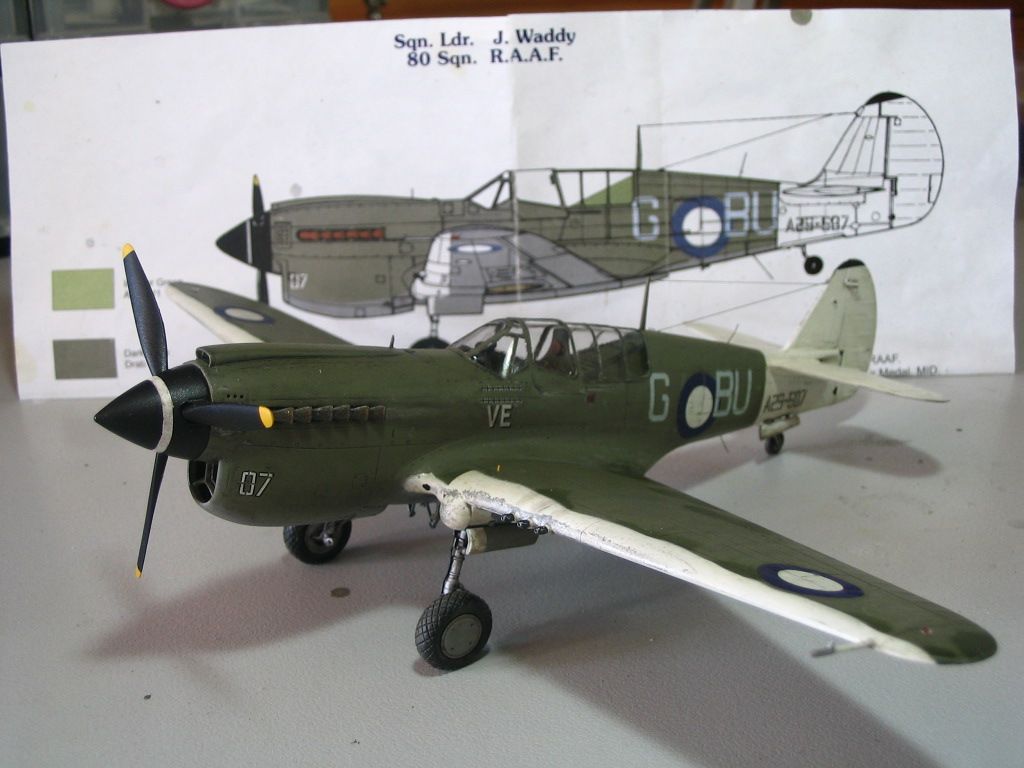
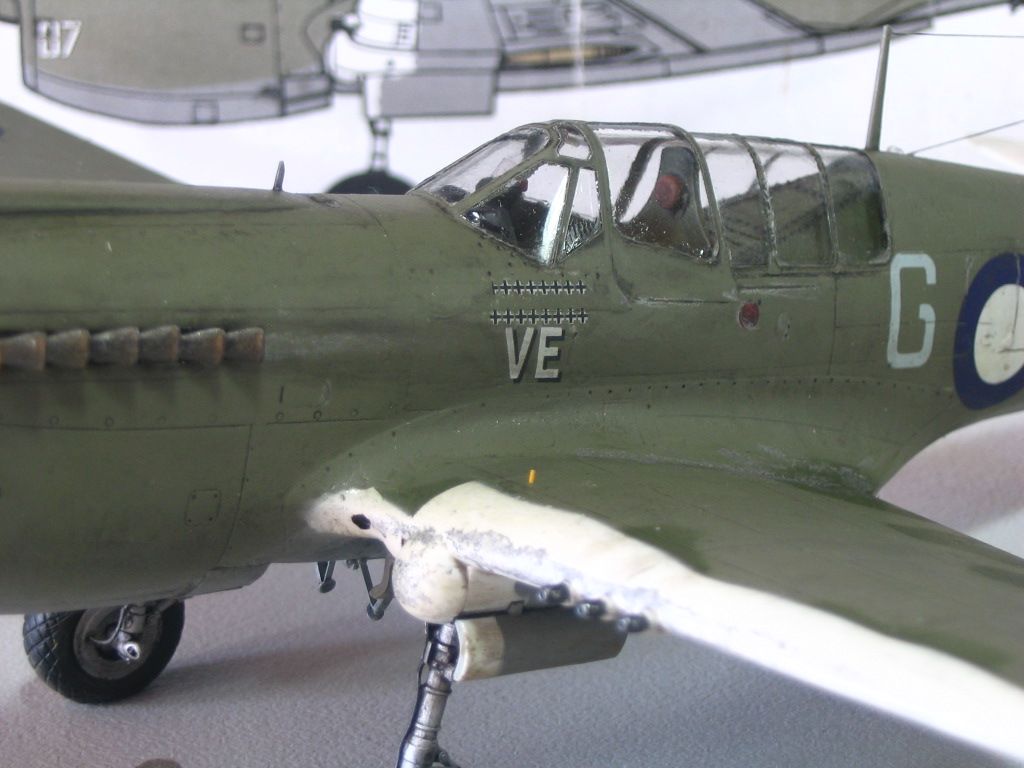
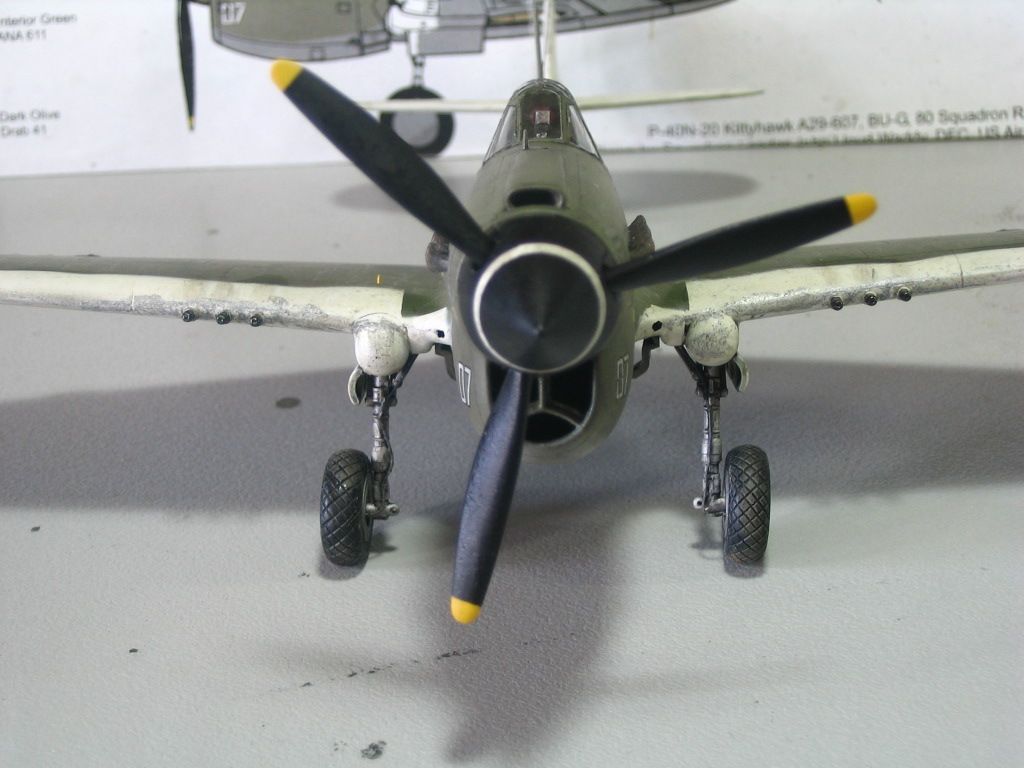
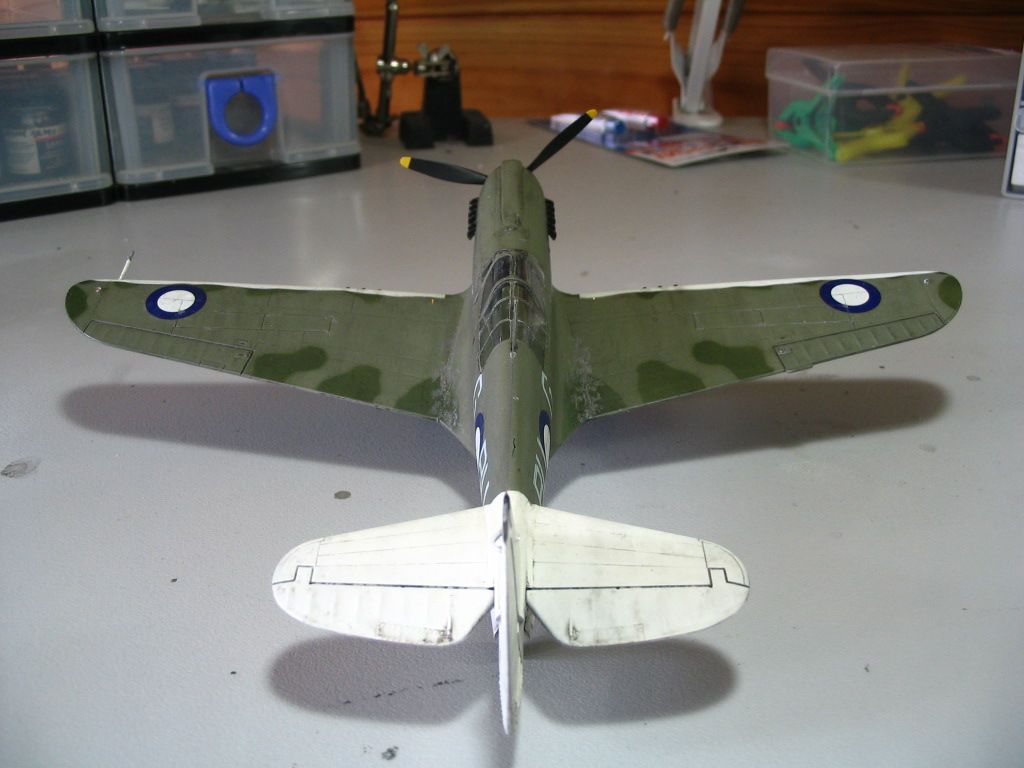
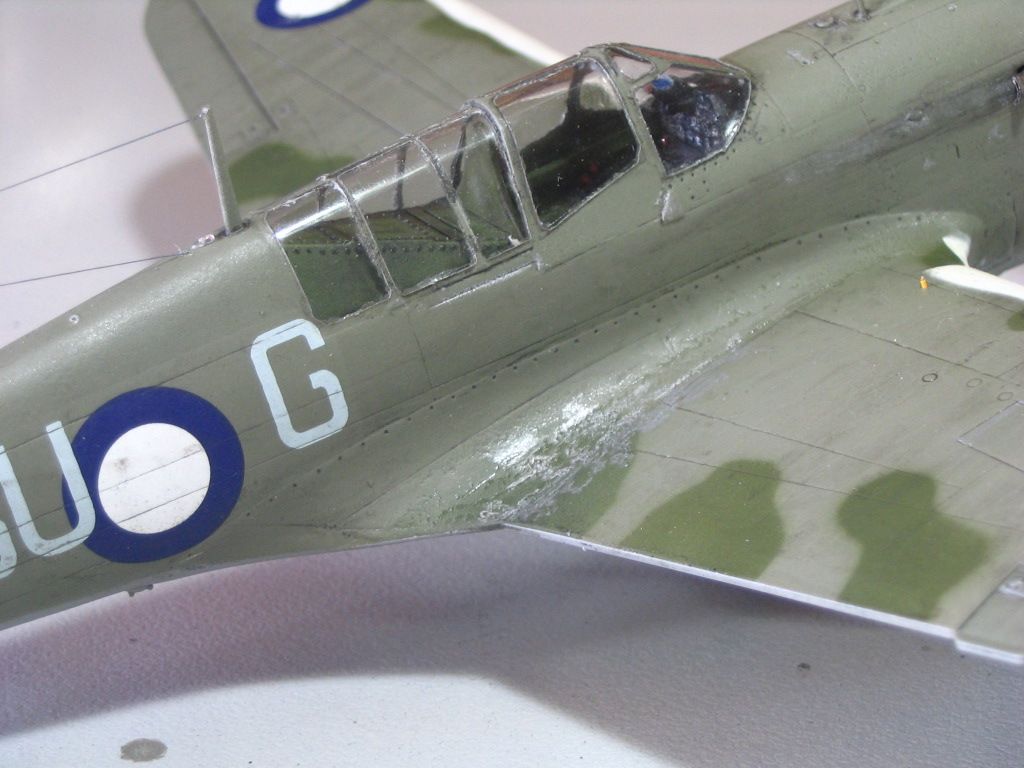
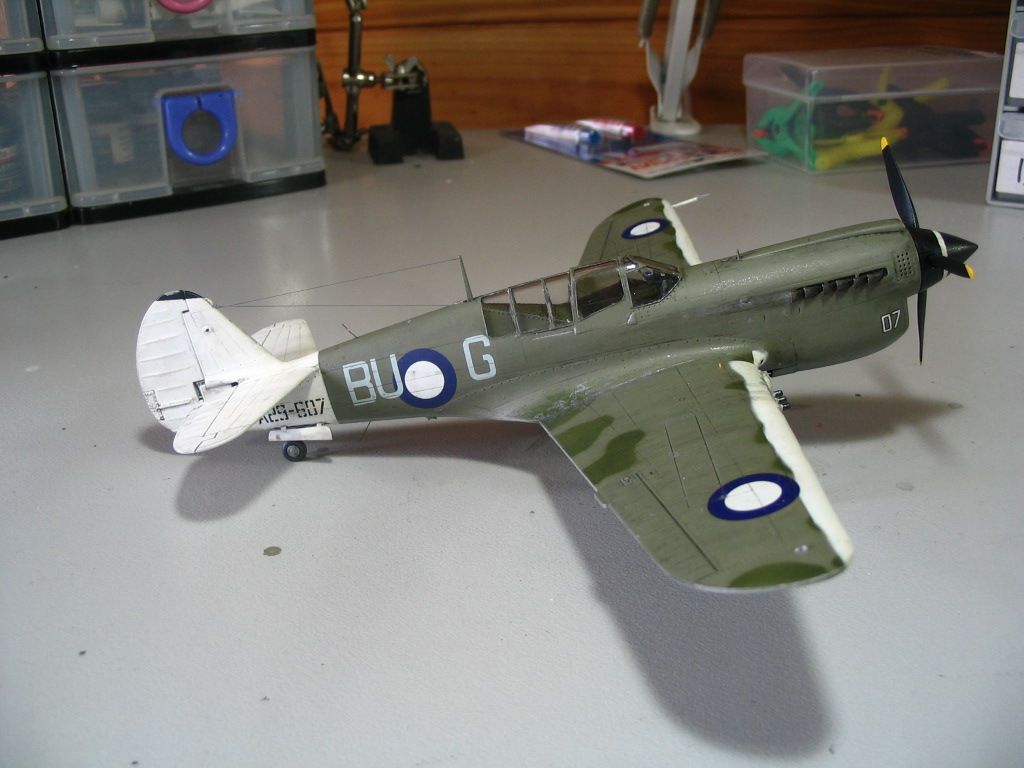
Some valuable lessons re learned like always let the Future cure properly (an hour IS NOT enough) before adding the Flory wash and small a clear plastic part can launch itself 10 metres! All in all a bit of a labour to get it off the bench and probably not my best but it looks good in the cabinet. Thanks for looking and please comment if you see fit.
Regards,
-
Oh the pain...the pain! (in my best Zachary Smith voice with all due respect to Jonathon Harris!)
Regards
-
Thanks Kev,
I have a Trimaster D9 in the stash but haven't looked at Dragon. I think it is not a Tamiya kit and the engineering is such that there are less "tolerances". By that I mean you need to ensure your parts are well prepared and dry fit before assembly. The much maligned 4 part cowling was a little trying but not the beast it has been portrayed as. You just need to take your time and approach it logically. The MLG attachment is different but once the retraction gear is added, it appears stable and looks the goods as far as angles are concerned. All in all i enjoyed the build and will have at some of the others in the stash.
Regards
-
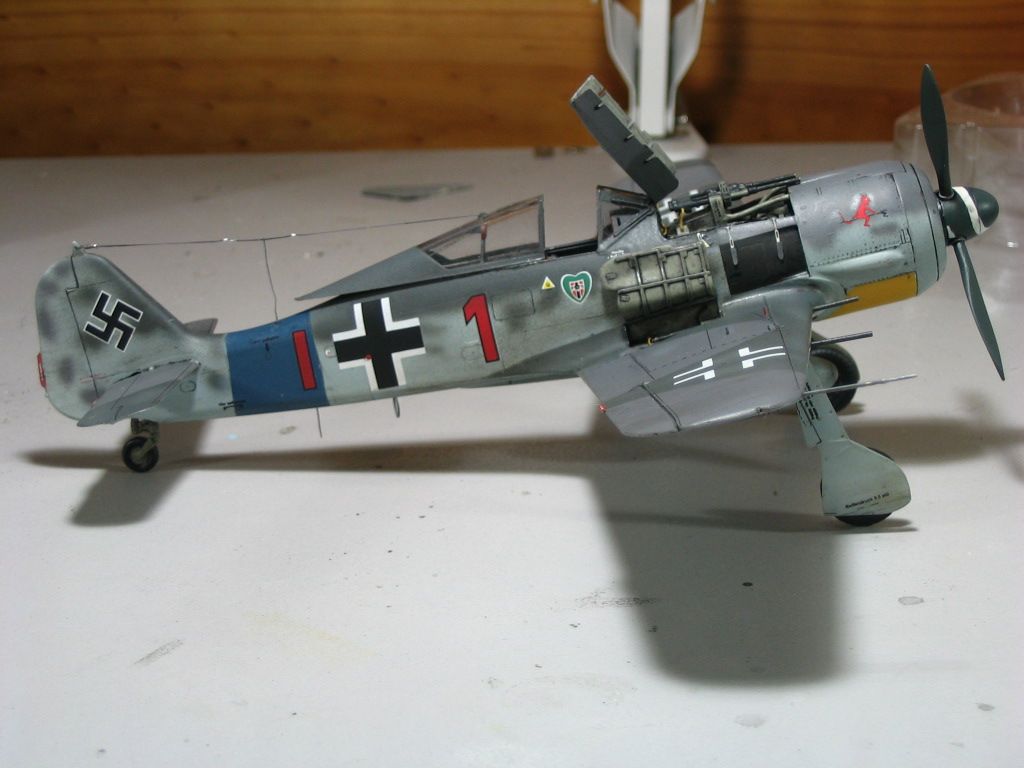
I built this as part of a STGB over at BM and you can find the build thread at http://www.britmodel...topic=234912857 . It is the Eduard Fw190A-8 flown by Hans Dortenmann France as part of 2/JG54 in 1944. The kit has a reputation for being difficult and it certainly presents some challenges but they are not insurmountable.Here are some finished photos:

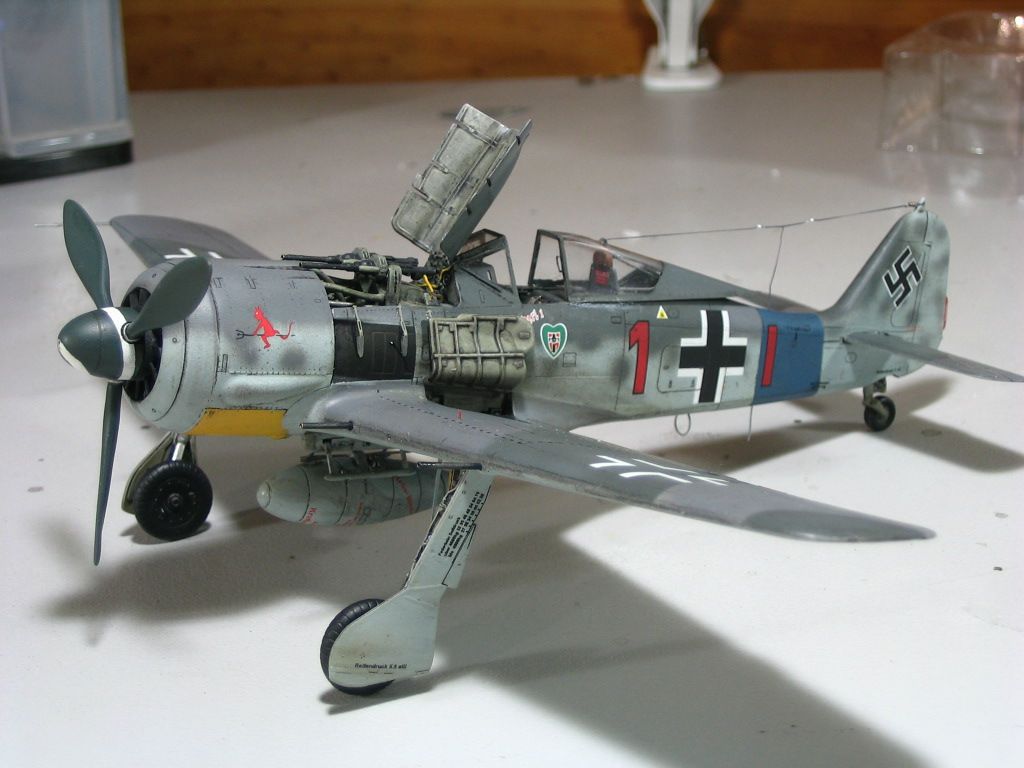
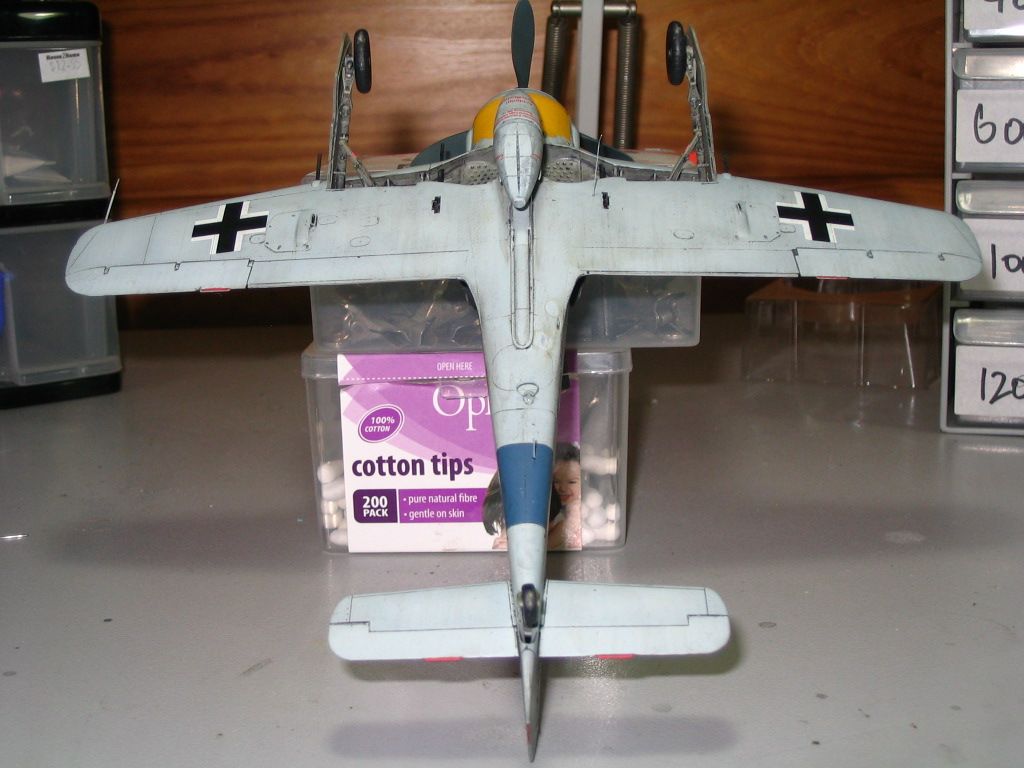
Regards,
-
Bravo Radu.
The whole cockpit looks great. Shame about those belts though, you think you could have fixed those
 (you know I am taking the mickey).
Regards,
-
Good to see you back at this Kev. Well done on the save
I have been a bit distracted with a small scale FW190 GB on BM but I hope to be back soon.
Regards,
-
Bravo, bravo!
A great build and complements your Me 262 so well. They must look great together!
Regards
-
I managed to leave my camera at work this afternoon so just the one pic for now.
Cheers,
Wolf
"Just one pic for now" he says but what a pic. Wolf this has been a true adventure watching your work unfold. Thank you so much!
Regards
-
Yeah mate, it's Hannants!

Kev
You are quite the wag Kev!!!
Regards
-
Well I'm not responsible! Ask anyone!
Kev

-
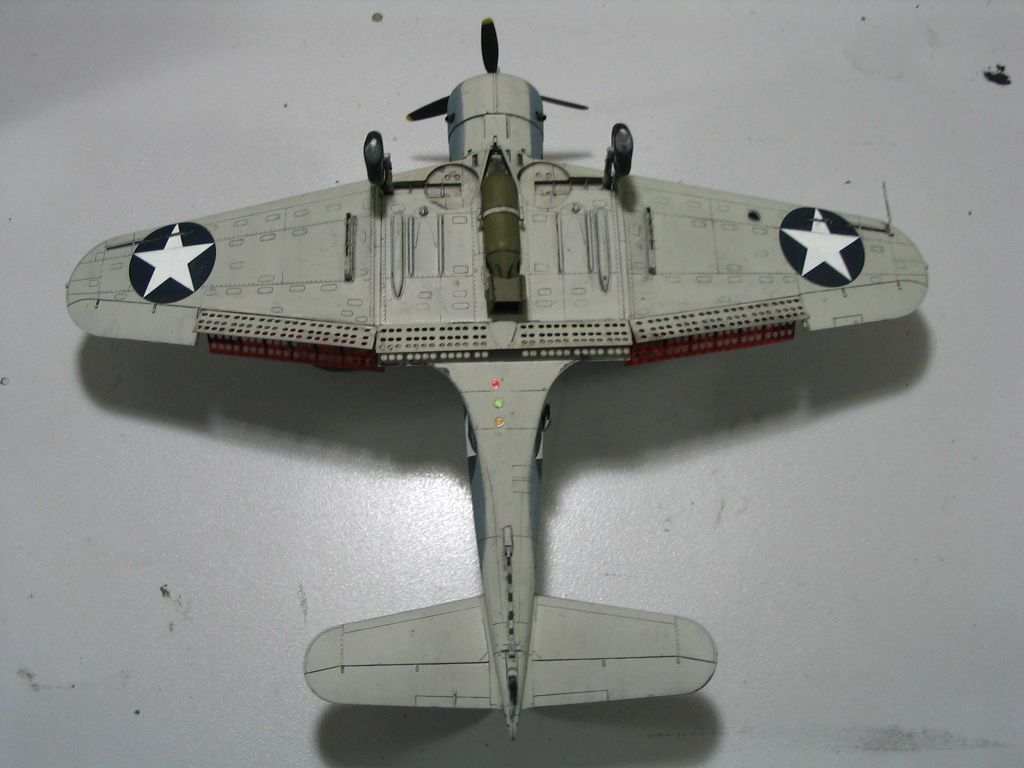
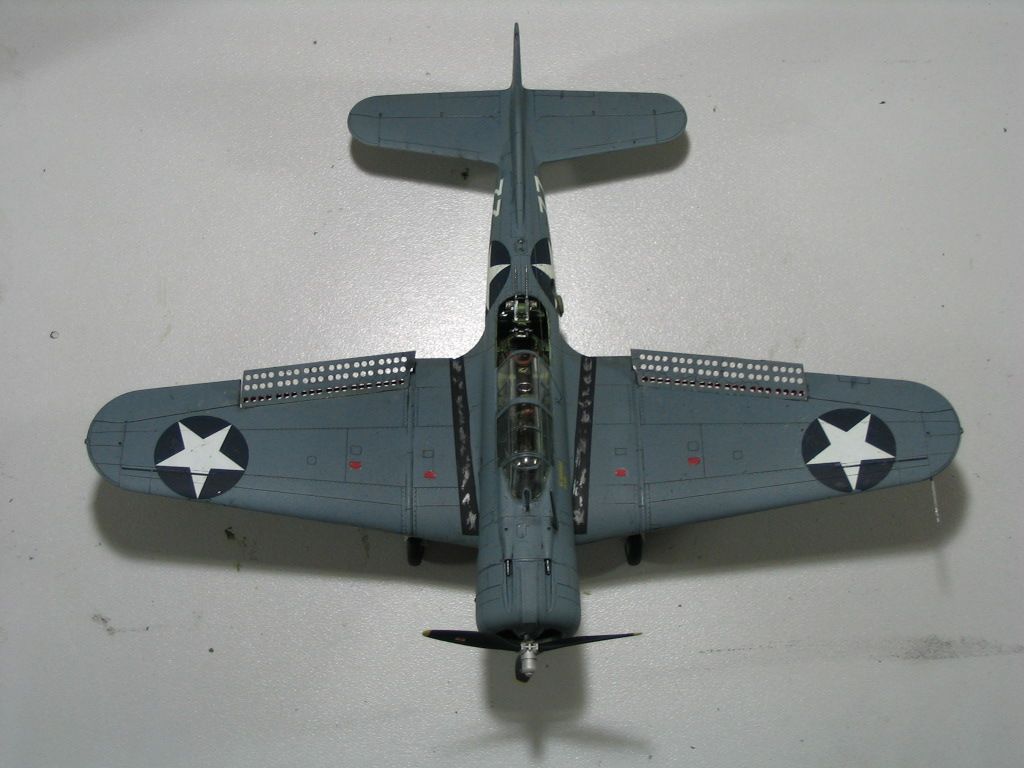
Great to see the end result in all it glory Kent, and what a terrific result it is too. Congrats on your well-deserved award. You might like to know that I was inspired enough to pick up an Accurate Miniatures SBD-3 kit since you started posting this.
Kev
Thanks for the kind words Kev. However, I cannot be held responsible for your purchasing practices!!

Regards
-
Ooh ooh! Watching this one. Thanks for sharing Radu!
Regards,
-
Photographs Man ..Photographs...Cant wait to see the end result...

I finally got my A into G and took some photos. The gunner's canopy experiment didn't work so I left it off after seeing some pictures that showed them without it. Very pleased to say it took a 3rd place at my club's competition on the weekend.
The pictures:
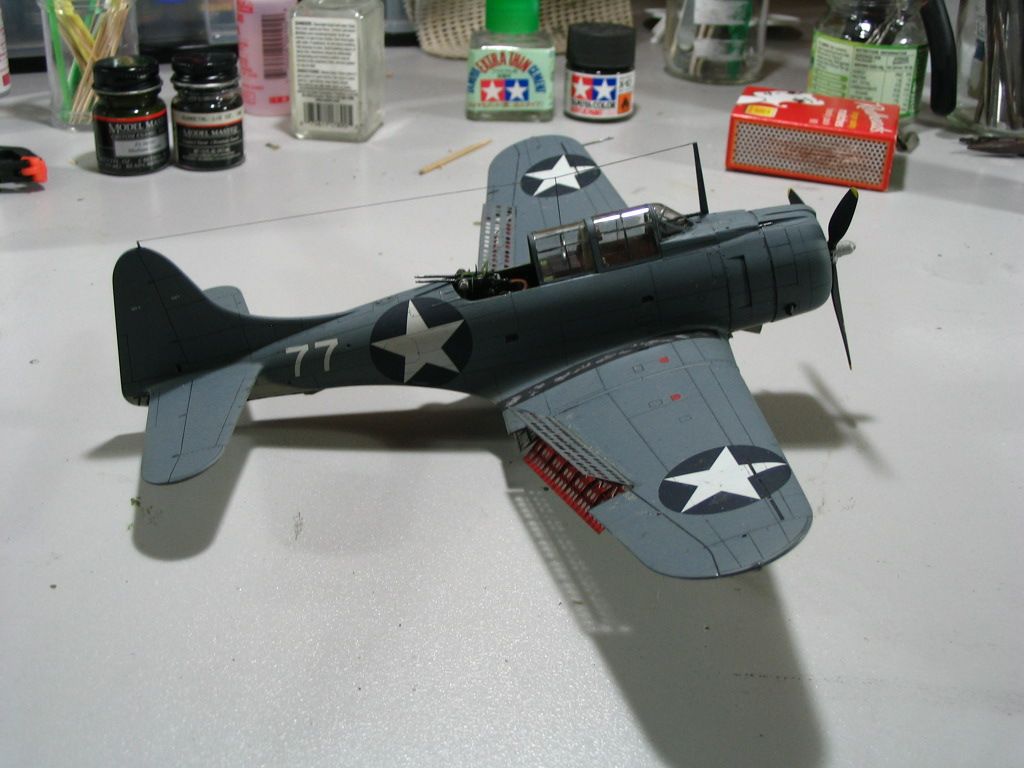
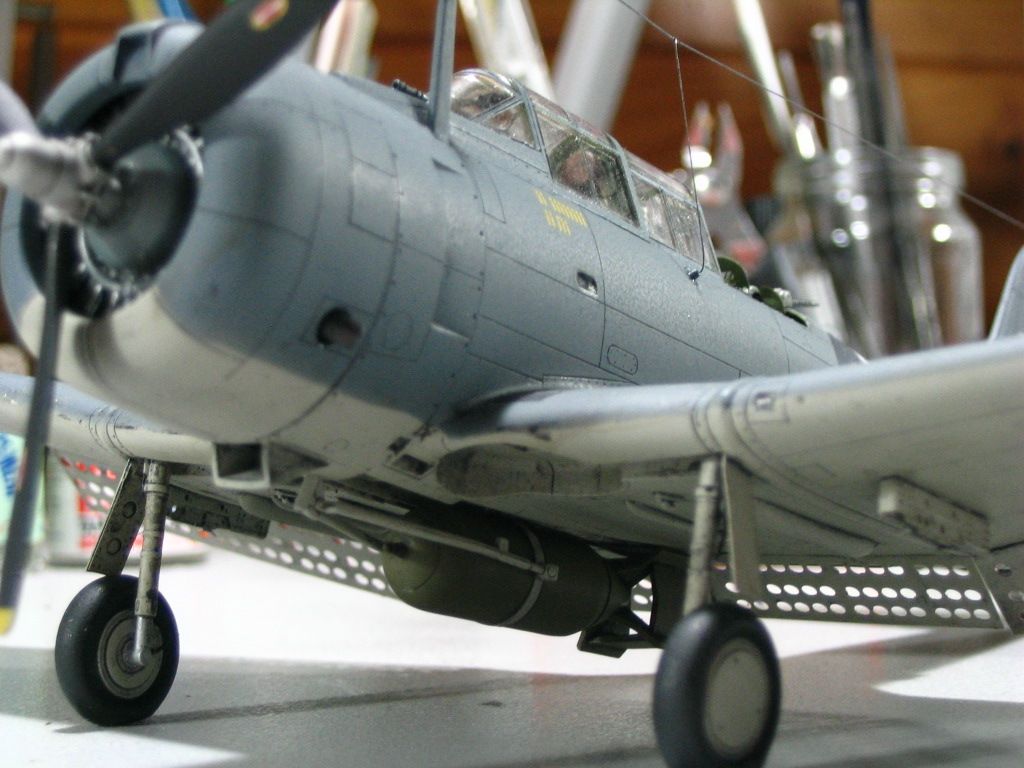
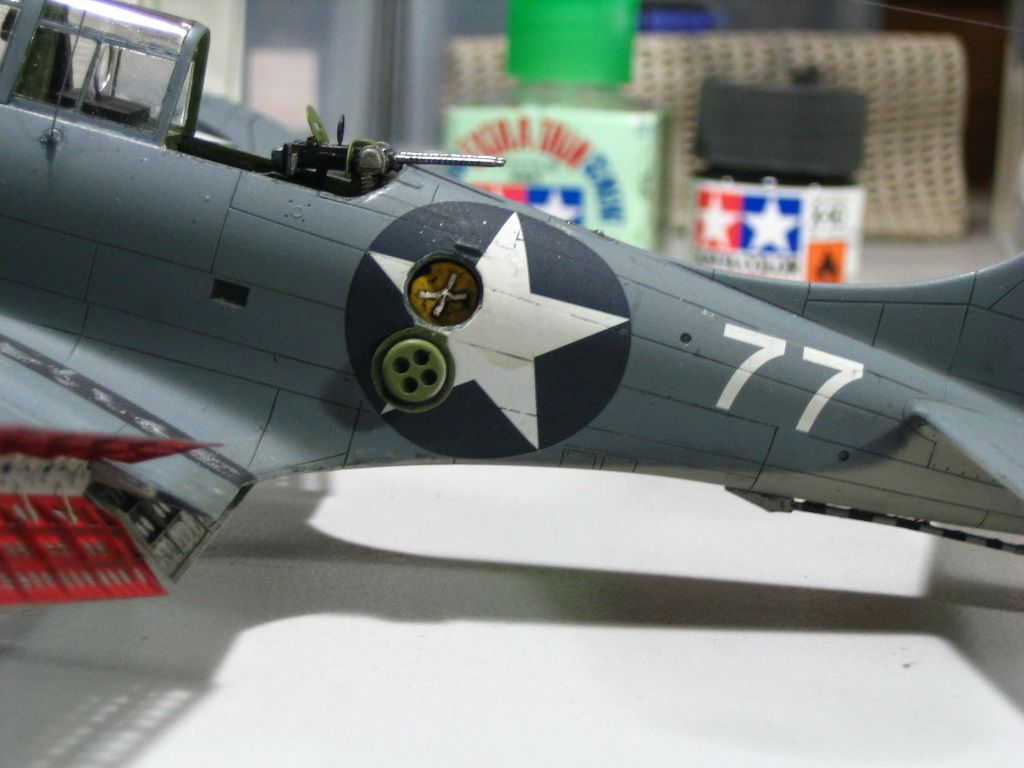
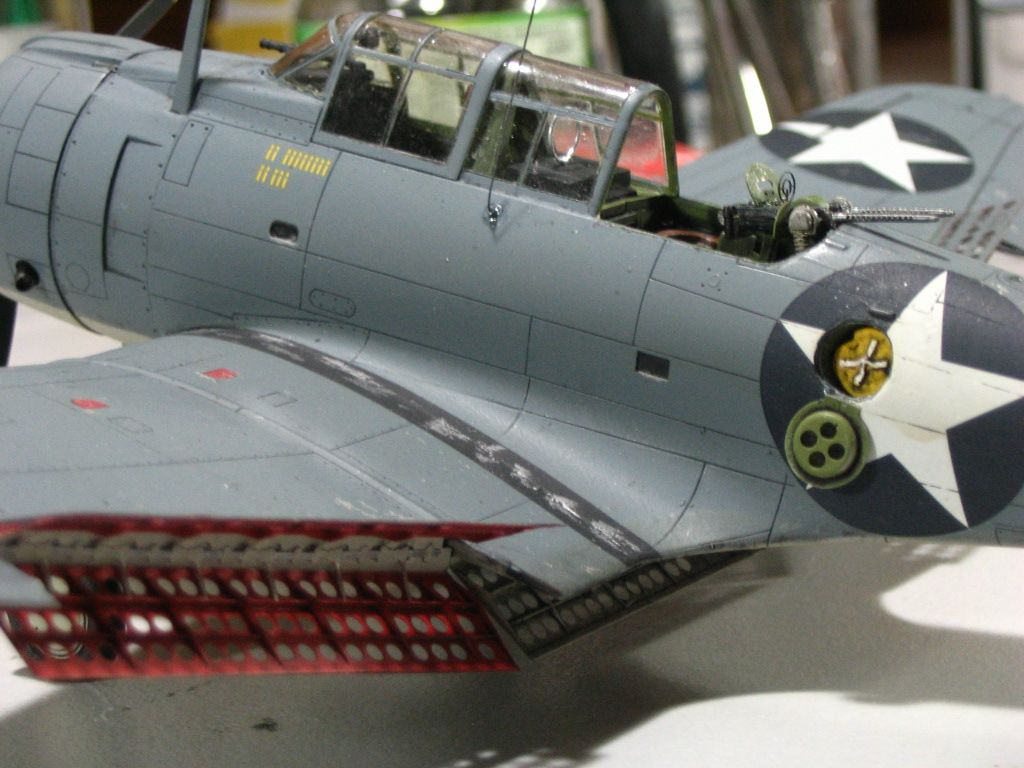
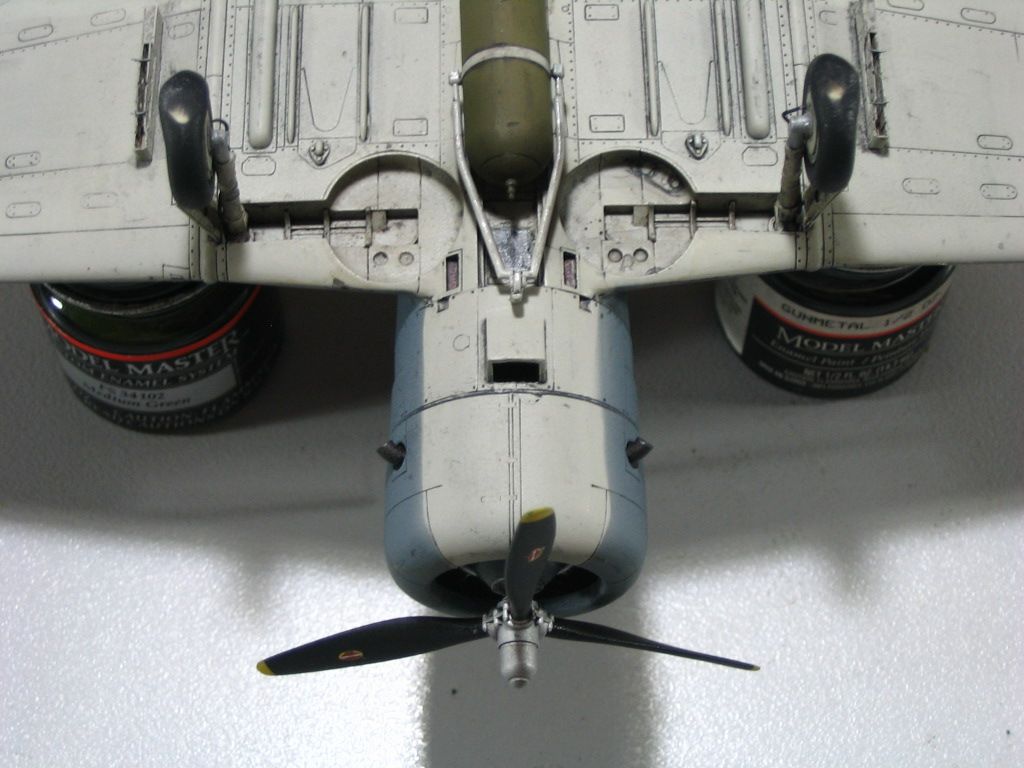

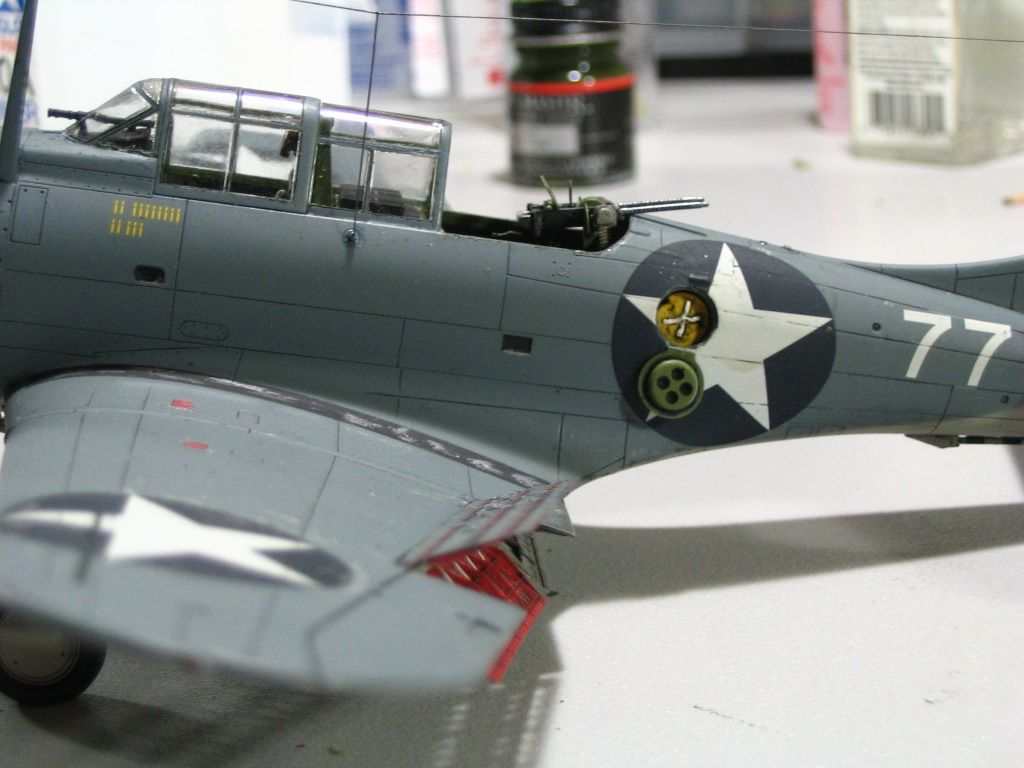
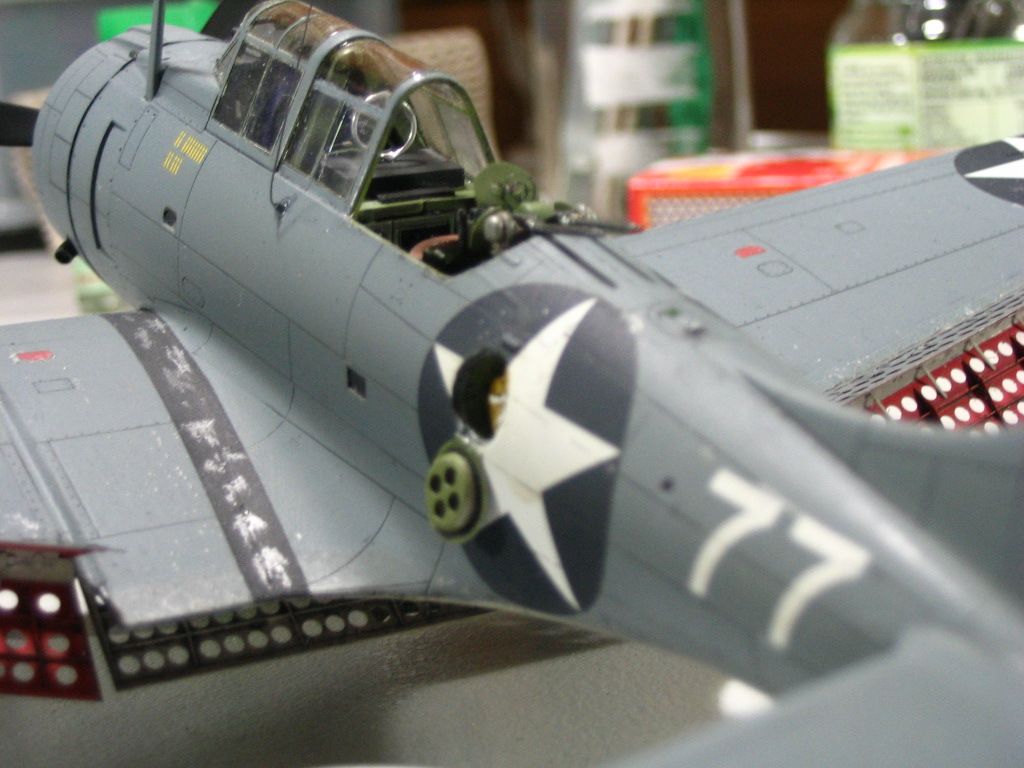
Many thanks for looking,
Regards
-
Good morning all,
I was reading the latest Eduard newsletter and saw their first foray into the "Big Sin" sets of their Brassin line. It is for their own 1/32 Bf109E and includes the wheels, engine and MG 17 mount sets. I know that Nick Mayhew used the engine in one of his builds but I have not seen the MG17 mount mentioned before. Here is a link:
http://www.eduard.com/store/Eduard/Brassin/Aircraft/1-32/Bf-109E-MG-17-mount-1-32.html?cur=2
Has anybody used it in a build? The photos look quite good (as they all do!) I am very tempted to order a set, knowing that Nick had some issues with his engine, but was looking for some feedback from somebody that may have used the gun mount.
Regards
-
So, I decided to spray a flat clear coat over the top of all the prepainted stuff to facilitate some weathering later in the form of filters and pastels. This will 1. allow weathering, and 2. allow me to alter the color a bit if needed to get it closer to the correct color, though I don't see much if anything that will need to be altered.
Great stuff you are doing, congratulations!
I am just wondering if the same result can be gained by appying a coat of Tamiya metal primer to the P/E?
from my experience it dries clear and flat.
Keep up the good work!
RAAF P-51D Mustangs
in LSP Discussion
Posted
It rounds out to US$130 with postage but still vastly cheaper than here or even my usual on line haunts so I grabbed one.
Good luck,
Regards