

Tudor Gh
-
Posts
75 -
Joined
-
Last visited
Content Type
Profiles
Forums
Events
Posts posted by Tudor Gh
-
-
So here's something different I decided to build. I made it for my friend's birthday, and I managed to take some photos just before it was delivered.
The kit is from Dragon, containing about 800 parts. The tracks were my favorite part to build, 101 individual links on each side. Tracks were painted with dark steel, weathered with a brown wash and a silver dry-brush. The chassis and upper structure were painted with sand, followed by brown and green, weathered with a light brown wash. Scratches were added with by metallic dry-brushing. The armor plates were an interesting feature, being made from thin aluminum sheet.
Enjoy!
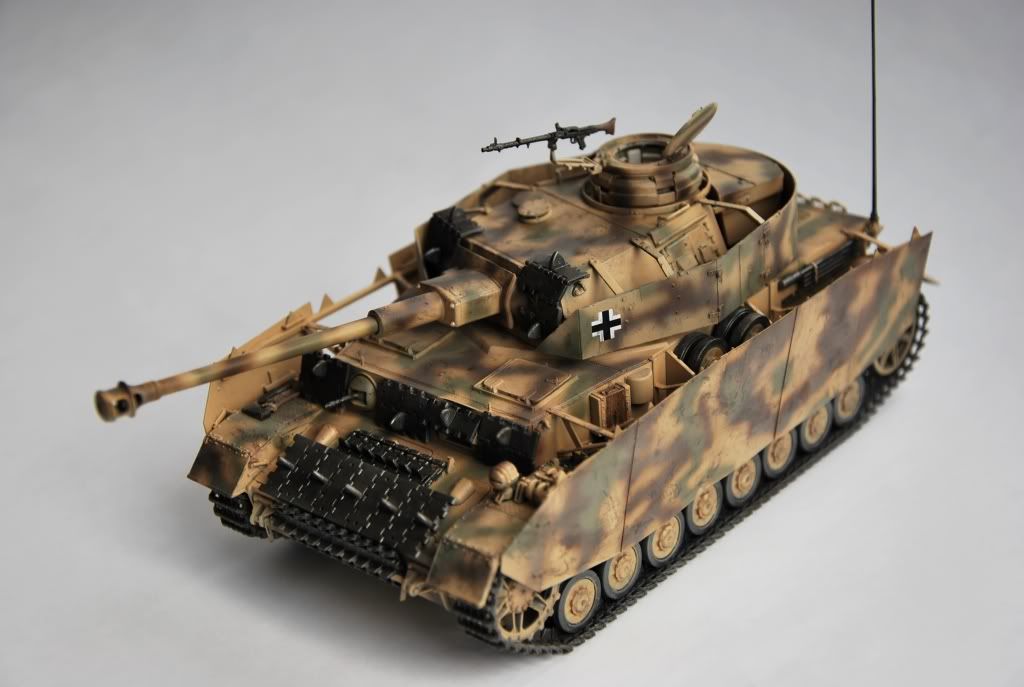
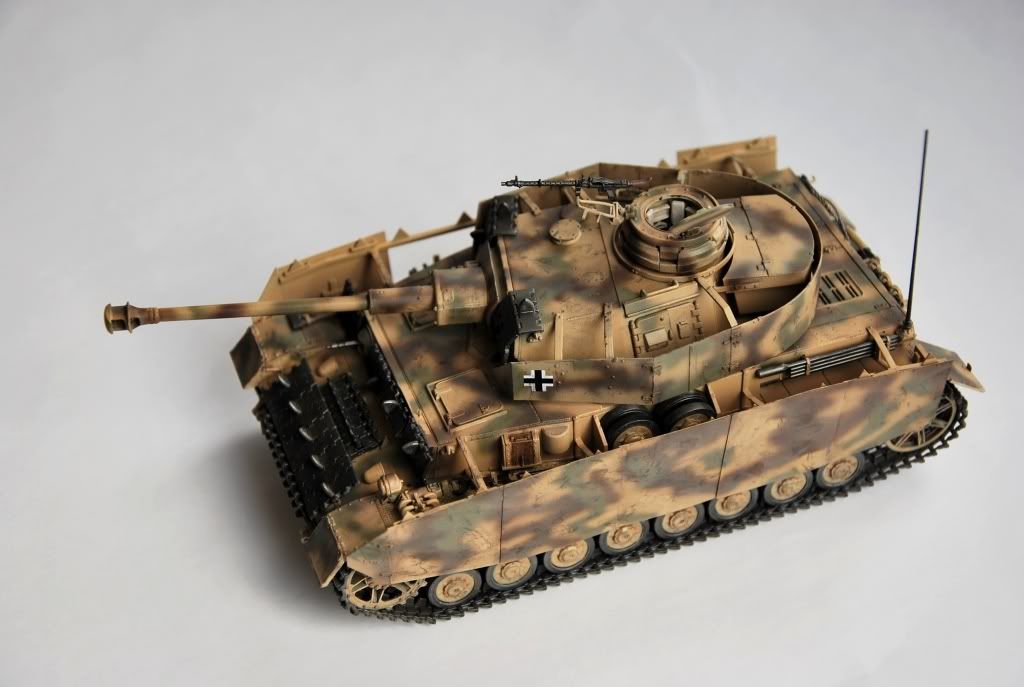
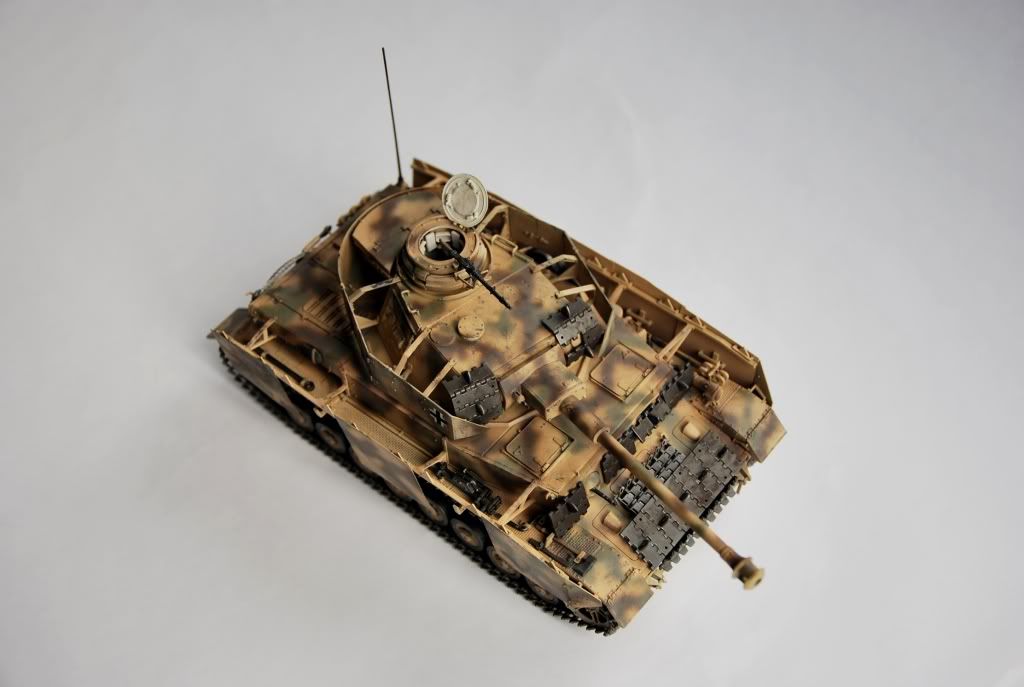

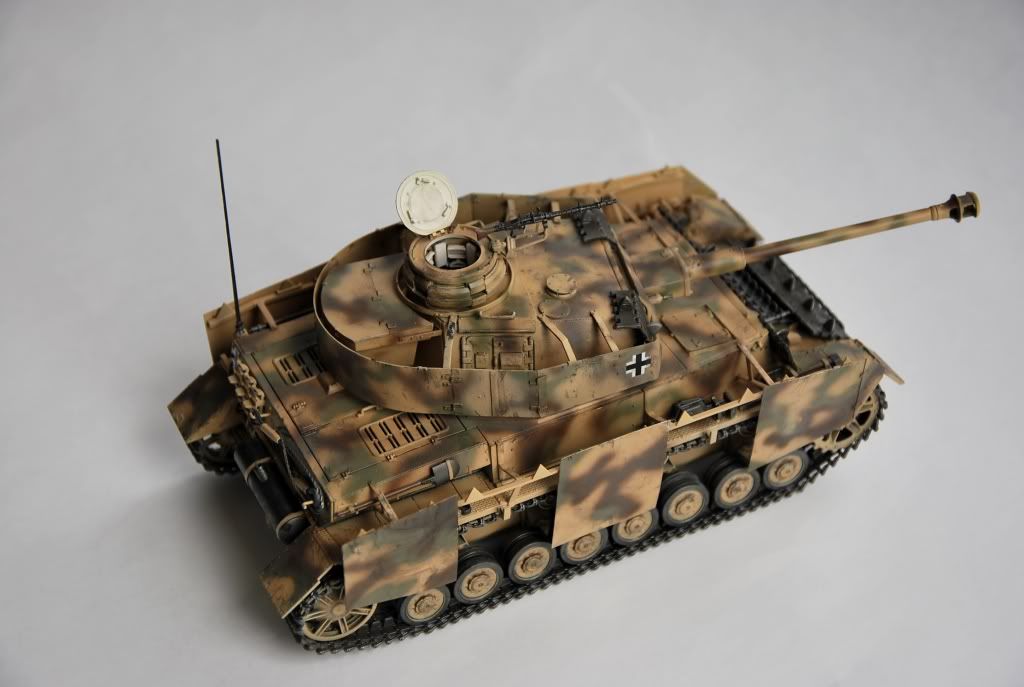
Tudor
-
I have to say my jaw dropped.

I've never seen such an awesome Dora build before. Motivates me to go back to my 32nd Dora and renovate it

Tudor
-
Have a mixture of armor and aircraft projects completed. Also, in various scales! (48th and 32nd, and 35th).
Enter IPMS Vancouver 2011 again.
Finish my stash (which is only 4 models)
Tudor
-
Been closely following your progress. Absolutely fantastic! The sheer amount of detail work is...breath-taking!

Tudor

-
Tudor,
looks great
i can't see anything out of place or untoward at all really, save for the white in the decals looks "Hollywood white" (you know, chessey Tom Cruise super-bright-teeth grin white!
 ) but maybe that is just the lighting?
your airbrushing skills are certainly top notch, and if i can replicate that sort of control when i (finally) get round to applying the camo on my build, i will be very pleased indeed!
thanks for sharing you work, it was a pleasure
nick
PS what armour you going to do then, and where do you post that?
PPS don't forget to put pics up in the Ready For Inspection forum here btw
Thanks for the feedback! I will still add small touch-ups as time goes. I agree with the "white-ness" of the decals. How do you suggest I should darken them?
For now, I am working on a Panzer IV Ausf H for my friend's birthday, 1/35 scale from Dragon. I plan to build another armor kit for myself, maybe a Jagdpanther, or a Tiger or a StuG. I'm not sure where I'll post it, maybe missing-lynx?
Tudor
-
Thank you for the feedback! Please don't hesitate to point out anything that seems faulty or such. I'm always looking for improvement.
And Allok, I dedicated all my efforts to finish it before IPMS Vancouver 2010, which was this past Saturday. So yes, quite a fast project

Cheers,
Tudor
-
Here's some spoiler pictures! I'll have to work on some better lighting and re-take them. But I figured it'd be nice to show these ones!

-
Well, the plane was finished last Tuesday night, and today I went to IPMS Vancouver 2010 with it. Unfortunately, it didn't win a spot in its category.
I will however, post some pictures and submit an article of the finished build very soon!
Tudor
-
OMG.

I noticed you cut the flaps, too!! And added the Eagle Editions wheel!
I'm gonna "borrow" your idea and add some hinges to my flaps, too...gotta figure out how to end this project by the end of this weekend or mid next week.
Excellent, amazing work so far!
Tudor
-
So, in order for me to use a "turned position" tail wheel and dropped elevators, do I have to pull the control stick back?
Thanks,
Tudor
-
This is my first time entering a contest, so I'm not sure how the judging works

However, I cannot cut my rudder out - it's been painted, glossed and decal-ed
 But you can definitely cut out your rudder and put it at an angle. That I do know has to come with a re-positioned stick.
The tail wheel is swung left/right as the plane is parking, right? Let's say the pilot was parking, and turned left a bit: the tail wheel is definitely turned left, but I'm thinking he would (after parking) also move his joystick, hence moving the rudder. So, both options for the rudder are fine, but the wheel is "fixed", if you know what I mean.
Once I get home from school today, I'll look into the two volumes by Jerry Crandall, and see if elevators are dropped/droopy when parked and other such details.
Cheers,
Tudor
-
Great great work so far!!

I'm literally afraid of looking at your work, as it overshadows my project on the same plane!!

Looking forward to more pictures,
Tudor
-
hang in there!
did you decide on what you were going to do with rudder and elevators?
i am still mulling over buying the BlackDog resin rudder and elevators for my build, but i too am a little unclear about how to pose everything
i was thinking rudder at slight angle along with tail wheel (if my resin permits!) and elevators "flopped" just slightly
what do you think?
hope you get your parts in time
Nick
I have looked at the Black Dog resin set before engaging in this project, but I thought I could get away with cutting my own elevators (which I did). I have left the rudder in its default position (straight). I'm still not sure what to do with the elevators - I put the control stick in a an upright position, so I think that implies the elevators should be straight as well. What do you think? This being my first 1/32 project, I felt I had to limit myself to how much resin I could implement; the next projects will have increasing amounts of AM parts/resin (once I overcome my fears heheh).
Given the sheer size of your project, I would totally invest into the Black Dog tail set - it would look perfect with the tail wheel and certainly improve the overall look.
Thanks for the support,
Tudor
-
Unbelievable. I have no other words!

Looking forward to more pictures,
Tudor
-
Little update on the progress, no pictures yet.
While attempting to rivet the canopy, I managed to crack it.
 I have sent an email to Hasegawa and I am currently waiting for a replacement part (been sent on August 30th). Definitely not planning to rivet it again!
The MDC tail wheel was somehow lost during the course of building. I was left with no choice but to purchase the Eagle Parts version of the tail wheel, so I am currently waiting on that one, too (sent a week ago). That being said, I hope they arrive in time before IPMS Vancouver (October 9th).
Meanwhile, all decals were applied and since this was the first time I've used Eagle Editions decals, I was more than impressed with their quality. Currently working on the main landing gear, exhausts, propeller and antennas. All these will be added soon and pictures will follow!
The project has hit a small hiatus, but it will resume and ultimately reach completion, even with school taking my free time away

Cheers,
Tudor
-
That is...astonishing! So much detail! Very very impressive!
Looking forward to more pictures!

Tudor
-
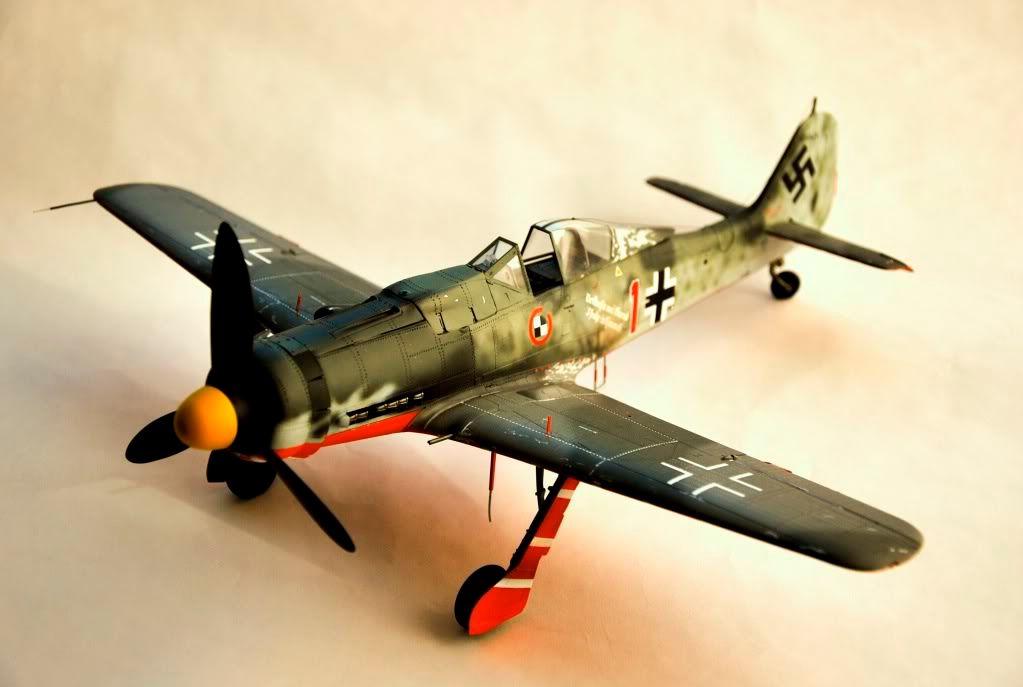
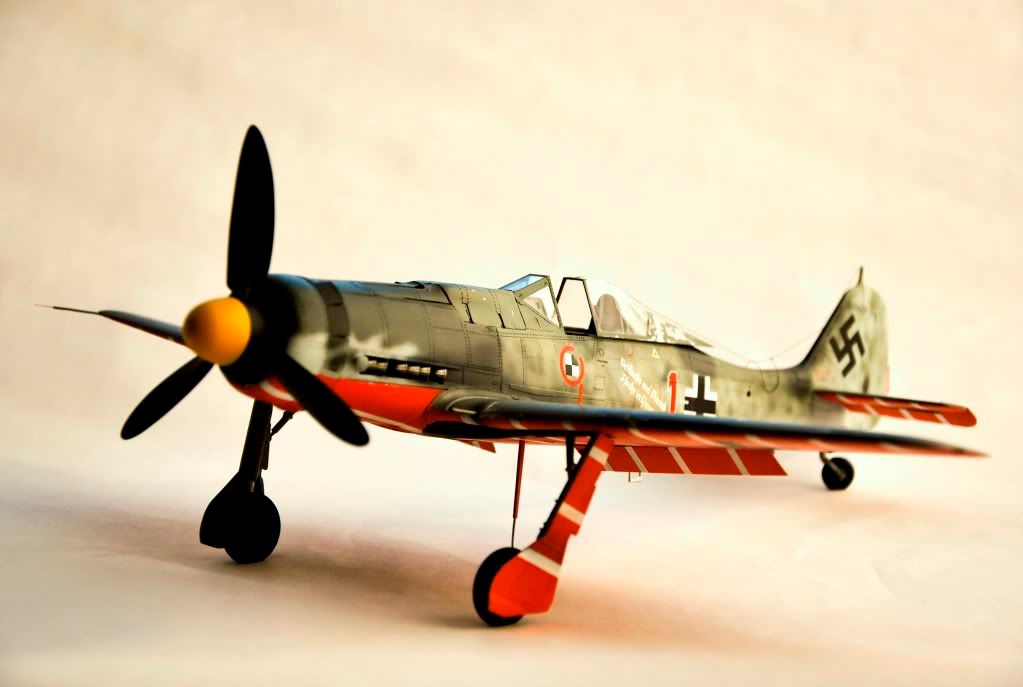
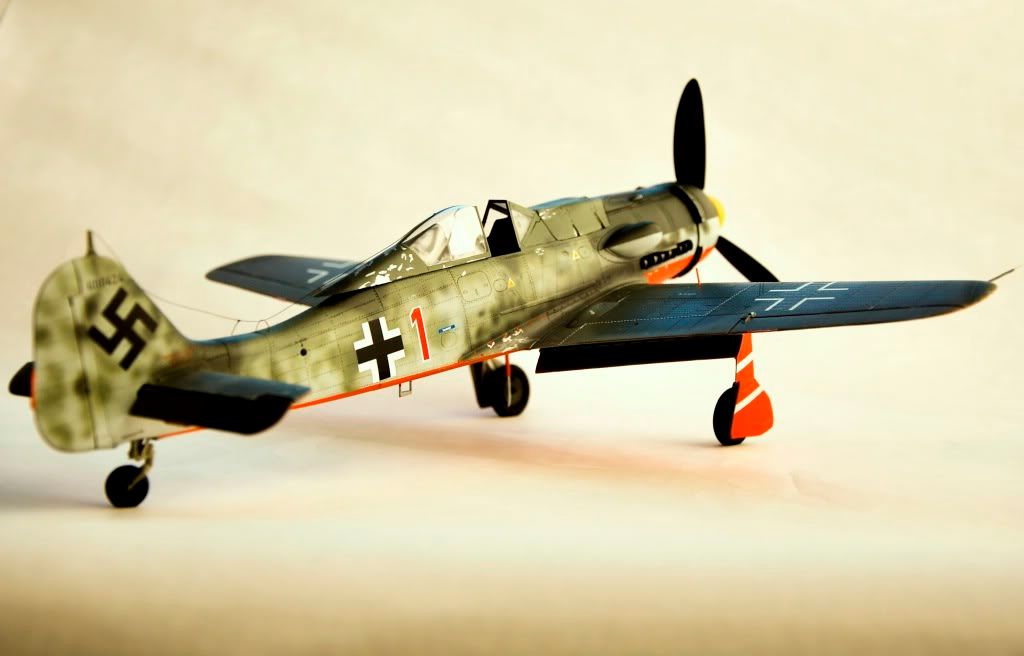
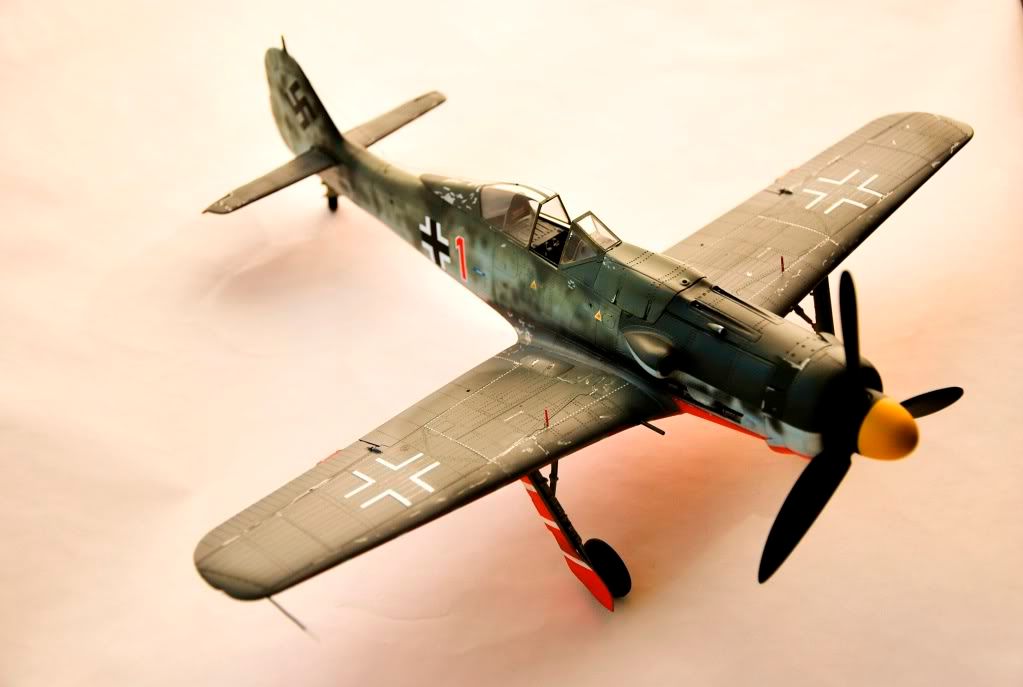
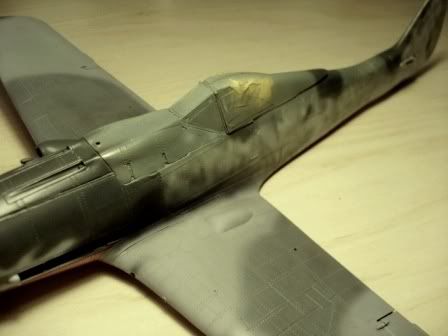
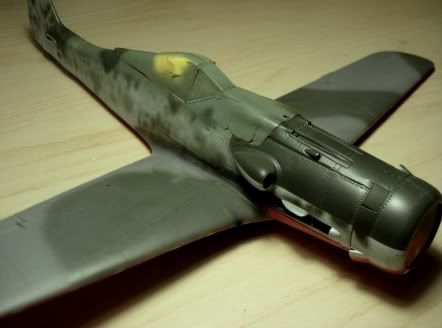
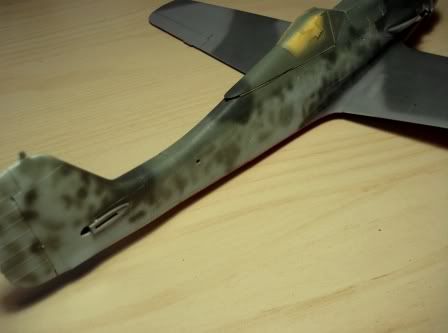
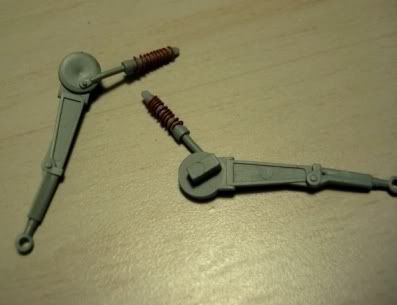
The camouflage is DONE! Here are some pictures! Base colour is RLM 76, and mottling was done with RLM 82 and RLM 83. Upper wings are painted with RLM 74 and 75. Smoke marks also added here and there. Exhausts painted with ALCLAD Steel. Nose painted with black and RLM 04 - took 2 trials, since I always have trouble painting yellow. The springs on the folding support arms were done from fine aluminum wire, and painted red.
Hope you enjoyed,
Tudor
-
Well, I already glued the control stick in a somewhat perpendicular position - not too far back or front. Any advice on how I should position the elevators?
Much appreciated,
Tudor
-
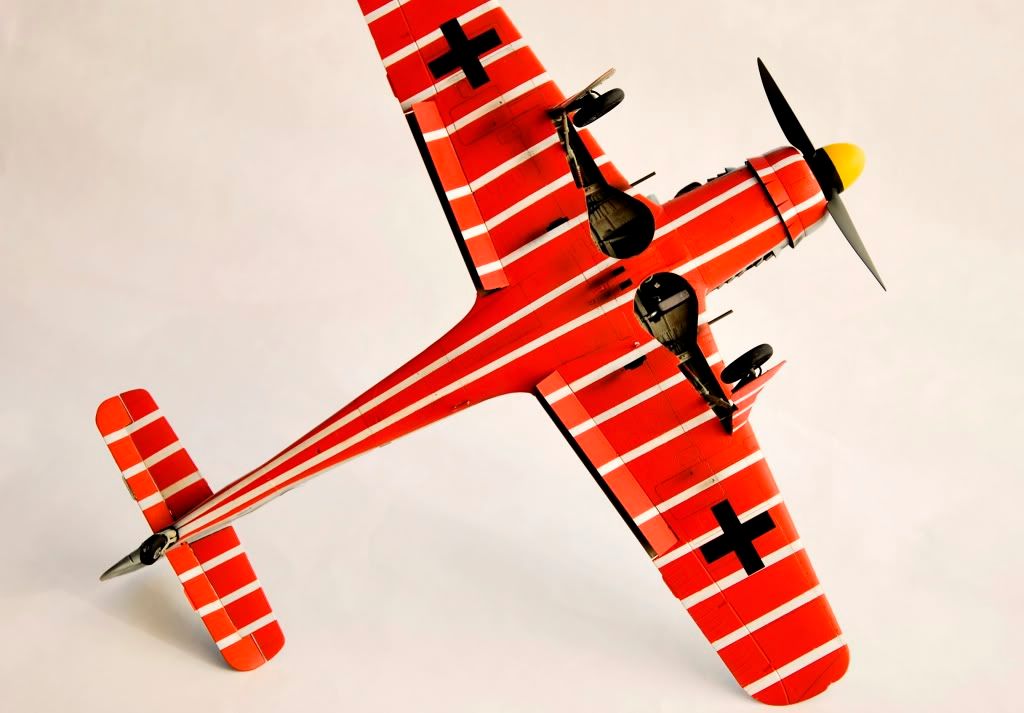
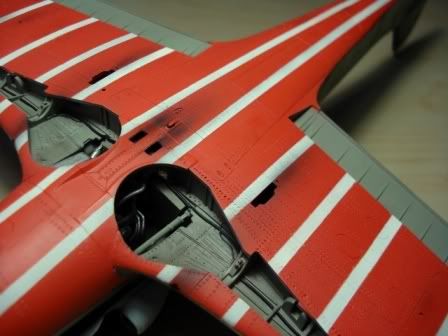
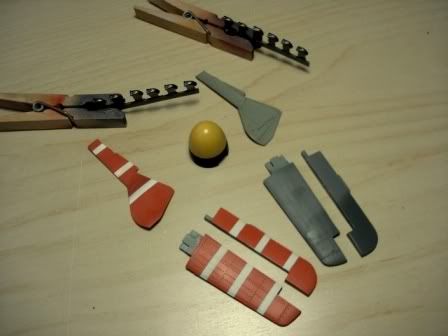
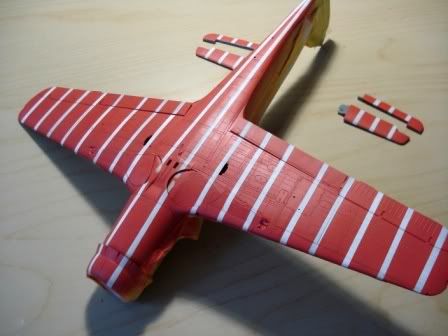
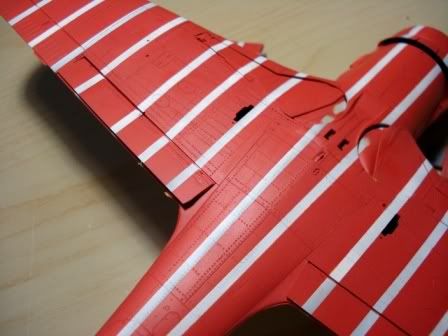
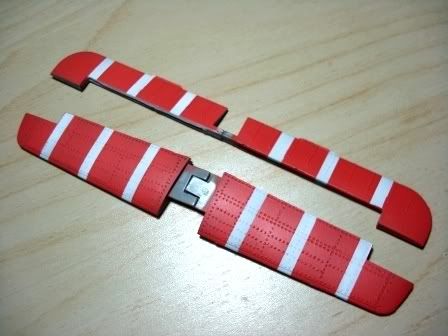
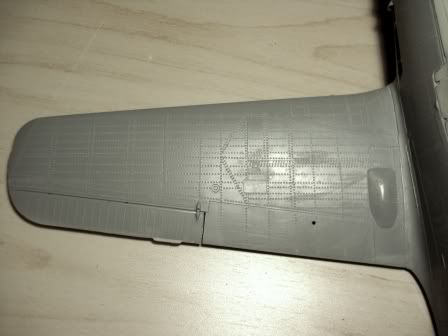
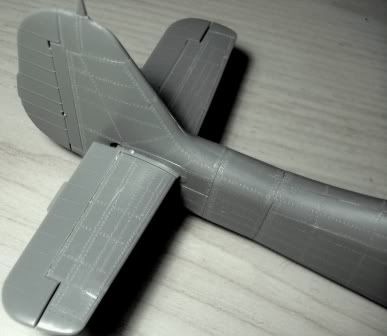
Here are some pictures of the unique underside camouflage. I painted with white the areas where the stripes would be located, masked, then painted with RLM 23. As mentioned in Jerry Crandall's terrific volume on this very bird, the white stripes were uneven in width and placed at different spacing distances, so I made sure I followed that closely.
Prior to painting the tail wings, I also decided to separate the tail stabilizers, and thus re-position them at an angle later on. I was also glad to see that the rivet marks are visible, yet subtle at the same time, after airbrushing the entire underside area.
Hope you enjoyed,
Tudor
-
Your work is amazing!! I admire the effort you're putting in this project!
Looking forward to new pictures!!
-
Brian,
It was definitely a patience and determination test for me. I'm so glad it's done
-
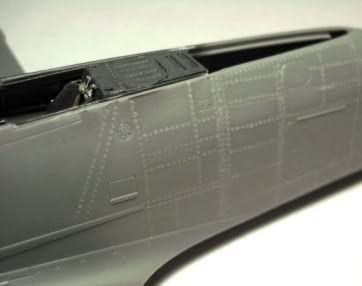
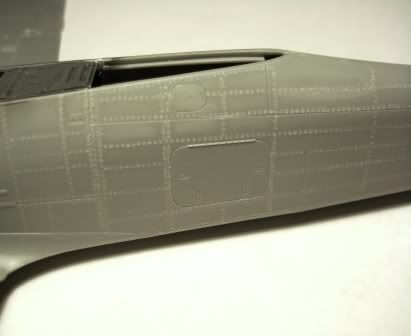
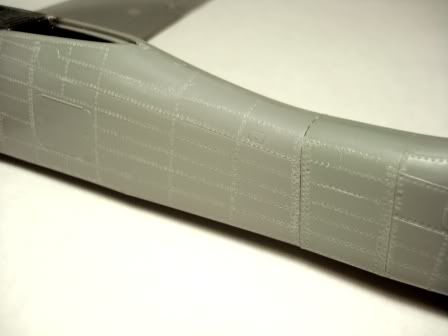
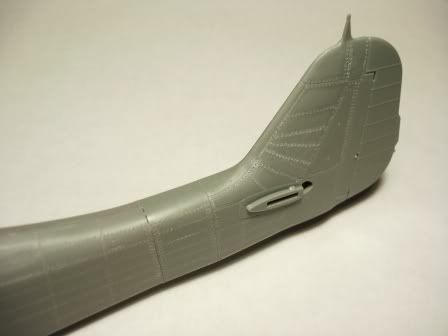
Since my last update, I have managed to squeeze in some time between work and school to finish the riveting. I have no clue how many rivets I have punched in, but I know it's a 4-digit number.
Here are a few pictures:
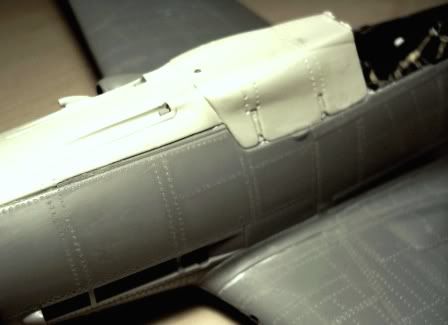
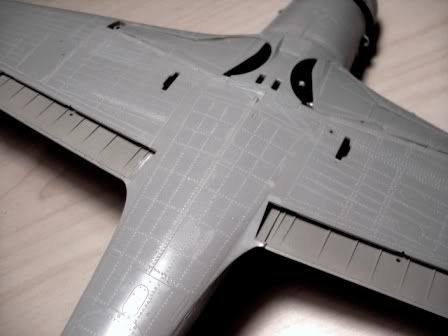
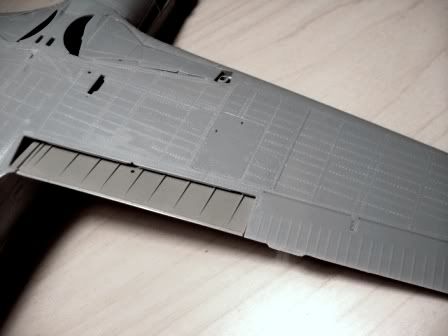
Special thanks to MDC and their amazing tool!
Now onto my favorite part: airbrushing!
Tudor
-
It is a single-punching tool: it as a pin with a circular head, and with a wooden handle, you can put in a lot of force. The resulting rivet actually looks like a flush, round rivet.
Tudor
-
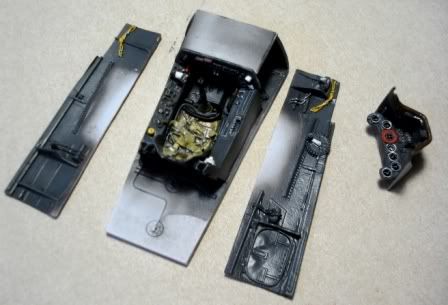
Ok, so with school and work, I have managed to make some more progress on the project! It's the photo-taking and editing that I am rather slow with, but here they are:
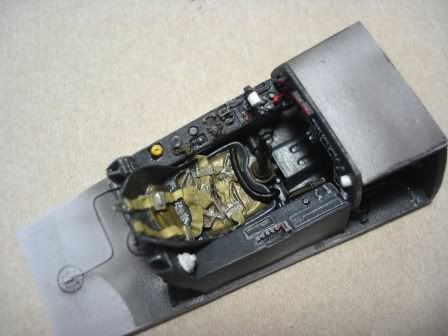
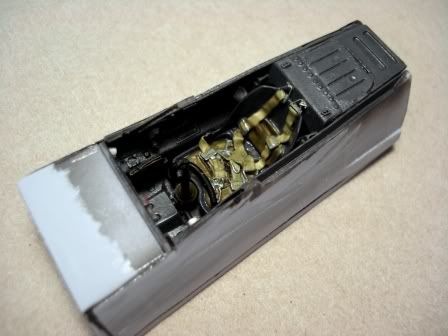
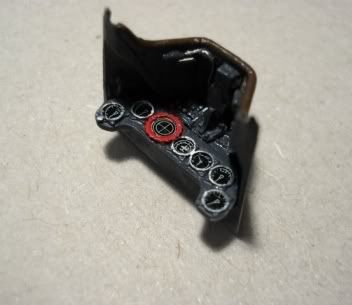
Cockpit: Eagle Editions' superb Dora pit, with so much detail, I felt sorry it was eventually hidden when I enclosed it in the fuselage. Painted with RLM 66, details with German Silver, Yellow, Red and seat with a mixture of tan and/or brown. The dial decals were used, but the bottom ones broke, so I dry-brushed instead. The top ones were lucky to survive.
Now, the riveting!! The MDC riveting tool is amazing, that's all I can say. With patience and time, the results are very convincing!
So far, I've spent about 11 hours on the engine, 25 hours on the cockpit and fuselage, and 3 hours on the riveting!
More to come, soon!
Tudor
1/35 Panzer IV Ausf. H
in Non-LSP Works
Posted
Thank you!
I actually cheated and used a combination of RLM 24 Red, RLM 79 and Dark Umber, all from Model Master.