Search the Community
Showing results for tags 'f104'.
Found 2 results
-
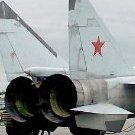
While waiting for the oil paints on the Nighthawk to dry properly, I just started another very special kit - the Italeri's Starfighter G/S: However, I'm still not certain of the exact version yet . This is my first of the US legacy planes if we don't count the SR-71. Althought it is the G/S version by default, and the included markings are all about German, Spanish, Italian, etc. planes, I'm 100% positive I want a conversion into a US plane with the shiny aluminum panels. My knowledge about the Starfighter is slim, anyway, the bare metal US version is the only kind of this plane that I always liked a lot. I did my best to find US aftermarket decals ever since I got the kit... but I could't. So, I got me high-res pics of the two decal sheets for the C version, and started studying/comparing them. I'm 99% optimistic I'll manage to do the conversion - I have the four national insignias from leftover kits that are in the correct registry and size (already compared them). The big black letters can easily be made out of masks as they are the same color. For everything else (stencils/smaller signs) - I'll use combinations of the included decal sheets - even with some little modifications, they will work. However, that's all I know at the moment... This kit offers a TON of options, and there are many steps in the instructions that include optional parts for 4-5-6 versions, including the C and G version. My knowledge extents to that the C version is the main US Starfighter, and that there was a moment when the G version was also with the US markings/bare aluminum before delivery to Europe. This made me lean towards the G version, but again - I'm not certain at all. I'd appreciate any help and bits of advice! I just don't know what to do. I downloaded two huge (100+ pages) magazines from where I learned that the G version from that period flew either from Luke AFB or somewhere in Southern California, had larger tail with fully moveable rudder, two sidewinder rails under the fuselage, and an improved radar system (but I'll keep the radome closed). I got me several aftermarket parts throughout the years - an AIRES pilot figure/seat, a Reskit nozzle, and 3D instrument panel decals by Quinta Studio: At first glance, the kit includes optional parts for the nozzle, the seats, the main wheel well doors, the intake cowlings, the tires, and I could be missing something. As the aftermarket parts go - here are my doubts: 1) I got that AIRES pilot figure only because I want a pilot figure, but it has a seat as well... which is the standard Lockheed seat, but it should be the Martin Baker seat for the G version. So, was there a time/possible reason for the Startfighers to use the Lockheed seet instead. Or, if I do a conversion to the C version - is it realistic to keep the Lockheed seat then? Otherwise, if neither versions used the Lockheed seat, I can just cut it from the part and use the OOB Martin Baker seat instead (which is very good btw). 2) The ResKit resin nozzle - it is with the longer turkey feathers, and is way better than the two optional nozzles from the kit, so I want to use it. But, did either one of the C/G versions use this longer type of nozzle? If not, I can shorter the afterburner can a bit, so the nozzle sits further inside the fuselage, and make it look like the shorter one. I'm sure I'll have many questions along the way, and I appreciate any tips and ideas. I have quite some documentaries to watch and read about this plane as well, but this is another hobby by itself. So, I started from the cockpit - there at least is one option only, and the instruction sheet for the Quinta Studio decals says ''F-104G''... It's also my first time using 3D printed decals and I checked a couple of tutorials... it looks relatively easy. I started by flattening the instrument panels on the OOB parts... it was an adventure: I'm not promising, but I want to ''simplify'' the assembly phase as much as possible. Only the wheels will be retractable for an in-flight and parked display, and the canopy will be moveable. The emphazis would be on the bare metal skin, for which I'm gonna use a combination of the AMMO Aluminum Tape and another self-adhesive aluminum tape from the hardware store (that looks just about the same as the AMMO's, but slightly thicker). It will be my first time doing things like that as well. Alternatively, I got a bottle of Micro Metal Foil Adhesive by Microscale and tried using it with bare kitchen foil... I did trials at least 2 years ago with the two methods, and the results were exactly the same. I initially thought that the Microscale's MMFA will harden with the time and will hold stronger, etc. but nope, it's absolutely the same as the self-adhesive tape, just requires extra attention during application. I'll use the self-adhesive tapes instead. First things first - on to the cockpit. Which reminds me of another question I had today - is it allrgith to glue the decal directly on the central console as it is, with the hole on the plastic surface that used to be the radar screen? Is the decal strong/hard enough to keep a straight shape, or is there a risk of concaving down due to the ''hole'' for the radar screen underneath? Thx!
- 53 replies
-
- 12
-

-
- starfighter
- f-104
- (and 1 more)
-
Hi guys, querying Italeri's call out for flat gull gray for the underside of the F104. I've got MM acrylic flat gull gray but it seems almost tan compared to some colour photos I've found which seem more like a light white/gray. I've got a few coats of tamiya's fine white primer down and even this seems closer to photos. Does anyone have any info as to what colour the underside should be? Maybe Italeri got it wrong... Thanks for any feed back. Cheers Bevan