Search the Community
Showing results for tags 'p-39'.
-
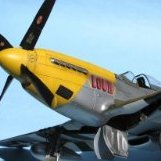
Another model goes to my shelf. This time, the design that appears at the competition quite rarely, namely the P-39 Airacobra. The model itself is pretty cool, but I've added Eduard plates, HGW straps, Master barrels and Eduard exhaust pipes. Markings painted from templates drawn by Mr. Decal and cut Maketar
-
Ok, inspired by JohnB I've started a new build - the Kitty Hawk P-39N/Q which I'll build as Snooks 2nd. I'm only a few days into the build and already having a love/hate relationship with the kit. I really like Airacobra's and 1/32 is ideal to show off the cockpit, engine and nose of this unique bird. But the fit of the kit and mold quality leaves a lot to be desired. JohnB has highlighted a lot of the fit issues so I'll try not to duplicate those here. I was very surprised at the flash and excess pour plugs (at least that is what I call them). The flash is very noticeable on the engine wiring harness: And on the back of certain parts: The exhausts come in 24 parts, and half had significant flash. Not ideal on an $80 kit. The fit so far has also had issues: for many pieces that are supposed to come together, either they are so tight as to nearly be snap-fit, or the lugs just don't fit. For example: parts D10 and C30: Part D10 has holes for locating pins, but part C30 doesn't have any pins. Things like that just slow down assembly. On to the build! Have to start with the engine, but remember that only the sides are really visible: I have a lot of work to do on the exhausts, and then will add the wiring harness and detail the engine block. Started work on the cannon and machine gun parts: As we know P-39 models are tail sitters so I'm trying to find as many places to put some lead including inside the machine gun magazine in the nose and all of the other hollow boxes. Not sure how effective this will be and probably will still need to add nose weight, but hopefully a bit less. Here is the cockpit so far. Using the Vallejo acrylics and have been very pleased so far. They go on very well (if not very bright!) with easy water and Windex clean-up. I have not tried detailed work with the paint yet. Getting used to the eye-dropper dispenser but also like being able to easily add more paint, and not having to thin it (I am spraying right out of the bottle). This is the green the Kitty Hawk kit called for - looks very, well, GREEN to me. I've started doing some highlights using Model Master Dark Green to reduce the monochromatic effect. More to come.
- 106 replies
-
- Kitty Hawk
- P-39
-
(and 2 more)
Tagged with:
-
Hello everybody, The great majority of P-39 models show the plane with the flaps down. Yet nearly every photo of full size P-39's on the ground shows them with the flaps up. Am I missing something? Thank you for your help Quang
-
Here is a link to a review of the Kitty Hawk P-39 Q/N Airacobra that has sprue shots, decals, etc.


