Search the Community
Showing results for tags 'airacobra'.
-
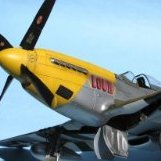
Hi, my latest finished kit. Hard to put together, large holes in beetwen fuselage and wings, blurry details, canopy does not fit. I made many improvements, changed fuselage length by making a tail rudder wider,corrugated surface, replaced kit nose gun with Master barrel, added cables. Eduard PE and Montex Masks for national insignia and bottom inscription, shark teeth from kit and letters/numbers is a mix of of other kits leftovers.
- 23 replies
-
- special hobby
- airacobra
-
(and 1 more)
Tagged with:
-
Another model goes to my shelf. This time, the design that appears at the competition quite rarely, namely the P-39 Airacobra. The model itself is pretty cool, but I've added Eduard plates, HGW straps, Master barrels and Eduard exhaust pipes. Markings painted from templates drawn by Mr. Decal and cut Maketar
-
Hello, I've finally finished this one.... As in title - this is P-400 Airacobra "Airacutie" by Special Hobby , reboxed by Revell. Model isn't good, I'm sure that Kittyhawk one is much better but it was on sale so I bought it Basically it's OOB but there are seatbelts from Eduard and guns from brass pipes. Lady on wing is from Masterbox Pinup set. Whole model is painted with Mr.Hobby range and weathered with MIG,Tamiya and AMMO products. It has very shallow panel lines so wash didn't go well. I found a topic about Airacutie on this forum so I know that this particular P-400 had it's gear covers dismounted. After finishing I found that left cockpit door on real P-400 was permanently blocked. Another mistake is supposedly wrong cockpit color but I have no chance to correct it now. Anyway , hope you'll like it
-
I know, I SWORE I was done with P-39's after the debacle with the KH P-39 (and soothed my frayed nerves with a Eduard P-39 just to make up for it), but ended up with the Special Hobby P-39Q a while ago and finally pulled it out to take a look at it. After building five other P-39s I finally found a subject I had never seen before - so giving it one last go! SH with the resin cockpit and Eduard PE Interior bits. Lovely, with NO engine or nose machinery so this should be a decently quick build with most of the focus on the finish (more on that in just a minute) and the cockpit. Kind of unassuming, and I missed it when I looked at the box, but that is a gloss black Airacobra from the Pacific theater. Its called 'Spare Parts' as it was cobbled together from various 72nd FS aircraft. Here is the text from a 1944 article about this aircraft: REBORN P-39 FIGHTER PLANE NAMED SPARE PARTS Spare Parts is the name of this reborn Bell P-39 Airacobra fighter . Riddled by Jap bullets in the South Pacific , it was tough enough to be patched together again with odds and ends after officers at first thought it was ready for the junk pile. The picture is an official U.S. Air Forces photo, and shows some of the men who put their spare parts to good use. Ingenuity—as someone has pointed out — is one of the real secret weapons of American soldiers . And to prove the point, the story has just drifted back to this country about how a group of mechanical-minded boys in a South Pacific theater took a bullet-riddled plane, a collection of odds and ends, a lot of elbow-grease—-and, with these ingredients, put together a fighter plane that no one expected to see . They started with a wrecked Bell Aircraft Airacobra (P-39) shot down in combat by the Japs. It was all ready for the junk heap. But they scrambled around and put together enough salvaged parts to put the plane back into flying trim again. Appropriately enough, they named the ship Spare Parts. Builders of the plane are members of the Sky Riders Squadron of the 7th Air Force. Written off the books, no longer boasting a serial number, the reborn fighter, at last reports, was still doing a job in the air . How can you not LOVE a gloss black Airacobra?? Love the idea of a glossy black finish so will be spending a bit more time than usual on this Airacobra finish. Usually they are pretty heavily weathered but this one seems to have been rather decently well taken care of. With no engine or nose canon, etc to deal with, already have the entire plane in primer and have sprayed the green zinc chromate for the vents and the wheel wells, and most of the interior green for the cockpit. Taking the easy route and just going with the green chromate as I didn't have yellow handy. I did notice what looks like the circular antenna behind the cockpit, which I don't think is in the kit so I'll have to do a bit more research and see if it really was on the aircraft or if that is something behind the plane, in the picture. So there we go. On to P-39 number 6. Chris
- 94 replies
-
- Special Hobby
- P-39Q
-
(and 1 more)
Tagged with:
-
One of my favorite kits for a quick-build P-39 is from Eduard - the fit is amazing, you can build in a LOT of detail in the cockpit and you don't mess with the engine or nose cannon assembly so it is a very quick build. I have the old Cutting Edge Air-A-Cutie decal set so am finally putting it to use. Also have a bunch of other old bits, including the Moskit metal exhausts. :-) From 2007 I do believe. I decided not to got to town on the cockpit, esp the IP, since I am going to use the pilot figure and he really does clog up the cockpit more than a little bit. Not the best picture, sorry! Will retake and repost, but have already lightened up the face. I have a few in-process build pics but let me jump ahead a bit... I've actually closed up and have started to sand the fuselage seams, esp that one on the back. There is a bit of gloss in the cockpit for some decals that I will flatten out. I would weather the seat, and will a bit on the sides, but with the pilot in place, you really on see the one side. I'll have the right side door open but expect to have the left door closed. More to come later! Chris
-
Ok, inspired by JohnB I've started a new build - the Kitty Hawk P-39N/Q which I'll build as Snooks 2nd. I'm only a few days into the build and already having a love/hate relationship with the kit. I really like Airacobra's and 1/32 is ideal to show off the cockpit, engine and nose of this unique bird. But the fit of the kit and mold quality leaves a lot to be desired. JohnB has highlighted a lot of the fit issues so I'll try not to duplicate those here. I was very surprised at the flash and excess pour plugs (at least that is what I call them). The flash is very noticeable on the engine wiring harness: And on the back of certain parts: The exhausts come in 24 parts, and half had significant flash. Not ideal on an $80 kit. The fit so far has also had issues: for many pieces that are supposed to come together, either they are so tight as to nearly be snap-fit, or the lugs just don't fit. For example: parts D10 and C30: Part D10 has holes for locating pins, but part C30 doesn't have any pins. Things like that just slow down assembly. On to the build! Have to start with the engine, but remember that only the sides are really visible: I have a lot of work to do on the exhausts, and then will add the wiring harness and detail the engine block. Started work on the cannon and machine gun parts: As we know P-39 models are tail sitters so I'm trying to find as many places to put some lead including inside the machine gun magazine in the nose and all of the other hollow boxes. Not sure how effective this will be and probably will still need to add nose weight, but hopefully a bit less. Here is the cockpit so far. Using the Vallejo acrylics and have been very pleased so far. They go on very well (if not very bright!) with easy water and Windex clean-up. I have not tried detailed work with the paint yet. Getting used to the eye-dropper dispenser but also like being able to easily add more paint, and not having to thin it (I am spraying right out of the bottle). This is the green the Kitty Hawk kit called for - looks very, well, GREEN to me. I've started doing some highlights using Model Master Dark Green to reduce the monochromatic effect. More to come.
- 106 replies
-
- Kitty Hawk
- P-39
-
(and 2 more)
Tagged with:
-
Hello everybody, The great majority of P-39 models show the plane with the flaps down. Yet nearly every photo of full size P-39's on the ground shows them with the flaps up. Am I missing something? Thank you for your help Quang
-
Here is a link to a review of the Kitty Hawk P-39 Q/N Airacobra that has sprue shots, decals, etc.

.thumb.jpg.f0920d798d5d8600fb58b1d8a906ddff.jpg)


