Search the Community
Showing results for tags 'Special Hobby'.
-
Hello, I am not sure, if it was already posted here. Special hobby bought Cobra from ICM and will be producing it as a HighTech kit. https://www.specialhobby.net/2021/09/sh32082-ah-1g-cobra-early-tails-over.html
- 10 replies
-
- 2
-

-
- early
- special hobby
- (and 2 more)
-
Done! Lots of firsts in this build, and Improving my photography skills wasn't one of them. Overall, a typical of Special Hobby's earlier offerings, with plenty of opportunity to use good ol' Basic Modelling Skills The paint scheme was surprisingly straight forward, if a bit monotonous. The drawn out build can be found Here Make sure not to stare, lest it traps you in its gaze... All hail the Hypno-Fiat! Paints used were MRP. Thanks for checking it out! Denzil.
- 28 replies
-
- 40
-
-
- fiat
- special hobby
- (and 2 more)
-
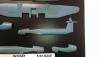
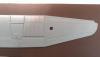
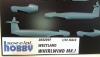
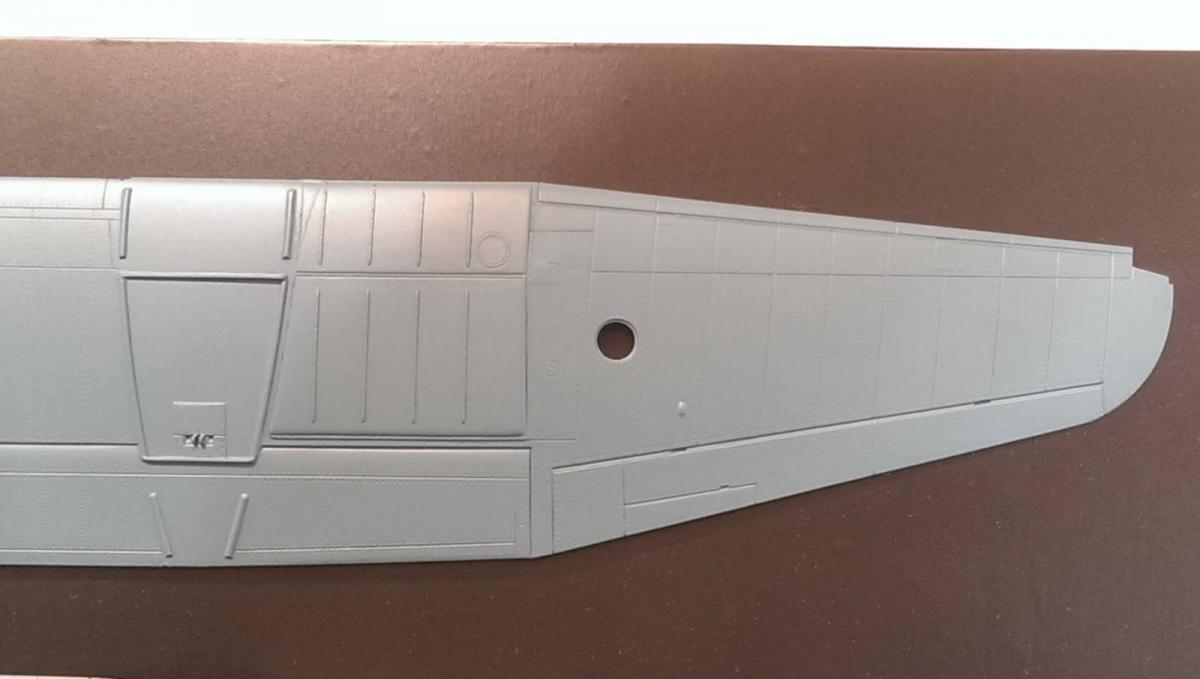
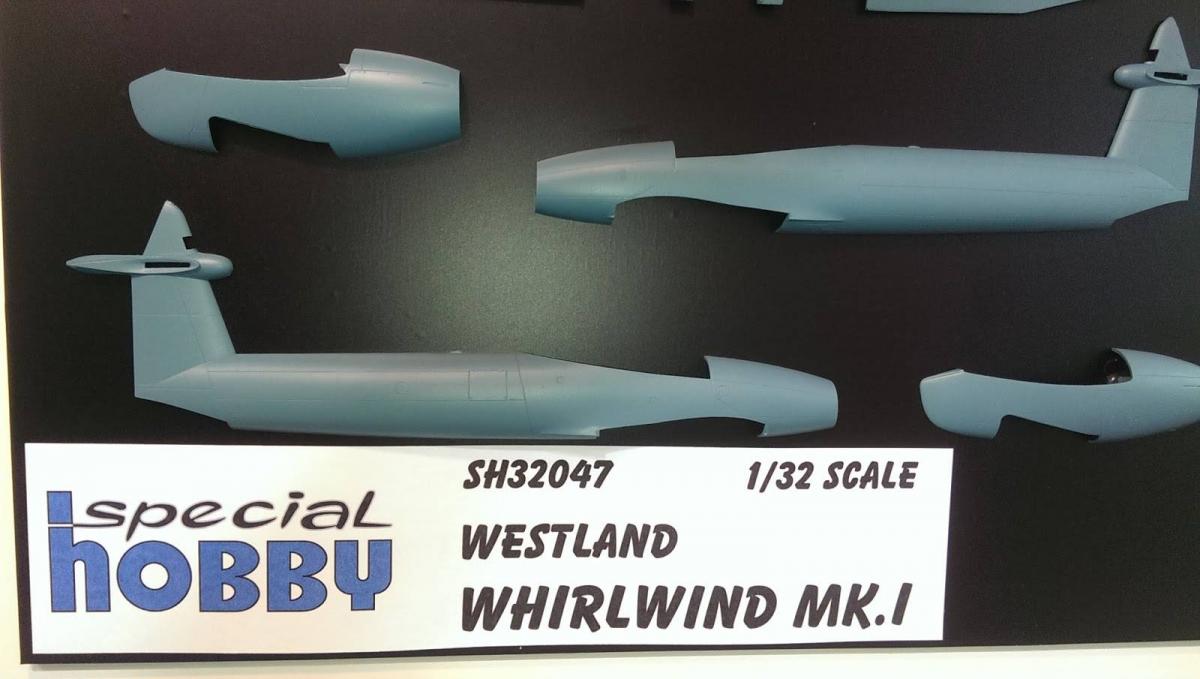
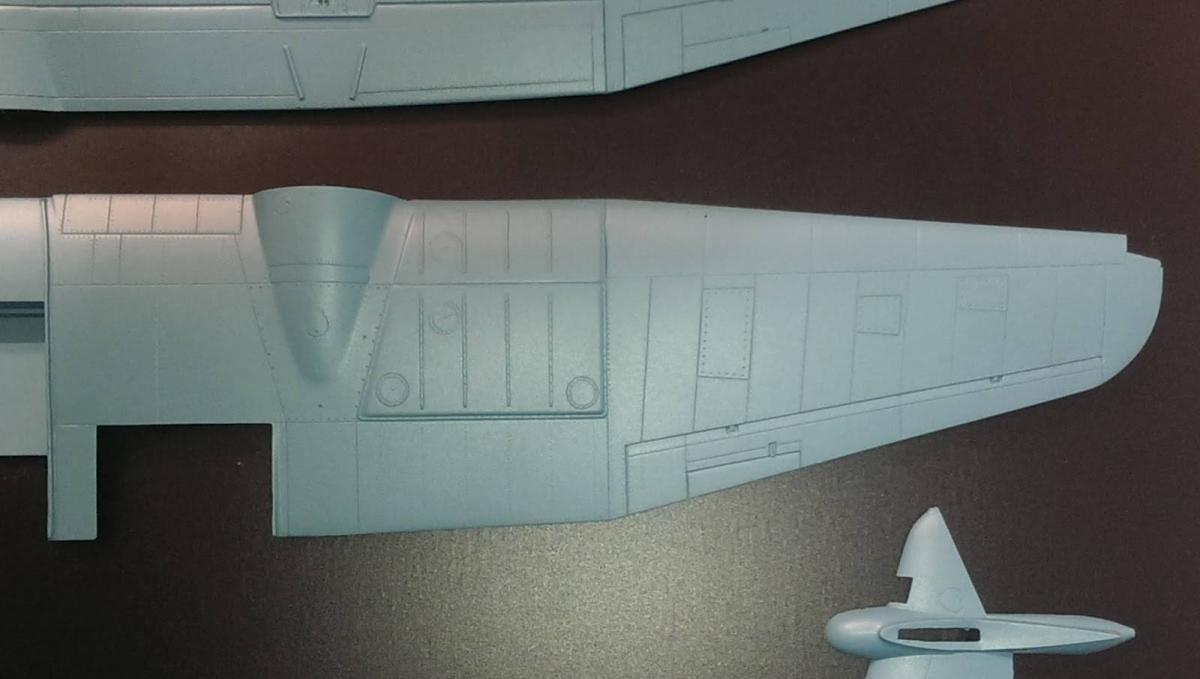
Westland Whirlwind Mk. 1 patterns on display on the Special Hobby stand at the Nuremberg show - from the Special Hobby Facebook Page: <want> Iain


-
.thumb.jpg.5da8bff9741de420eb2e87addd8f2cf6.jpg) Those new year/new project/new cutting-mat feels! Special Hobby's Fiat G50. Just a cool looking plane, and I'm going to finish it as the aircraft depicted in the box art, so it should be a lovely challenging paint session. The contents of the box are miles ahead of SH's Heinkell He100 (Which I've just finished), being crisp and well detailed. This kit comprises plastic, resin and photo etched parts, all quite well detailed, albeit all requiring some cleaning up to some degree. I'll be using MRP paints for as much as I can, hopefully I've deciphered STORMO!'s colour guide accurately! This is the scheme I'll be having a crack at. Should be fun. Cue the Fiat A74 radial engine noises! Denzil.
Those new year/new project/new cutting-mat feels! Special Hobby's Fiat G50. Just a cool looking plane, and I'm going to finish it as the aircraft depicted in the box art, so it should be a lovely challenging paint session. The contents of the box are miles ahead of SH's Heinkell He100 (Which I've just finished), being crisp and well detailed. This kit comprises plastic, resin and photo etched parts, all quite well detailed, albeit all requiring some cleaning up to some degree. I'll be using MRP paints for as much as I can, hopefully I've deciphered STORMO!'s colour guide accurately! This is the scheme I'll be having a crack at. Should be fun. Cue the Fiat A74 radial engine noises! Denzil. -
FINISHED Fiat G-50 Part Trois *All glory to the Hypno-Fiat!*
RadBaron replied to RadBaron's topic in Works in Progress
This one has moved back to the bench almost 2 years to the day since beginning! So here's where we kick off. The cockpit can't be fitted after the fuselage half are closed (which is my normal preference), so everything (except the seat harness, is being installed Let's see if I can get this across the line this time! Denzil -
FINISHED Fiat G-50 Part Trois *All glory to the Hypno-Fiat!*
RadBaron replied to RadBaron's topic in Works in Progress
Well, here it is, back again for the third time. In between wresting the Infinity Helldiver, little bits of work have been done to get this thing across the line. Previous attempts can be found here Can't rush these things... Anyway, the G50 is too cool looking a plane to let go to waste, and besides, THIS paint scheme is screaming to be replicated! Where I last left, the fuselage was together and work has begun on straightening the elevator hinge lines. Here's a quick summary: Easy fix, right? File down the leading edge of the horizontal stabilizers to pivot them forwards, to make a straight trailing edge. Derp. This made a large gap between the elevators and the fairings. Nothing a bit of shimming and sanding can't fix In this pic you can also see the soft corners of the fairings where they meet the elevators. I made a razor saw cut down the middle of the fairings, superglued in some parts from a photo etched fret and filed them to a fine point. Also installed were representations of the control surface hinges. This was all sanded and trimmed to size and primed, and now the tail end is done. Test fitting parts Primer coats to see where surface details need re scribing. And that brings us to now. Some more surface detail work is needed, but she IS getting close to paint Denzil -
Issues with posting photos... Back in a moment...
- 12 replies
-
- 1
-
-
- raaf 76 sqdn
- p-40n
- (and 3 more)
-
Hi, my latest finished kit. Hard to put together, large holes in beetwen fuselage and wings, blurry details, canopy does not fit. I made many improvements, changed fuselage length by making a tail rudder wider,corrugated surface, replaced kit nose gun with Master barrel, added cables. Eduard PE and Montex Masks for national insignia and bottom inscription, shark teeth from kit and letters/numbers is a mix of of other kits leftovers.
- 23 replies
-
- 38
-
-

-
- special hobby
- airacobra
- (and 1 more)
-
my last built , nice kit for a nice plane , enjoy :
-
A Thing Divine For Nothing Natural I Ever Saw So Nobel Special Hobby Tempest Mk.V #32052 was used for Evan Mackies mount. Mackie, RNZAF, was the highest scoring Tempest ace with 20+ kills. Albeit, most of Mackies kills were in Spitfires. This kit is a most difficult build. I started this almost 2 years ago and binned it several times as my MoJo was clearly flattened with this. From the cockpit, wing root and landing gear construction offered me plenty of WTFFF! and Are You Kidding Me! moments. There was a good chance you may have heard my screams. This kit is clearly recommended for experienced modellers only. I chose Mackies build as I have several Kiwi friends and the lack of ordinance and invasion stripes show the beautiful lines of the Tempest. Weathering kept to a minimum as this aircraft was delivered to Mackie May 1945. See my build log. Build Details Yahu 3214 IP, center panel only as side panels do not fit Barracuda 32334 Nose Correction Set, 32140 Tempest Wheels, 32011 Spitfire Cockpit Upgrade Part II (Acemaker II gunsight only) Master Model 32096 Tempest Mk.V "short" Cannon Tips Maketar Masks 32122 Tempest Mk.V REXX 32043 exhausts ANYZ AN011 .5mm Braided Thread, AN016 Line Connectors MV Lenses 197 Amber, LS800 Red & Green, PN21 Clear Albion Aluminum Slide Fit Tubes .3mm, .5mm, .7mm and .9mm MR Paint 77 Nato Black 110 RAF Green 111 RAF Interior Grey Green 112 RAF Medium Sea Grey 115 RAF Ocean Grey 118 RAF Sky 122 RAF Marking Yellow 123 RAF Marking Red 135 Insignia White 183 Oxford Blue Vallejo 306 Dark Rubber Various Alclad Colors Tamiya X22 Clear, XF86 Flat Clear MiG Washes Dark Wash Streaking Grime 1203 Engine Oil 1408 PLW Deep Grey 1602 PLW Green Brown 1612 MiG Pigments Light Dust 3002 Black Smoke P023 Rust P025 Russian Earth P034 These publications, highly recommended, were critical helping me on this build. Especially the landing gear rake. Airframe Minature No.4 Hawker Tempest Osprey 27 Typhoon and Tempest Aces of WWII Warts and all this build yielded some great lessons. Thank you all for your encouragement and support during this build.
- 21 replies
-
- 24
-
-
- most difficult build
- tempest mk.v
- (and 2 more)
-
hello, my last built , all markings are paint , enjoy :
-
This is Special Hobby's 1/32 scale V-1. A lovely little kit, the usual lo-run moulding features, a bit of etch and a good decal sheet. All paint by Mission Models with a final wash of Flory Black Weathering fluid. Very fast and easy to build and paint. The rear end of the fuselage and engine was assembled and painted in one factory, the explosive section in another and the nose guidance system at a third, all painted where manufactured. Like most munitions, they would only come together as a complete unit prior to launch, being assembled and adjusted in the local bomb dump. Hence the mottle cammo on the back end, the linear colour demarcation on the explosive section and a freehand wavy colour separation on the nose. Some areas were treated to a very thin wash of Mission Models Tyre Black to change the RLM83 and 76 on some sections to emphasise the disparate part manufacturing.
-
le premier de l'année : Voilà voila
-
I was very delighted when Special Hobby announced the V1 in 1/32 scale. The only other option in our beloved scale is the Profimodeller resin kit which has a very steep price (€60,-) for such a small kit. The Special Hobby kit can be picked up for a mere €22,-. So I immediately bought this little kit when a had the option. After the Ju388 I needed a quick build; simple and without aftermarket. This little kit was the perfect choice. I've build and painted it about a 5 or six evenings. Plastic is nice and good to work with. Some of the holes for the locating pins on one half of the fuselage where closed. I choose to cut away the pins instead of opening the holes. In the end I had a very little step between the fuselage halves which needed a tiny amount of filler and sanding to get right. If I had taken a little more care glueing the halves, this would not have been necessary. The kit feautures some very restraint but lovely detail so care needs to be taken to avoid sanding it all away. The kits decals (yes the germans loved stenceling there vehicles) are tiny and have the tendency to roll over themselves. Because of this a few decals never made it to the model and some where cut short. Other then that, I can recommend this kit for everyone as an in between build or to get your mojo back. Painting was done on a base of Mr surfacer 1500 black. Paint is from MRP and the washes from AK interactive Paneliner series. Wouter
-
SH is going to produce V1/Reichenberg in 1/32 Info from their blog.
- 15 replies
-
- 1
-
-
- reichenberg
- v1
- (and 1 more)
-
Special Hobby Fiat in finnish markings. This paintwork required some work on tail. Unfortunately higher vertical fin isn't supplied in the box so i needed to scratch it. I made some corrections and adjustments to match finnish planes: - pilot seat is moved backwards - guns have metal tubes made from syringe needle - shelf between IP top and bottom is added I used these additions: - Yahu IP - Techmod hakaristi decals - Montex masks (plane number) Surface is riveted and wheels are weighted. I can really recommend this kit to everyone who likes Italian planes - it's simple, and construction goes without any big problems. Photos from the bench:
- 25 replies
-
- 18
-
-
I know, I SWORE I was done with P-39's after the debacle with the KH P-39 (and soothed my frayed nerves with a Eduard P-39 just to make up for it), but ended up with the Special Hobby P-39Q a while ago and finally pulled it out to take a look at it. After building five other P-39s I finally found a subject I had never seen before - so giving it one last go! SH with the resin cockpit and Eduard PE Interior bits. Lovely, with NO engine or nose machinery so this should be a decently quick build with most of the focus on the finish (more on that in just a minute) and the cockpit. Kind of unassuming, and I missed it when I looked at the box, but that is a gloss black Airacobra from the Pacific theater. Its called 'Spare Parts' as it was cobbled together from various 72nd FS aircraft. Here is the text from a 1944 article about this aircraft: REBORN P-39 FIGHTER PLANE NAMED SPARE PARTS Spare Parts is the name of this reborn Bell P-39 Airacobra fighter . Riddled by Jap bullets in the South Pacific , it was tough enough to be patched together again with odds and ends after officers at first thought it was ready for the junk pile. The picture is an official U.S. Air Forces photo, and shows some of the men who put their spare parts to good use. Ingenuity—as someone has pointed out — is one of the real secret weapons of American soldiers . And to prove the point, the story has just drifted back to this country about how a group of mechanical-minded boys in a South Pacific theater took a bullet-riddled plane, a collection of odds and ends, a lot of elbow-grease—-and, with these ingredients, put together a fighter plane that no one expected to see . They started with a wrecked Bell Aircraft Airacobra (P-39) shot down in combat by the Japs. It was all ready for the junk heap. But they scrambled around and put together enough salvaged parts to put the plane back into flying trim again. Appropriately enough, they named the ship Spare Parts. Builders of the plane are members of the Sky Riders Squadron of the 7th Air Force. Written off the books, no longer boasting a serial number, the reborn fighter, at last reports, was still doing a job in the air . How can you not LOVE a gloss black Airacobra?? Love the idea of a glossy black finish so will be spending a bit more time than usual on this Airacobra finish. Usually they are pretty heavily weathered but this one seems to have been rather decently well taken care of. With no engine or nose canon, etc to deal with, already have the entire plane in primer and have sprayed the green zinc chromate for the vents and the wheel wells, and most of the interior green for the cockpit. Taking the easy route and just going with the green chromate as I didn't have yellow handy. I did notice what looks like the circular antenna behind the cockpit, which I don't think is in the kit so I'll have to do a bit more research and see if it really was on the aircraft or if that is something behind the plane, in the picture. So there we go. On to P-39 number 6. Chris
- 94 replies
-
- 5
-
-
- Special Hobby
- P-39Q
- (and 1 more)
-
Before participation in 303 Squadron in England Polish pilots fought in France. They destroyed 50 german planes and probably 17 more. 10 fall, also pilot of my plane - Kazimierz Bursztyn.
- 16 replies
-
- 14
-
-
- Special Hobby
- Morane
- (and 1 more)
-
Some in progress shots of of this Tempest I've been working on for a GB on Facebook. The theme is British aircraft in foreign markings, so I'm be doing a Royal Pakistan Air Force birdy. Except for a few styrene filler strips here and there I'm doing an OOB build. Wheel bay assembly is a mess and part H34 and H49 have shape issues. Despite what the instructions say I used the top part of the wing to align everything and that helped a great deal but there's a lot of sanding and scraping needed on the wings to get it all to fit. The "engine" is more of a placeholder but you won't see much of it anyway. I did drill out the plastic between the cylinders because that would be visible if I left it like that. Also needed to sand off the top of the exhausts to get it to fit inside the cowling.
- 15 replies
-
- 8
-
-
- OOB
- Special Hobby
- (and 2 more)
-
Luv this kit. Engine and cowling was fun to fit but other than that a great build. Mr Paints for the scheme. Will be at Telford on Scale modelling now stand
-
This kit is a tough build (typical limited run) but if you want a LSP Yak, well, this is your only choice. Places to watch out for are the wheel bays, canopy, forward upper engine cowl, and the wing/fuselage attachment (none of them fit!). I was originally going to do a ton of weathering on this, but after all the fit problems, massive putty, and sanding, I pretty much lost interest and just wanted to finish the darn thing. Painted with MRP (aka Mr Paint), which is exceptional paint, AMT-7, 11, & 12. Done OOB with kit decals.
- 19 replies
-
- 24
-
-
- 1/32
- Special Hobby
- (and 1 more)
-
Hi, Like most of my recent WIP thread, it's about a build that i've started for a while. But i just try to FINISH things ! So, it's the Special Hobby kit, it will be built OOB, except the decals (Begemot) and a few small additions or rather replacement. It will be a Dux made Nieuport 11, with the dull silver grey paint typical of russian built Nieuport and with a skull on the rudder (badass !), and quite dirty. The kit is quite good, like any other Special Hobby kit (i love them !), but let's be honnest, that's not Wingnut Wings. However, i'm sure that it can give a great model that wont be a shame besides a WNW model. The supplied engine is cast in resin, which is a good idea. The problem is that it's pretty bad. The quality is good but it doesn't look like a Le Rhône 9C. The cylinders are too skinny and the copper intake pipes look very thin. In fact, that's what made this build stalled : i need a replacement for that engine. The best answer is the WNW Le Rhône 9C, i first wanted to buy some spare but it's long OOP. So i can take it from my last Sopwith Pup kit and as i plan to make other builds with the same engine (another Nie11, a Nie21...), so i need to make copies. And that's what i started to do today. Let's start with the begining. The cockpit. I drilled the seat so it looks like a Nieuport seat. I painted the wood grain on the wooden parts and then installed the bracing wires with Gaspatch 1/48 turnbuckles. Then the cockpit assembly continues. Here besides a Tamiya extra fluid jar. It's really tiny ! The full assembly with the side frames required tricky clamping !
-
As I have a bit of a soft spot for the Yakovlev piston fighters, I wanted to build the new Special Hobby Yak-3 kit for a while. I am actually building this kit in the "From Russia with love" GB which commences on Saturday at Britmodeller, but I hope it is ok I showing my progress here as well. I was undecided in what colour scheme to paint the model. I didn't like to make a Normandie-Niemen Yak-3 in this scale as I prefer to make one in 1/48 as a companion to my Yak-1 build which still needs to be completed. Fortunately Begemot decals released their new 1/32 sheet on the Yak-3 earlier this year which contained all the favored markings seen on models in the past, but one scheme was new and it looks stunning Yes the same scheme will also be part of the new VVS boxing of the kit. But I prefer the the Normandie-Niemen boxing as it has some extra resin goodies - and as I will most likely build just one Yak-3 in the big scale, it is better to use what I have than buying another kit This plane was flown by Senior Lieutenant Ermohin Valentin Grigorievich of the 402nd Fighter Regiment (265th Fighter Air Division, 3rd Fighter Aviation Corps, 16th Air Army, 1st Belorussian Front). He shot down 9 enemy aircraft between July 1944 and April 1945 and several of them on this aircraft. There is an excellent page where I got this information from There are already some Work in Progress reports on this kit here which I find always very helpfull when approaching a new build. So here is the kit. And some extra goodies. The decals look very good indeed. It will be the first time I am using Begemot decals. Anything special about them helpful to know? The kit looks great in the box, but is in stark contrast to the Cyber Hobby Bf 109 E-3 kit I am currently building. The Cyber Hobby kit is maybe a bit over engineered and the Special Hobby kit is a rather simple affair - so it will be interesting to build these two kits in parallel. As I would like to add some detail to the kit, I spent a bit of time researching the type and the kit - an activity I enjoy as much as building the kit . I read lots of reviews and build reports. Specially some French forums are a treasure trough (but need registration to see the contents). Reviews: Britmodeller Large Scale Planes Hyperscale Aeroscale Brexit Modeller Modellingmadness Detail Scale Review Scalemodel (French) Scalemodels.ru (Russian) Build Reports: Large Scale Planes Large Scale Modeller Brexit Modeller Scalemodel (French) - needs registration, but 16 pages of lots of detail! Nothing on Russian forums ... Walkarounds: Vadim Zadorozhnyi Technical Museum at Arkhangelsk (Russia) Museum of Military Equipment Battle Glory of the Urals at Verkhnyaya Pyshma (Russia) Orenburg (Russia) Air and Space Museum at Le Bourget (France) Air and Space Museum at Le Bourget (France) - shown also under restauration Aeronautical Museum at Belgrade (Serbia) - some great detail pictures Museum of Flying at Santa Monica (US of A) Museum of Flying at Santa Monica (US of A) Scalemodels.ru - not a walkaround as such, but some great info. Unfortunatel most pictures are gone in the earlier posts Certainly no shortage of information, but If you know any other links, please share them here. In general the feedback is favorable, but it is far from the perfect kit (which kit is). Yes a great looking Yak-3 can be build straight out of the box as some of the build reports illustrate. But a lot of the detail is simplified and so much more could be shown in this scale. I am aware that people build large models for various reasons, but for me as a Mega rivet counter, it is the extra detail possible in the larger scale which makes the 1/32 scale so attractive. Yes I know of the "rivet counter syndrome", trying to replicate and correct every little detail and thereby not finishing a model ever. I will try to find a compromise and accepting some of the inaccuracies and keep moving - maybe easier said than done. The general outline and shape looks good, but there is scope for improvement with some details which I feel will enhance the look of the model. It looks to me that some of the detail in the kit is based on the Yak-3M reproduction build which unfortunately isn't a representation of the wartime aircraft. Also restored aircraft contain parts from other Yak types, making it difficult to draw conclusions - so I guess Special Hobby had a hard time too finding the correct information. As always, any comments are much appreciated. Cheers, Peter
-
Started a new project, that I had in mind for some time. In short: A Yak-3 1/32 with a scratch built engine. Since there is no Klimov VK-105 engine in 1/32 on the market and not wanting to use an Allison or Merlin, I choose the challenging way. :-) In getting this done, I use the 1/48 Klimov engine from the Zvedva kit as a template/master. Progress hasn´t got very far. Working on the engine block. For the cockpit I got the ip from Yahu. Fantastic details. I am still waiting for some PE sets for the interior and the flaps (not sure if I display them open). Additionally I ordered some new decals from Begemot. Dirk **************Since Photobucket changed theire "Terms of Service" and my photos can´t be seen, I deleted those in this thread and added them again further down using another uploading service!***************
-
Another Special Hobby kit reviewed today - their second release of the Yakovlev Yak 3. Really nice kit that shouldn't take too long to put together! Iain


.thumb.jpg.f0920d798d5d8600fb58b1d8a906ddff.jpg)


