Search the Community
Showing results for tags 'Kitty Hawk'.
Found 21 results
-
I have the Kitty Hawk T-28C kit and AOA decals which includes 2 T-28C's. One is a fairly early T-28C in VNAF colours for which, as far as I was able to find, the kit wheels or the Navy style wheels by RESKit are good. There is also a Laotian T-28C that was converted like a T-28D-5 with land-based wheels and extractor seats. I can't find a picture of this exact machine, but have found others like it (D-5s that is). I noticed these have bigger tyres, and I'm wondering which of these wheel sets are good match for those. The Kitty Hawk kit seems to come only with a "fat" nose wheel and tyre. https://www.dersockelshop.de/search?p=1&q=T-28&o=9&n=20&f=6|364 Anyone more knowledgeable in T-28s know what set I might need for a T-28C that's been updated like a T-28D-5? And are the aftermarket extractor seats or do I need to find and modify these from a Skyraider? Thanks! Jeroen
-
Project started in Spring lockdown, stalled all summer & autumn but completed in a flurry of activity in the last couple of weeks. Bare-bones w.i.p thread: T-28 Trojan Kitty Hawk 1/32 - Page 2 - Works in Progress - Large Scale Planes I'm not very good at knowing when to stop and take pictures but I'll try better next time! Extras used: Aero Bonus pilots, Airies Cockpit (in the yellow C), Aero bonus propeller sets x2 but used the lovely one-piece hubs only with the nice kit blades as I find two-piece hub assemblies don't clean up well. Magic Scale modelling light & sound kit in the B (turn the sound on if you watch the video). Kit decals. Thank you for looking and any critique is welcome.
- 6 replies
-
- 14
-

-
- magic scale modelling
- kitty hawk
- (and 2 more)
-
My Training Day Group Build entry... Building the SNJ version. This is my first "public" build so I am open to critique, comments, and advice. Probably have a lot of questions too... Thanks! Regards, Len
-
Another model goes to my shelf. This time, the design that appears at the competition quite rarely, namely the P-39 Airacobra. The model itself is pretty cool, but I've added Eduard plates, HGW straps, Master barrels and Eduard exhaust pipes. Markings painted from templates drawn by Mr. Decal and cut Maketar
- 15 replies
-
- 27
-
-
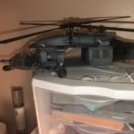
So I had been waiting on the kit and soon as it came in I have began working on it. All was going well with the build until I saw the work Pete had done to the ceiling and I was inspired. So I started butting mine and began cutting and filing away. Ceiling is about to the point of primer coat, just a little more sanding left. Originally I was breezing through the kit and it just wasn’t feeling “right” to me and while to cabin door area was nice, it wasn’t as grand in the flight engineer seat area. Debating how to recreate current Pave Hawk seats.(last image)
-
Hey guys, long time no talked... It's been a while since I participate or even finish something on LSP nor else.... I hope I'm not too far gone with this one I stalled a year ago, Did finish another F-86 before that one but a little accident happened... a few day's befor Torcan. I guess after that I ran out of gaz (motivation...) and put it back on my doom shelf, have quite a few on that one.... Hope to hear from you and have fun. Regards, Dan.
-
Hello everyone! It's been some time since I posted any work on LSP. Since my Revell F-4 debacle I took a break from 1/32 scale and worked on some 1/48 projects instead. I decided to get back to my favourite scale and was looking for a modern but non-jet subject. I came across Kitty Hawk's OV-10D kit and despite some negativity surrounding the kit itself and the manufacturer in general I bit the bullet and got it. While I don't know much about the aircraft I immediately fell in love with its distinctive shape and overall agricultural look. The kit is an excellent candidate for super-detailing considering its large canopy and provided open engines. For this build, apart from the model itself, I'll be using AMS Resin's seats and True Details' wheels. The rest of the details will be scratchbuilt. So... Here goes!
- 121 replies
-
- 5
-
-
- kitty hawk
- ov-10d
- (and 3 more)
-
Hi guys, I’m currently building the Kitty Hawk 1/48 RF-101C Voodoo (a smooth and pleasant ride despite what’s being said In some circles). My intention is to do an Vietnam-era replica in one of the early test camouflage. During my research, I noticed that Voodoo of that theater often carry a different kind of auxiliary tanks, slimmer and longer than their European counterparts. I curious to know where those peculiar tanks come from. Since the RF-101s used in Vietnam were originally based in Japan, were these long tanks associated with their base in Japan ( just like the Misawa tanks on the F-86 during the Korean War?) What do you Voodoo fans, think? Thank you for your input. Cheers, Quang
-
 Hey everyone, Can't wait no more and have to start a long time wanted project.... an ''E'' Tiger II, at NAM. So far to me, a very nice kit, very few flashes, nice fine panel line and planning to have a lot of fun. Planning mostly an OOB build quick and easy, with some mod confirm with Airfixer but, hey, we never know..... Dan.
 -
Gents- After my wife decided I needed to get back in to building (or dorking as she likes to call it), we went to Hobby Town. After picking up the Kitty Hawk T-28C, she insisted I buy it. I have been out of the hobby for more than a year. We downsized apartments and I got rid of most of my supplies. Our apartment does have computer nook, which she has allowed me to set up a new "workshop". However, I can't airbrush, so most things will be hand painted. I decided to do this as a restored Warbird T-28, so I'm not striving for 100% authenticity, this works cause the decals are for Warbirds. Just a few pics to get started. Here is the cockpit mostly assembled. I did use the decals for the instrument panels. They look great, but I wish they would have left them with a clear background, allowing us to match the grey a lot closer. The seat belts are the kit parts but I used bandage tape for the fabric. It works pretty well. Sorry for the quality of the pics, they are taken with my phone. You'll notice that the front seat has no belts, I am planning on placing a pilot in there.
-
It has been some time since I have posted anything of any substance as of late. My family, career, and 1/1 aircraft restoration take up the majority of my time these days. I have been building some, although not as frequently as I would sometimes like. I had been tinkering away with an Academy 1/48th CH-53E, and desperately needed a break from the filling and sanding of the hundred or so ejector pin marks on the model. I chose the Kitty Hawk Trojan as a welcome distraction after following some of the builds here from "Herr Clunk" and Brian Leitch, among others. Being that I have both flying and "wrenching" experience around Trojans, I decided that I was going to build this model primarily straight from the box, with a notable few exceptions....(which I will explain as I go)... Here is a shot of the cockpit so far. I used Model Master enamels throughout. The base color is Dark Gull Gray with details picked out in their respective colors. I had originally applied the decals like others had, but found the pit decals would not settle over all of the raised detail in my example. JohnB came to the rescue, and sent me a spare sheet he had not used (Thanks John) I modified the kit's side console decals by cutting out each individual placard and panel an applied them in their respective locations. The reasoning here is that Kitty Hawk printed the decals with a strange blue background that does not near match the actual color of the aircraft. Brian used them successfully, but I decided in the end I could not live with the discrepancy. So it made the job much more difficult, but I am happy so far with the results.... And another shot of the cockpit in-progress.... I managed to do the same procedure with the instrument panel decals, cutting them out one at a time to eliminate as much of the printed cockpit color as I could....the placards were quite tiny, and tough to maneuver. I find Kitty Hawk's decals like to stick where they land, so I had to float them into place. A bit more work than usual, but worth it in the end. Next time I will use some Airscale instruments.... Here is the left sidewall, with the same treatment of the decals. I am going to add the throttle, propeller, and mixture control levers that are so prominent in the real aircraft. This will also add a bit more color and definition to this side of the cockpit as well. Last shot of the cockpit parts, including the back deck, sticks, and control gust lock. The kit provides two of these, but I am only using one in the front pit, as there usually was not in the rear cockpit. I still have to gloss-coat everything, do some pin washes, weathering and highlighting. I am leaning toward one of the Vietnamese attack birds on the AOA decal sheet. But I still have not decided completely. I will also be making my own harnesses for the seats, as the kit ones are, well, different (not that the kit seats are totally correct, either!).....I also do not like layering photoetch straps to build them. I will use some wine bottle foil and Tamiya tape to fabricate these. I also will not be replicating them exactly, as I will be installing a standard four point harness. Last pic of the night is the engine assembly. I have shoe-horned more nose weight into every hollow part I can to help keep the model from sitting on it's tail. I did not bother detail painting anything aft of the exhausts, as I plan to display the cowling closed.....I also applied a spare data plate decal to the crankcase, and still have a bit of weathering to do. More this weekend....(unless the girls have anything to say about it!! ) As always...Thanks for stopping in- THOR
- 17 replies
-
- 10
-
-
- Kitty Hawk
- T-28
- (and 1 more)
-
Well I will first say that this was my first kitty hawk kit after I heard a lot of good things about them, so after more than a few issues (for me anyway) on this one, I shall reserve judgement on the Kitty Hawk brand of kits. Ignoring the kit issues, this was my first modern Luftwaffe aircraft ever, so it was a nice change from the 'norm'. Built straight from the box, except a few cables added in the cockpit to liven it up a little. I haven't had a great deal of time to get the photos I wanted, so I will add a few more later......well enjoy (hopefully) and all comments welcome. Thanks for looking, any comments and questions welcome
-
Hello! Finished my first piloted LSP build, a Caudron 714 in gaudy colours. Time to start a new build. Another prop with another odd paintjob. How about a North American Texan in the Heart of Darkness? Just one word: Biafra. A lot of darkness, indeed. And some small aircraft. Regards - dutik
- 80 replies
-
- 4
-
-
- Kitty Hawk
- 1/32
- (and 2 more)
-
This is my version of the new KHM T-28 Trojan. I have seen several of these built, and all but one have been in this scheme, as I think it is one of the more pretty schemes for the ol girl. The kit is without a doubt one of Kitty Hawks best kit, and all the evidence points to KHM getting better and better with each later release of LSPs. Some observations on the Kitty Hawk T-28 if I may............ - KH did a nice job of fixing the delicate ignition ring, Id LOVE to see that type of engineering continue on all further radial-engine powered KHM kits. It REALLY saves you from having to scratch a new one, with the extra part in the center to help give it strength. - KHM also did a VERY nice job of listening to what most of us want.......... reduced # of open panels. I would love to see this too continue, as I do think the majority of people buying this that DO want open panels will not have an issue cutting their own. This also gives lend to some great fit all around. - Wheels. The OS2U had weighted wheels if I recall correctly, and I would have loved to have seen that on the T-28. The lack of weighted wheels really puts a quite large and heavy plane "on its tip toes" so-to-speak. - Pylons. The armed version of the T-28 had quite a few of them, and thats understandable, but I think the majority of people building this one love it because it is a trainer, which means no pylons. However, the OS2U did have these filled (but needed to have a place in the instructions where it mentioned punching them out before wing assembly) and let you punch out holes as needed, which in the end was a MUCH better solution than having to punch out discs to fill the pylon holes. All that said, this is by far and away one of the easiest OOB builds I have done, and other than having to know you need more nose weight, its a pretty straight forward build, that fits REALLY well, and has all the potential in the world for super detailing if one desires. I tried to keep the weathering so it was no so overbearing but keeping the well used theme going, with enough dirt that could have realistically accumulated on a trainer that saw lots of use/hours. I also realize that bright sun-light is not the ideal picture taking light, but its what I had to work with so hope you find them acceptable. So without further babbling, here is the T-28 built for Glen and KHM that you may see on one of their display tables in the future. Its quite pic heavy so bear with me: MORE.......................
- 44 replies
-
- 17
-
-
- Kitty Hawk
- T-28
- (and 2 more)
-
Ok, inspired by JohnB I've started a new build - the Kitty Hawk P-39N/Q which I'll build as Snooks 2nd. I'm only a few days into the build and already having a love/hate relationship with the kit. I really like Airacobra's and 1/32 is ideal to show off the cockpit, engine and nose of this unique bird. But the fit of the kit and mold quality leaves a lot to be desired. JohnB has highlighted a lot of the fit issues so I'll try not to duplicate those here. I was very surprised at the flash and excess pour plugs (at least that is what I call them). The flash is very noticeable on the engine wiring harness: And on the back of certain parts: The exhausts come in 24 parts, and half had significant flash. Not ideal on an $80 kit. The fit so far has also had issues: for many pieces that are supposed to come together, either they are so tight as to nearly be snap-fit, or the lugs just don't fit. For example: parts D10 and C30: Part D10 has holes for locating pins, but part C30 doesn't have any pins. Things like that just slow down assembly. On to the build! Have to start with the engine, but remember that only the sides are really visible: I have a lot of work to do on the exhausts, and then will add the wiring harness and detail the engine block. Started work on the cannon and machine gun parts: As we know P-39 models are tail sitters so I'm trying to find as many places to put some lead including inside the machine gun magazine in the nose and all of the other hollow boxes. Not sure how effective this will be and probably will still need to add nose weight, but hopefully a bit less. Here is the cockpit so far. Using the Vallejo acrylics and have been very pleased so far. They go on very well (if not very bright!) with easy water and Windex clean-up. I have not tried detailed work with the paint yet. Getting used to the eye-dropper dispenser but also like being able to easily add more paint, and not having to thin it (I am spraying right out of the bottle). This is the green the Kitty Hawk kit called for - looks very, well, GREEN to me. I've started doing some highlights using Model Master Dark Green to reduce the monochromatic effect. More to come.
- 106 replies
-
- 4
-
-
- Kitty Hawk
- P-39
- (and 2 more)
-
When KH announced the Viper and the Venom, I knew it was a "must" have for the stash. I've been waiting to build a LSP Helo for a while but couldn't find the right one and the Revell Cobra just needed way too much to make it look fierce. Then came the KH Viper in 1/48th... I learned a lot about building KH kits. They are not as simple as just following the instructions. While that may get the job done, you really need to think about how you are going to assemble and paint the kit before the glue drops hit the sprue. In this kit, it was the cockpit....it's all black and needs some tonal variation to add interest. If you don't assemble some of the parts before paint (try to paint them separately), you won't be able to get them together afterwards. Another area to pay attention to during assembly is the glass. Is it going to be open or closed? If open, make sure you figure out how to glue it in that position... Oh, and the nose weight needs to be waaaaaayyyyy up front... That said, the detail is great. The decals are nice and the fit is generally good. I used a lot of new techniques on this build and they turned out ok. I'd prefer to not have all the panels open, but they were not too bad to close up. The rotor mast and head assembly is fiddley but it works. In the end, I'm proud to have it on the shelf! One of these days I'll learn how to use a camera...
- 2 replies
-
- 6
-
-
- Kitty Hawk
- AH-1Z
- (and 1 more)
-
Well gents, this is it, Kitty Hawk Models brand new 1/32nd OS2U Kingfisher! This will be a demonstrator model for Glen @ KHM, to display at shows and what-not to promote the kit. The kit itself has been VERY anticipated not just by me, but as I can see by the reaction on the forums and social media, by a LOT of others as well. Im pretty sure others here will be doing an IBR of the OS2U, so I will not be going into every single detail that the kit has in it, as the minutia of the kit will be covered in great detail Im sure. I will go over what I normally would on a WIP, as this is a build review first and foremost, to give those interested in the kit and opportunity to see how the kit builds up. On to the show then! This one will be strictly OOB since its a manufacturers demo, but I have yet to determine the scheme, as I believe Glen has something special in mind for this. The kit in OOB form is QUITE nice, and I can say I honestly have NO affiliation with KHM, other than building these types of demo models, and this kit might have some of the best molding features I have yet seen from this new gen of KHM LSPs. As my standard WIP fair, I like showing what we have up front. The kit itself is really well molded, has excellent surface detail, and so far I find no mold issues, short shots or other manu flubs. The glass parts come in the now standard KHM separate box inside the kit, keeping them safe and out of harms way. The instructions are now the standard 8x5 or so booklet style with clear and concise directions, also containing all of the OOB scheme profiles as well. Some very attractive schemes chosen IMHO: Decals are also well done, and in register, and include IP decals, as this method seemed to work decent as an OOB solution on my Bronco as well: On to the plastic then! The kit looks to be well engineered, and has some very fine detail to it, including raised rivets, and even some raised panels, and recessed panel lines: MORE.....................
- 419 replies
-
- 13
-
-
- Kitty Hawk
- Kingfisher
- (and 1 more)
-
This is the forthcoming (August 2015 release) Kitty Hawk 1/32nd OV-10A. What can I say...........................Its a great kit. VERY few flaws, great fit all the way around, VERY few large omissions or errors, and will have a price point (at least as far as I can judge by the cost of the D model Bronco that is) that most everyone will be able to enjoy it. Normally this is where I tell you to "go buy the kit!"................but alas you cannot...............not YET anyway. Upon its release in August of this year, I will definitely be getting another one and building it as well! This was a commission build for Glen @ Kitty Hawk models and will be used to promote the kit. After these pics were taken she was boxed up, and is now ready to be shipped out to Glen. I was a bit forlorn as I think she turned out very fetching looking if I do say so myself. Thanks to Randy (AKA sluggo) @ StencilPal for the paint masks used on the very first ever OV-10A kit built, and thanks also goes to Steve (AKA ziggyfoos) from AOA decals, as well as Danny (AKA Vandy 1 VX 4) for their OV-10 knowledge, as well as all who stopped in and gave helpful advice, and en encouraging word............cheers to you all. Some of the pics give the model a funny optical allusion, looking like it has a bit of anhedral to the wings, but I can confirm they are straight and level. Things are quite pic heavy ahead, so without further ado, here is the soon to be released OV-10A for I built for Glen and Kitty Hawk: MORE.........................
- 52 replies
-
- 14
-
-
Well guys we are off to the races again.........................More Broncos! I have received my shipment of parts for the new Kitty Hawk OV-10A from Glen..................... There is not box nor box-art, there are no instructions, and no decals, so this one may be slightly more of a challenge than the D was overall, but still should not be an issue with the instructions from the D model. There are not a whole lot of differences between the kits that i can see other than the nose of coarse, and then the exhausts, props and some cockpit differences. The cockpit still appears to be slightly inaccurate for the A model, and there dont appear to be any new weapons stores for the A, but again this is a test shot ONLY so things may change when the actual kit is released. Im not even sure of what the OOB schemes will be as Glen has not let on about that yet. So in light of things, I will be using some left over decals from my OV-10D build in conjunction with some custom made Black Ponies and some fuselage codes to make a SEA scheme from the VAL-4 Black Ponies based at Binh Thuy in 1969. I have everything I need save the Black Ponies themselves, and some fuselage codes: Here is another drawing of a ship from the same squadron based out of Vung Tau also in 1969 with a pretty much identical paint scheme as I will be going for: I will likely be using the first set of codes for 55403. This will be a down and dirty 100% OOB build. I will not be adding anything that I don't already have in the cardboard box that the parts came in since this will be a demo model for Glen to display at his tables. In that light, I will also be doing something out of the ordinary for me, and in keeping with the demo/OOB theme, I will be displaying all 4 cockpit crew hatches open, and likely one engine cover displayed open as well. This is not my normal SOP, so it may take some finagling during the shipping process to keep things from breaking off. Im not sure on that yet, and will cross that bridge when its time to start thinking about shipping this one to Glen. The main parts difference (at least in my test shot) is a pretty short list of parts: Well boys and girls that is about all for today........................Ill be getting an actual start on this one soon, I just have to wrap up the build article on the OV-10D, paint on the anti-glare green on teh windscreen and Ill be digging into this one. Cheers!
- 309 replies
-
- 6
-
-
- Black Pony
- Bronco
- (and 2 more)
-
It was setting on my door when I came home on Friday. Man have I been looking forward to this kit for some reason. I knew nothing about this aircraft 6 weeks ago except the USAF did not fly this version and Academy makes a 72nd Desert Bronco with Double Horse-shoe tail markings. Let's see, Horseshoes, Bronco, Peyton Manning, Colts Desert Camo................................................I'M IN LOVE! Those that know me know I love building In-Flight with pilots, Desert Camo Horseshoes, Peyton Manning , Andrew Luck, Colts, Broncos.....not necessarily in that order. I started to do some research and Brian started his review and got my self in trouble on colors . I have been paying attention to his build and can see some things I want check out in the cockpit. All that GLASS you can see for days. This kit reminds me of when I "Discovered" the English Electric F1A Lightning, picked up an Airfix 1/48 for half price and before long I had 2F1A, 4 F6 about a dozen Airfix, Hasegawa, 1/72 and 3 1/32 F1As and 2 F6. Then I bought a CASE of the latest F6 kits.
-
Ive been waiting for this one for a LONG LONG time. Its by far and away one of my all time favorite air-frames, possibly top two. I have always loved it ever since my dad got me up close and personal to a demonstrator way back in the day at a show at our local AFB.............simple, effective, superlative flying characteristics, great visibility, super maneuverability, and extreme adaptability and flexibility. It was always just do damn small in the dreaded 1/48th scale to model, along with the fact that the Testors kit was really JACKED UP and needed mondo AM parts to make it even remotely acceptable............................. Enter Kitty Hawk! Glenn and crew have been putting out some real stunners lately, and this little gem has to be seen to be believed! This 1/32nd OV-10D from Kitty Hawk is possibly their best kit to date, with some wonderful molding, precise and restrained reviting, and some very fine detail all the way around. Our very own LSP_Paul will be doing an In-Box review of this kit shortly, and I will let his review cover what you get in the box, so I wont go into a great deal on that up-front. This will be a build review for Kitty Hawk models, so it will be built OOB using only what KH give you in the box, which is some REALLY nice stuff! I will let Pauls IB review cover that in more depth, but believe me, there are some VERY nice touches in the kit..................but for now, lets get started! Unlike some previous new releases from other manufactures, KH has chosen some really great box art for their D model release of the OV-10: For whatever reason, I really like the shape/size of the Broncos box..............that is not something I often think about, or even contemplate when modeling really, but in this case the KH OV-10 box is not that large in length or width, but its quite thick, with glossy artwork of all the schemes the kit comes with, and is just about the perfect size to work with on the bench: The box itself, comes absolutely STUFFED full of light gray sprues and some nice little treats, but again Ill let Paul get into those detail in his IB review. I had to completely revamp my work room and clean up some cluttered and effectively unused space, to free up some room to get the HK OV-10 on the bench and still keep adequate room to continue the HpH Walrus at the same time. Ive not attempted a double build before, but I freed up ample room for the OV-10, along with some space to put finished parts, the instructions, as well as getting a new work matt for the space, and rigging an old light I had laying around as a 3rd work light for this new work space. I will still be able to use my PC, but I seem to have ample room to work on, and spread out with both kits, and not get anything mixed up, or have either one hamper the other as far as room goes.
- 548 replies
-
- 8
-
-
- Kitty Hawk
- OV-10
- (and 1 more)