Search the Community
Showing results for tags 'Eduard'.
-
Just a couple of odds and ends to do but the main build is done. tail light, wing lights, pitot tube and aerial and she's done. Again be at Telford
- 19 replies
-
- 13
-

-
Hello the next kit i will start the mosquito Yes another one im still working on the corsair but im at the point for decals so everything is slowing down and i whant to build So this wil be a slow build and try to do better than my corsair After looking at all the mosquito builds over here i hope i can meet the finnish standard For the markings i have no idee at the moment So the kit. the aftermarket for this one i hope i can make a small start this weekend Mark
-
Our club does an annual 'Group Build' called Build the Same Kit. This year its the Hellcat and mine is the Eduard 1/72 kit. I chose Lt. Stambook, VF-27 from the USS Princeton as my subject (kit decal options) since it had that nice mouth on it (can't really say its a sharks mouth). Already in progress using mostly Vallejo and Model Master paints. This is the Profipack kit, so it has the PE parts for the cockpit (color photoetch). For the first time I was able to get all of the various switches in place and the PE seatbelts. I've seen a few different light blues on these aircraft, but have a feeling the blue I chose is just a LITTLE too bright. Interesting too is that the kill markings are on the right side of the aircraft. Had not seen that before. VF 6 and VF 33 seem to have done this. Working on the washes now, using a light gray around the gun ammo doors (as I've seen in reference photos) and black on the folding wing and flaps. Best as I can tell, the rest of the panels for the most part were not outlined so just leaving them alone. Will hit with a matte finish at the end. Thanks, Chris
-
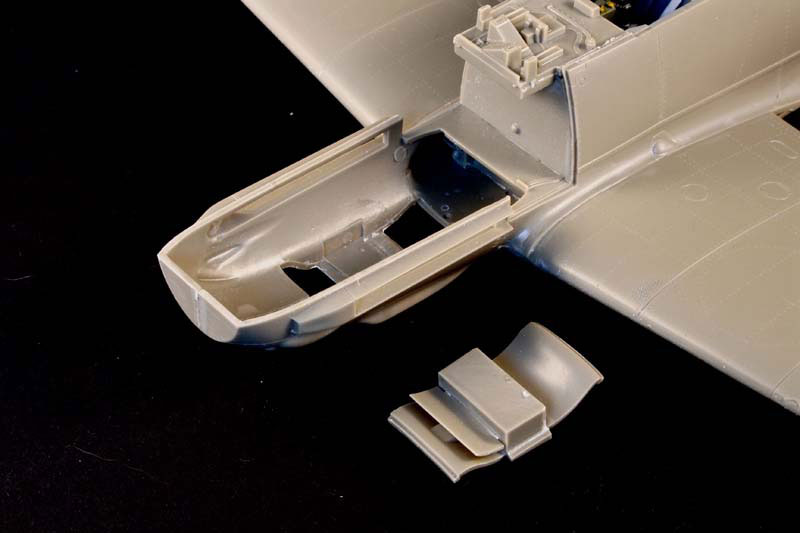
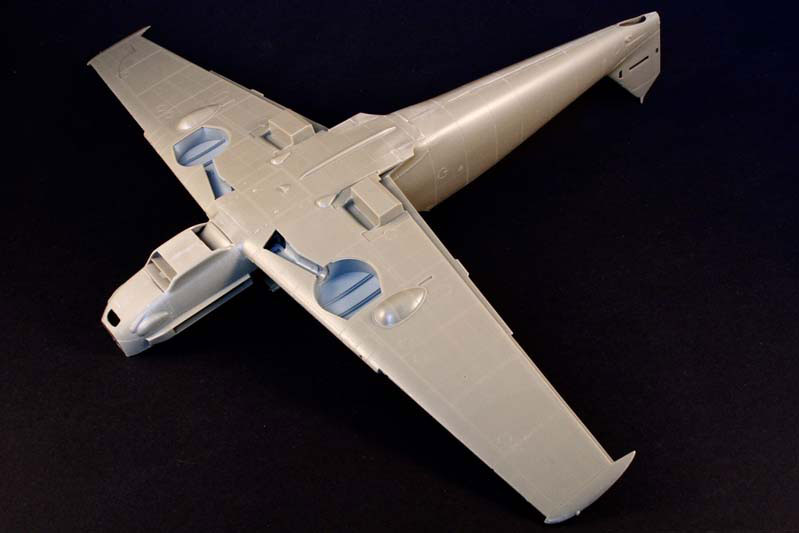
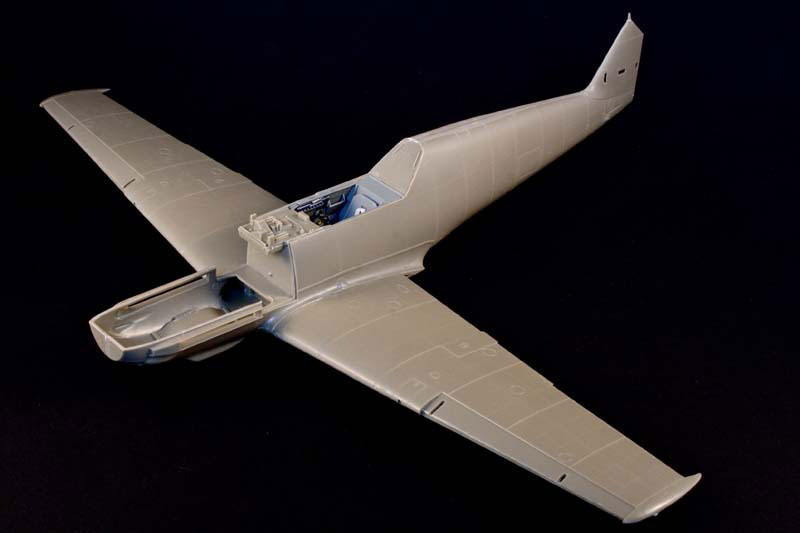
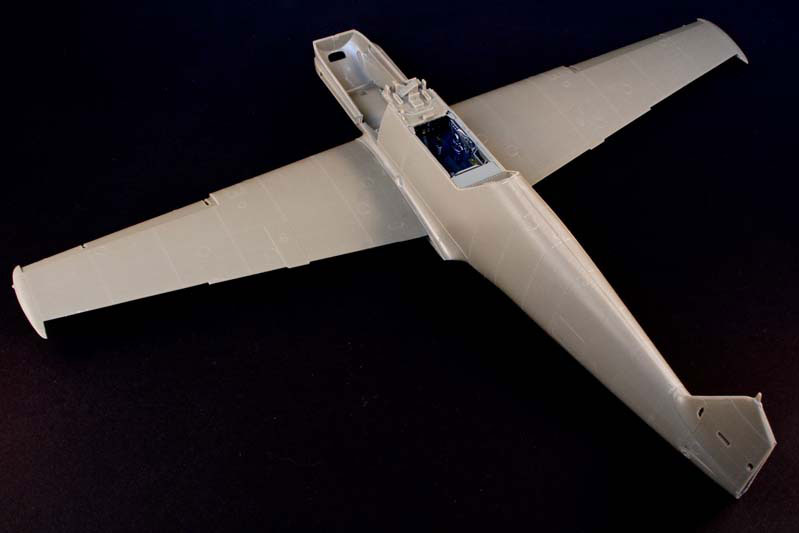
OK - so I know I'm easily sidetracked, but I fancied doing a quick, fun, build of a model that's been shouting 'build me' for a looooong time. And I have finished two other projects in last two weeks - so on a bit of a roll. Now I realise that the Eduard 109 isn't the 'fashionable' 1:32 109 kit, but I actually like the look of them in the box, especially the finesse of the surface detailing - and I now have 6 in the stash. These comprise 4 'weekenders' bought for the princely sum of £15 each at various times, and two standard kits (E-3 and E-7) with all the etched bits and choices of decals which cost an astronomical £21 each. So all a lot cheaper than the alternative. The start was an E-1 I purchased to use with the Alley Cat conversion to an early 109 - made sense after that to base my 109Es on the same kit. This was started yesterday afternoon - and uses some parts from the old Eduard etch set for the old Hasegawa kit - but shows some good progess for only a few hours work. One of the areas that was a common bugbear reported by previous builders was the under-nose radiator area. A look at the parts appeared to confirm that the radiator assembly could be added after the fuselage was joined and the area cleaned up. So far she's going together really well - will try and get the exhausts and cowls done later today so she can go sit in the airing cupboard whilst I take some review photos for the site, and work on my Spits and Lightning parts. Still undecided on scheme - but may be this one - flown by Hptm. Wilhelm Balthasar, Kommandeur III./JG3 - Desvres/France - August 1940. Please feel free to remind me in 6 months that this was going to be a 'quick build'! Iain
-
One of my favorite kits for a quick-build P-39 is from Eduard - the fit is amazing, you can build in a LOT of detail in the cockpit and you don't mess with the engine or nose cannon assembly so it is a very quick build. I have the old Cutting Edge Air-A-Cutie decal set so am finally putting it to use. Also have a bunch of other old bits, including the Moskit metal exhausts. :-) From 2007 I do believe. I decided not to got to town on the cockpit, esp the IP, since I am going to use the pilot figure and he really does clog up the cockpit more than a little bit. Not the best picture, sorry! Will retake and repost, but have already lightened up the face. I have a few in-process build pics but let me jump ahead a bit... I've actually closed up and have started to sand the fuselage seams, esp that one on the back. There is a bit of gloss in the cockpit for some decals that I will flatten out. I would weather the seat, and will a bit on the sides, but with the pilot in place, you really on see the one side. I'll have the right side door open but expect to have the left door closed. More to come later! Chris
-
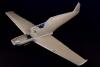
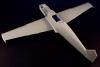
Hi hi, it`s been a big airbrake with the Eagle, but I was dealing with the Harrier. Well, I may become famous, but this Harrier became something like my best model so far. It`s not finished yet - just the decals are attached today. There will be a full video review of the build on the Mitko`s youtube channel and check out what a trailer he did about this model: There will be a full build review on the DNmodels blog, so check it out when you can. So far I could only share a couple of photos from today - the decals are on and a thin coat of lacquer. That`s it for now. Btw, I plan to use oil paints for the weathering for the first time and with the help from the local IPMS club - the oil paints should do miracles for the weathering. So... the Harrier GR.9A ZG478, with the huge Lorraine Cross on the tail: It`s an interesting plane. Honestly, I had only some basic knowledge about this plane and it is not one of my most favorite planes (even the US Harrier), but during this build I kinda found its beauty. Yeah, it`s a beautiful plane. Almost forgot to mention ... it is something like 3 models in one - I mean 3 different displays out of this model - just about everything turns, rotates, etc., to transform it from a parked jet, through the VTOL mode, to a fast flying plane... there is a sneak peak in the trailer.
-
- 16 replies
-
- 21
-
-
 Even though I'm pretty much a WW2 freak, I've always had a fascination with Migs. In particular, the cold war era jets. I've sworn to myself that I'm going to build at least one of all the main Mig jet designs at some point and probably multiples of several different types. I'm also really a large scale guy, but the buzz and feedback surrounding the Eduard 1/72 scale kit really got my attention. I had pretty much sworn off this tiny scale, years ago. However, in the last year or so, I've seen several builds of Eduard's series of kits and decided that I had to have one. The clincher was when John (Thunnus) posted his magnificent build of this kit, here on the Non-LSP forum. Coincidentally, I had been watching a Profipack kit of the 15bis on Ebay that also included the Brassin cockpit and speed brake sets, all for the price of the kit alone. I took it as a sign from above to go ahead and get it and it arrived this morning. Aside from just being a cool little kit, this build will also serve a couple of other purposes. I'm going to do it in a natural metal finish. I've been playing with a couple of test parts shot with Testors Metalizer buffable paint from the rattle can. I've used this paint before for NMFs and really do like it. However, it's a delicate affair and very easy to mess up. Being that I've also been learning to use oil paints for weathering over the last couple years, I wanted to see if I could pull this off without messing up the NMF too bad, especially on a more expensive kit. All of this testing is in preparation for an Eduard 1/48 scale Mirage IIICJ kit that I also plan on doing in NMF. I toyed around with the idea of doing that one in aluminum foil, but have come to the conclusion that a complete foil job may just have to wait for a while and will most likely be reserved for something in my preferred 1/32 scale (like another Mirage, or a Mig 21...or two...or five!). So, for now, it's baby steps with a "baby" of a kit. I forgot just how tiny 1/72 scale is (especially PE cockpit parts!) until I opened this box! The last purpose of this build will be sort of a kick-start to my mojo. I have a 1/32 scale F3F biplane build on the bench right now, but I'm just not feelin' it and I feel a bit rusty after not really completing much over the last year. So, the Mig has my attention and my passion flowing. I'm going to run with that while I'm in the mood. This is the scheme I will be doing. It's a North Korean bird that was put back into VVS service and markings, which were just painted over the previous users insignia/numbers. The NK decals are fully opaque and it's been recommended to mist silver paint over them or, as one other builder did in an article I found on the web, to carefully sand back some of the color on the decals before applying them, giving them a faded look. While I'm sure I could accomplish either (but would prefer the latter after seeing the other builder's excellent results), I'm really leaning towards the idea of just using the North Korean markings, as it would have appeared before being remarked with the Soviet stars/numbers. I want this to be more of an "anonymous" looking North Korean example, if you get what I mean. So, I'm hoping to dive into this over the weekend. I will probably even get started today. I wanted this to just be a quick, possibly even "weekend" build. However, the PE and resin parts are going to require a lot more attention and this kit really deserves it, in my opinion. It's really a gem. I've decided to pass on using the Brassin brakes, as it would require some surgery and I prefer the "cleaned up" look, anyway. I do have the Master barrel set on order and it should be here next week. Wish me luck. I'm goin' in! John
 -
Hi Folks and Folkess – Been a while since I have been around have had the pleasure of moving house – with all that that entails!!!!!!! So have finally got my bits out of the boxes……. Just the one breakage that I can see so far Doh – But an easy fix So now I am feeling the urge to build (And Not Decorate as my better half would like) also need to find some new work! Got to earn it to burn it! Need to feed my plastic habit somehow! So I'm going to dip my toe into some German hardware. I have always shied away from these subjects as all that fine mottled paintwork terrifies me and will defiantly push my fat fingered airbrushing to its limit. The other reason for this one is with all the generosity with the Crimbo raffle that I have read - I thought I would put my LSP acquired bits to use. So the kit came from a Group Build give away – think it was All Most Out Of The Box And then I won the stickers in the raffle last year! So put them together to get an LSP given to me inspired build. I have also added some extras as you can see and I bought the book awhile back. So that's me set – It'll be a little while to get full into it with Crimbo and stuff to do first! But I hope it wont be to long to cutting some plastic!!!! Hope everyone has a great Christmas and Santa brings you some nice presents Happy Days – Taff
-
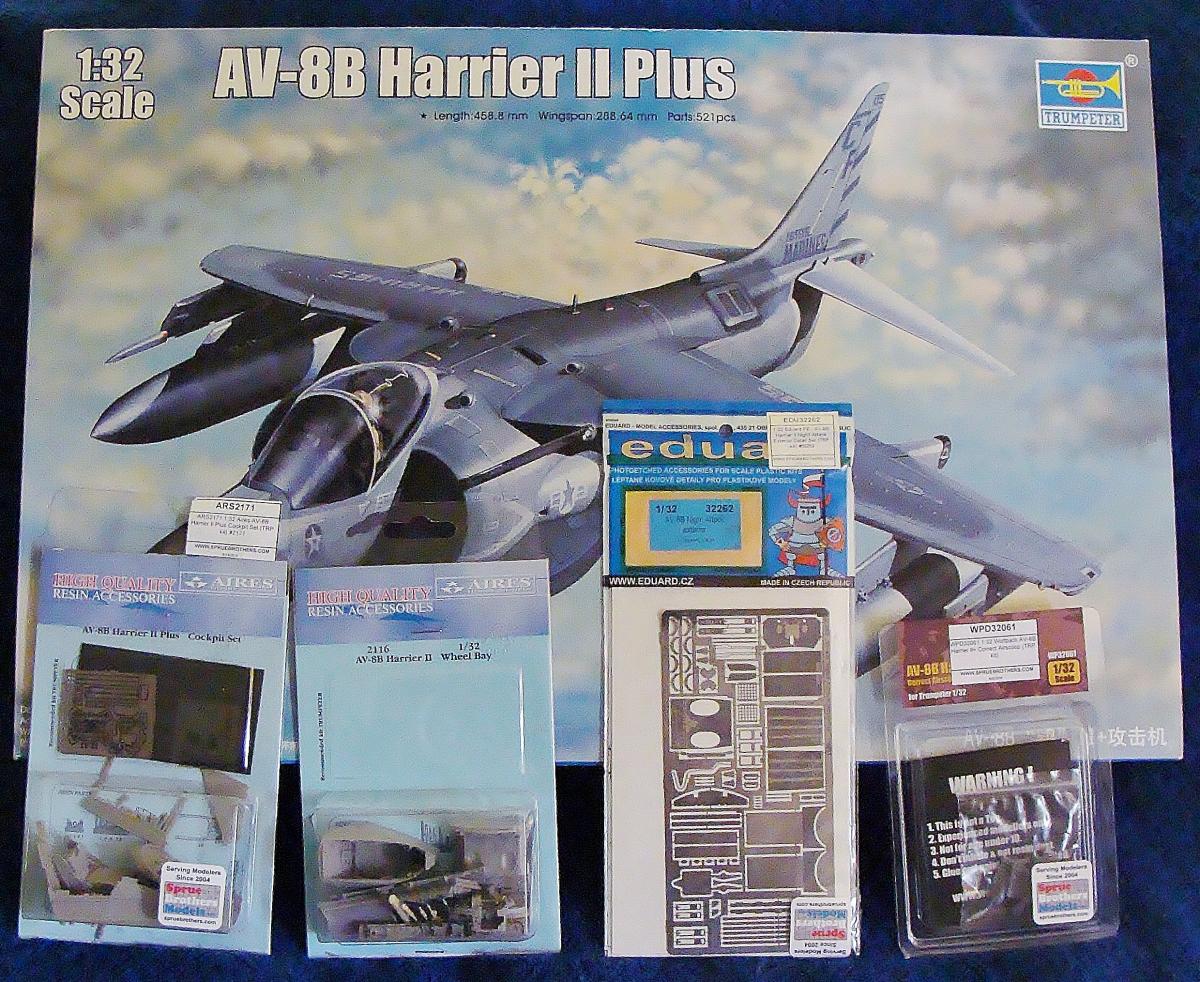
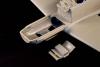
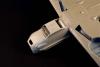
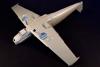
And so it begins! A lot of things have been written about the Harrier series of kits from Trumpeter, and to be honest, a lot of folks have either been scared away from the kit because of a few minor shape issues and the somewhat negative reviews that came out just after its release, and you dont see a ton of them built as a result. The good news is that most of what needs to be "fixed" can be done so without a huge drama post condemning the kit and curse words flying across one's model bench onto the internet. Yes, this will require modeling skill, not just aftermarket, but anybody who has worked with plastic, putty and glue a while should be able to do this. I hope to show that with a bit of work, This can be a really great model. I have spent the better part of 3 weeks in my spare time collecting references, reading build logs all over the internet and watching video of the real aircraft from as many angles as I can. I dont know why, but doing this programs my mind to look for things that are not correct as far as the lines of the "model" aircraft when dry fitting, assembling and painting. It also helps to know that LSP'rs are around and lots of you like to help, so If I'm missing something I will ask for help, count on it! I will be using the following : Trumpeter kit 02286 Harrier II + Aires cockpit set 2171 Aires wheel bays 2116 Eduard photo etch for the exterior 32262 Wolfpack models corrected Air scoops 32061 I will possibly still pick up a vinyl det cord for the canopy and still need some decals. So far I've opened all of the boxes, the kit is fine some of the Aires is broken already, not hard to fix but I wish they would work on their packaging some times. I am currently cleaning up the cockpit resin since that's where I will start. Here is a pic of the whole lot, I just got the Harrier in a trade this morning! Thanks again to Jan and Ernst More as soon as I have something to show, Paul Lets Fly!
-
Eduard releases August http://www.eduard.com/store/out/media/distributors/leaflet/leaflet2016-08.pdf 1/32 Mirage III Big-Ed set - yeah! 1/32 AIM-9B Brassin 1/32 AIM-7E Brassin 1/32 A-6E TRAM etch stuff Plus a bunch of proppy stuff for the big 1/24 Typhoon and 1/32 Tempest Tony (still hoping for 1/48 coloured etch for the Su-9U Maiden)
-
http://www.eduard.com/store/out/media/distributors/leaflet/leaflet2016-03.pdf Scroll down a bit and you'll find Eduard are releasing interior + exterior etch sets, a simple zoom set, and Brassin wheels for the Italeri Mirage IIIC kit. So it's a goer now, although Airscale's latest generic jet sets provide an alternative or additional avenue. Tony
-
http://www.eduard.com/store/out/media/distributors/leaflet/leaflet2015-11.pdf#page=12&zoom=auto,-274,842
-
After two months of not building im going to restart the building. A fresh start with a fresh kit. Last week i recievd this one and evry day im looking in the box,so now i have to start this. I dondt know much about WW II planes but you are all out here to help. I will use Brian hese build on lady Lil for a guideline. This is the kit. Whats in the box. I hope i can make a start this weekend. And yes this one will be foiled. Mark
-
Well Gents, with Revell's Bf-109 G-10 Erla done and me still in the 109-mood, I wanted to give an early type a go: an E-4. I had an Eduard kit in the stash with lot's of decals and p.e. parts in it. This is my 3rd 109, the first being Hasegawa's K-4, the second Revell's G-10. I went pretty fast on it, and I have to say, the details and the fit of this kit are impressive. The i.p. is really great. I didn't need any putty and before I knew it, I started painting it. Here are some photos of it so far: Here it is, with some camo on it. Keeping it clean (at the moment) because I'm building one of Galland's E-4's and I guess they were kept in quite a good condition. The photographer (from Bronco) recording the progress in this build takes a closer look at the i.p. and cockpit. Great out of box, pretty cool! In an earlier attempt to build this kit, I painted the engine cover yellow, but that, I'll have to do over later ... The green paint is done, still have to do the grey though! Because it is a great fit, it was a quick build so far. I didn't build the engine, I'm keeping that for another model. And the photographer takes another shot of this soon to be E-4. Next will be grey paint, some extra mottle, a little post shading and clear. I hope the decals will go on fine... I'll keep you posted! Thanks for watching ! Nic
-

Trumpeter A-4F VA 212 1969-72 6/5/ Update.. Decals!
LSP_Paul posted a topic in Air War Over Viet Nam
Well here we are. Just a while ago this GB was nothing more then an idea.. a dream. My first project will be Trumpeter's A-4F. I bought the following additions for it and plan to use them all. Aires Resin cockpit set AMS Resin Corrected Air Intakes Eduard Slats and Vortex generator parts CAM Decals for VA 212 I will most likely do my own landing gear bay details when I wire and plumb the landing gear on the scooter. I will also use Harold's New MK 82 snake eye bombs and Paul Fisher's Zuni Rockets. Here is the prerequisite first day shot, taken early this morning before I went to bed.5/1/2014 I am looking forward to watching all the great builds, and thank you all for joining in! Paul- 175 replies
-
- 2
-
-
- Eduard
- Quickboost
- (and 6 more)
-
Does anyone have experience using the Eduard Slat set on the Trumpeter F-100? Specifically how did you secure the large pieces for the wing and underside of the slat? Also so how do the Eduard's actuating arms look compared to the kit pieces? TIA Barry
-
 ... it is done... The B-17G Flying Fortress - "YANKEE LADY" in scale 1/32 by HK Models, with all photo etched parts by Eduard, Decals by Kitsworld brass parts by Profimodeller Pictures of the interior or you find "in the works" or on my website again. Now have a loot at the "Yankee Lady":
- 31 replies
-
- 2
-
-
- b-17
- yankee lady
- (and 6 more)