Search the Community
Showing results for tags 'Bearcat'.
-
OK, Proof of concept is complete. I have the patience and skill to build large scale planes from scratch. So without pause, I'm back at it with the Bearcat. It's not exactly starting today but it has now moved into #1 in the queue , so let's "Get it on". There is some history in other threads, some of which crashed due to the Photobucket hosting issues, but I'm just going to start fresh here with this thread and take it from here. To recap: I have done a considerable amount of work on the engine and landing gear using 3D designs I made so much of that is already behind me. I'm actually going to build the fuselage conventionally and not using 3D printing. So here's progress today getting that work underway. I really love doing this part quite a bit and have no regrets tossing the 3D work I did do in the bin. That's hobby birchwood (mostly used for R/C planes). The paper bulkheads in the pic will soon be made from birch too and then glued to the fuselage per the plan. I have some hi density foam I got online using the method that Ben "Starfighter" used for his C2A Greyhound and I have hopes that will work out better than my old method (tons of Magic Sculpt that takes a lifetime to sand) . Wish me luck. Done by Xmas???
- 363 replies
-
- bearcat
- scratchbuild
-
(and 3 more)
Tagged with:
-
Doing my research on the French War in Indochina, I discovered that France deployed F-8 Bearcats to Vietnam, some of which found their way into the Air Force of South Vietnam. Trumpeter makes three different kits, so I am trying to figure out if this is a rabbit hole I want to go down.
- 6 replies
-
- armee de lair
- indochine
-
(and 2 more)
Tagged with:
-
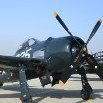
It's been quite some time since I've been active on LSP and busy times are no excuse of course, so my excuses for that. My posting again might drop the overal level, but I have to play my role! Tonight, however, I've managed to finish a kit: Trumpeter's F8F Bearcat. Very nice kit of a really cool looking aircraft. I added just a little detail; the open panel could use some. It truly was a joy to build and the decals are from the box. They went on like a dream, by the way. I used Tamiya and Gunze paint. The dark blue wasn't the easiest colour. It was very transparent and I had to put on about seventy four layers or so. Enough of the bla-blah; here are a few photos. This Bearcat is pretty high on its feet because of the propellor. Makes the gear a bit wobbly in the beginning, but it turns out great! First layer was chrome, followed by a spunch of maskol and the dark blue. Shading was done with tire black. A view on the other side: Little close-up of the nose and the open panel: The open panel edges are simple sprue with a plenty of holes that were punch in it. Only took me eight tests to get it exceptable. Anyway, if you have one in the stash, build it! It's fun! I hope you enjoy the result and I'll try to be back sooner (auch!) Nic
-
OK, I'm in, having bought two Bearcats just for the engines, I have enough bits and bobs about to hack at least one of these kits together, and hopefully rekindle my acquaintance with my airbrush, before I go and mess up the Swordfish!! My idea is to use a Sea Fury prop, enlarge the rudder and wing tips a bit, put Brit Triplex 300lb rockets and cannon fairings, maybe replace the wheels and tyres if I can enlarge the wheel bays a bit, and finish it as a Korean period strike fighter. Tim
- 50 replies


