

LSP_Matt
-
Posts
7,317 -
Joined
-
Last visited
Content Type
Profiles
Forums
Events
Everything posted by LSP_Matt
-
Some assembled shots where I've been applying decals. Gloss went on underneath last night and the decals later today. Oh..I took a trip to my local hobby shop and got some brass for gun barrels...thought it might look a little better...found it hard drilling them out byt keeping the drill centralised though

-
One of the chair and control stick ( fine wire wrapped around the grip...which got additional paint later on )

-
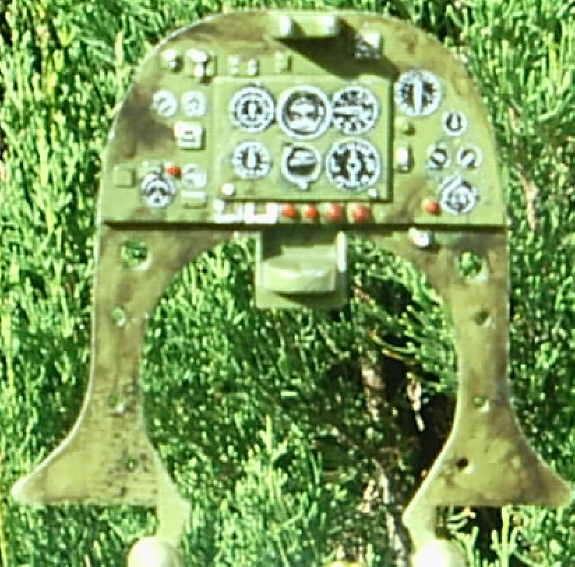
The cockpit panel I was pretty happy with. Sorry if its outa focus. My technique eventually developed and I think I got it right ( it took me about 6 goes and plenty of oven cleaner to strip off old paint). I painted the dials semi-gloss black...then put blue tac over them...sprayed cockpit green...waited till it dried...then used a sharp exacto blade and scraped off the black from the dials leaving the light grey plastic showing as the faces. hope you like it.
-
Right side...the metal strap over the bottle was done with the wrapper from a wine bottle...as were the seat belts.

-
I consulted with a friend of mine about the drybrushing... It looks overdone here when I took the photo so I toned it down with some more cockpit green later on...although once assembled its all pretty hard to see. Never mind...I used some dyes as well. No idea if its realistic or not.

-
Right side...I made the switch near the top of the cockpit ( no idea what it is). Thanks for the inspiration LSPers because starting to scratch build these kinds of little details makes modelling SO much fun Oh...that seat is big eh? But given I'm earning bugger all as I'm still unable to work with my arm I kinda gotta draw a line. I think when my scratch skills improve I'll try handmaking one next time becasue it eventually hides so much detail.

-
cockpit

-
wing

-
Ok...I reckon copying is about the best form of flattery. I'm not saying I managed to do it successfully, but Brian Caucci's Spit VB got me going and I shamelessly tried to dress up my cockpit in a simlar fashion to which he had. I'm just trying new things with modelling all the time. Whats frustrating is that some of the other kits that I have in near completion phase...well, I need to finish them but now I'm thinking..sheesh...I could have done that better using a different technique. I also used Chris Hannovers technique for the weathering on the prop...works a treat and given I live by myself ( hence the huge amount of space for kits and modelling) I knew where the ScotchBrite pads were in the kitchen. so here we go with the scribing and cockpit details first

-
Engine photo 2. All top stencils done tonight. Gloss before bed...decals on lower tomorrow...then glue on undercart and glass bits. Inks for wash in panel lines then hopefully finish on Sat with dulcoate and weathering with pastels. Thats my cunning plan

-
Yeah thanks chaps. :-) Only extra photos I have of the engine. It seems the DB series don't seem to have lashings of spagetti much like the PW2800 types...they seem pretty much black with a coupla pipes...but they are great. Anyway I'd added some extra wires up on the fuselage gun platform and soldered them together...I had planned to add some tissue paper and simulate the effect that the Airfix 1/24 kits has...and then I realised it couldn't be seen anyway. He he...but I know its there. It seemed also that the kit engine injectors running above the exhaust are not correct. There was a great walkaround posted on LSP a while ago and it shows them superbly. Besides I lashed and bought myself a saw...sheesh does that cut better Photo 1 A top view.

-
Thanks Smithery but I reckon i'll take the plunge and give the pledge a go. Thanks Coolie I'd found it at Safeway ( Mexican for Woolies). I can get demineralised water from work...we have to use it in our autoclaves. Sounds like a great technique though guys and am looking fwd to giving it a go. Cheers Matt
-
that sounds like a great idea Smithery. In Aus I've only been able to get my hands on Pledge ( Johnson and Johnson) which is the alternative recommended by Swanny ( I belive the "future guru" ). Any experience with this product any LSPers from Aus?...it'd be nice just to get future though because it sounds magically good..
-
Last one...more to follow in next few days...I've committed to finsihing a kit or two before I keep going with some others. Hope there've been worthwhile but I've enjoyed making this kit. Mind you I wondered why I chose the Wick when Otto Bertrams one from 1/JG2 would have been easier. Cheers Matt

-
Engine...I think its too far back...I think a boo boo on its position within fuselage. Ah well...gotta finish something at some stage

-
Right side

-
another

-
better side on views

-
I used the kits manufactuer recommended RLM71 for the spine and fuselage. Before this I'd done my fuselage in RLM74 and post shaded the centre of the panels with a lighter grey...it was looking really good. But by the time I added the green all my 'grey' work had become obliterated by the busyness of the Wick Camo. The RLM71 also had no contrast compared to the RLM74. You could hardly see the green. In the end I went for a Black/Green RLM70 to increase the contrast and it started to look better. I've tried some initial weathering with simply wet and dry rubbed over to take off some the paint. No panel line work yet and still in gloss for decals. I used a dental microbrush for the Wick but I'm not sure they are small enough. I tended to follow the kit profile in the instructionsa but I think some of the photos people kindly placed in "discussion" showed a smaller/more busy pattern.

-
I know I've skipped ahead a bit...but I'm putting on decals on all except the bottom at the moment. Stencil diagram from hasegawa I'm not finding as useful as it could be. I'm wondering if the people who make these kits ever test drive them. Sheesh...I found the tank/cockpit/engine just didn't locate anywhere positive in the fuselage. Oh well...its not like I'm not having fun. I used Chris Hannovers post shading ideas here...I think its beginning to shape up.

-
My attempt at dry brushing the instrument panel...as best as I could focus it...trust me with an SLR I'm pretty slick...but this digital thingo. Pilot is from a newer 109 K kit...I dodgy'd up some seat belt straps on his back as well. I took the grease mark off his face later on.

-
Engine ( actually I found this whole caboose of cockpit/engine/instrument panel and ?fuel tank was fraught with error on putting it together. In fact I still stuffed it. How lame is it to be having errors of assembly...Doh! Anyway...when I do another one in the future I'll know the pitfall.

-
Really sorry...had borrowed my Ex's Digi Camera and I've been getting used to it...the later work is somewhat better in picture quality but I'm still getting used to it. Thanks to Erwin for suggesting the various ways of helping to scribe over curved surfaces. I have noticed though that I've been tending to cut trenches. Anyone have any comments on what is an appropriate depth for 1/32 scale

-
The beginning of my getting back to modelling. Plenty of time off work at the moment becasue the # of my left arm still hasn't healed from January. ( just had a bone graft...owwwch ) LSP inspired I thought I'd give scribing a bash and add some wires to my DB601. Hmmm bit wild and outa control with the CA...and this was before I got my hand drills.

-
Yeah thanks for the good oil Koala. I'm thinking I might be inclined to try on a kit that I'm not too fussed about or one that I have spare decals for. Actually, the guy at the shop did mention that one of the reasons why he recommended not to touch it for 24hrs is the Mr softener can cause the dyes on the decals to run. Not that I'm doing much at the moment except trying to remove this really F%**&^g annoying "Trek Blue Error Nuker" spyware from my PC. All of my spybot and Nortons nails it but its regenerating....Arrrgggg :angry: Cheers Matt
