

Jackman
-
Posts
18 -
Joined
Content Type
Profiles
Forums
Events
Posts posted by Jackman
-
-
On 7/11/2019 at 9:29 PM, ericg said:
Whilst stuff was drying in the cockpit I dry fitted the fuselage halves together and sawed off the really inaccurate intake from the kit. this will allow me to fit the Zactomodels correct intake, an essential upgrade to the kit.

Any chance you could post a pic from the front of the intake, looking inwards? I'd like to see how the Zactomodels intake blends in with the kit's intake trunking.
Also, a pic from the top would be good ( I'm interested in how the resin & plastic join together and how seamless they are.)
Thank you .
-
7 hours ago, Out2gtcha said:
Ive always liked ZM kits a lot, but I too think that is a bit far, and dont know of a single person who has cut the engines to expose the cylinders.
An alternative would be to embed tiny magnets on the engine covers so that they could be opened and closed, as and whenever you feel like it. Some modelers are already doing that for weapons pylons so that they could "mix & match" whatever load they want on their kits. See Haneto's post #9:
Some of these magnets are as small as 1mm and can be found on Ebay.
As an aside, ...since I don't have the ZM kit....how good are the clear fuselage parts? I don't see too many builds using them. Thank you.
-
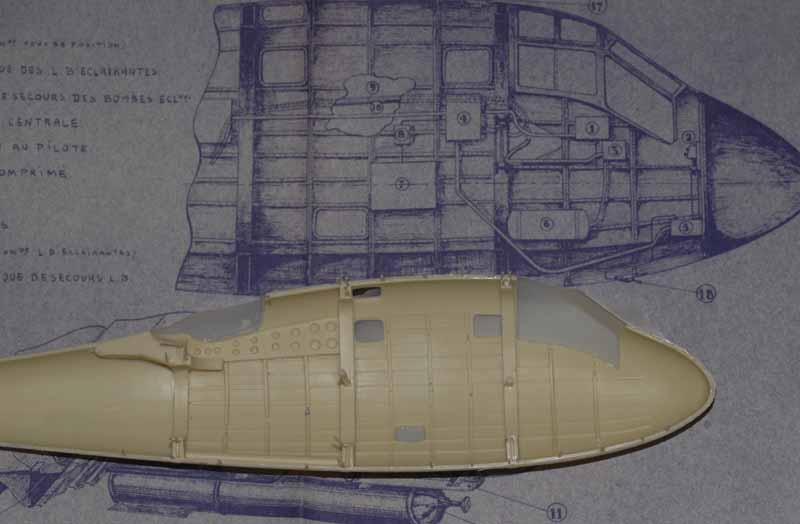
Wow, that camera bay is awesome! Could I ask what you are using as a reference for the bays? I've been searching & searching for internal shots of the RF-8 camera bays but haven't been successful. Thank you :cheers:
-
Ben, those are awesome! Good detailed work! Thanks for posting them.
-
On 5/13/2019 at 1:08 AM, EricF said:
Hello Jackman,
You are right. To be honest I processed before taking my decision. The option to instal the cameras needs to detail all the interior because the windows are large. Painting the interior in black would not have been sufficient. The depth of the resin is very variable in these compartments and I afraid that it could have been visible.
Due to the very difficult accessibility to work on it, I decided that I will paint the inside surface of the widows in black.
Eric
I understand & support your decision, Eric. You're doing great work so far

Actually, it seems to be quite difficult to find pictures of the interior of the RF-8 camera bays. I have seen pictures of the cameras on the internet but I have no idea how they are mounted.
These are the pictures that I have seen:
Cameras:
https://modelingmadness.com/review/viet/us/attardrf8b.jpg
The viewfinder in the nose:
http://www.vfp62.com/IMAGES_3/F8U-1P_viewfinder.jpg
but I cannot find anything that shows how the cameras were actually mounted inside the camera bays. Also, I always wondered if they facing outwards or downwards.
Starfighter, any chance you could show us pictures of how you modified the RF-4 cameras?
-
Just curious, how do you plan to add the cameras since you have closed up the fuselage?
-
Just out of curiosity, is the A-4K Kahu nose different from the standard A-4E nose? Don't know if my eyes are playing tricks on me or perhaps it was the lighting but when I look at photos of the A-4K, it seems slightly different from the standard A-4E but I can't quite put my finger on it.
To me, the A-4K nose looks almost like the modern Argentinian A-4AR Fighting Hawk nose. IIRC, they both used the similar-to-F-16 radar (?).
Can one just use the standard A-4E kit without modifying the nose?
-
A nice thin coat of Tamiya Fine Surface Primer
Hi,
Did you spray this straight from the can or was it airbrushed on? I have a can of this stuff but am worried that the lack of control over the can's pressure may wipe out some delicate panel lines. Thank you in advance.
-
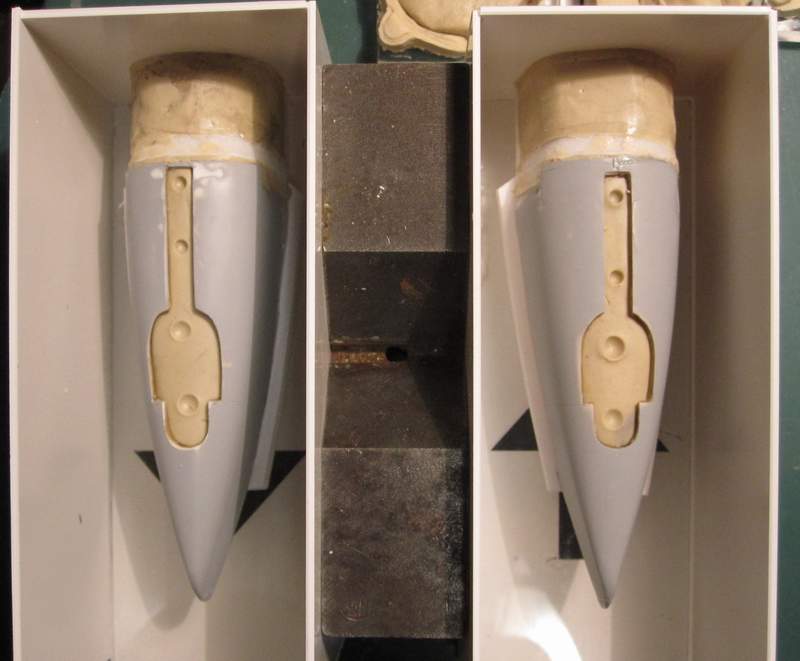
Today, the nacelles before pouring silicone rubber. The molds will be in two parts fitted together as for the engine cowling and rear cowling.
When these molds will be made, the hard part will be done (pray for cast resin is easy and good in these mold)
I really appreciate you showing these in-progress shots. It helps us learn more about the process of resin casting & silicone molding. Thank you!
-
-
I really appreciate these "how-it-was-done" in-progress pictures of your resin casting. It's like watching a movie and the story starts to slowly reveal itself. Great work!
-
@ jack: I make à counter mold before cast the half fuselage.
Oh, so it's a 2-part mold. Do you cast in a pressure pot? Because the details look fantastic!
Thanks in advance.
-
Hi,
Before continuing the other molds, it was necessary to be sure that the fuselage was castable.
because the thickness and many detail as main frame, frame, stiffener, the fuselage will be very difficult to cast.
Without the fuselage, it is useless to make the rest of parts.
MostlytRacer vacform the shells(1,5mm plasticard) on the master
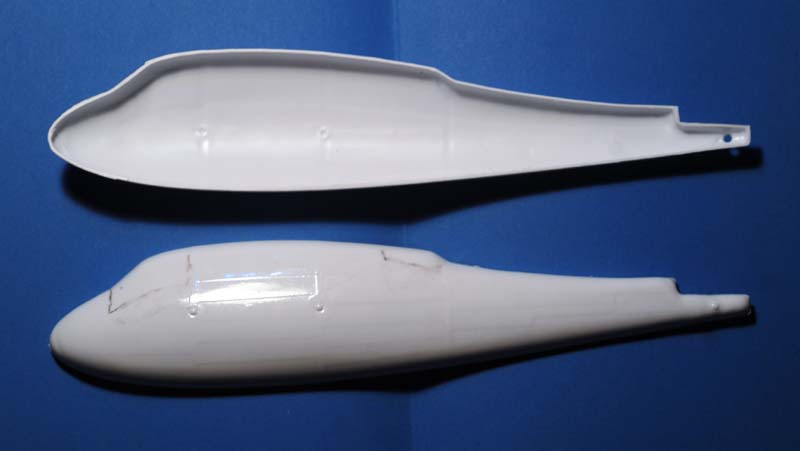
drawing the frames, stiffeners are already in place. (I use plastic strip for frames and stiffeners, and plasticard for main frame)
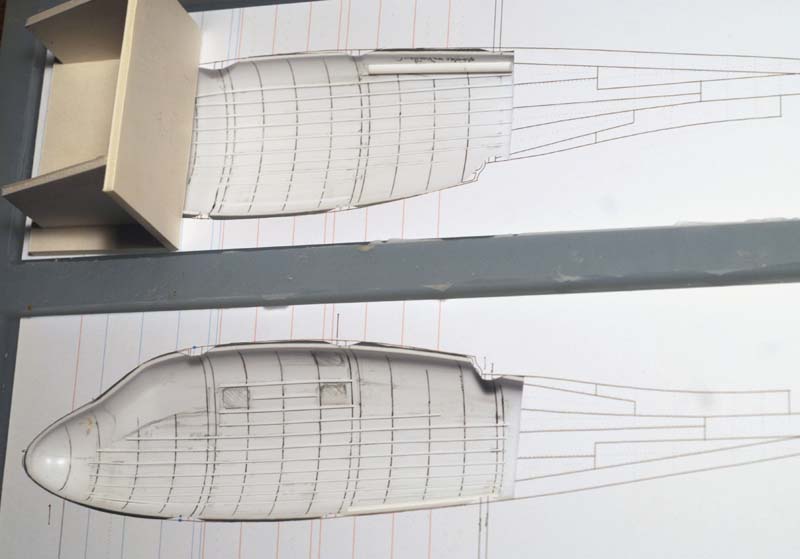
the shells in the mold of master
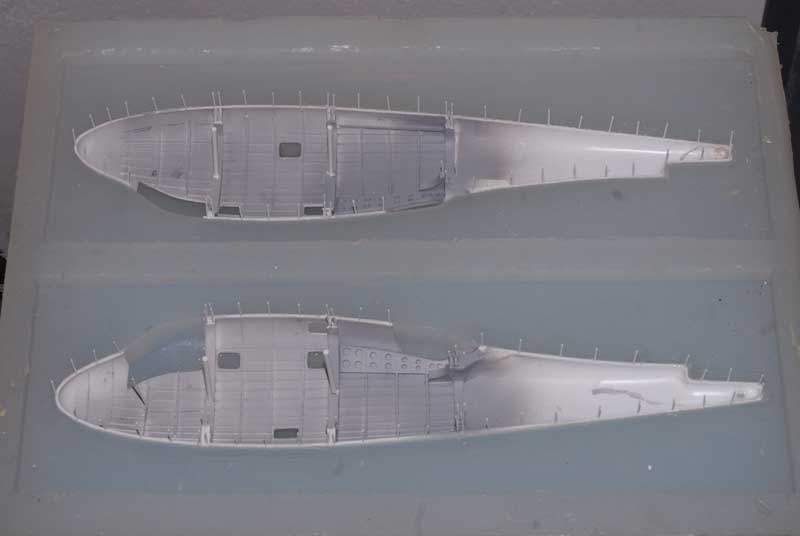
and the first test.....theere is some bubbles, the ambiant temperature is too warm (near 30°), the resin harden too fast, bubbles are trapped. The fastcast is Veryfastcast
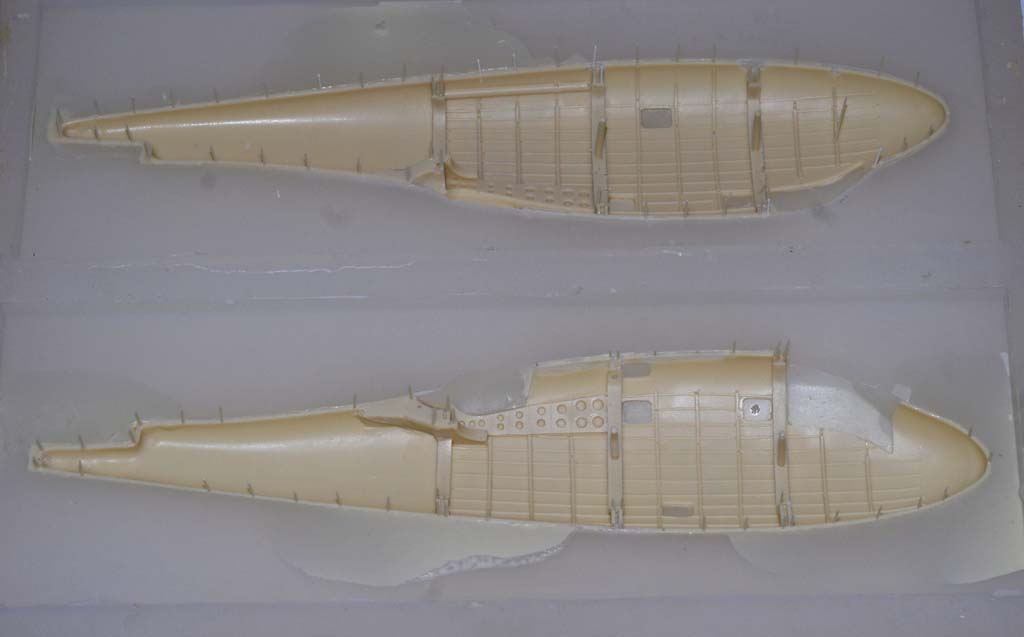
Another fuselage casting, made the night when the temperature is lower. it's better.
For the next, I try cast it in the refrigerator.....
Already, the last week my wife find the mold in the oven....
Hi,
I've just been following this epic thread. I have a question: From above pictures, how did you go from vacuform to resin? Do you have any step-by-step pics? I am just curious how the vacuform master was turned into resin. What techniques did you use? A two-part mold? Slush-casting?
Thank you in advance.
- tomv87 and Alburymodeler
-
 2
2

USAF F-100D FINISHED!
in Works in Progress
Posted
Thank you for the pics. Beautiful work!