
bdthoresen
-
Posts
1,817 -
Joined
-
Last visited
-
Days Won
1
Content Type
Profiles
Forums
Events
Everything posted by bdthoresen
-

P-47 Olive Drab Question - "Little Bunny"
bdthoresen replied to John1's topic in Aviation Discussion & Research
While I find your theory of wetness intriguing, if you look just aft of the cheek fairing, there are spray gun marks following the rivet lines when the mod was installed. They would have had to drill some rivets aft of the position to install it, and you can clearly see they painted over the new bare rivets in a hurried fashion to cover them up. Those are clearly spray gun marks. I have been an aircraft/warbird mechanic, restorer, and painter for the last 27 years, And I have left a few spray gun marks myself, albeit with a color a little closer to the original!!!!! Awesome photos.....Absolutely amazing! THOR -
That’s the way I’d go, and yes, the brake lines were flexible at the scissor link, and the gear pivot point, turning back into aluminum lines heading towards the cockpit. The photos you show appears the struts are a bit deflated of Nitrogen/5606. Make sure you have a bit more oleo showing than that! Your build is looking great! THOR
-
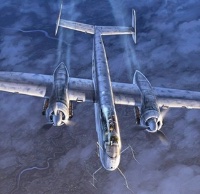
Test flight of He 219 V1
bdthoresen replied to Alain Gadbois's topic in Aviation Discussion & Research
That was my thinking as well. It would appear that the pump unit was small, along with the relevant plumbing in the airframe compared to the volume required by the three gear actuators. The sequence appears the same throughout the video, with the left main, then right main, then nose gear retracting in order. Now, I am not certain what kind of pump they were using, whether it was engine driven off the left side, or if it was an electric pump that was actuated by the position of the selector off of the gear handle. But, the actuator closest to the pump would get the fluid first, followed by the next unit and so on..... I need to go do some research now. Excellent quality video. THOR -
Oliver- Stunning work as usual. Is that Milliput you applied to the boom joint in the photos? Really looking forward to the next update! THOR
-
CG- DON’T use the SAC gear legs. Their white metal is extremely soft, and tends to bend easily over time. A P-47 I built for someone a few years ago had a set installed, and the had bowed on the shelf within two years under the weight of the model. Furthermore, they were nothing but a direct knock-off of the kit parts anyway, so there is no real gain in detail. I would use the kit struts, Barracuda wheels, and add some brake lines from lead wire. Clean up the scissor links, add some cable clamps for the brake line and you’re away. It will look good under paint. THOR
-
Chuck- I think the dry brushing looks perfect for the scale. Anymore and I think it might be overdone. The fact it is light dependent is awesome. But I would put a darker metallic wash in all of the recessed fasteners, and that should take it to the next level....but it looks fantastic so far! THOR
-
1/32 FW-190C V18 (Revell & Planet Models conversion)
bdthoresen replied to Grunticus's topic in Works in Progress
No, they had no provisions for external fuel at that phase of their development.....so no worries there....and being that the late 190’s mostly carried their fuel tanks on their centerline, this could not have because of the belly scoop. I also think this airplane was originally converted from an A-5, which did not have the ability to carry the underwing pair of tanks purportedly seen on some of the later types....(F/G?) THOR -
Welcome to the Forums! The work thus far looks pretty good to me. I have not had the pleasure of building a Tamiya Corsair as of yet, not too much time for building right now......Covid has unexpectedly made my job busier in many respects. Please keep the updates coming! THOR
-
1/32 FW-190C V18 (Revell & Planet Models conversion)
bdthoresen replied to Grunticus's topic in Works in Progress
I always liked the lines of the C series -190’s....I have wanted to build this conversion for awhile, I just have never been able to source one while I was looking! Looks like fun. Please keep the updates coming! THOR -
HH-60G Pavehawk Kitty Hawk 1/35 DONE!!
bdthoresen replied to Pete Fleischmann's topic in Works in Progress
PEDRO! Pete, looks stupendous. Not much more I can say! THOR -
Peter, another fabulous installment. Really looking the business. And congrats on Grand-fatherhood! Grandkids are amazing, I love mine with all I’ve got! Take care- THOR
-
1/32 FW 190-D Dora Accessories Questions
bdthoresen replied to James Rademaker's topic in LSP Discussion
Hi James- The old tool Hasegawa kit sure is an old chestnut. I had one of those Hi-Grade editions many a moon ago, but never got around to building it. My friend who purchased it did, and he made some minor improvements to it with some “bolt-on” aftermarket parts, and rescribed the wings to match the fuselage. Actually turned out quite nicely in the end. As far as replacement wheel wells, you might have a bit of a hard time adapting the A/F series wheel wells to the Dora. While similar as Thierry mentioned, they were not quite identical. You might squeak by by removing the stamped plates towards the centerline of the wells, as the Doras were open here exposing the rear underside of the engine. There were other differences, such as boots covering the canon barrels passing through the front spar on the A/F’s, where as I believe the Doras did not have the boots. Others might know better. Another few simple mods to up the “curb appeal” would be to add a set of Barracuda Studios resin 190 wheels, (smooth tread for most Doras), and if you can get one, AML’s resin and p.e. 190 seat. Add some brake lines, rescribe the wings, and add some EagleCals markings and stencils, and you would have a very respectable Dora- especially considering which kit you started with! HTH- THOR , a huge Dora fan..... -
Welcome aboard, Cory! I too, have a similar dilemma with a couple of projects in that scale, most notably a 1/18th scale Dora 9 that I have been hacking about for years. I stopped messing with it, mostly because of a lack of markings and stencils. I am in the camp of not being terribly computer savvy, so learning new skills with them is a bit daunting......especially since I have a full time job and attend University. I would say that custom masks would be the way to go in that scale, as most of the major markings could be easily masked and painted. Stencils and complex nose art would have to be decals, more than likely. Some good suggestions here from the other members. I would love to see what you eventually come up with! THOR
-
Phew! I was so nervous to say anything, Chuck, that I think I peed a little.....glad the gear was not harmed in the making of yet another excellent post.....Keep them coming! THOR
-
John is right, it’s still available. Stay away from Mission Models, they are mostly water-based acrylics, and they don’t react to handling well. I have had excellent luck using Model Master enamels thinned with Gunze’s Mr. Color Leveling Thinner....it flows out beautifully, especially gloss colors. The usual caveat......try it on a scrap piece before committing to your project!!!!!!!! THOR
-
Ha! Too funny. I am part of the Mod Team that is installing air-to-air refueling capabilities on the first 45 E-2D’s. Huge job. Interestingly enough, one of the birds I am working this minute was one I helped build on the assembly line two years ago......she has been assigned to a rag squadron since we delivered her, and it shows. She’s beat up already. But I do love fixing them up and handing them back.....Turns out NG figured out that I was a far better aircraft mechanic rather than a factory assembly worker..... I would love to see some photos of the old B-ship program. Bunch of my co-workers here were on that program. Who knows, you might have a few photos of them! Anyway, enough of my jabber. Great work on the Prowler- I am loving it! THOR
- 502 replies
-
- 2
-

-
- conversion
- prowler
- (and 1 more)
-
Nice work, Pete. I was just scraping and resealing a bunch of fuel tank panels on the E-2D I am working on. Some kid had used a tongue depressor and slathered it over all of the seams on its last deployment, what a mess. I guess in the field it has to work. Here, that won’t fly! THOR
- 502 replies
-
- 2
-
-
- conversion
- prowler
- (and 1 more)
-
Wow, Chuck, outstanding work as usual. I like the sheen you have achieved with the X-22 on top of the Alclad. Looks more like the pictures earlier in this thread...... Keep em’ coming...... THOR
-
Only ever seen a scratchbuilt one in 32nd from a French Modeler who’s name escapes me. It was incredible..... Tamiya will NEVER do a 32nd scale Rafale.....your only hope would be in Trumpeter/Hobby Boss doing one. Alternatively, I am sure some enterprising modeler will design one in CAD for 3-D printing, which will be our best bet...... Good Luck in your quest, sir..... THOR
-
Me 109 G-2 "Augsburg Eagle" 1/24 Trumpeter
bdthoresen replied to aquatarkus10's topic in Works in Progress
Wow, George a few of those photos look like a real 109 being restored in some shop somewhere. Bravo! THOR -
I had used a set of markings of theirs on a Stuka some time ago (decade!) and I seem to remember them being somewhere between Cartograf and Techmod. They were nice and thin, good color density, but they did try to stick in place quickly. I remember having to kind of float them in place. Once down, Microsol did not do much, but they did respond to multiple applications of Solvaset. In the end, they looked great. Still my buddy’s favorite model... Be interesting to see if they have upped their game since. Let us know, Bri. THOR
-
Great work Karl. Loving this build! THOR
-
I hear ya, Stuart. The styrene might be of better quality than the original in the Revell boxing, but the challenges will remain! Good Luck- THOR
-
Looks good on my screen, NC1- Nice work on not necessarily a shake and bake kit! THOR
-
1/18 Scale Blue Box F4U-1A Corsair Modification
bdthoresen replied to JayW's topic in Works in Progress
Pffffffft.......that’s it, I quit...sheesh. THOR- 1,636 replies
-
- 1
-
-
- scratch building
- corsair
- (and 4 more)

