Radub
-
Posts
4,704 -
Joined
-
Last visited
-
Days Won
15
Content Type
Profiles
Forums
Events
Everything posted by Radub
-
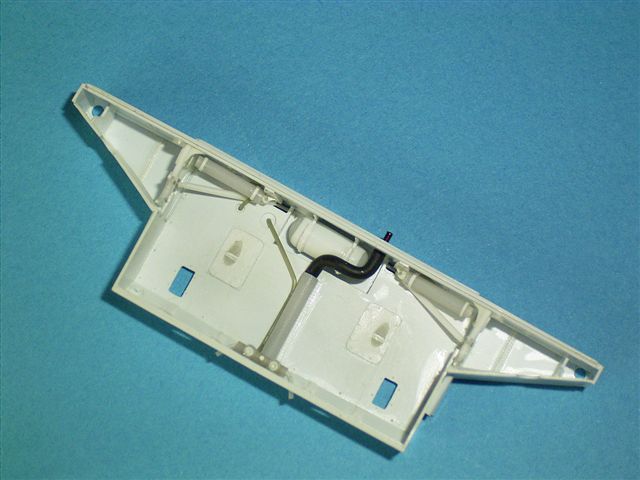
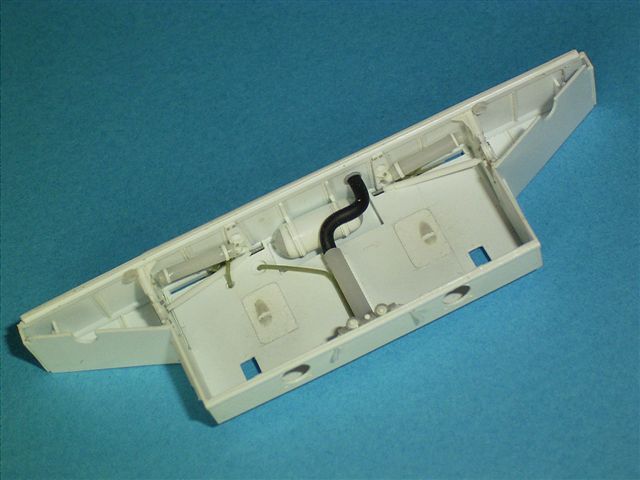
Bottom framework. There is a typo in my drawing, The width should be 2.0mm instead of 1.9 mm. Apologies.

-
This is the front bulkhead

-
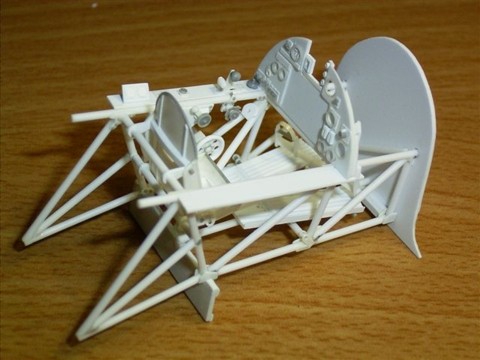
Here is a drawing of the side framework It is a bit basic, but I hope you get the idea. I added some dimensions for sizing it. I made the framework from 1.2mm evergreen rod. I hope this will be of some help. Radu

-
Hi Alan, I used the drawings by Arthur Bentley for the framework. I will try to re-draw my own framework. (I do not think that I can publish his work on the internet without his permission). Bobba, I know what you mean about the escape hatch :-). I too saw many Hurricanes at shows with hinged hatches and had a good laugh. When I said it will be workable, I meant that it will be removable, just to make the cockpit more visible, and also work with the sliding canopy. As a matter of fact, I should have been clearer with all of my little notes attached to the photos. I wrote all those "explanations" in such a hurry, I never even noticed the misspellings. Regards, Radu
-
Hi Dan, Thanks for the good words. Thanks for the offer as well. Prince August (they make figures) have a a workshop about 20 Km from my home and they do custom casting. They are a bit closer to home for me. Otherwise, I may invest in one of those centricast machines, and that should solve the problem of bubbles for me. There is a Tiranti dealer in Dublin and according to their brochure they can order centricast machines. That is not the main issue. The main thing is redoing the parts with casting in mind. It would be difficult (not impossible) to cast the parts as they are now. The cockpit is made in such a way as to allow me to take it apart for painting. When taken apart, there are about 8 large parts to it and about 10 smaller parts. For example the seat is attached to the rear framework and includes the adjustment lever. It is one part now, but when broken down for casting it would end up as 8 parts. (two bars, four brackets, one seat, and one lever). When I started thinking about it, I ended up with so many other questions. The cockpit may end up as a 70 plus part kit if not more. Also, the cockpit is not even complete now. When I finish with it, it will also include the radiator pipes on the right side, the throttle rods, cables, escape hatch, maybe the radio behind the seat etc. The wheel well may be a multipart item and may also need to include the lower-centre section of the wing. I think that the idea is to strike a balance between detail and ease of casting. I must keep it simple yet detailed. I will definitely look into it. Radu
-
Wing centre. This is the worst part of the Revell Hurricane. This area is more like 1/28 than 1/32. Everything is too big and inaccurate out of the box. These are my changes.

-
Nose and prop governor unit (well, sort of. It is simplified because very little will be visible betweeen the spinner and nose)

-
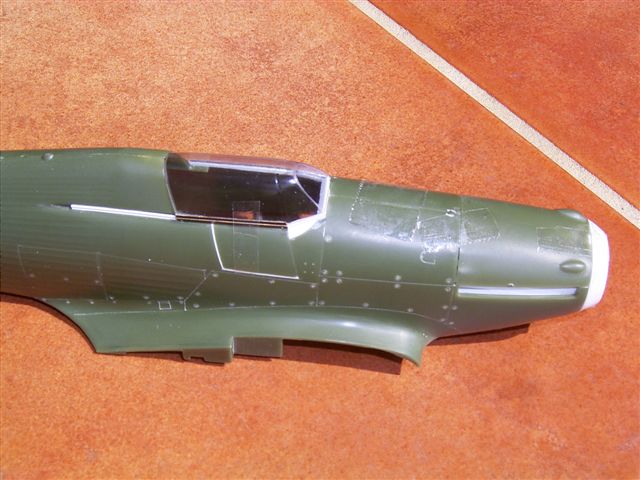
canopy, (it is going to be a "workable canopy), windscreen shelf, and escape hatch (openable)

-
canopy and windscreen shelf

-
Early style radiator (rear)

-
Some people asked for detail photos. here they are The right side of the cockpit is still in progress. Radu

-
Hi everyone, Thank you very much for the kind words. I have been scratchbuilding for a while, but I never really took many photos of my work. I started doing that a couple of years ago when I got a digital camera. I will try to answer some of the questions: References used. - The most important source of information are the Arthur Bentley drawings. They were printed over the past two decades in a number of publications, so they are easily available. They are available on his website. These contain detailed drawings of the cockptit framework, interior, flaps, etc. - Books: Hawker Hurricane Inside and Out by Melvyn Hiscock, Squadron Signal Hurricane Walkaround, Modeller's Datafile by SAM publications: The Hawker Hurricane A Comprehensive Guide for the Modeller (I have to say that this book usually gets a bad press in newsgroups. That is totally unwarranted: it is absolutely fantastic when it comes to technical drawings from the pilot's or maintenance manuals, useable photos, etc) - I also spent some time around the exhibited Hurricanes in RAF Hendon, where I took notes and some photos. The model will indeed be a Romanian Hurricane: Yellow 1 of E53 based in Mamaia, post 1941 (with crosses), my own-printed decals. As for making the parts in resin, well, that is a completely different story. I cannot cast these particular parts, because they were not built with casting in mind, if you know what I mean. For example, the cockpit has about 70 parts, many of which are glued together. They need to be separate for casting. I can rebuild the parts with casting in mind, I had good fun doing it. I also do not have enough experience with casting resin. I tried in the past, but I do not have the necessary tools, especially the pressure and vaccum chambers. I tried to work without those, but the air bubbles made everything a mess. I will see what I can some up with. I hope to keep updating this thread as I go along with it. All of those photos show work completed since January. Hey Dave, thanks again for the kit. Regards, Radu