

ruzlkampf
-
Posts
3,126 -
Joined
-
Last visited
-
Days Won
4
Content Type
Profiles
Forums
Events
Posts posted by ruzlkampf
-
-
All this is a mute point anyway. I just wanted to show that any image can be imported into Paint no problem, but if you want scaled decals(by not importing a larger image than your canvas), and crisp images(Ididn't even show what would happen to your images after you did the 'saved as' thing with different formats) you've got to follow a few simple steps......using your free paint program to get these variables to lock together. Illustrator and Photoshop don't have these limitations, and that's what you're paying the big bucks for when buying them.
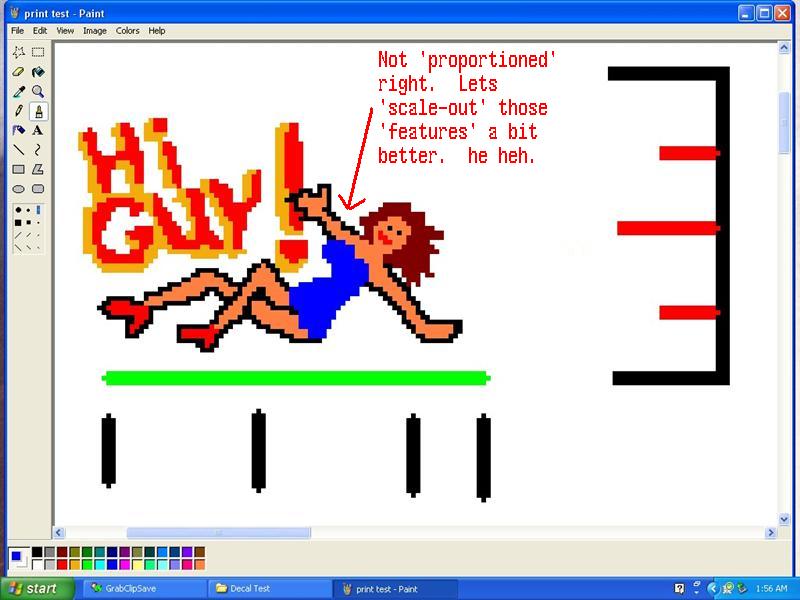
BUT! Paint is fully capable of overcoming these limitations with a few easy steps, and a few more clicks of the mouse than the big bucks stuff. Here is a pic of a print-out I did on regular paper of Phil's beauty at about 1 inch(25mm) tall. If I had used glossy photo paper, or decal paper with the printer set on glossy photo paper with decent light this image would be literally a miniature photo. Not too shabby from a 68dpi Paint program, eh?! Let me set stuff up on how to explain to do this, it isn't hard. A background on what NOT to do was necessary to help explain why I'm going to be doing what I do without bogging it down in so much detail as to be confusing. If ya'll want to practice importing pics of your model planes into paint, and drawing lines/touching details up and stuff....go for it! The sizing thing doesn't matter then, this is only if you want your decals properly scaled out and don't want your images mushed looking. Any digital image can be imported, but you may want to size it around 800x600 or it will look huge and require scrolling around to see the edges. You can then draw and scribble on it to your hearts content! Gotta go now, so I'll continue this thru-out the weekend. later All! Russ
-
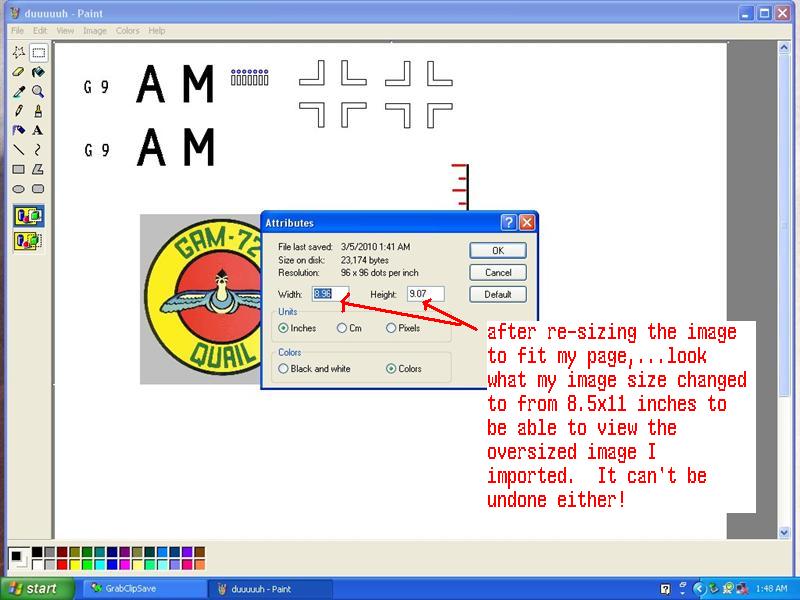
I re-sized the image to be smaller, then went up to the 'image' button....scrolled down to 'attributes'.....and look what it did to my original 8.5x11 inch image. My canvas is now the size of the image I imported before reducing it. Even if I type in 8.5 and 11 in those boxes,....it won't go back!
-
Image slid down to show my drawings underneath, and how it re-sized my canvas. Compare the white area with previous views above.

-
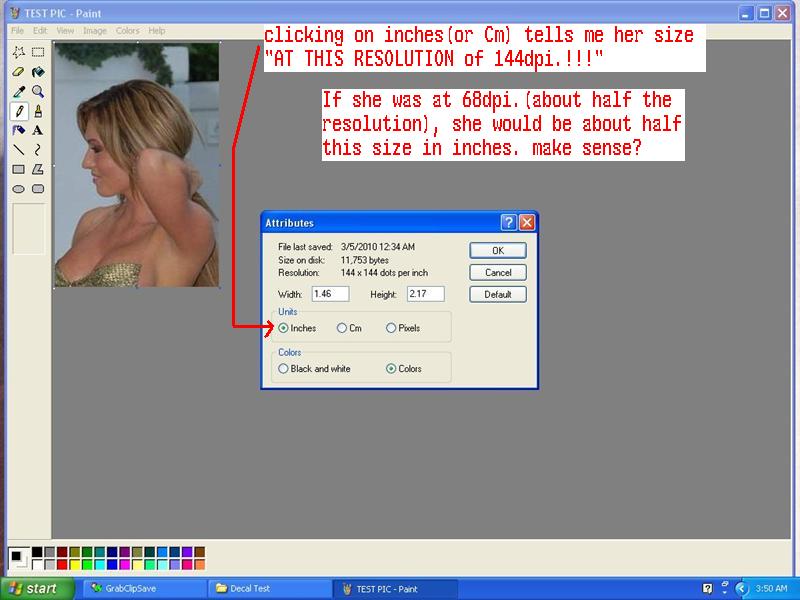
Now i click on that 'inches' box(or Cm if you're looking for metric size) to see what this image is sized at it's 96dpi resolution.
-
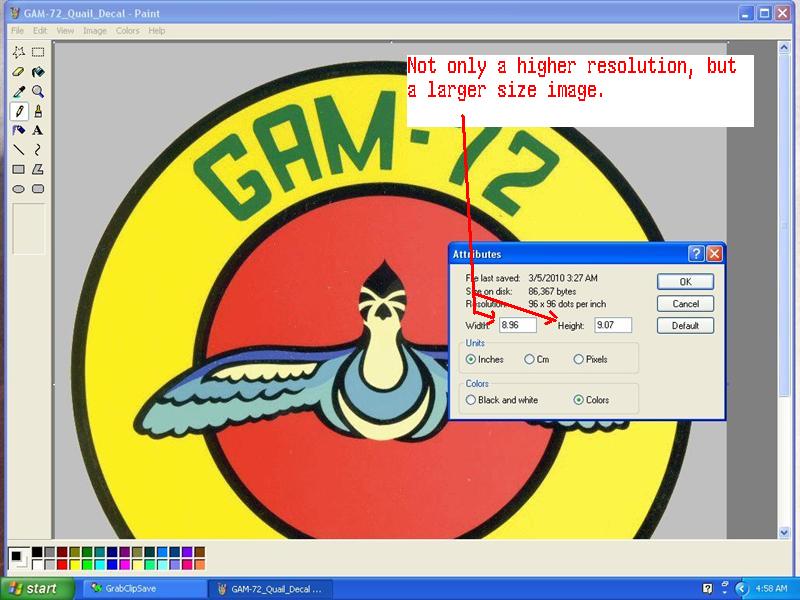
It's so big, my drawing is completely covered up.....and Paint has re-sized the canvas to be able to view the entire image. Gaaaaaah! While it's up....let's do the 'image' scroll down 'attributes' thing to see what the pixel size and resolution are for this pic.

-
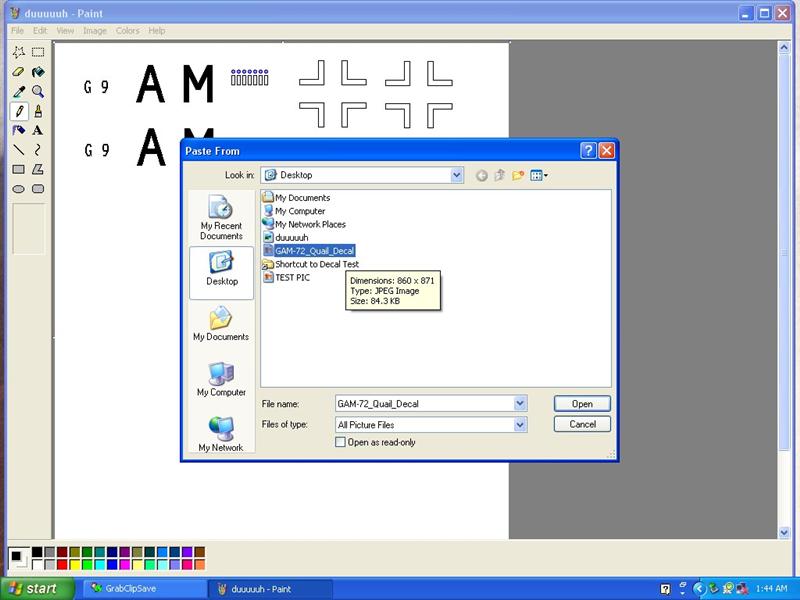
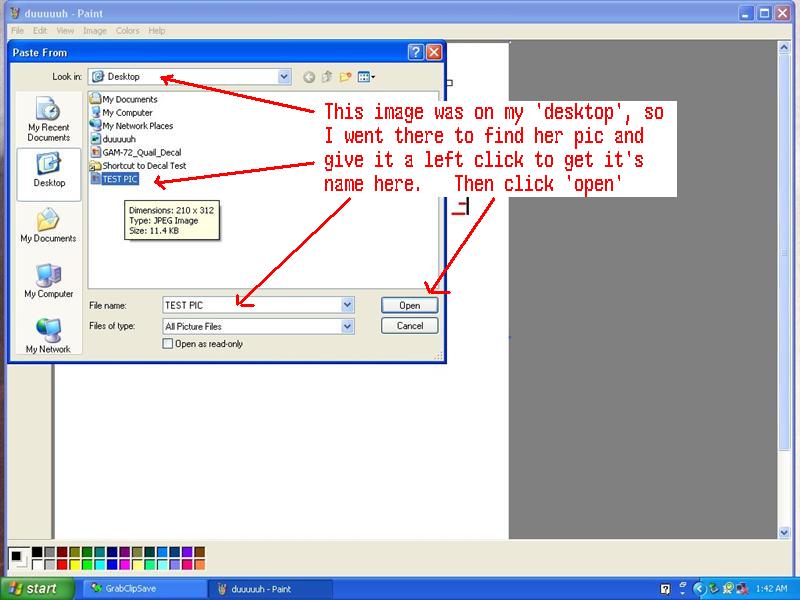
Open up my decal canvas in Paint again.....go to 'edit' then 'paste from' remember? Then find my image on the desktop and click on it to get the name to show in the box and hit OK.
-
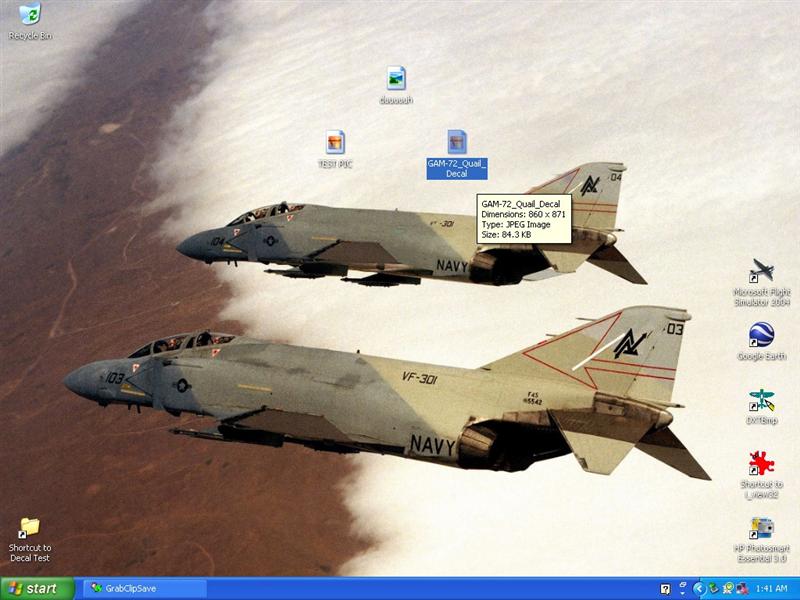
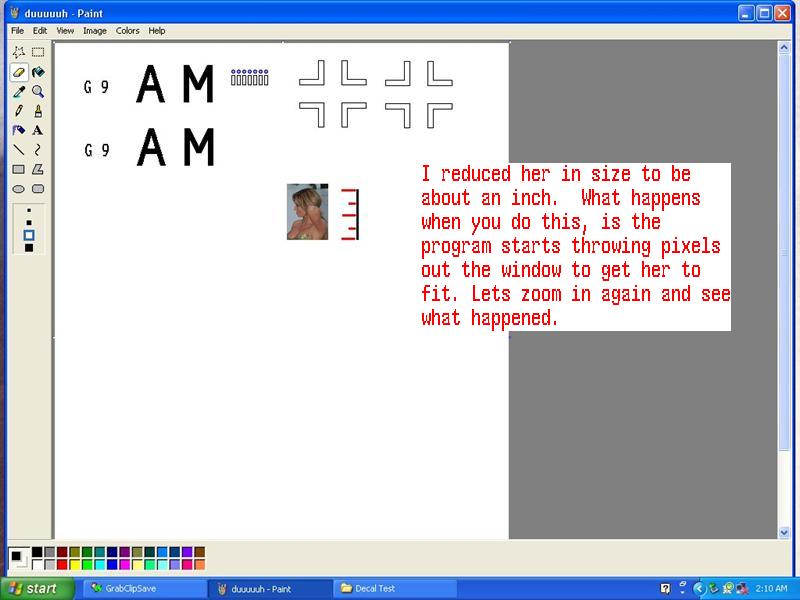
Now back to importing an image into Paint that has MORE pixels size-wise than your image. Remember my original is 581x752 pixels, and when I run my mouse over this image I created(it's my avatar) it shows 860x871 pixels. A bit bigger.
-
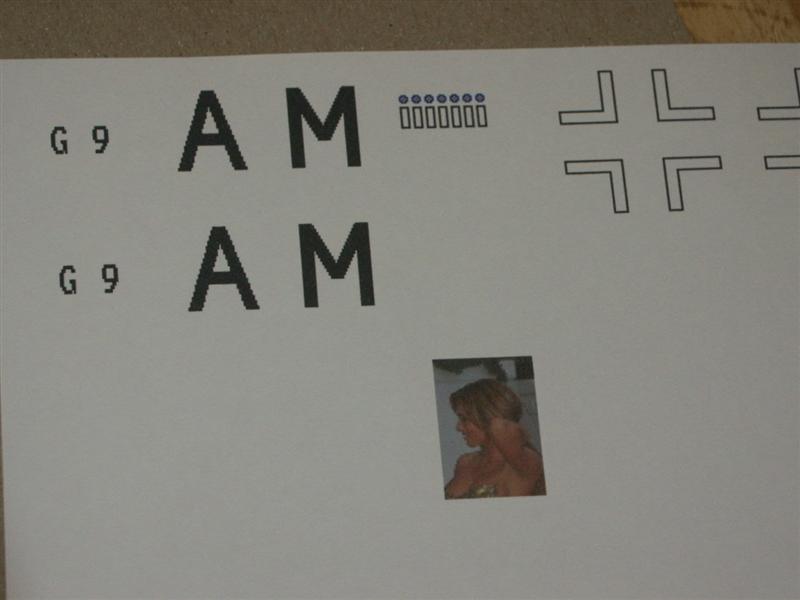
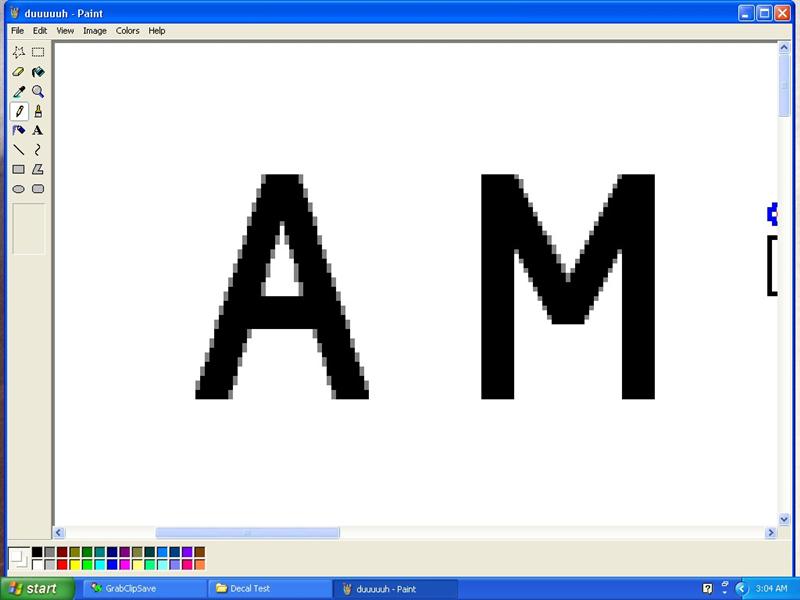
Code letters on the bottom are untouched, and this is zoomed out a bit more. See how the eye 'blurs' them into looking less jagged?
Now, zoomed out to 1x magnification. See how it 'smooths' things out? Cool, huh? You'd be amazed at what a few pixels of color will do to make an image look almost perfectly 'photographic'.

-
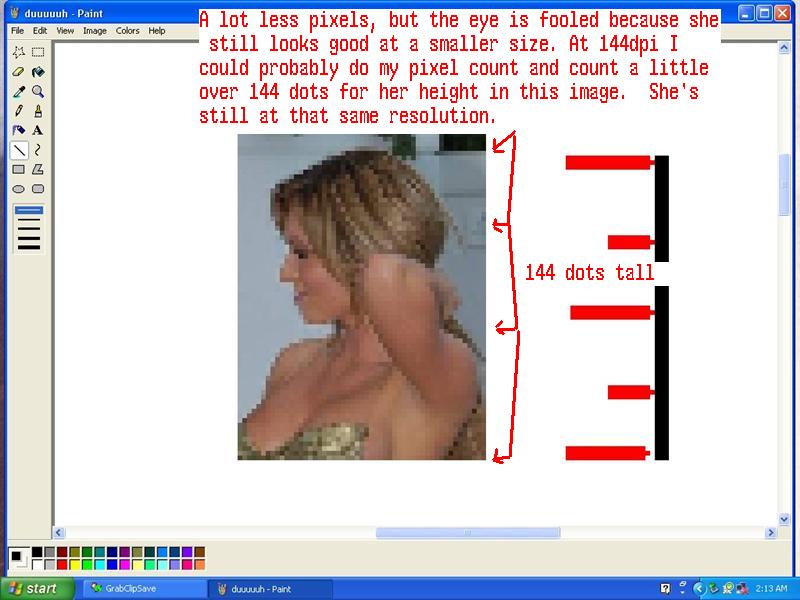
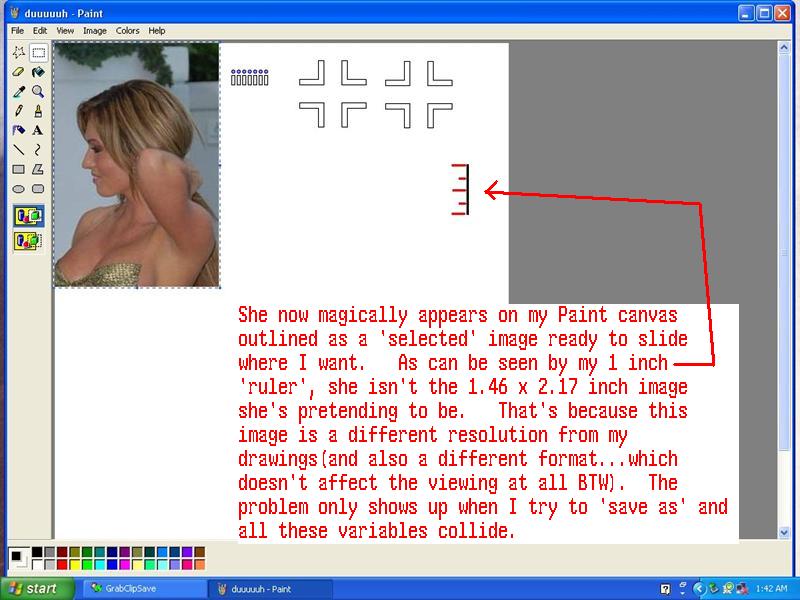
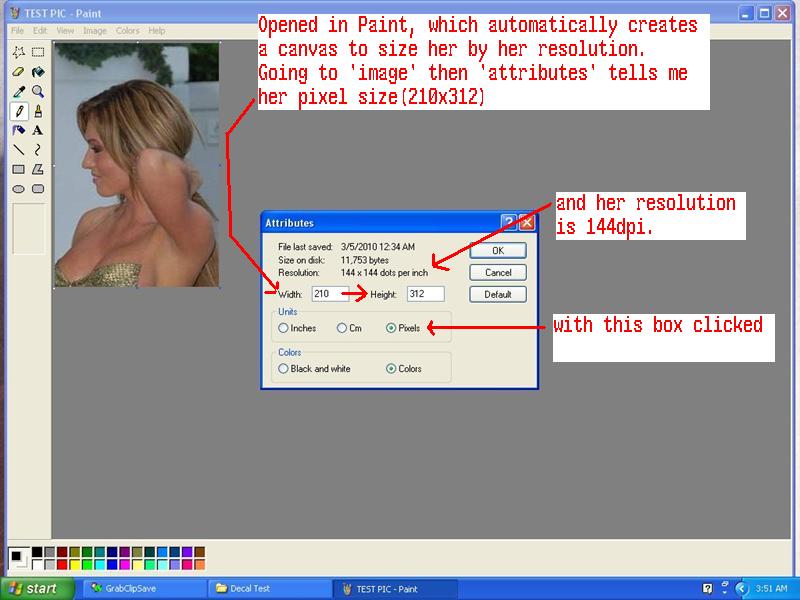
Alright, now as ya'll can see....it's possible to import an image from a different format and view it/size it/move it around even at a different resolution. My original image is 581 x 782 pixels, and she was 210 x 312, so the image fit onto my canvas OK. I'm going to show what happens when I try to import an image that has MORE pixels (not per inch....that's resolution) than my original image.
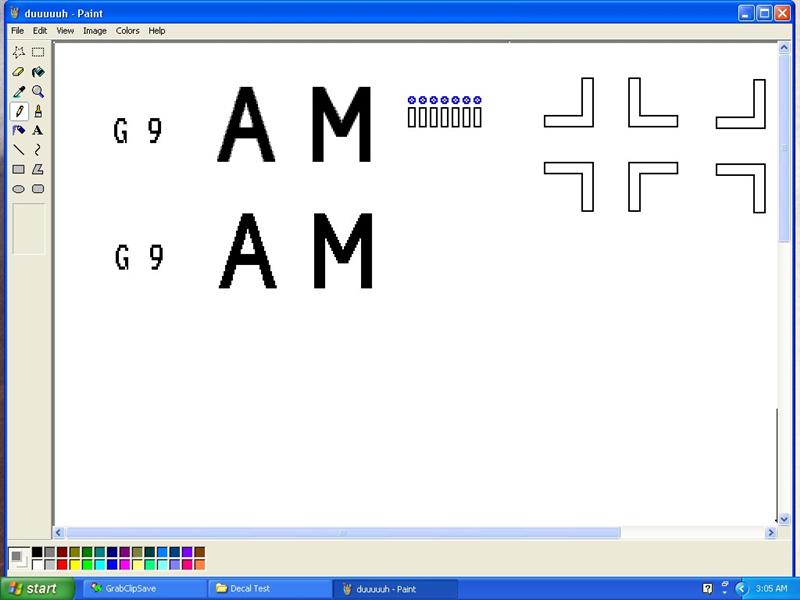
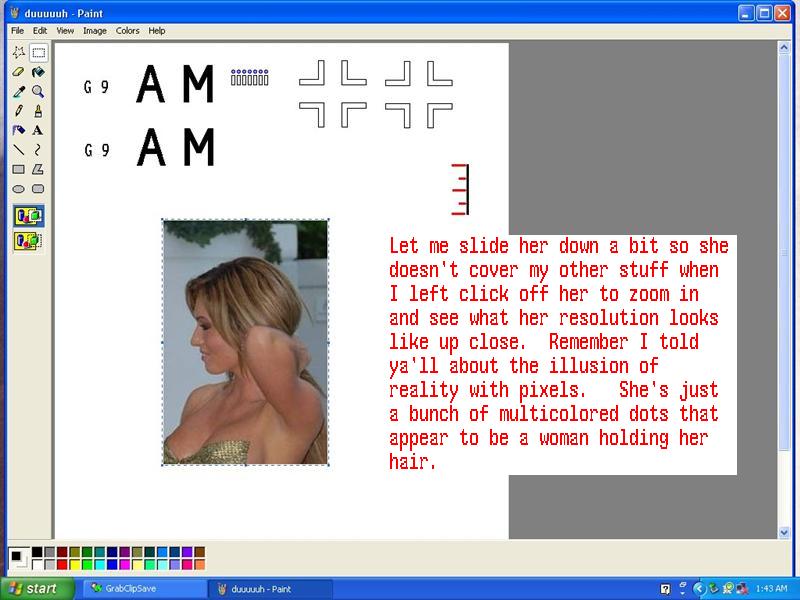
But first, while ya'll have her pixellated image above fresh in your minds.....I want to show how I can fool your eyes with making a lower resolution image 'appear' higher with a bit of color. See how she's just a bunch of multi-colored dots that blend together to give photo-realistic illusion even at 1 inch tall? I'm going to 'blur' your eyes with a few spots of color on my original 68dpi black code letters to make them appear less jagged or pixellated. Check out the grey color I applied to the 'steps' in my 'M' and 'A'. These letters are 3/4 inch or 20(?)mm tall, and this is highly zoomed.
-
-
-
-
-
-
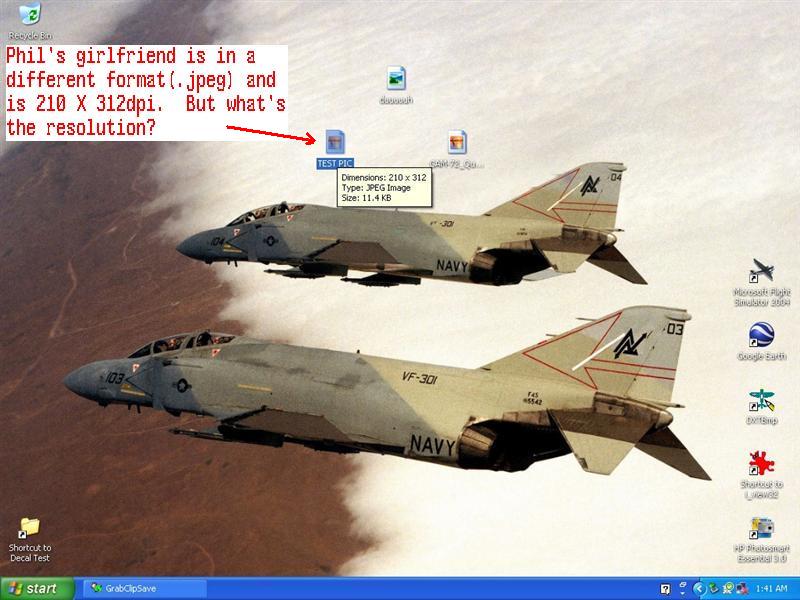
So she's a different resolution, and a different format from my original image. Let me show you how to bring an image onto your canvas from anywhere on your computer. First i open up my drawing that I've already 'saved as' an 8.5x11 inch 68dpi image in .tiff format.

-
-
-
-
Alright, abbreviated lesson today is how to import an image into Paint. I'm leery of doing this, because there are so many ways to mess up it would make a very confusing and long discussion. I'm going show ya'll how to do this during this weekend after I get my slide-show organized and put together. This is just an overview of how to do it, and some of the pitfalls. Again dudes, it's real easy to do,....it's just hard to explain why you're doing what I tell you, and not do things another way. Here's some examples. We're going to use that pic of Phil's new girlfriend, and another original that I have to demonstrate this. I've been trying to use original art work so far, because I'm sure that everybody is aware of the legalities and copyrights involved with using somebody else's stuff and I don't have the time or inclination to get into that. %99.9999999 of anything we use is going to be used for a 'template' of sorts to get a sizing and general idea of what we're trying to draw and will be edited beyond recognition from what it was originally.....but please be careful of the images you use. No matter how careful you are, even with original art,.....there are those that will you accuse you of copying. Be for-warned! Nuff said.
OK, so I've got 2 images to show how to import. Both are .jpeg files(remember I saved mine as a .tiff and it's a different format?) and different sizes and resolutions. This will have no effect on how it views or gets edited in Paint, BUT all hell will break loose when you try to 'save as' and wonder what happened to your images that looked so good on your canvas. Both of these images can be made to print well, I only have time to show how to get them onto Paint for now. I saved Phil's (.jpeg)image to my desktop and called it 'TEST PIC'. Then, I take my file(which is a .tiff) and open it in Paint. When I put my mouse over my icon, it tells me what size this image is in pixels....not the resolution(remember my Paint had a 68dpi resolution?)

-
GAAAAAHHH! Already causing problems Matt?!
 Great, now you woke up Derek and I've got to buy everybody plane tickets to Brazil so we can use Phil's new girlfriend for an artistic model. Hey, this thread is for ya'll so I'll wander down any tangent paths anybody here can think up. We can bounce around as much as everybody wants!
  It has been quite the experience seeing the difference between the Mac I have , and the PC I hooked up to 'see' what you 'see' doing these decals. Especially without any specialized software or 'stuff'.
First thing I want to mention; DO NOT have Paint open, go to 'file' then 'print' and try to get your printer to spit out what you want! I've discovered it's much more reliable to save your project and open it with Windows Picture and Fax Viewer, and use the 'print' button from there. I'll show everybody what I'm talking about this weekend. It takes too long to put a presentation together for me to do it during a weeknight.
Next thing; I'm going to show how to import an image into Paint..... (every pic I've used in this lesson so far has been done in Paint, captured with a screen-saver program and re-sized, then re-imported into Paint for drawing lines/captions/etc.) ......but just to play around with for now. If you've already started a project,....start another canvas to play around doing this as it's fraught with danger and will probably mess up anything you've already drawn and plan to save. Enough of the disclaimer stuff, let's move on, e?!
I don't feel tardy...Hey Mr. Kampf, For those of us who are not so artistically inclined/enhanced, will we be able to import a scan to paint? I don't mean to instigate or go ahead of the lesson plan. If this will be covered in a later session I can wait patiently in the corner with Derek. If I missed this part it is because my ears and eyes are clogged with Honduran mahogany dust.
"Wood" is good.

And everyone wondered why he's called 'BIG' Matt?
 Hey, that's pretty good poetry there. Shortest poem I've ever heard....and it even rhymes! You are obviously artistically inclined, so we're going to name you class 'Poet Laureate' and move you away from Derek to over by the door so you can get some fresh air.(and let your dog out to go do his 'business') Unfortunately this title requires wearing a tie, combing your hair, and acting like a 'new-age sensitive guy'. What?, you'd rather be a beatnik banging on bongo drums?
  Meh,...only if you promise to quit giving Out2Getcha lyrics for his new rap songs.(maybe those are Gregorian chants he's singing?.....can't tell, he's tone-deaf.)Russ...Is the any chance of continuing this tutorial in Brazil?
 (See, I'm wide awake now!
  ).
).Derek
See what you've started 'big matt'?
Go back to sleep Derek, we'll wake you up when we get there, OK? 
Whoohooo! You're all over this Phil.
 Looks like you're getting the hang of things! You used the code letters 'barf'? Wish I had time to get into a semi-technical discussion about the aspect ratio of your monitor and the square ones most everybody else here is using. Even between CRT and LCD/LED monitors as it would explain a lot about having to put one of those 'rulers' on your Paint canvas to size/scale things out....and why they all look different. But that would definitely put Derek back to sleep, so it'll have to wait until it's forgotten. Remind me to show you how to use the 'curve' button to help with those 'rounded' images that are so tough to get right. That 'curve' button makes it much easier and takes less time. Good job on getting something drawn(and printed) out. Cooool!
-
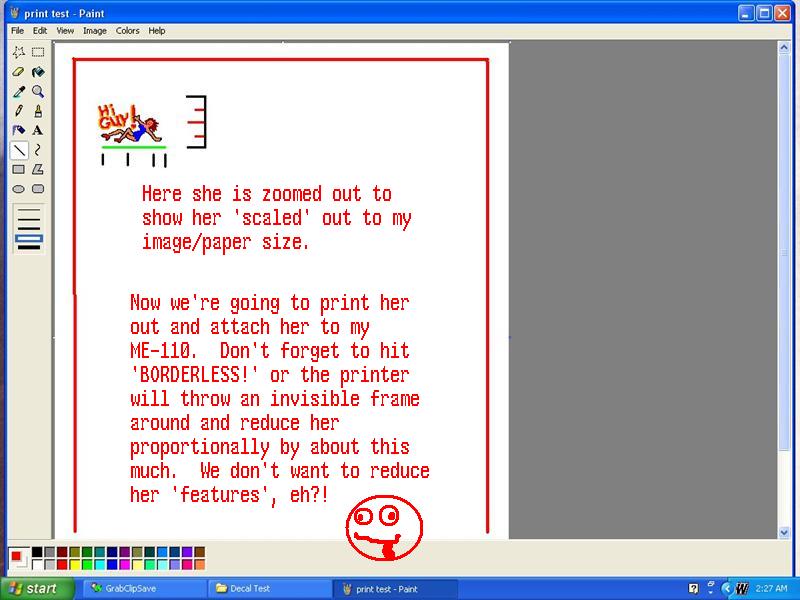
OK, I printed her out on a piece of 'crack and peel' paper to be able to cut her out and stick her to the side of the 110.

This concludes my demonstration of how to use your printer and a piece of paper to create a ruler on your paint canvas that matches the ruler in your hand. Excuse the crude drawing, this was just an exercise in sizing not image quality. I'm going to go pass out now. These lessons really take it out of me, sheesh. If anybody has a better idea for universally sizing every type of monitor to a ruler......wake me up tomorrow as I'd love to hear it. I'll take any questions also when I get coherent. Time for a pudding cup and a spot of sleep. Later all, Russ

-
-
I wanted to call it "Hi Sailor", but I'm too tired and in a big hurry. DRAT! Not in a big enough hurry to give her a few more enhancements first.

-
Aaaaaand, after 5 minutes of scribbling I got this. An image that will print out borderless at 1-1/4 inches long by just a little under an inch tall, and I know it will size correctly no matter what size my monitor is. SWEEET!

OEFFAG Albatros DIII, Austrian LFT, 1917
in Aircraft of the Aces
Posted
HURRAY! Congratulations on surmounting all the obstacles and bringing this build over the finish line!!!!
  Turned out magnificent(as usual), .....and what a cool paint-scheme, and gnarly skulls. I like the missing teeth.
  Bet this makes an interesting size comparison with all your jets? heh heh. This is going to make a nice addition to the gallery pics for this GB for sure! Can't wait to see what you start on next dude.
  Later, Russ