
Cbowling
-
Posts
47 -
Joined
-
Last visited
Content Type
Profiles
Forums
Events
Everything posted by Cbowling
-
One word…..STUNNING! Top shelf paint work. Congratulations on your master piece. Now, I must go to my build area and work on my skills! Lol. Chris
-
The build and paint job are truly top notch. Photos are great as well. Chris
-
1/32 Trumpeter A-6A INTRUDER “505 DEVIL LEADER”
Cbowling replied to miketippingmodels's topic in Ready for Inspection
Big fan of your work Mike. From the weathering, to your figure painting, I’m truly amazed at your skills. Thanks so much for posting Chris -
Thanks a lot Peter. The decals are from Zotz. Very easy to work with. Nice and thin to. After a gloss coat, the decals were applied. I prefer to use Walthers Solvaset as my decal solution. It does a very nice job of melting the decal down into all of the crevices and cracks. Because the decals were so thin, once I applied the decal solution, I did not try and readjust them. Regards Chris
-
She’s a beauty!! Great job on the paint and weathering. The exhaust nozzle. Chris
-
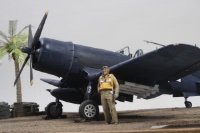
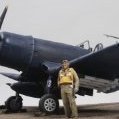
https://www.flickr.com/photos/159342774@N07/albums/72177720300583451 I’m working on a better way to post the photos here directly. Click on the above link, and it will take you to flickr.com where the album is. I was able to build this pretty old kit for a good friend of mine. He was in the Navy, and worked in the aviation branch . He picked up this kit for $20. Pretty straight forward build. The only issue with the kit was that the canopy was warped on the rear section. Because of this, I chose to open the canopy partially as they were going down the taxiway. Thanks for taking a look. Any comments or feedback are welcome all the time. Happy modeling! Chris
- 13 replies
-
- 16
-

-
I’m at a loss for words. This is one amazing model. From the weathering, to all the detail. One of the best Corsairs I’ve seen. Congratulations and thanks for sharing. Chris
-
1/32 Trumpeter P-40B Warhawk of the 3rd pursuit SQN
Cbowling replied to miketippingmodels's topic in Ready for Inspection
Great photography. The weathering and wear is just the right amount. Cheers Chris -
Kilo X-ray: A Hurricane, but not as you know it.
Cbowling replied to whitt_a's topic in Ready for Inspection
The paint job really makes this build stand out. Fantastic job. Chris -
Outstanding build Lain! Thanks for posting. Chris
-
De Havilland Mosquito B Mk IV (FPU) - Diorama...
Cbowling replied to kkarlsen's topic in Ready for Inspection
Absolutely phenomenal job on the photography. I’d be proud to have a model like that in my collection. Chris- 56 replies
-
- 1
-

-
- HK Models
- Bedford MWD
- (and 1 more)
-
“You sir are a steely eyed missile man” Fantastic work. The Lighting is AMaZING!!!. It brings the entire build up to a whole new level. Thanks so much for sharing. Chris
-
Trumpeter 1/32nd scale F/A-18F Super Hornet
Cbowling replied to Cbowling's topic in Ready for Inspection
Thanks guys! Any feedback would be much appreciated. Chris -
1/32 - MiG-29S (9-13) - Ukraine Air Force - Digital Camo
Cbowling replied to Zola25's topic in Ready for Inspection
One word, STUNNING!!! You’ve done an amazing job on both the build, and the paint job. (A very difficult one, at that). Chris B -
That looks amazing! Great job on the weathering, and especially, your painting skills. Thanks for sharing. Chris
-
https://flickr.com/photos/159342774@N07/albums/72177720300241842 My good friend, The Mongoose, wanted to go head to head on these builds. The only thing that I added was the Big Ed set for the Revell kit. With some slight modifications, I was able to use all of the photoetch on the Trumpeter Kit. This was a very interesting kit to say the least. I had larger gaps than Chris did. (Even after shaving off alot of plastic). As Chris pointed out, the instructions were at times very confusing. I choose to do the Jolly Rogers VFA-103 scheme. Rather than use the yellow kit decals for the top of the rudders, I chose to airbrush it on instead. The center drop tank did not have the decal stripes to Match the fuselage. I airbrushed a design on the tank as well. Trumpeter gives you a small box of ordinates to choose from. I replaced some of it with leftover ordinance from a 1/32 scale Academy F/A-18D that I had built some months ago. As far as the display base, I wanted to build something new. I chose to pose the F/A-18 taxiing towards the catapult over the arrester cables. I used 100 grit sandpaper for the surface. I used 1/32 scale aircraft tiedowns from Tom’s model works. The cables themselves are thread from my local model store used for ship rigging. The leaf springs that suspend the cable above the deck were made from leftover photoetch. The deck was painted with various shades of Tamiya gray. To simulate skidmarks, I cut slots in plastic sheet, then airbrushed tire black. Chris has some amazing painting skills. The digital camouflage scheme is right up his alley. It will look fantastic. Chris B
-
DigiHell & the F/A-18F Super Hornet - 3rd Wire & On The Deck
Cbowling replied to themongoose's topic in Works in Progress
Thanks Gentlemen for the warm welcome. Chris, the fit on yours was so much better than mine. And that was after I trimmed a lot of the detail off of the inside of the front fuselage (avionics Bays). My seams were much larger. The one seam in front of the intakes was horrible. I had to go back several times and re-putty the trench. It’s smooth sailing from this point forward. I patiently waiting to see the Jedi master of painting execute such an awesome paint scheme on this bird. Can’t wait to see yours complete. It’s going to be awesome. Chris B. -
1/32 Hasegawa Bf 109K-4 Günther Landt JG53 Yellow 1
Cbowling replied to duke_'s topic in Works in Progress
Absolutely stunning work. Love the wood effect. Chris -
Wow! That is some high quality workmanship. Always loved the Huey. Thanks for sharing. Chris
-
DigiHell & the F/A-18F Super Hornet - 3rd Wire & On The Deck
Cbowling replied to themongoose's topic in Works in Progress
The vents on top of the intakes look so much better thinned out.The ECS vents look a lot better as well opened up. Looking really good. Chris -
DigiHell & the F/A-18F Super Hornet - 3rd Wire & On The Deck
Cbowling replied to themongoose's topic in Works in Progress
Just amazing work. You’ve done one heck of a job improving the cockpit. Can’t wait to see that paint job. Chris