

sillymodeler
-
Posts
35 -
Joined
-
Last visited
Content Type
Profiles
Forums
Events
Everything posted by sillymodeler
-
Beautiful!! I have the same kit; your work would be a reference for my build!
-
 I'm very impressed with that night scene!
 -
P-38L-5-LO, s/n 44-26412, "Shady's Lady", August 1945
sillymodeler replied to Miloslav1956's topic in Ready for Inspection
This is magnificent!! -
SPAD XIII C.1, Frank Luke Jr. (RODEN 1/32)
sillymodeler replied to sillymodeler's topic in Ready for Inspection
Thank you. Of course! I am very honored! -
SPAD XIII C.1, Frank Luke Jr. (RODEN 1/32)
sillymodeler replied to sillymodeler's topic in Ready for Inspection
Thank you for the comments!! -
Thank you, everyone, for the comments!!
-
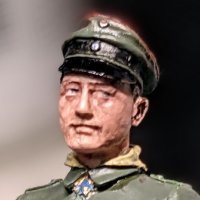
Hello, everyone I recently finished building Frank Luke’s SPAD XIII. Frank Luke was America's second highest ace in WW1. He shot down 14 balloons and 4 planes just in 10 sorties in 8 days. After making an emergency landing behind enemy lines, he refused to surrender, returned fire with a pistol, and was shot dead. Roden's SPAD XIII is a little difficult to assemble in some aspects, but the proportions is good. One of the shortcomings of Roden's kit is the quality of the decals. The decals for the unit markings of the 27th aero squadron, to which Frank Luke belonged, were not similar to the real ones, so the decals were printed by tracing photos of the real marking. The checkered pattern on the wings was also corrected to four rows, although the kit has three rows. I used photo etching hexagon mesh for sides of the engine cowling and stealed Vickes guns from extra parts of Copper State Model’s Nieuport kits. The Frank Luke figure was sold on Amazon, and although I don't know the manufacturer, the quality is very good. I also built a Hispano-Suiza 8Ab engine. This is an independent engine kit by RODEN. It is very finely crafted. I highly recommend this kit for everyone. I want more engine kits to be released!
- 9 replies
-
- 19
-

-
Hello everyone. This is my last finished 1/32 Hasegawa, Ki-61-I “飛燕 (Hien)” I chose this model as I still wanted to explore metal cladding. Hien is a suitable aircraft for this purpose because it was shipped from the factory in bare metal and then various camouflages were applied by units. I used the usual kitchen aluminum foil and water-soluble glue for the metal cladding. The hand-painted random camouflage applied to Hien is another attractive point for modelers. So, I hand-painted a crooked camouflage pattern on the fuselage and wings with an airbrush like a mechanic of the time. It was the most enjoyable thing in this build. One of the advantages of metal cladding is that you can redo the camouflage paint as many times as you like. Unlike other Japanese airplanes, Hien was equipped with a liquid-cooled DB601 engine produced under license. However, it suffered from low reliability and low mission-capable rates due to insufficient craft quality and frontline supply, and the inexperience of mechanics on liquid-cooled engines. However, as long as it was up and running, it performed as well or better than its elder brother Bf109E. I adopted a paint scheme inspired by the 68th squadron that fought in Papua New Guinea. The squadron was one of the first to receive the newly developed Hien. Papua New Guinea was far from its homeland and probably one of the harshest battlefields in WW2. Many died not only from battle but also from starvation and disease as supply lines were destroyed. It is said during the war: “Java is paradise, Burma is hell, and you can't return home from New Guinea even if you die”. Actually, most of the members of the 68th squadron, as well as many other soldiers, are still lying there. It’s basically OOB build. I just used metal gum barrels and pitot tube. The squadron marking is a combination of hand-painting and some extra decals. I also slightly modified Hasegawa’s lovely kit figure to one that resembles tropical pilot uniforms. (One more thing, I would like you to assume that my model is a reproduction of an aircraft whose tailwheel was lost in an accident on the battlefield. The tailwheel is still lying somewhere in my room.) I hope you all enjoy the model. Sorry for my plastic cup as usual!
- 6 replies
-
- 23
-
-
Thank you for your comments! I am honored that my build is published as an article.
-
Fokker E.IV, Oswald Boelcke (Wingnut Wings 1/32)
sillymodeler posted a topic in Ready for Inspection
Hi everyone This build is a Fokker E.IV prototype with the father of German fighter tactics and the mentor of Red Baron, Oswald Boelcke. His plane has a special personal emblem combining O and B on the center of the engine cowling. Although not explicitly indicated in the kit, this kit is designed to reproduce Boelcke’s Fokker E.IV. The kit has his personal emblem, actually. The Fokker E.IV was similar in appearance to the E.III and early Eindeckers but had a huge double-row 14-cylinder engine, which was unusual for WWI aircraft. It did not seem to be maneuverable due to the reaction torque generated by the heavy rotary engine. The rotary engines of the time leaked a lot of oil, so the underside of the fuselage was heavily weathered in this build. The figure is made by my favorite figure maker, Model Cellar, and they produce a lot of WWI pilots. I hope you guys enjoy it.- 9 replies
-
- 23
-
-
Of course! Thank you for the honored offer!
-
@mozart Thank you. Yeah, I noticed the kit canopy is a bit different from the prototype. and I also found the shape of the rudder is different after I painted my model. Haha. PCM kits are hard to find, but we need to build them before Kotare hopefully releases Mk.I. I have fixed some of the photos in my post that were not showing.
-
"Euthanasia": PCM Hurricane metal wing
sillymodeler replied to mozart's topic in Ready for Inspection
Great Diorama! I just posted PCM's Hurricane as well! I also have the metal wing version of the Mk.I so your work is a good reference for me. Thanks for sharing! -
Hi everyone I recently completed building my Hawker Hurricane prototype K5083. This is basically a Pacific Coast Models Hawker Hurricane Mk.I (Early version). I changed its engine cowling panel lines and exhaust pipes to make it look like a prototype. Hawker Hurricane is characterized by its mixed fabric and metal construction, which is most evident in the coloring of the prototype model. To show the difference between metal and fabric, aluminum foil was applied to the metal part, and silver dope color was applied to the fabric part. The aircraft numbers were airbrushed with handmade stencils and then fine-tuned by hand-painting. The prototype was modified through the process of its development. I specifically built the version of the plane that the RAF finally evaluated at Martlesham Heath airfield because this version most closely looks like PCM Mk.I Early kit. However, I may be wrong as I do not have sufficient reference documentation. The Hurricane is often hidden in the shadow of the Spitfire, but it is a masterpiece that served irreplaceably as the RAF's warhorse. I built this model to honor my favorite unsung hero. I hope you all like it. (I like to build model airplanes in flight status, but I should have something better than a plastic cup for display.)
- 17 replies
-
- 24
-
-

-
Thank you! Yes. That's the model I used here. This model is good enough in 1/32 scale, but you need to rescale it to your desired scale. The scale of the model described in the Cults is 1/72, but it's actually modeled in 1/6. For rescaling, I used "3D builder", a pre-installed application in Windows 10. The detail of the model is very delicate, so you need to use 4K level 3D printer. I asked my friend for printing. Good luck!
-
Red Air Fighter - Meng Fokker Dr.I (1/32)
sillymodeler replied to Greif8's topic in Ready for Inspection
@Greif8 Like you, I plan to build the plane that Baron rode in his last battle. That will be a part of three pairs of planes I am personally building as “the Last Battle series.” Last year I built the Albatros D.II (Richthohen) & Airco DH2 (Lanoe Hawker). This year, Fokker F.I (Werner Voss) & SE5a (James McCudden) Next year Fokker Dr.I (Richthohen) & Sopwith Camel (Arthur Roy Brown) Bron's red aircraft should be the final piece in this series. Just for your information: You can mention me like @sillymodeler, so that I can receive notification of your mention. -
Nieuport 17, Francesco Baracca, Copper State Models 1/32
sillymodeler replied to sillymodeler's topic in Ready for Inspection
@Greif8 I agree. The silver dope color is something delicate. We want it not too silver, not too gray. It’s basically 2x Alminium + 1x pale gray. This recipe is based on the instruction of the Wingnut Wings Pfalz D.IIIa I specifically used Mr. Metal color mc218 Alminium + Mr. Color 35 IJN GRAY. But I don't know the ratio I used actually, as it was decided by my feeling. You can adjust it to your preference! -
Red Air Fighter - Meng Fokker Dr.I (1/32)
sillymodeler replied to Greif8's topic in Ready for Inspection
Great work! Baron's last plane is on my to-do list too! -
Nieuport 17, Francesco Baracca, Copper State Models 1/32
sillymodeler replied to sillymodeler's topic in Ready for Inspection
@europapete Thank you! I recently noticed that CSM's WWI Italian ace figure seems to be modeled after Barraca. I bought it and will paint it when it arrives! -
Nieuport 17, Francesco Baracca, Copper State Models 1/32
sillymodeler replied to sillymodeler's topic in Ready for Inspection
@LSP_Ray Of course. My pleasure! -
Hi All I completed this at the end of last year. This was my first CSM kit, and I found it excellent. Compared to Wingnut Wings, I think the mold is a little less sharp, but the reproduction of the internal structure is better than WNW. The fitting is perfect, although assembly is somewhat difficult due to the delicacy of the parts. The instructions are also very clear. The decals are based on the Italian top ace Francesco Baracca, which CSM sells separately. The horse is famous as it became the Ferrari emblem. This is my first time building a Nieuport, and I found I like the lightweight look. I hope you all enjoy it too.
- 10 replies
-
- 20
-
-
Hi All I completed building Werner Voss’s Fokker F.I. last month. The kit is from MENG (originally designed by Wingnut Wings), but the decals for Voss’s plane designed by the MENG is awful. So I used the Aviattic Werner Voss decal set for this build. The fuselage painting is also Aviattic’s overall decals. The fantastic figure is from the Model Cellar. The color scheme of Voss’s plane might be controversial, but I chose light blue as the base color because British ace James McCudden described the color of Voss’s F.I. as “silverly blue”. I also find the 3D model of Voss’s motorbike (Wanderer 1914). Voss is one of my favorite aces, so I'm happy I could build this bike with him. I hope you all enjoy it.
- 12 replies
-
- 26
-
-
-
Hi All I have built a P-47D Thunderbolt in 1/32 from Hasegawa. It is straight out of the box with an Eduard interior. My only challenge was to finish the fuselage with aluminum foil. Although it's not perfect, pasting foils was not as difficult as I expected. I have learned much from this build, so I think I can do it better next time. Finally, I just wanted to display both Japanese & American Thunderbolts (Raiden / 雷電). These two aircraft are my favorite WW2 fighters.
- 5 replies
-
- 17
-
-
@MARU5137Thank you. I did not post my WIP to largescaleplanes.com. But you can see my WIP in instagram. I'm grateful if you like it. https://www.instagram.com/sillymodeler/
-
Junkers J.I (Wingnut Wings 1/32)
sillymodeler replied to sillymodeler's topic in Ready for Inspection
Thank you for all the kind comments! I added some additional photos of the build process. One idea I tried for painting the propeller is using a jig of stacked 0.5mm aluminum plates with a gap between them. It worked well to draw color boundaries.