
Paulpk
-
Posts
30 -
Joined
-
Last visited
Reputation Activity
-

-
Paulpk reacted to LSP_K2 in Hasegawa P-40N
Time for some attention to the gun sight. Not really correct, but I’ve added a small disc to simulate the projector lens. Some flat black, followed with some light grey dry brushing and a spot of color for the lens, doctors it up OK. I don‘t believe the sight itself is really all that accurate, but certainly good enough for my needs. Projector lens was probably clear, but I decided to do ‘er up as clear green instead.
The reflector glass itself:
-
-
Paulpk reacted to JayW in 1/18 Scale P-51B 3D Print Build
Getting back onto the subject at hand - the Malcolm Hood drive and emergency release mechanisms, I have finally got Rhino 3D representations of the parts (13 in all) that I will 3D print. It was a bit of an integration nightmare, as alot of stuff gets crammed in between the flanges of the upper longerons. And my longeron flanges are thicker than the real thing by a good bit (scaled of course). Also my longerons are not quite as wide as the real thing, to account for my skin gages, which are also thicker than the real thing (scaled). This all works against me shrinking the space to work with. Neverthless here are some hard won details that I hope will look representative once painted and assembled (assuming they print up OK):
Yup - you are looking at a 3D printed chain (with sprockets). I measure, from the pictures I have, a 1/2 inch pitch and about 1/2 inch wide. Scale to 1/18, and the links are much smaller than I could scratch build (something I managed to do on the Corsair tail wheel door mechanism a while back - but the chain was a bit larger). It is alot to ask of my printer - we shall see. You also see other details that have had a whole lot of artistic license applied to them.
Shortly I hope to show you the actual parts installed into the fuselage side panels. Stay tuned!
-
Paulpk reacted to JayW in 1/18 Scale P-51B 3D Print Build
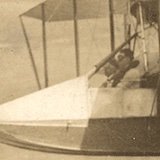
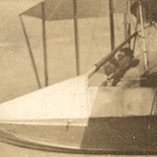
Oh cool pic indeed! Thank you Antonio. Some things to notice:
1. Relocated recognition light electrical box (a few inches forward) seen through the side window windshield glass (with what appears to be a natural metal finish bracket)
2. Some dark colored strip of putty or something along the periphery of the aft enclosure cutout - clearly meant to seal the gap between the hood and the fuselage crown when hood is closed. First I have seen that - I wonder if that was common...
3. There are five sets of rollers exposed with the hood open. All other pictures I have seen either period or modern have six sets. Mine too. Hmmm... Is the hood in this pic not fully open? Or, were more rollers added at some point to address a service issue.....
4. You can see a portion of the round outboard end of the crank handle / forward sprocket support bracket peaking out from behind the roller rail just aft of the windshield. You'll see that on mine too pretty soon.
4. The girl is very hot.
I hear you on modern restos. However I am very confident that the cranking system is accurately represented. All are consistent, and anything that can be gleaned from period photos seem to be in acordance.
As for escape - the Malcolm has an emergency jettison mechanism, including a red pull handle not unlike what we see on all production Mustangs whether greenhouse or bubble top canopy. You will see that on mine soon.
Upon your suggestion, I sent in a querie to the Imperial War Museum in GB, since the British back in the day modified practically every one of their many P-51B's (or Mustang Mk 3's as they called them), to have the Malcolm hood. We'll see if they respond or have anything. Hope they hurry - I am not waiting.
-
 Paulpk got a reaction from JayW in 1/18 Scale P-51B 3D Print Build
Jay, great work. I am very suspect of restored equipment in private use as being totally accurately restored. So I’d stick to period photos myself. I find this so true with armor vehicle restorations.
I knew of the Malcom hood but not the details of usage or installation. I find the cranking system to close and open questionable. I hope there was an over ride when you needed to escape fast
I searched today for an answer to your question and probably came up with the same answers you have. There must be a set of instructions for installation somewhere in a British museum. Have you contacted any museum?
-
Paulpk reacted to Antonio Argudo in 1/18 Scale P-51B 3D Print Build
superb job Jay, just saw this cool pic and wanted to share, keep the great work, cheers
-
-
Paulpk reacted to Marcin_Matejko in Brown B-2 „Miss Los Angeles” 1/32
Brown B-2 joined the rest of the collection, so I took a group photo of my 1/32 scale racers on this occasion :-)
-
Paulpk reacted to airscale in Hawker Hurricane 1/12 scale scratch build
This is truly spectaular!
Thanks for sharing - I just want to sit with you in your workshop and watch how you do such incredible micro engineering
absolutely enthralling
Peter
-
Paulpk reacted to hurribomber in Hawker Hurricane 1/12 scale scratch build
Thats it for now. Further pics will follow.
Thomas
-
Paulpk reacted to hurribomber in Hawker Hurricane 1/12 scale scratch build
The next challenge: Center-Section ! First milling the 12-sided main spars, then the 0.5mm slot with a side-milling cutter.
-
Paulpk reacted to hurribomber in Hawker Hurricane 1/12 scale scratch build
Upper formers provisional fitted with Plasticine. Yust to find out how it looks !
-
-
Paulpk reacted to mywifehatesmodels in 1/32 Hasegawa Ki 43-II "Oscar"
Been a while since I posted (or even finished) a LSP build. This Ki 43 was supposed to be a quick weekend project, but it ended up taking me a couple of weeks, as I ran into some trouble. This particular boxing was one of the limited edition versions that came with a replacement resin cowl. The new cowl, while not exactly "correct", was still an improvement over the original kit part. However, that was not to be, as I found out that the resin part had either shrunk significantly, or was never quite large enough to begin with (kind of leaning toward the latter). So, I used the original plastic cowl, instead, but did a few modifications in an attempt to improve it's looks. Not sure if I accomplished that, but it made me feel better, anyway. I sanded about a millimeter off the front face of the cowl to shorten if a touch and then recontoured/opened up the opening, itself, to round it back off again. The next step was to improve the looks of the intake by building it up with Milliput and sanding it smooth. Hardly noticeable unless you're looking for it. But, again, it made me feel better.
I also decided to add a pilot, but didn't want to use the "Gingerbread man" type that was originally issued with the kit (which I believe may be older than I am). I used the pilot from Hasegawa's more recent Ki 61 kit. Beyond that, I made a new pitot tube from Brass/hypodermic tubing, as well as adding brake lines made from wire. The cowl flaps are PE parts that I had left over from my last Ki-43 build, several years ago. I used mostly Model Master enamels for the main finish and took a swing at the hairspray technique to achieve the chipping I was after. I made a big painting blunder on the fuselage sides, so I ended up going over those areas again. I like the way it looked before I messed it up, even better, but it is what it is. The final step was to do some oil filters/wash. The photos don't do it justice and I found it extremely difficult to get good, representative photos of the model. It's no contest winner, but I can honestly say that it looks much better in person than in the photos (especially the depth of the finish). Oh, I also forgot to mention that all the markings were masked and painted, using the kit decals as a stencil to cut masks for the tail number. The only decals used were on the trim tab and flap warnings, which are almost invisible, anyway.
A fun build, but also reinforcing my opinion that we need an updated kit of this iconic aircraft. Hope that comes soon!
Thanks for looking!
John
-
Paulpk reacted to mywifehatesmodels in Hasegawa 1/32 Kawanishi N1K2-J Shidenkai "George" from the "Turning Japanese" Group Build
Just completed this one for the "Turning Japanese" GB, which was an absolute blast to participate in. The Hasegawa kit is excellent, overall, with outstanding fit and good detail. However, I added a few things to the kit, as well. The additions/modifications were...
* Yahu Instrument Panel.
* HGW seatbelts.
* Master brass cannon barrels.
* Wires, hoses, etc. added to the cockpit.
* Added sparkplug wires and hoses to engine.
* Riveted the entire airframe.
* Most markings masked and painted. National Insignia masks from Dead Designs and tail/fuselage number masks were made on a Cricut, using the kit's decal sheet as a guide and cut from Tamiya's Kabuki tape paper.
*Antenna wire made from EZ-Line.
*Probably plenty of other little bits that I'm forgetting (noticed that I forgot to add the landing gear indicators to the tops of the wings, but I'll get to that!)
Paints used were mostly Gunze/Mr. Hobby, with a few from Tamiya, MRP and AK interactive. I also used some of AK's Engine oil and Pigment Fixer (for pastel dirt/dust). The photos were difficult, since I'm currently snowed in and would usually be doing outdoor, forced perspective shots. I had to take them in my shop with LED lighting, which is pretty horrible for photography and made capturing the colors extremely difficult. There is a lot of glare that I couldn't quite get rid of. The plane appears much brighter in most of the photos than it appears in real life. From more than a couple feet away, it appears plenty dark, but as you get closer, the layered color shades and underlying rivets start to pop out at you. Overall, I'm quite happy with how it turned out and am looking forward to the next GB!
Thanks for looking and for everyone who followed along with the WIP thread. On to the pictures!
Thanks again,
John
-
-
Paulpk reacted to JayW in 1/18 Scale P-51B 3D Print Build
I have updates. My plan the last few weeks has been to finish up the "blue noser" painting, out of fear that the paint would degrade over time, and it will take a long amount of time to finish the fuselage to a point where the paint would ordinarily be applied. To do that, I wanted to finish up the windshield surround and instrument panel assembly prior to painting, in order to minimize handling the (fragile) painted surface.
Last we visited the IP and windshield surround was Feb 1, where I posted this picture:
Now, I have this:
Added is a bunch of stuff below the IP:
Armament switch panel
Pilot's center switch box
Fuel shutoff bracket and handle
Fuel selector panel and handle
Hydraulic pressure gauge and bracket
Landing gear door emergency release handle
A close-up:
My stuff is never perfect, like some modelers on this site somehow accomplish, but this is the best I have done so far. I'm good with it. All these items should be familiar to the P-51 enthusiast. All parts (with just a couple of minor exceptions) were 3D printed from the drawings, like usual. The switch covers, turn knobs, handles and such were done separately and then bonded onto the panels, brackets, and boxes. And, I will say again because it deserves repeating - Peter Castle is reponsible for the outstanding decals. It must have taken him months to work it all out and have them printed.
Also, there were a couple of items added to the RH windshield frame:
They are:
Type C-5 fluorescent lamp
Recognition light switch box
Also 3D printed. Very difficult and delicate installations with small parts. I might add - this is the first of my 1/18 scale models where I have decent thumb switches. Up til this point I have cut off bits of wire to do them, which is OK until you look closely. Then not so much. These however are 3D printed. And as long as I am careful not to break them, they are fine. MUCH better. I will also add that upon studying for the upcoming Malcolm hood drive mechanism, I found that part of the field mod was to relocate the recognition light switch box further forward - the very same part that I worked so hard installing! Grrr. Wish I had noticed that earlier. The reason - the box interferes with the opening/closing hand crank for the hood. This:
I will have to follow suit and break off and relocate the switch box.
And then, it was time for the blue paint. Assemble the forward fuselage with engine cowl onto the jig, and mask the critical paint boundary:
Here she is:
The masks for the white crosses are from Thunnus - provided to me quite a while back. Thanks John!
Here is what it is all going to look like:
I might add a semigloss coat to the new paint. I think that's what I did with the engine cowl, and it should better the match. BTW - the paint showed zero signs of degradation. I guess I didn't have to go out of sequence, but I also would have fretted about it. Now I don't have to.
Lastly for this update - the Shapeways rear windows came in the mail:
"Diamonds in the rough". And a bit pricey. They will polish up very nicely I guarantee. Recall the ones I printed off myself didn't fit very well; these fit perfectly:
It is going to be a while before you see that crown part of the fuselage in action. First will be the lower radio floor and fuselage tank, and then the upper radio rack and the SCR-522 radio equipment and the battery. All in future installments.
I believe the next step should be the Malcolm hood drive mechanism. It will be all guesswork - whatever I can glean from the photographs I have. I'm excited about it. And hope to have a great update in a couple weeks. Take care all, and thanks for tuning in.
-
Paulpk reacted to Anthony in NZ in RAF FG.1 XV571 WILD HARE Phantom Conversion
Thanks guys, really appreciate it!
Well I have actually been steady with progress, but with such things I didnt really have much to show until today
A package arrived in the mail from Kerry!
Somewhere in here is an FG.1 leg test print!
I know that because I have seen this....
So I set about trimming and found this inside
Now for those who cant remember, the reason for the completely new leg is because it is very different to a std Phantom NLG. Aside from the double extension with extra scissor link, the actual oleo itself is of a bigger dia and rakes rearward
He nailed it.... a perfect fit!
An overall shot showing the rearward rake, only done by eye, not actually glued in properly of course. I have started testing all the dimensions and so far so good!
Also an area that needed attention was the aux air doors top and lower. Both sets needed scratchbuilding. First up are the lower ones, just basically layer upon layer of plasticard and raised rivet decals, followed by a layer of Mr Surfacer
Raised rivets and extra details on the other side....
And a comparison on the other side with the kit ones. The kit ones are smaller and further back.
Apologies for the lack of updates, had a bit going on. But still not stopped on this...she is still alive!
Cheers guys and thanks for stopping by
Anthony
-
Paulpk reacted to sillymodeler in SPAD XIII C.1, Frank Luke Jr. (RODEN 1/32)
Hello, everyone
I recently finished building Frank Luke’s SPAD XIII.
Frank Luke was America's second highest ace in WW1. He shot down 14 balloons and 4 planes just in 10 sorties in 8 days. After making an emergency landing behind enemy lines, he refused to surrender, returned fire with a pistol, and was shot dead.
Roden's SPAD XIII is a little difficult to assemble in some aspects, but the proportions is good. One of the shortcomings of Roden's kit is the quality of the decals. The decals for the unit markings of the 27th aero squadron, to which Frank Luke belonged, were not similar to the real ones, so the decals were printed by tracing photos of the real marking. The checkered pattern on the wings was also corrected to four rows, although the kit has three rows. I used photo etching hexagon mesh for sides of the engine cowling and stealed Vickes guns from extra parts of Copper State Model’s Nieuport kits.
The Frank Luke figure was sold on Amazon, and although I don't know the manufacturer, the quality is very good.
I also built a Hispano-Suiza 8Ab engine. This is an independent engine kit by RODEN. It is very finely crafted. I highly recommend this kit for everyone. I want more engine kits to be released!
-
Paulpk reacted to sillymodeler in Ki-61-I Hien “飛燕” in the Papua New Guinea (Hasegawa 1/32)
Hello everyone.
This is my last finished 1/32 Hasegawa, Ki-61-I “飛燕 (Hien)”
I chose this model as I still wanted to explore metal cladding. Hien is a suitable aircraft for this purpose because it was shipped from the factory in bare metal and then various camouflages were applied by units. I used the usual kitchen aluminum foil and water-soluble glue for the metal cladding.
The hand-painted random camouflage applied to Hien is another attractive point for modelers. So, I hand-painted a crooked camouflage pattern on the fuselage and wings with an airbrush like a mechanic of the time. It was the most enjoyable thing in this build. One of the advantages of metal cladding is that you can redo the camouflage paint as many times as you like.
Unlike other Japanese airplanes, Hien was equipped with a liquid-cooled DB601 engine produced under license. However, it suffered from low reliability and low mission-capable rates due to insufficient craft quality and frontline supply, and the inexperience of mechanics on liquid-cooled engines. However, as long as it was up and running, it performed as well or better than its elder brother Bf109E.
I adopted a paint scheme inspired by the 68th squadron that fought in Papua New Guinea. The squadron was one of the first to receive the newly developed Hien. Papua New Guinea was far from its homeland and probably one of the harshest battlefields in WW2. Many died not only from battle but also from starvation and disease as supply lines were destroyed. It is said during the war: “Java is paradise, Burma is hell, and you can't return home from New Guinea even if you die”. Actually, most of the members of the 68th squadron, as well as many other soldiers, are still lying there.
It’s basically OOB build. I just used metal gum barrels and pitot tube. The squadron marking is a combination of hand-painting and some extra decals. I also slightly modified Hasegawa’s lovely kit figure to one that resembles tropical pilot uniforms. (One more thing, I would like you to assume that my model is a reproduction of an aircraft whose tailwheel was lost in an accident on the battlefield. The tailwheel is still lying somewhere in my room.)
I hope you all enjoy the model. Sorry for my plastic cup as usual!
-
Paulpk reacted to mc65 in Fiat CR42 CN 1/32 ICM
Mike, I don't know how I do it: I start working with the table (a large technical drawing table) free, and I always end up locking myself in the space smaller than an A4 sheet!
Denis, thanks, but never say never: the ICM biplane series is really well designed, think about giving them a chance!
I think the I-153 kit is the simplest, as a biplane... I'll be able to tell you hopefully soon, it's one of the next on my list of models to make.
well, after a few tweaks here and there and some unsuccessful attempts to take some decent photos, I'd say I can declare it completed.
be gentle... even though I used a reflex camera for photos in the lightbox, I'm still very poor at digital photography.
a few more shots in the RFI section:
https://forum.largescaleplanes.com/index.php?/topic/99921-fiat-cr42-cn-mm7584-300a-squadriglia-167°-gruppo-autonomo-ciampino-spring-1942-pilot-cpt-corrado-ricci/
cheers, and thanks to everyone, Paolo.
-
Paulpk reacted to ChuckD in B-24J 42-99949 of the 93rd BG/328th BS - Naughty Nan
Hello, all. We're back with another update.
I spent the better part of the day buried in the turretry of this big dumb beast. I finished the scratch building of the tail turret and I have to say I'm pretty pleased with how it all came together.
At this point, most stuff is just dry fit so I can break it all down and paint everything. This shows my favorite .50 barrels on the market - Master Models. They're turned brass and come in two parts with separate barrels and cooling jackets. No resin or other aftermarket parts come close, in my opinion.
The rear doors took a little finagling to get sitting flush, but they are nice and snug now.
Here's the rough breakdown. It's not a perfect recreation of the turret interior, but in all I'm pretty happy with how it looks when bundled up into the turret shell. The arm for the gunsight can be snuggled nicely into place once the other half is put together.
Here's the Cold War Studio solid turret. I had to scratch the rear doors, naturally. When dry fit, they're a little loose, but a small bit of superglue ought to tack it in place without much trouble.
I also got the ball turret assembly around as well. It will no doubt be a delight to mask and paint, but at least the assembly was very straight forward.
I know I said I didn't want to more lipstick on this pig, but I decided to break down and order another tail turret shell from CWS. Their page says it's out of stock and "pre-order." That's what their site said when I ordered the turrets that I have now, and they arrived within a few weeks. So, we'll see. Worst case, I can dispute things with paypal and get a refund.
All that said, now that I'm through with the major scratch building part of this project, I think the rest of it will start to pick up speed. I can tell you that I'm going to be burning a boatload of paint on the interior.
-
Paulpk reacted to ChuckD in B-24J 42-99949 of the 93rd BG/328th BS - Naughty Nan
Today's update:
I decided to tackle a couple items today. First, I wanted to fill the holes in the nose as mentioned yesterday. I left plenty of extra material on the outside of the fuselage so I'd have plenty to sand and feather. The inside of the fuselage will not be visible, so I wasn't as worried about getting that as smooth.
While I was/am waiting for that epoxy putty to cure, I decided to start looking into the turret question. As expected, the internal components for the A6C (of which this a/c has 2) are nothing like those in the Emerson front turret. So, with no other options, I'm going to have to do my best to scratch build the internals for one of them.
These are the parts in question.
To be fair, I did check eBay for a parted out kit, but alas no Z-sprue is available. I don't have a 3d printer either, or I'd probably build these in there. I had started the build expecting it to be a pretty simple, straightforward thing. Surprisingly, it's already throwing up a challenge for my scratch building skills.
The good news is, I'm already making some pretty good progress.
The main armor plating/framework roughed in.
I recreated the bend by carefully cutting partway through the plastic sheet, then back-filling the new gap with stretched sprue.
A compass helped cutout the ring.
And here you can see the fit of the factory part vs the blank of the scratch part. I will use the scratch parts in the tail turret along with the kit-supplied split turret. The factory turret innards will go in the CWS single-piece turret. I've got the other side plate started, but it's very rough at this point. Still, it's off to a good start. I'll add details like the control boxes and wiring after I get the rest of the main structures together, but I'm pretty sure that once the turret is closed up and painted, nothing will really be visible of the interior.
-
Paulpk reacted to ChuckD in B-24J 42-99949 of the 93rd BG/328th BS - Naughty Nan
Hello, all. For this group build, I decided to do something a little off the beaten path. I'd considered a couple different fighters in the stash that would be applicable, but ended up deciding on the B-24J that'd been sitting on my shelf of doom for years. I think I originally bought it as a COVID project and, to the SoD it went after something else happened to catch my attention.
I typically don't like to do any of the markings included with kits as they often tend to be overdone. And, with access to a mask cutter and decal printing paper, I usually like to try to do something unique. To that effect, I've spent the better part of the evening scouring Joe Baugher's USAF serial number lists and b24bestweb.com trying to determine which ship to build and have ultimately landed on Nan.
If you're at all familiar with the B-24, you know that it still holds the title of the most produced heavy bomber aircraft in history. As such, the modeler is left with a dizzying array of options and combinations as to what may or may not be appropriate for a particular build. Best I can tell - and I make no claims to be a B-24 expert - the kit really won't make any B-24 correctly. (This is, of course, ignoring the wing shape and other form issues.) My primary criteria in my search were the nose window and turret configurations, and nothing I could find quite matched the layout of this kit. Either a ship would have the right window layout with the wrong turret, or vice versa.
So, we're going to grit our teeth and do the best we can with what we've got.
Here's the subject ship. She's B-24J-55-CO s/n 42-99949, nicknamed Naughty Nan. On the right side of the nose, there's a Vargas pinup girl whose head has been chopped off in favor of ad hoc armor plating (See here). She was lost in a mid-air collision with another B-24 on September 21st, 1944 over Belgium. According to the Missing Air Crew Report, 5 of the 9 crew went down with the ship.
The most glaring issues between this a/c and the kit are the facts that the kit calls for an Emerson forward turret and also has side windows next to the bombardier's windows. The latter are easy enough to smooth over. The former, however, is a bit of a twist... but I think I have a halfway acceptable plan.
Here's what I'm working with so far.
Obviously, I haven't done a whole lot yet, but the build has been pain free. It's a huge, chunky kit, but it seems to be going together fairly well.
As you can see, I have oodles of aftermarket to lipstick up this pig, including both an Emerson nose turret and a A6C turret from Cold War Studios. Our subject ship has an A6C in the nose as well as the tail. Technically, I have two A6Cs if I include the split-down-the-middle tail turret from the kit. So, in an effort not to spend more money on more lipstick, I'm going to try to use the kit turret for the tail and the CWS A6C for the nose. Crossing my fingers here that everything works out because I'm not yet sure if the guts of the Emerson turret from the kit will fit the A6C turret. (See here for a lengthy discussion. Bonus points for my giddy naivete in the 3rd post)
For Naughty Nan, the window aft of the bombardier's sighting glass will need to go.
And so it shall be done. Plated off with a little plastic card.
Rivets around the area are filled with liquid sprue. Once that's cured, I'll fill the recesses for the windows inside and out with epoxy putty and sand them smooth.
So, that's where we're at. Time to finally get this going. As I'm not doing any figures or ground work, I expect this build to go pretty quickly, so stay tuned!