
Paulpk
-
Posts
30 -
Joined
-
Last visited
Content Type
Profiles
Forums
Events
Everything posted by Paulpk
-
Jay, great work. I am very suspect of restored equipment in private use as being totally accurately restored. So I’d stick to period photos myself. I find this so true with armor vehicle restorations. I knew of the Malcom hood but not the details of usage or installation. I find the cranking system to close and open questionable. I hope there was an over ride when you needed to escape fast I searched today for an answer to your question and probably came up with the same answers you have. There must be a set of instructions for installation somewhere in a British museum. Have you contacted any museum?
-
Hawker Hurricane 1/12 scale scratch build
Paulpk replied to hurribomber's topic in Works in Progress
Very nice work. Are your formers also brass? -
Wow wow wow . . . wow so, with that canopy closed, how the h_ _ _ did the pilot fly this thing! Not easily. Great job Peter!
-
*** Finished*** 1/32 Dragon Bf-109E-3 "Dr Erich Mix"
Paulpk replied to Tolga ULGUR's topic in Works in Progress
Go with your reference. I would forget what it should look like -
A stunning example of “attention to detail” modeling…love it, well done! I also like your approach to picking a color.
-
Nice work and subject. The actual aircraft looks so fragile. Your using brass to add strength is a good move against those gremlins waiting to do their work.
-
Great tutorial! Thanks for sharing your technique.
-
Good soldering
-
Excellent! Well done!
-
Jay, great progress, just a pleasure to watch this new technique evolve! Your gig is an excellent idea. I think without it you would regret it!
-
Rod within tube struts, nice strength!
-
Always a pleasure Peter! Merry Christmas all.
-
For brass to brass, I did a number of tests a while ago and found Permatex Steel Weld 84109 had my best results. My first test with it failed but luckily I did additional tests and was extremely impressed. It is not as fast as soldering, actually a slow process but very strong once cured. 5 minute working time, 10 minute setup, 24 hr full cure according to the instructions.
-
First time with resins. One question, so far.
Paulpk replied to trgt's topic in Construction & Scratch-building
If you are doing the casting, try using the resin for a patch. The resin I used bonded to itself and plastic (great way to make fillets) -
Old school …well done!! Just great craftsmanship.
-
Such an interesting approach to this model. I assume you are going to litho skin this? Is rivet detail too small for printing? Great work
-
Bright side…better you found it now and not after completion! Looking good.
-
Nieuport 21 N2453 - Donat Makijonek - 7 IAO spring 1917 - CSM 1/32
Paulpk replied to Boch's topic in Works in Progress
Nice to know the history behind the man. Nice progress on the cockpit. Look forward to more progress -
Well done! Interesting the crude outlining of the tail underside stripes in the reference photos. I wonder how long it took them to paint replacements in the group markings?
-
Jay, what is the tool you use to do the riveting? Something you made or commercially available?
-
Peter, just absolute great detail work. The “bar” is so high, I can’t imagine it could be surpassed. Very refreshing…thank you!
-
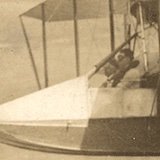
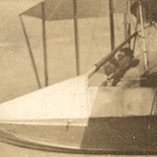
Jay, looking good. What is the thickness of your litho? .012”, .015” or thinner? Thanks for addressing my concerns about the tail wheel strength. I was reminded of the WWI images testing wing strength
- 1,636 replies
-
- 1
-

-
- scratch building
- corsair
- (and 4 more)
-
Basically the main pieces that give it strength. The tubings, joints and related supports. Not the other detail pieces that are non bearing. I have no experience with 3D printing and from what I’ve read, I thought these plastics were brittle. I do a lot of brass work and thought this would be a challenging piece to make. At least you would only have to make one.
- 1,636 replies
-
- 1
-
-
- scratch building
- corsair
- (and 4 more)
-
Jay, is this going to be strong enough? Looks wise it is great but strength wise…good candidate for brass construction.
- 1,636 replies
-
- 1
-
-
- scratch building
- corsair
- (and 4 more)
-
Impressive. Quite elaborate markings. Well done.
