
turbo
-
Posts
252 -
Joined
-
Last visited
-
Days Won
3
Content Type
Profiles
Forums
Events
Posts posted by turbo
-
-
-
-
1 hour ago, John1 said:
I hit it with a wash, didn't do much. I'm really on the fence, the real thing was somewhat of a bright red. See below. What do you think? Leave it as is or tone it down a bit?
No argument with the colour of the real object John, it just looks a bit overt to me in 1/32 scale and "sticks out" from the rest of your beautiful work. Personally, I would tone it down a bit for scale effect.
-
That looks simply awesome John, love the detail!
Very minor point, I agree with you, you could perhaps tone down the red on the shells with a touch up or wash.
-
-
That stance does look a lot better for landing gear with the aircraft's weight on it Antonio.

-
Hi All, the rather time-consuming process of removal of molded kit parts from sub-assemblies and replacement with PE detail, drilling of lightening holes, and other various tweaks continues in preparation for painting.
There is still a fair bit more to be added after the first round of painting and assembly. It's all a bit disjointed at the moment but I like to get all my sub-assemblies ready for painting at the same time so I'll pull it all together with a better description of what has been done as we go along.
I recently acquired the David Union D360 Elite router and D400 sander with the help of Troy here on LSP - more details of these tools can be found on Troy's vendor thread here. The main advantage of the router is that it is smaller and spins down to a much slower speed than a Dremel so allows precise work without melting the plastic. I've found both tools very useful so far in precisely cutting and grinding off molded kit parts and sanding in preparation for the addition of PE.
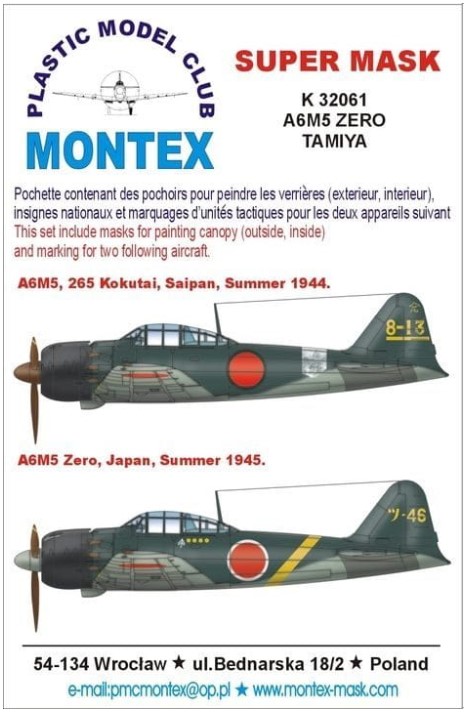
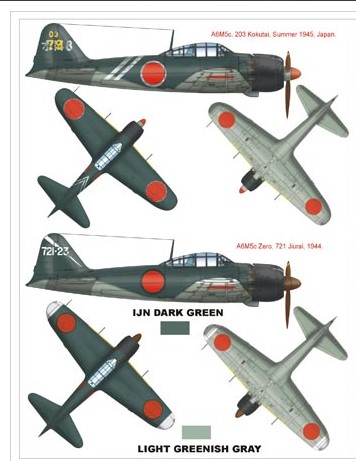
Moving on to the subject for this build, in addition to the kit schemes I have been considering some other schemes offered by Montex for the Tamiya kit. From the research I have been able to do, all of these aircraft except for tail code 8-13 are A6M5c Hei models, which is curious as the Tamiya kit is the first A6M5 variant. Although it would be cool to do in the future, I'm not up for a conversion for this particular build so the options are tail code 8-13 which was one of the aircraft captured at Aslito airfield on Saipan (wrecked at the time) or, more likely, tail code 210-105 of the 210 Kokutai based at Meiji air base from September 1944. I cannot find any reference photos or information (eg c/n) about the latter aircraft, so if anybody can help there it would be greatly appreciated...
Thanks for looking and until next time I'll continue to go cross-eyed on the PE work...
- Anthony in NZ, KUROK, dodgem37 and 15 others
-
 18
18
-
Very nice Antonio! I also noticed some staining coming from the supercharger intake on reference photos of an Emil I built recently. Do you know what this is due to?
-
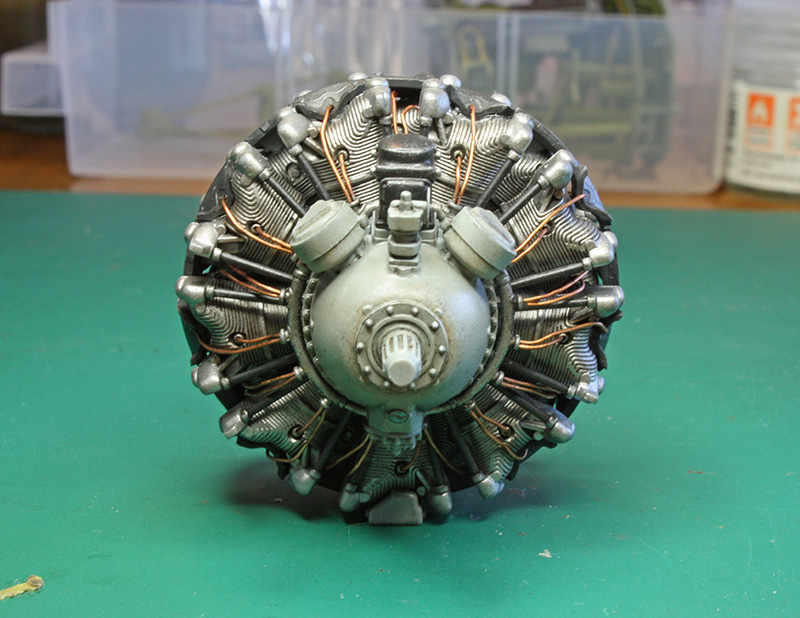
That engine looks awesome Alex!
 Taking lots of notes on how you're going about it.
4 hours ago, Alex said:
Taking lots of notes on how you're going about it.
4 hours ago, Alex said:Any suggestions for tricks to impart a uniform and gentle curve to PE parts would be appreciated. Especially with these flaps, which are a double thickness once folded over, I'm worried about kinking them rather than curving them, especially since they will be so prominent on the final model.
I usually try and find an object with a similar curvature such as the side of a wine bottle or tapered beer bottle (mainly because I have them close to hand while modelling!
 but anything conical to give a range of curvatures is ideal) to use as a template and shape the PE part on that. If I screw it up, I just put it under my PE bending tool to flatten it out and start again. Tighter curves can be done with a pencil, bit of sprue, or cocktail stick, etc.
-
That engine's looking great Alex! I quite like using 0.3mm copper wire for ignition leads. I find it is a good balance of being pliable whilst also holding it's shape.
A RAAF Buffalo will be awesome!!
- Johnny Cloud, AlbertD, Alex and 6 others
-
9
-
Lovely work John. Those guides are a great idea, Tamiya's attention to detail is first class and you are adding to it wonderfully I must say.
-
11 hours ago, Alex said:
That Eduard interior kit is nice! The one AM thing I didn’t get for my A6M2, but next Zero I will.
It really adds a nice amount of detail Alex, I can recomend it to anybody building these kits. One vendor site has the A6M5 set labelled as "discontinued" although it is still available on the Eduard site so not sure what is happening there...
-
On 8/15/2020 at 2:59 AM, Alex said:
It MAY (may) come down again to land versus carrier based plane - when operating in the open ocean without a land airstrip to return to, the RDF is certainly a more critical function. But I do not know if they were removed from land-based planes, or not installed, or perhaps still present. Others may know more.
Thanks Alex. As you note, my subject is most likely to be land-based so I'm leaning towards the RDF system having been removed. The fact that the kit does not include a RDF receiver is probably a bit of a hint! I might still include the radio but don't have to decide on that just yet.
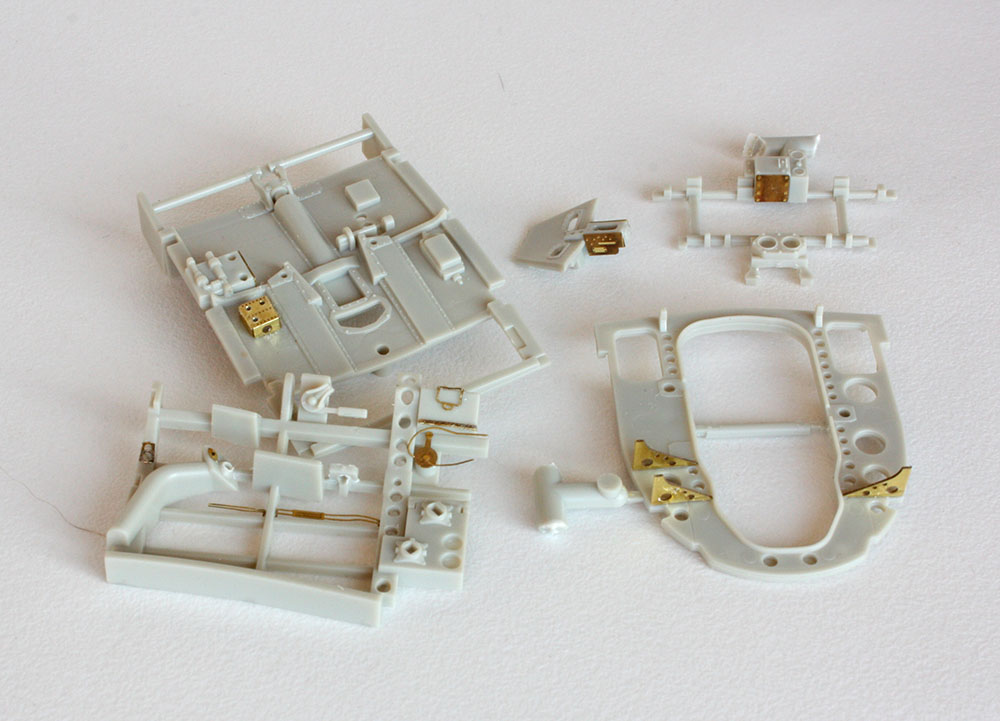
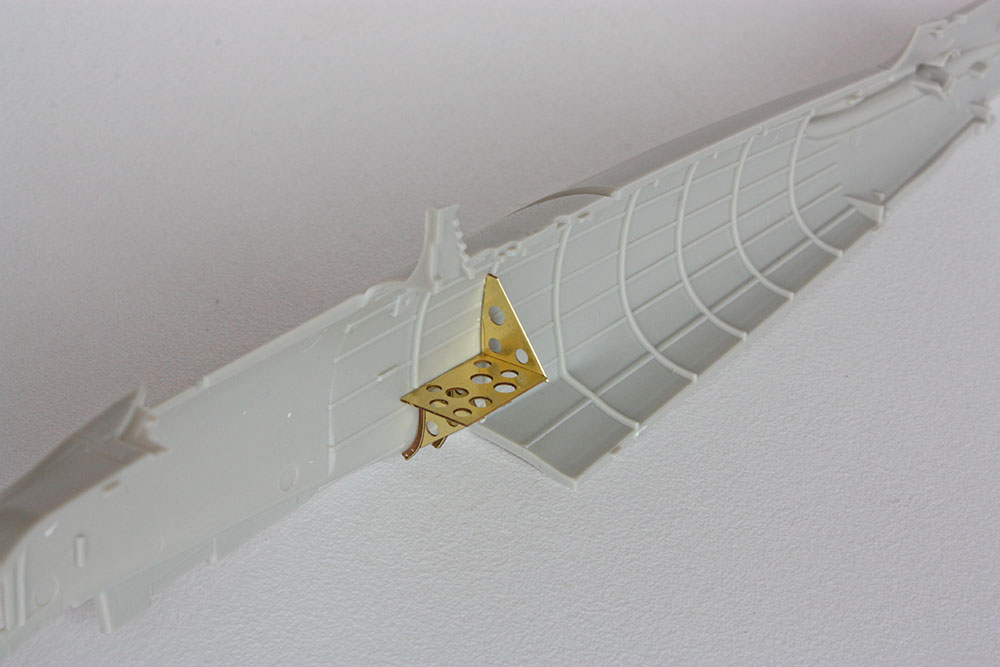
In the meantime, a bit of progress on the fuselage interior. The kit part for the RDF rack was replaced with Eduard PE. A bit of careful dry-fitting is required here to ensure the supports don't interfere with the fit of the lower wing later. As with everything in the zero, it's full of lightening holes!
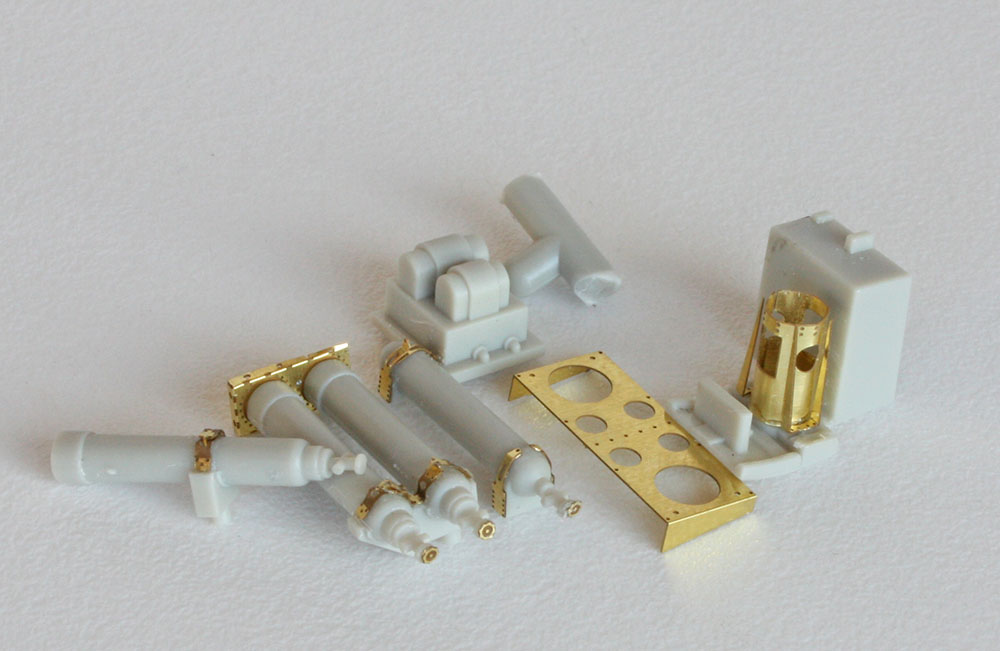
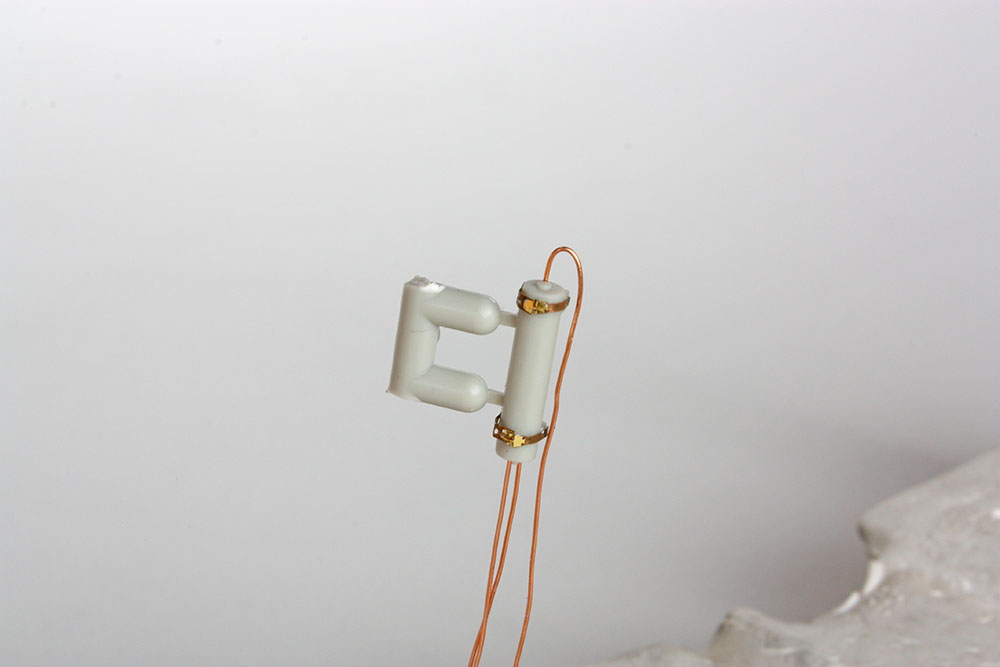
The crude block of plastic for mounting the CO2 cylinders for the wing fuel tank fire extinguisher system was shaved off and replaced with a photo-etch bracket. It's just held in place temporarily with Blu-tac for test fitting with its fairing on the fuselage floor. I broke one of the regulators off during handling (minimal damage for me!) which will need to be replaced later prior to plumbing.

Similarly, molded plastic brackets were shaved off the hydraulic reservoir and replaced with PE and plumbing added with 0.3mm copper wire. I've left part of the sprue on as a handle which will be removed prior to painting.

Thanks for stopping by!
-
Lovely work Chuck. It looks seamless now and that Tempest is looking appropriately mean!
-
Very nice treatment of the exhaust stacks Chuck!
-
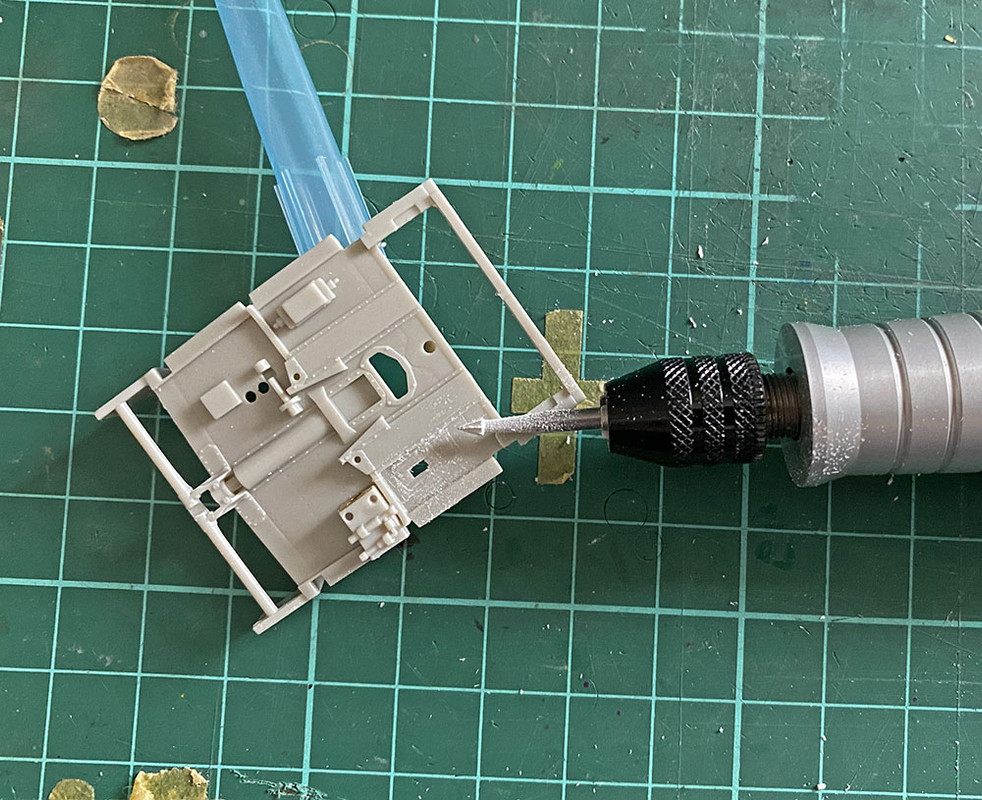
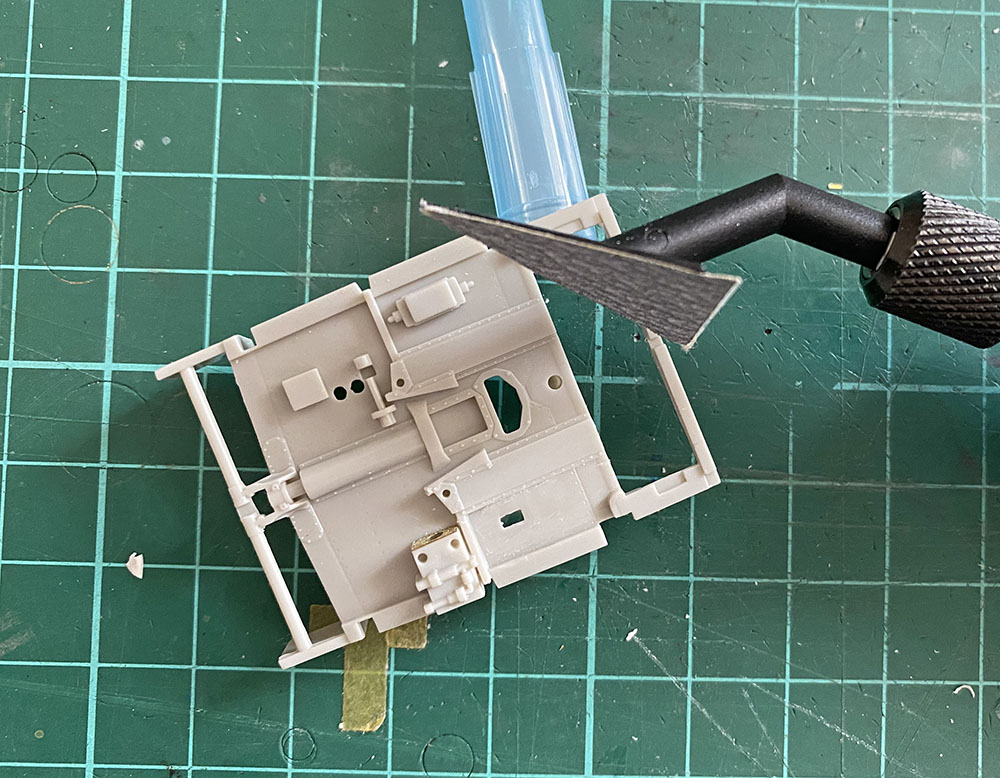
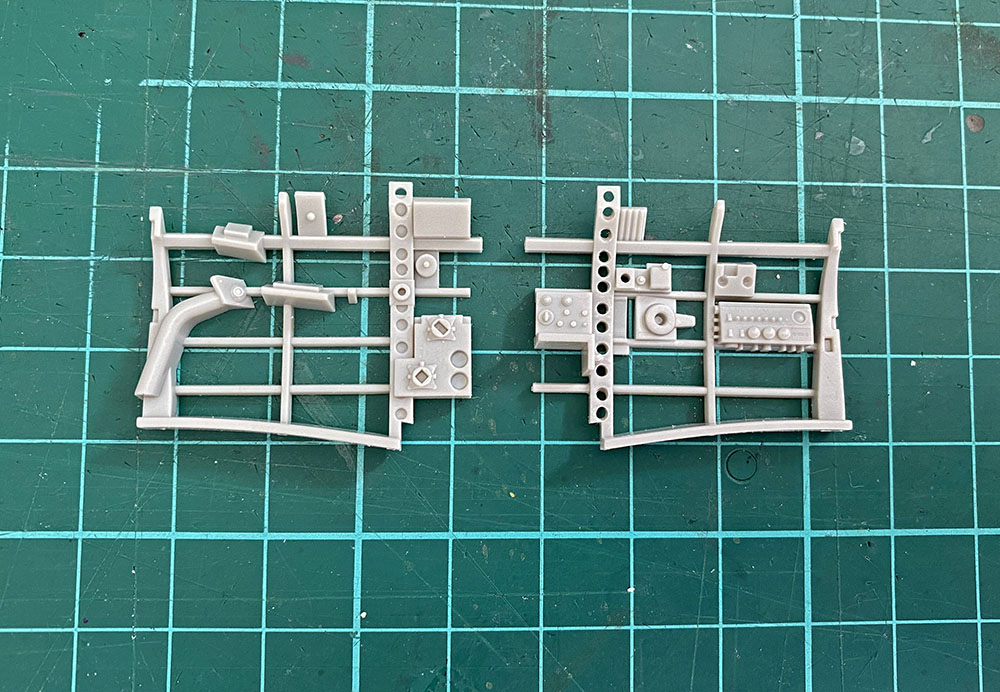
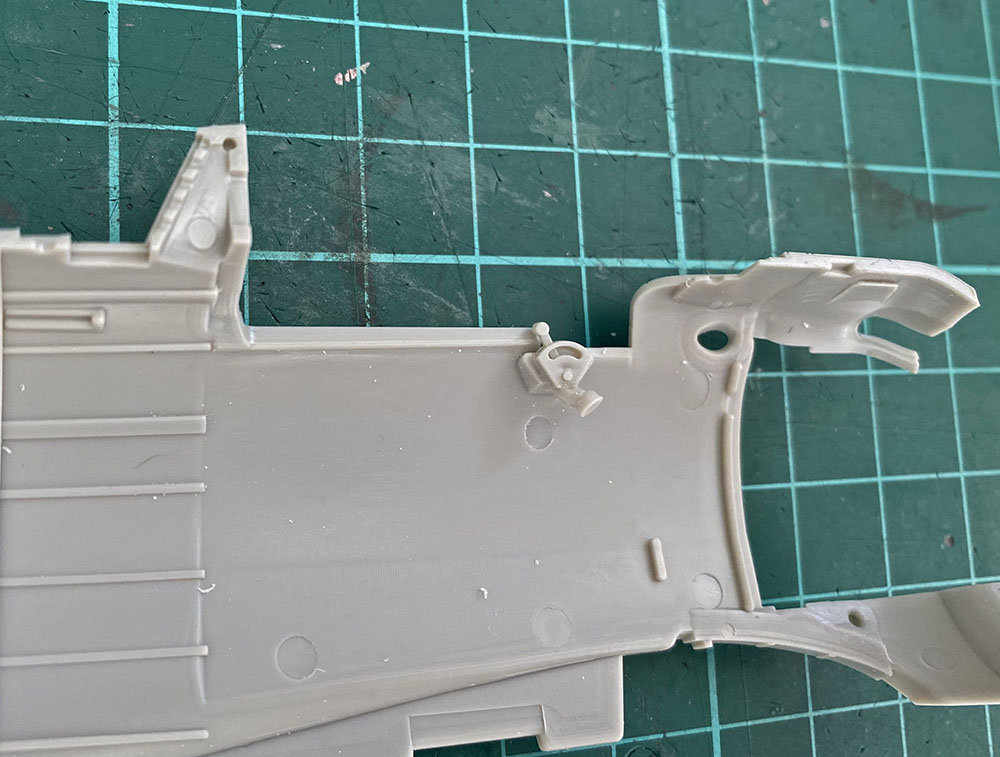
Thanks folks! So I've made a tentative start on the interior of the A6M5. Design of the zero placed a strong emphasis on minimising weight, so many structural components contained lightening holes such as the formers on the cockpit walls. These are only semi-molded on the kit (see part on left) so were drilled out (part on right). The box at the left hand end of the part on the right I believe is the fire extinguisher control box so will likely need to be moved to the cockpit aft bulkhead as described in Ryan Toew's tweak list for this kit.
Another thing noted in Ryan's tweak list is that the ammo counter was only present in early A6M2s, but that the lamp remained.
Looking at some reference photos of the A6M5 cockpit confirmed this so it was shaved off, just leaving the representation of a small attachment bracket for the light. There were several shallow ejector pin marks on the cockpit wall. After test-fitting of cockpit components, those that would potentially be visible were sanded away and ones which would be covered up left.
It was about at this point as I was planning my build and paint sequence that I realised I have more questions than answers. Soooo....I was hoping I could get a bit of help from the folks around here. My first couple of questions relate to the radio setup. The kit has parts for the Type 3 Ku 1 radio set and the control box for the Type 1 Ku 3 RDF system but not the receiver/processor which would be located on a rack on the starboard side of the fuselage aft of the cockpit (the A6M2 kit has this). Zeros, particularly land-based ones, frequently had their radio equipment removed in the interests of minimising weight (plus the equipment could be a bit flakey). I know it doesn't help that I am yet to select a specific subject (although info on the radio configuration would likely be unavailable anyway), but my 2 questions are:
1. Is it likely a late-war A6M5 would be carrying a Type 3 Ku 1 radio set?
2. Is it likely a late-war A6M5 would be carrying a Type 1 Ku 3 RDF system? Is that dependent on whether it is land or carrier-based?
The one other question I have for now is does anyone know what this box mounted on the port fuselage just aft of the cockpit bulkhead is? Is it something to do with the fire extinguisher system?
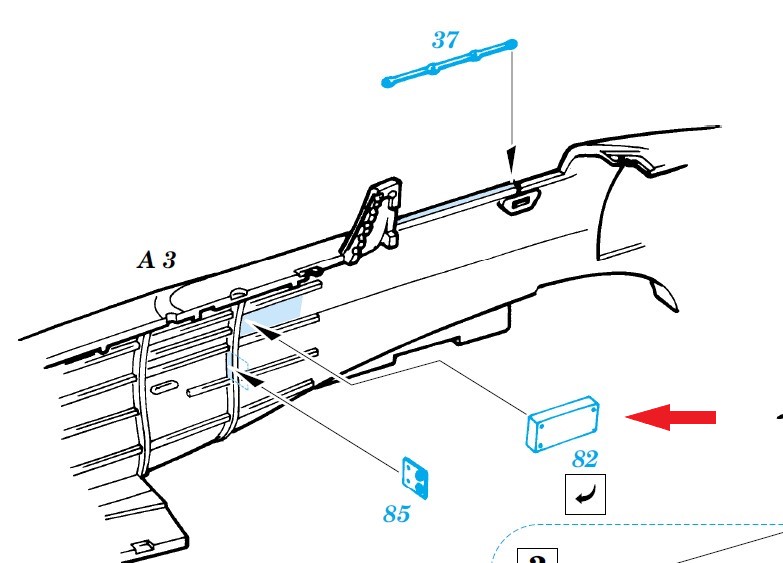
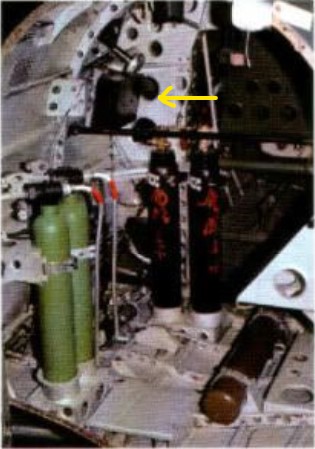
Thanks for any help!Kirby
-
That really is coming together beautifully John!
-
Very well done Miloslav!
-
This looks cool George!

Regarding the inconsistency between the photo above and Techmod's scheme, here are some other photos of Ehrler's yellow 12.
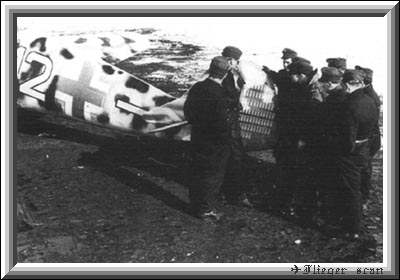

Note particularly the kill markings on the rudder and the camo pattern. These do not correspond with the photo above so it seems Techmod are correct and the photo above is probably Muller's yellow 3 (although they have the canopy frame colour wrong).
-
That is very nice sculpting!
-
-
-
The rivetting and plumbing in the wheel well looks fantastic John! It really sets these models apart.
-
Thanks for the kind words, much appreciated!


A6M2b Zero - Attack on Pearl Harbor - 1/32 Tamiya
in Works in Progress
Posted
This is coming together beautifully Alex - have a good break!